Warbird Information Exchange

DISCLAIMER: The views expressed on this site are the responsibility of the poster and do not reflect the views of the management.
It is currently Sat May 10, 2025 7:47 am

All times are UTC - 5 hours


Classic Wings Magazine WWII Naval Aviation Research Pacific Luftwaffe Resource Center
When Hollywood Ruled The Skies - Volumes 1 through 4 by Bruce Oriss


Post new topic Reply to topic  [ 506 posts ]  Go to page Previous  1 ... 12, 13, 14, 15, 16, 17, 18 ... 34  Next
Author Message
 Post subject:
PostPosted: Sun Nov 01, 2009 10:42 pm 
Offline
3000+ Post Club
3000+ Post Club
User avatar

Joined: Thu Sep 28, 2006 12:56 pm
Posts: 3442
Location: North of Texas, South of Kansas
In Bill's last photo of the intake system you can see a box with some linkage on it. That is the diverter box that either admits filtered air or ram air direct from the wing leading edge intake to the induction system. In a long ago time I rebuilt one of those for TR. It's kinda complicated when you get it all torn apart...... Here is what they look like inside:
Image

I'll probably do a battery tray "in progress" later.

S


Top
 Profile  
 
 Post subject:
PostPosted: Mon Nov 02, 2009 10:37 am 
Offline
2000+ Post Club
2000+ Post Club
User avatar

Joined: Sat Oct 04, 2008 6:57 pm
Posts: 2716
Location: St Petersburg FL, USA
Very cool! Thanks for keeping the pics flowing. Complicated bird for indeed, I shudder to think of how many hours it would take to build just that air flow box from scratch!!! Multiply that by xxxxthousand times and you have the time it takes to do a full restoration!

Just how big are those pesky bolts causing all this trouble?!?

_________________
Image
Aviation Illustration Website
http://shepartstudio.com/illustration/


Top
 Profile  
 
 Post subject:
PostPosted: Mon Nov 02, 2009 9:41 pm 
Offline
User avatar

Joined: Fri Mar 27, 2009 5:30 pm
Posts: 472
Location: Dallas/Fort Worth Texas
They vary in size up to about 3/4" in diameter and about 4" long. Mostly made out of unobtainium.

_________________
Bill Gorin
Vintage Flying Museum
http://www.vintageflyingmuseum.org
https://www.facebook.com/#!/group.php?gid=57513906106


Top
 Profile  
 
 Post subject:
PostPosted: Wed Nov 04, 2009 10:20 pm 
Offline
User avatar

Joined: Mon Dec 05, 2005 7:10 pm
Posts: 887
Location: Burlington, WI
Bill, Scott and crew,
Great job as always, Keep the updates coming. Are you looking for any little Sabre bits I should be aware of? We start our inspection on the Skyraider Nov 16 and the Sabre rolls in the first week of Dec. We'll be busy up North.
David
WHF Maint


Top
 Profile  
 
 Post subject:
PostPosted: Thu Nov 05, 2009 10:34 pm 
Offline
User avatar

Joined: Fri Mar 27, 2009 5:30 pm
Posts: 472
Location: Dallas/Fort Worth Texas
Well David, now that you mention it....I dont' think it qualifies as "little bits", but a nice freshly overhauled engine, some actuators, inboard gear doors, nose torque links, and, and, and,.................... :shock: :wink:

As you can see, right now we're focused on the Fort, but we're always keeping an eye out for Sabre stuff. Besides the obvious that you already know about, can't think of anything in particular. Looking forward to seeing some pics of your Spad, and Sabre, and Scooter, and, and, ..... :lol:

Coming back down to Texas anytime soon? I'm at FSI at DFW now, give me a shout if you happen to come down for training.

_________________
Bill Gorin
Vintage Flying Museum
http://www.vintageflyingmuseum.org
https://www.facebook.com/#!/group.php?gid=57513906106


Top
 Profile  
 
 Post subject:
PostPosted: Fri Nov 06, 2009 10:36 am 
Offline
User avatar

Joined: Mon Dec 05, 2005 7:10 pm
Posts: 887
Location: Burlington, WI
Hi Bill,
I'll keep my eye out for tidbits. I'll be at FSI at DFW on Monday. I'll try to come out to the museum while I'm in town.
David


Top
 Profile  
 
PostPosted: Wed Nov 18, 2009 1:38 pm 
Offline
3000+ Post Club
3000+ Post Club
User avatar

Joined: Thu Sep 28, 2006 12:56 pm
Posts: 3442
Location: North of Texas, South of Kansas
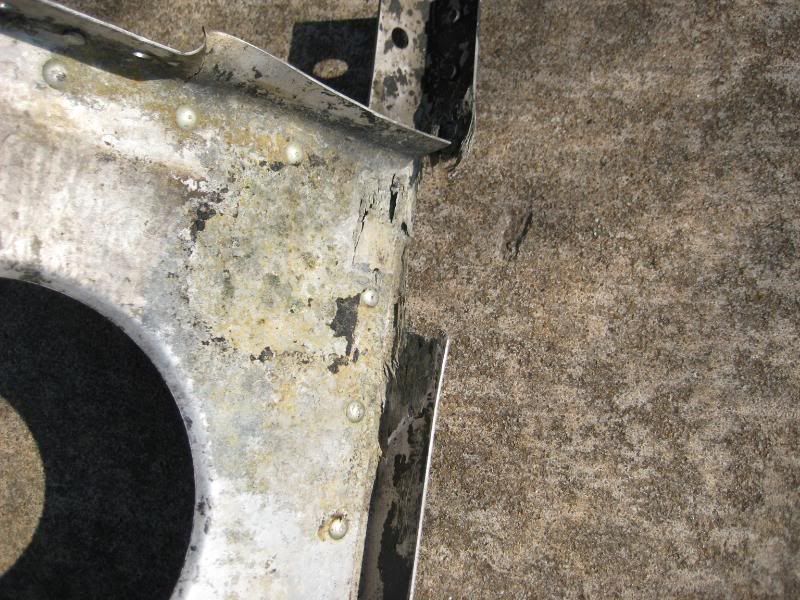
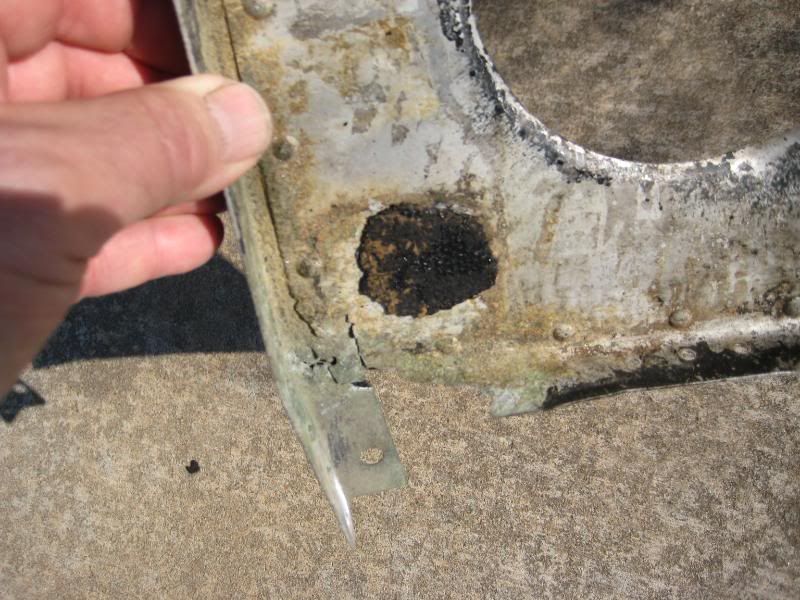
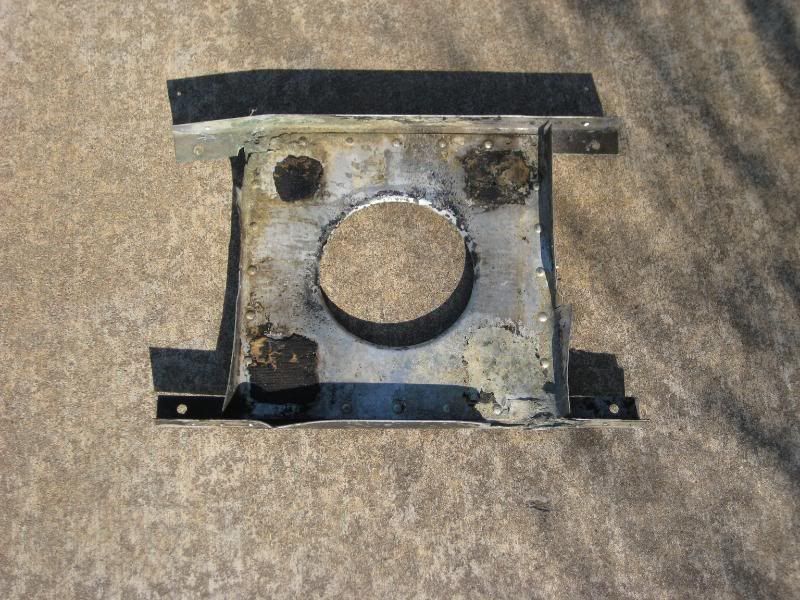
I suppose it is time to get back to doing updates. During the inspection process on Chuckie the left battery support tray was found to be corroded. The "anti-fouling" paint evidently wasn't applied quite as thickly on this tray versus the two in the right leading edge--they look great. Here are a few photos of the damaged unit after removing it from the wing:
Image
Image
Image

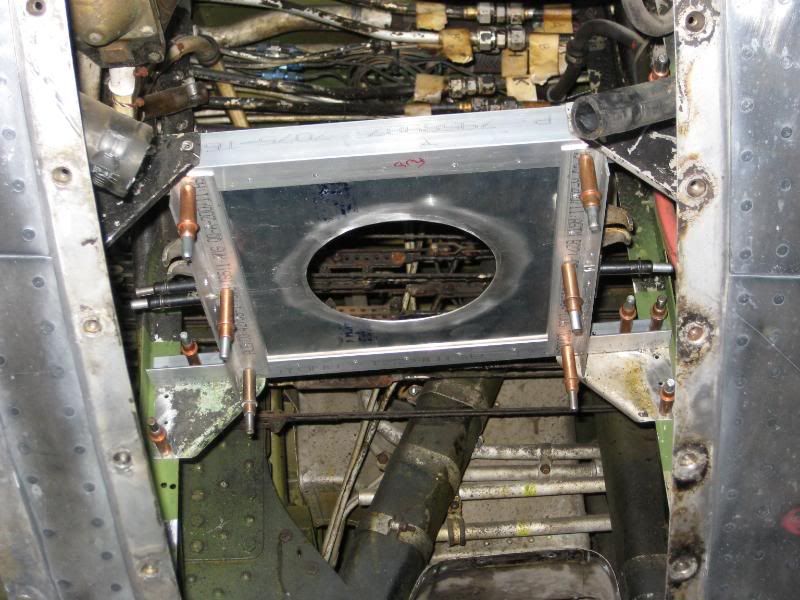
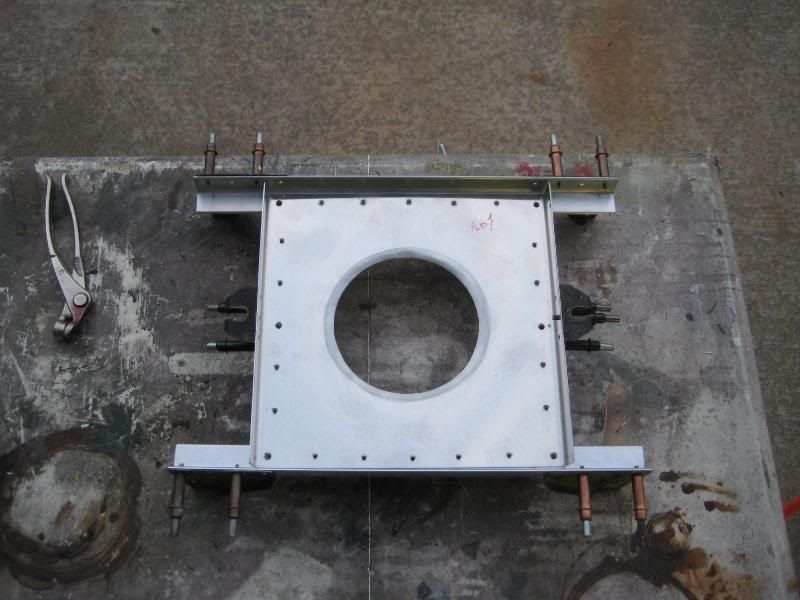
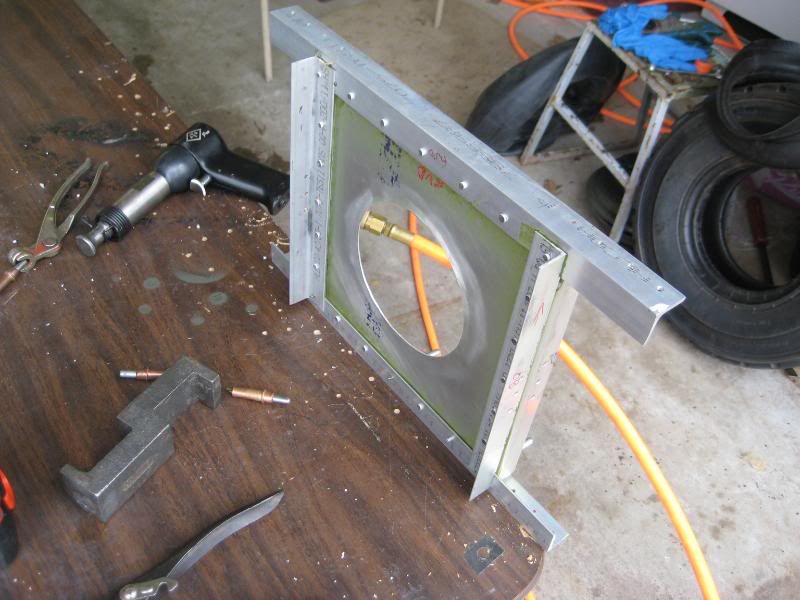
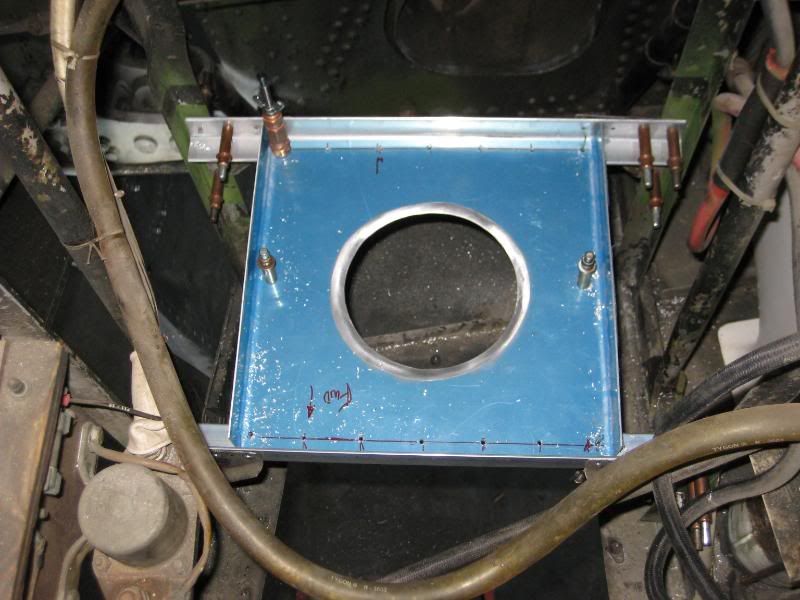
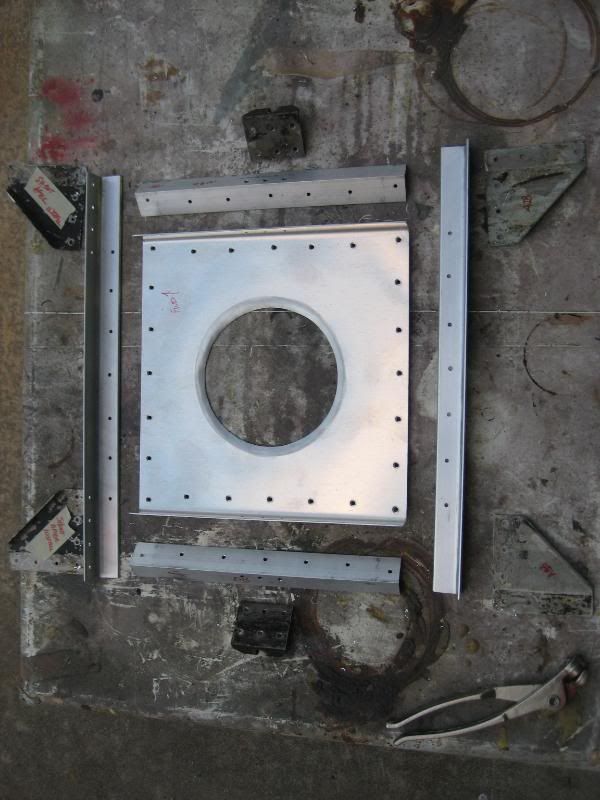
Since there was damage on the base and horizontal supports I decided to manufacture new pieces to replace the corroded parts. Here are the components clecoed in the airplane after I fabbed them.
Top view:
Image
Bottom view:
Image

For a change, there is lots of room to work and really good access since we had the leading edge intake removed for the spar AD. The battery is normally accessed through the Dzus-fastenered upper wing door.

The new parts laid out, then clecoed together, and finally, being shot together:
Image
Image
Image

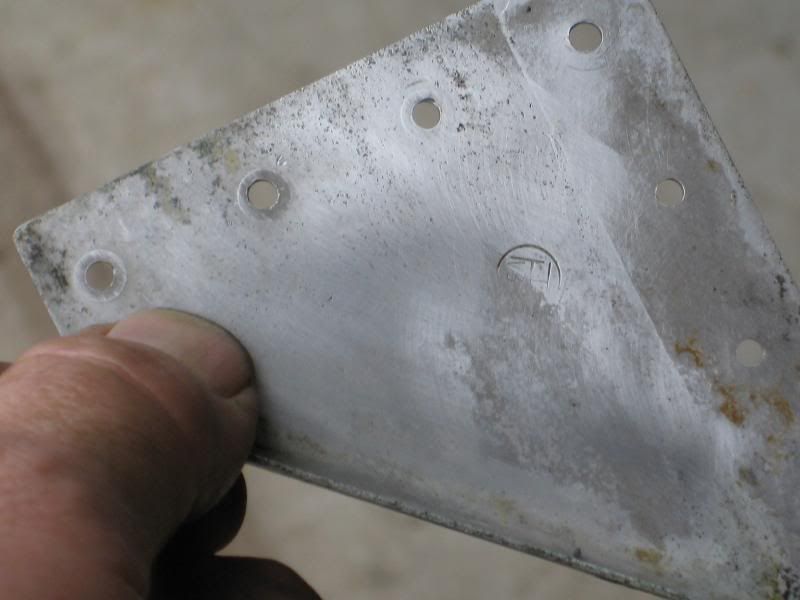
Here are two of the four original support angles that I'm able to re-use. Notice the part number on the first one and the Vega inspection stamp on the second:
Image
Image

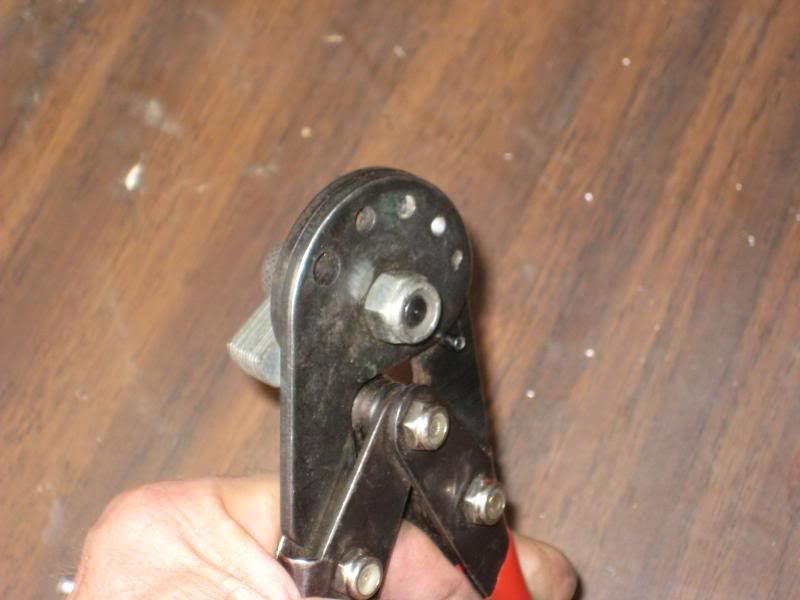
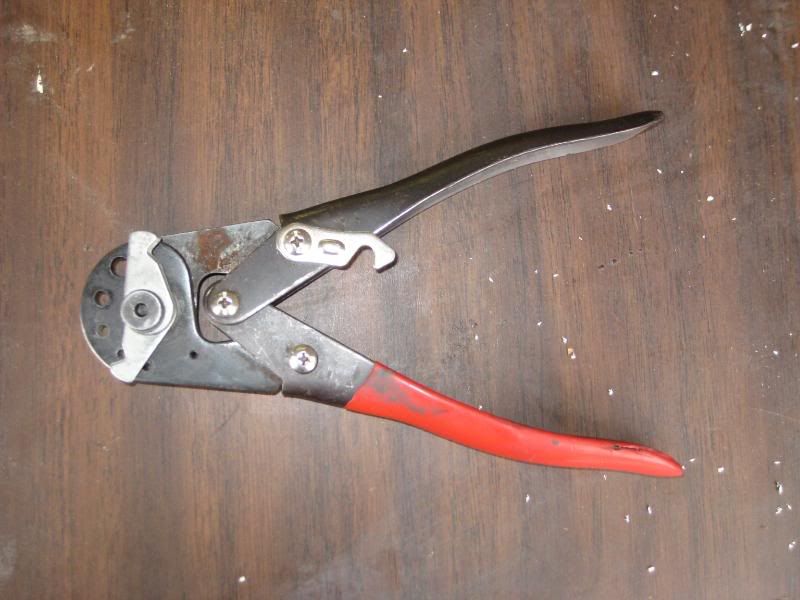
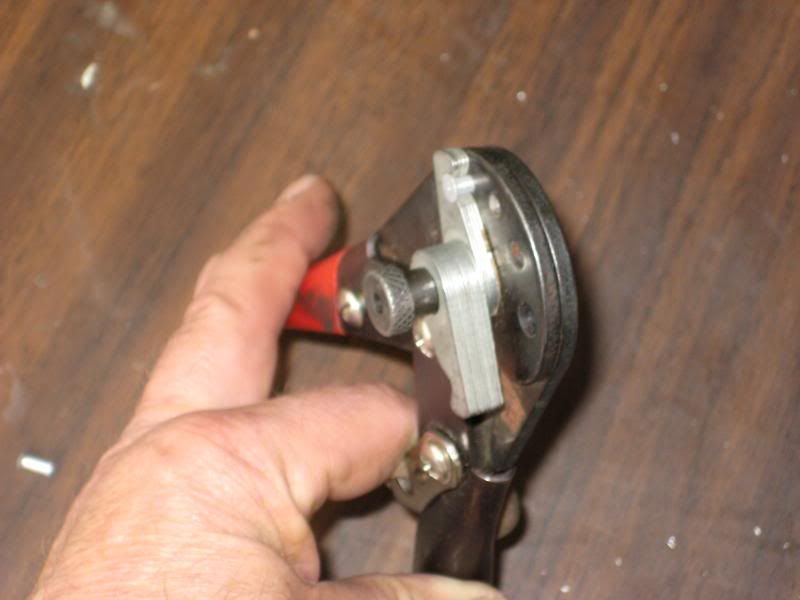
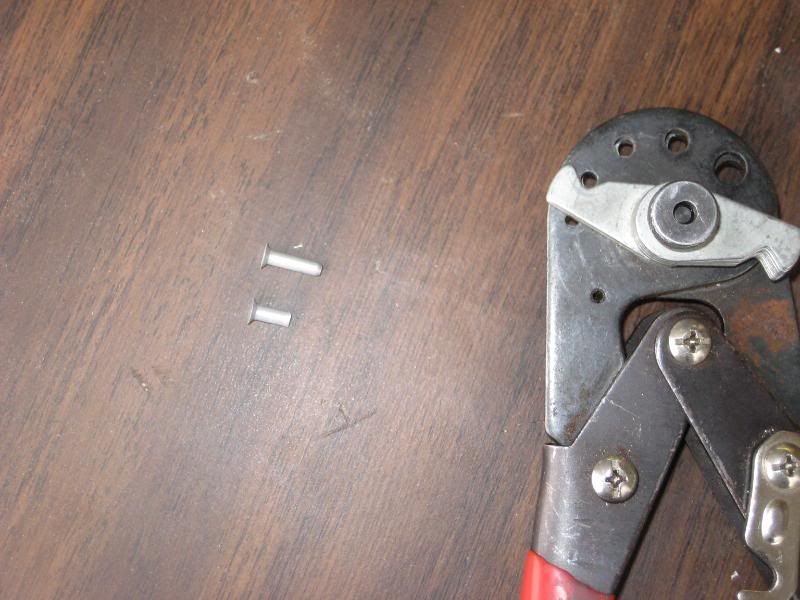
While I'm sort of on the subject of rivets, I'll demo how we use a rivet cutter. Ideally, we would have a stock of every different length rivet that we could possibly use for any given project. In the real world that isn't always possible. The VFM parts room has a LOT of fasteners in stock that are the correct material and diameter for the battery tray, just too long. Rather than go out and buy shorter ones when I have plenty of the long ones, Pat loaned me his rivet trimmer:
Image

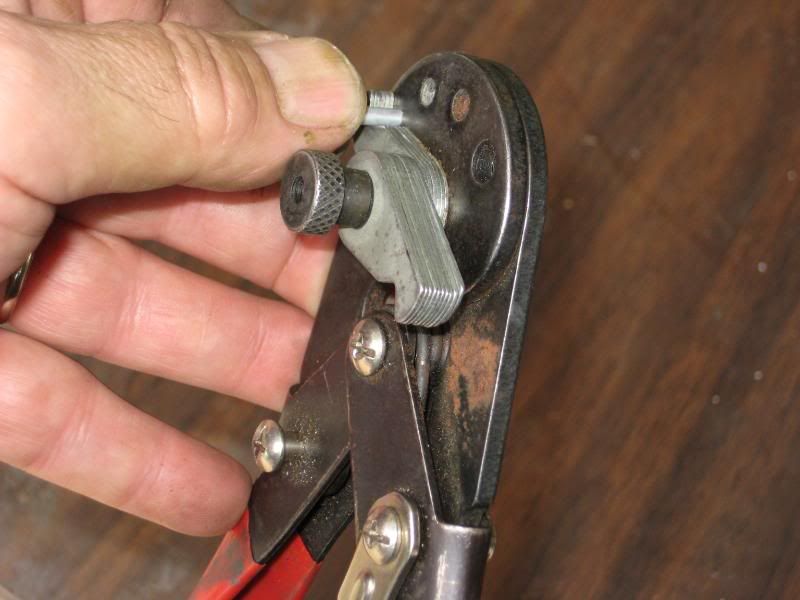
It's pretty simple, just determine the grip length you need and rotate the correct number of stops to hold the rivet at the right position:
Image

Here is how it looks from both sides before you squeeze the handles:
Image
Image

And the final product, ready to shoot:
Image

The tray is primered and ready for the battery box paint. We'll shoot it back into the airplane after the spar AD has been completed as it gives us extra access for those two terminal fittings.

More later,
Scott


Top
 Profile  
 
PostPosted: Wed Nov 18, 2009 9:56 pm 
Offline
User avatar

Joined: Sun Jun 08, 2008 10:26 am
Posts: 550
Location: Northants, UK
Nice bit of restoration and fabrication there Scott.

That old tray looks worse than some I've found in hedgebottoms over here that have been sitting there for the best part of 60+ years.

Keep up the good work,
PB

_________________
Paul Bellamy

401BG Association Historian & Honorary Life Member
401BG Historical Society (UK) Member
1st Air Division HQ Historical Society (UK) Founder Member
Director of Archives & Collections, Airfield Research Group Archive, Alconbury
RAF Alconbury Base Historian


Top
 Profile  
 
PostPosted: Thu Nov 19, 2009 1:23 am 
Offline
3000+ Post Club
3000+ Post Club
User avatar

Joined: Thu Sep 28, 2006 12:56 pm
Posts: 3442
Location: North of Texas, South of Kansas
I suspect there was a seeping battery somewhere in the past that got the process going, Paul. Fortunately there is no other evidence at all of any corrosive spill in the leading edge. The compartment was given a very good coat of anti-fouling paint that seems to have done its job.


Top
 Profile  
 
PostPosted: Thu Nov 19, 2009 11:45 am 
Offline
2000+ Post Club
2000+ Post Club
User avatar

Joined: Sat Oct 04, 2008 6:57 pm
Posts: 2716
Location: St Petersburg FL, USA
Looked like the old battery tray area of my old VW Transporter! Good job on the new tray!

_________________
Image
Aviation Illustration Website
http://shepartstudio.com/illustration/


Top
 Profile  
 
PostPosted: Thu Nov 19, 2009 12:23 pm 
Offline
Account Suspended
User avatar

Joined: Wed Nov 14, 2007 3:06 pm
Posts: 2713
Scott, I like your posts!!!! They remind me of what Gary would have posted.., a do it yourself B-17 restoration!!!

Cheers, Mate!!!!!!!

_________________
S.


Top
 Profile  
 
PostPosted: Thu Nov 19, 2009 12:41 pm 
Offline
3000+ Post Club
3000+ Post Club
User avatar

Joined: Thu Sep 28, 2006 12:56 pm
Posts: 3442
Location: North of Texas, South of Kansas
Thank you for that generous compliment, Smis. I learned to do updates from Gary when we were helping him with the B-24. In fact, his early Diamond Lil posts were the reason I became a member of the WIX family and got involved with his Ol'927 project. This is the first maintenance update that I've been able to hack together since his passing. It was a little tough to get started..........

While we're on the subject of updates, here's a photo of the old and new trays together. Notice that the original has button head rivets holding the tray to the supports and the replacement is flush riveted. Pat Mahaffey pulled up the engineering drawings for this tray and the use of flush rivets is an option on the blueprint. We went with them so that the battery will ride on a completely smooth surface. The two clecos are holding on the forward vertical supports that have to be installed after the tray is positioned in the wing.
Image

I'll try to get back in the saddle,
Scott

P.S.
I once had a '64 double-cab pickup, Chris. The corrosion in the battery box was so bad I had to cut out the whole corner of the quarter panel to fix it, louvers and all! :?


Top
 Profile  
 
PostPosted: Thu Nov 19, 2009 1:11 pm 
Offline
3000+ Post Club
3000+ Post Club
User avatar

Joined: Thu May 18, 2006 3:08 pm
Posts: 4542
Location: chicago
Lookin' good Scott. I thought of Gary too while I was reading your update.

That's cool you could save the pieces with the stamps and serial. 8)

_________________
.
.
Sure, Charles Lindbergh flew the plane... but Tom Rutledge built the engine!

Visit Django Studios online or Facebook!


Top
 Profile  
 
PostPosted: Fri Nov 20, 2009 11:44 am 
Offline
Account Suspended
User avatar

Joined: Wed Nov 14, 2007 3:06 pm
Posts: 2713
The highest compliment indeed Scott!!!!!!

_________________
S.


Top
 Profile  
 
PostPosted: Sat Nov 21, 2009 1:26 am 
Offline
User avatar

Joined: Fri Jun 26, 2009 1:29 pm
Posts: 88
Location: Fort Worth, TX
I see Scott H's post on his battery box build and am embarrassed that I shot video of same almost a month ago and just lost it in my multi-terabyte video farm. Found it! Here's a little short of Scott and his new box. More vids when he finally installs it after the spar work.

I'll shoot video this weekend if there's any spar AD activity or other activity that I think might be interesting. Post here or email me at franklin@pgctv.com if there's something you'd like to see about/around Chuckie or the Vintage Flying Museum.

DOH! almost forgot the link to the video: http://www.vimeo.com/7737110

_________________
Hawkeye Poole
https://www.youtube.com/c/hawkeyepoole
franklin@pgctv.com


Top
 Profile  
 
Display posts from previous:  Sort by  
Post new topic Reply to topic  [ 506 posts ]  Go to page Previous  1 ... 12, 13, 14, 15, 16, 17, 18 ... 34  Next

All times are UTC - 5 hours


Who is online

Users browsing this forum: No registered users and 11 guests


You cannot post new topics in this forum
You cannot reply to topics in this forum
You cannot edit your posts in this forum
You cannot delete your posts in this forum
You cannot post attachments in this forum

Search for:
Jump to:  
Powered by phpBB® Forum Software © phpBB Group