Hi Guys!
Thought it'd be fun to take you through the process of me trying to repair, replace, and repaint these two behemoth toy models. NOTE: I am not really performing any major surgery or modification on these two, as I'm now a bit pressed for time to get these two done for an upcoming show at the our local air museum on May 7th.
Background:In 2000, 21st Century Toys released (under their Ultimate Solider XD line) a 1/18th scale toy line, with all sorts of combat troops, vehicles, and even some aircraft. Being at the age of 13, I was instantly hooked and loved these GiJoe sized aircraft. I would later go one to try and find any of these 1/18th scale aircraft for cheap in second hand stores or on websites like Ebay and Craigslist. And in that time I was successful at grabbing more than a few of these models in varying levels of completeness. Two I had acquired that were not complete, I saw as an opportunity to do something special with them.
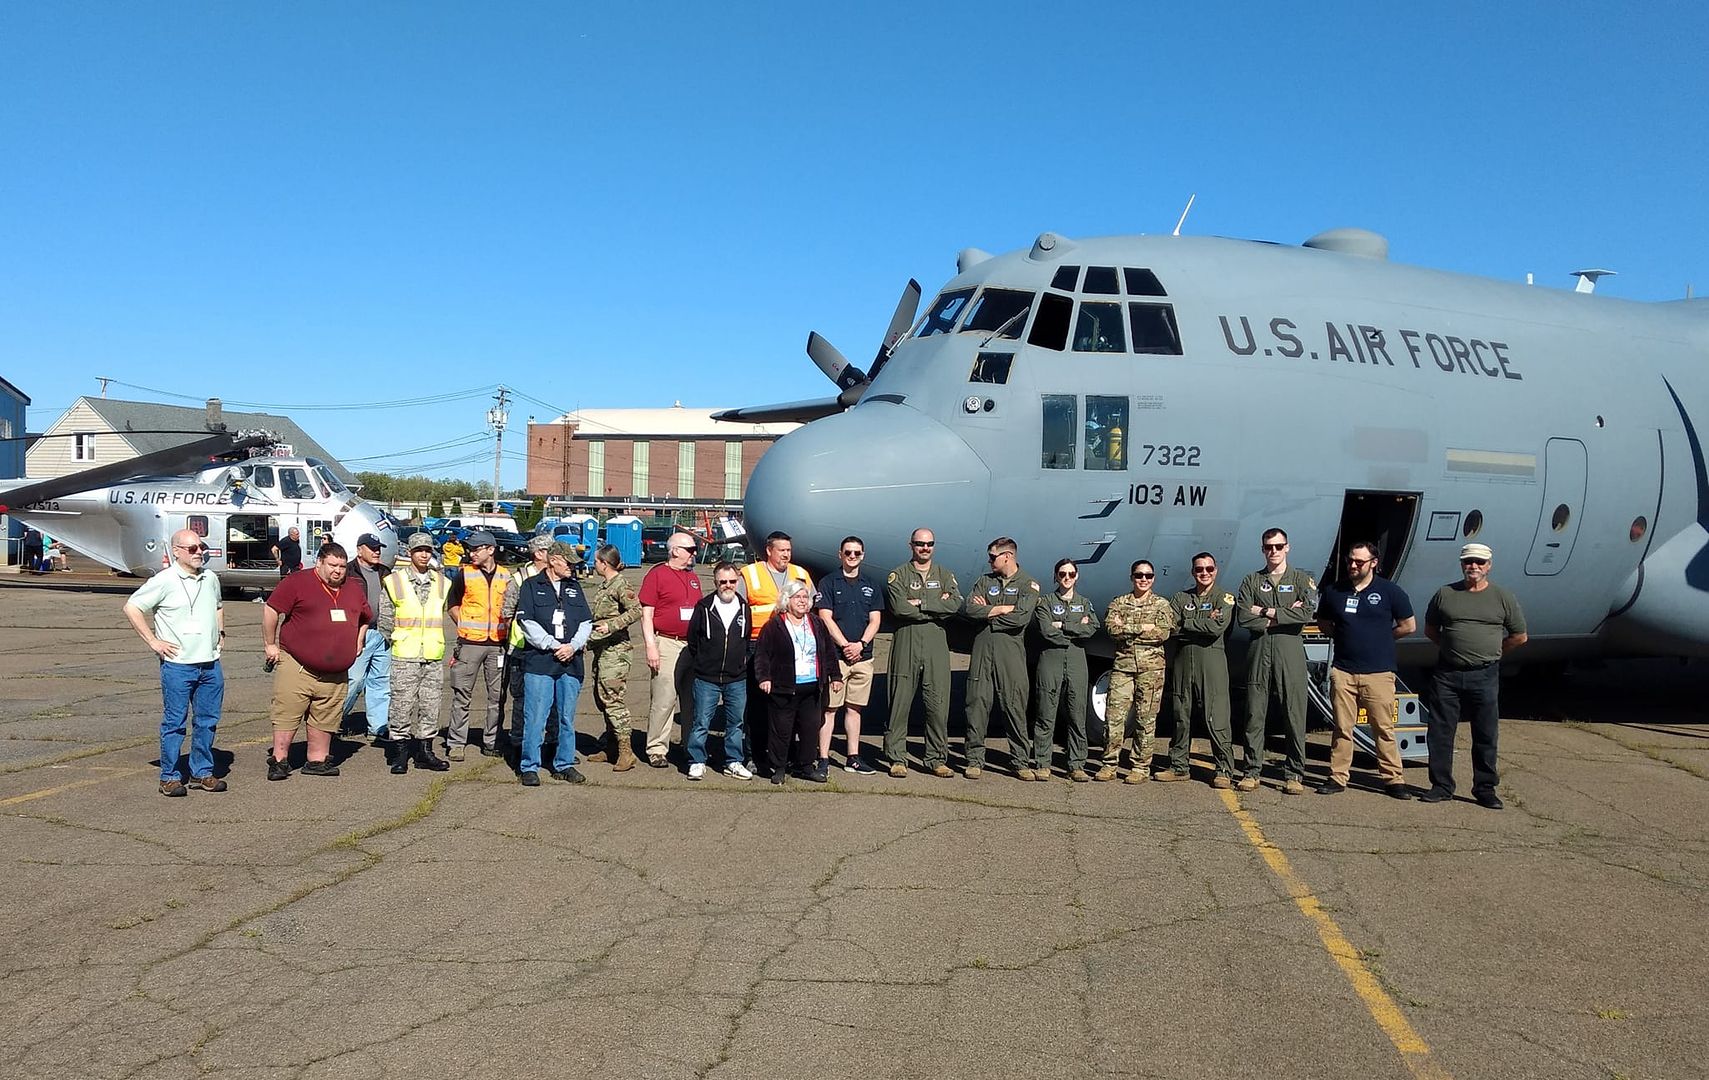
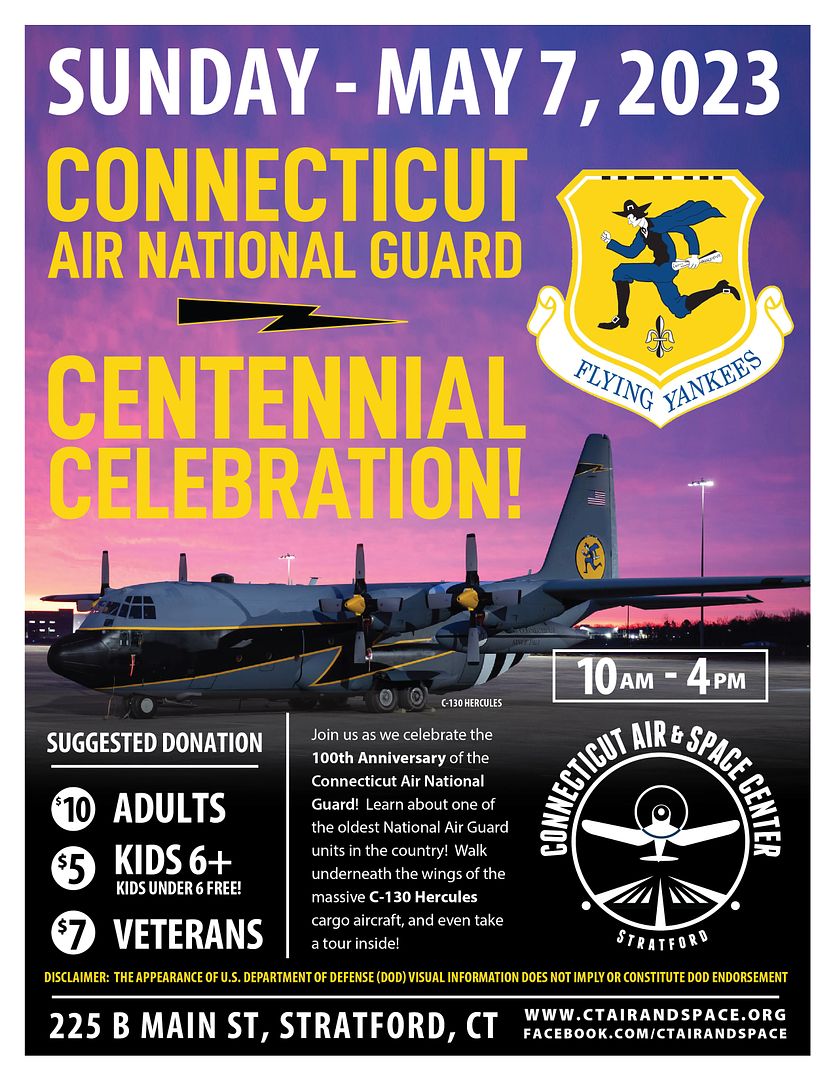
Being involved with the Connecticut Air & Space Center since 2005, I've since become the curator for the collection of artifacts. So my mind is always on displays and models that could help tell the story of our aviation history in Connecticut. With these two banged up models, a P-47D and a P-51D, I knew just what to do with them! Fast forward to 2023, our museum is in the planning stages for a 100th Anniversary Celebration of the Connecticut Air National Guard! The main attraction will be a CTANG C-130 visiting the museum!
So with that in mind, I started to think about just what kind of displays would be good to put together for the event. And then I remembered my two 1/18th models...
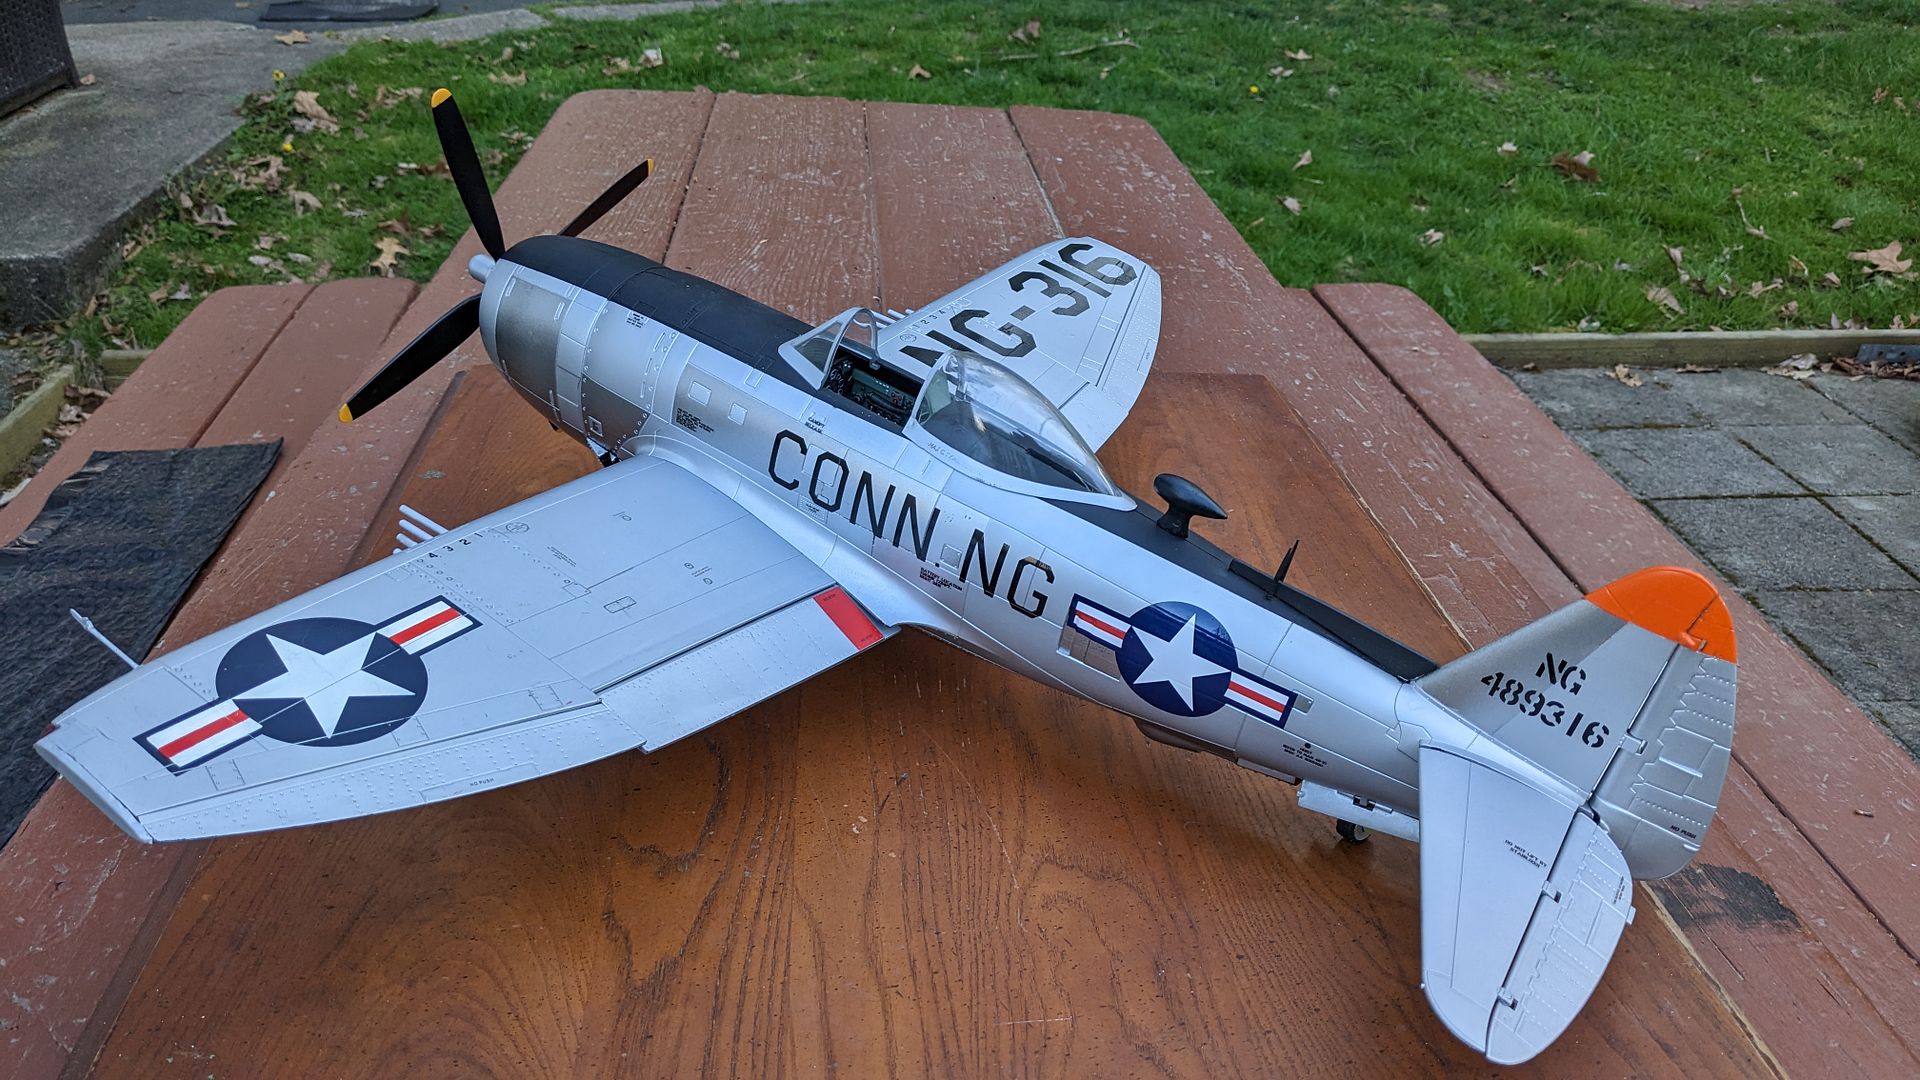
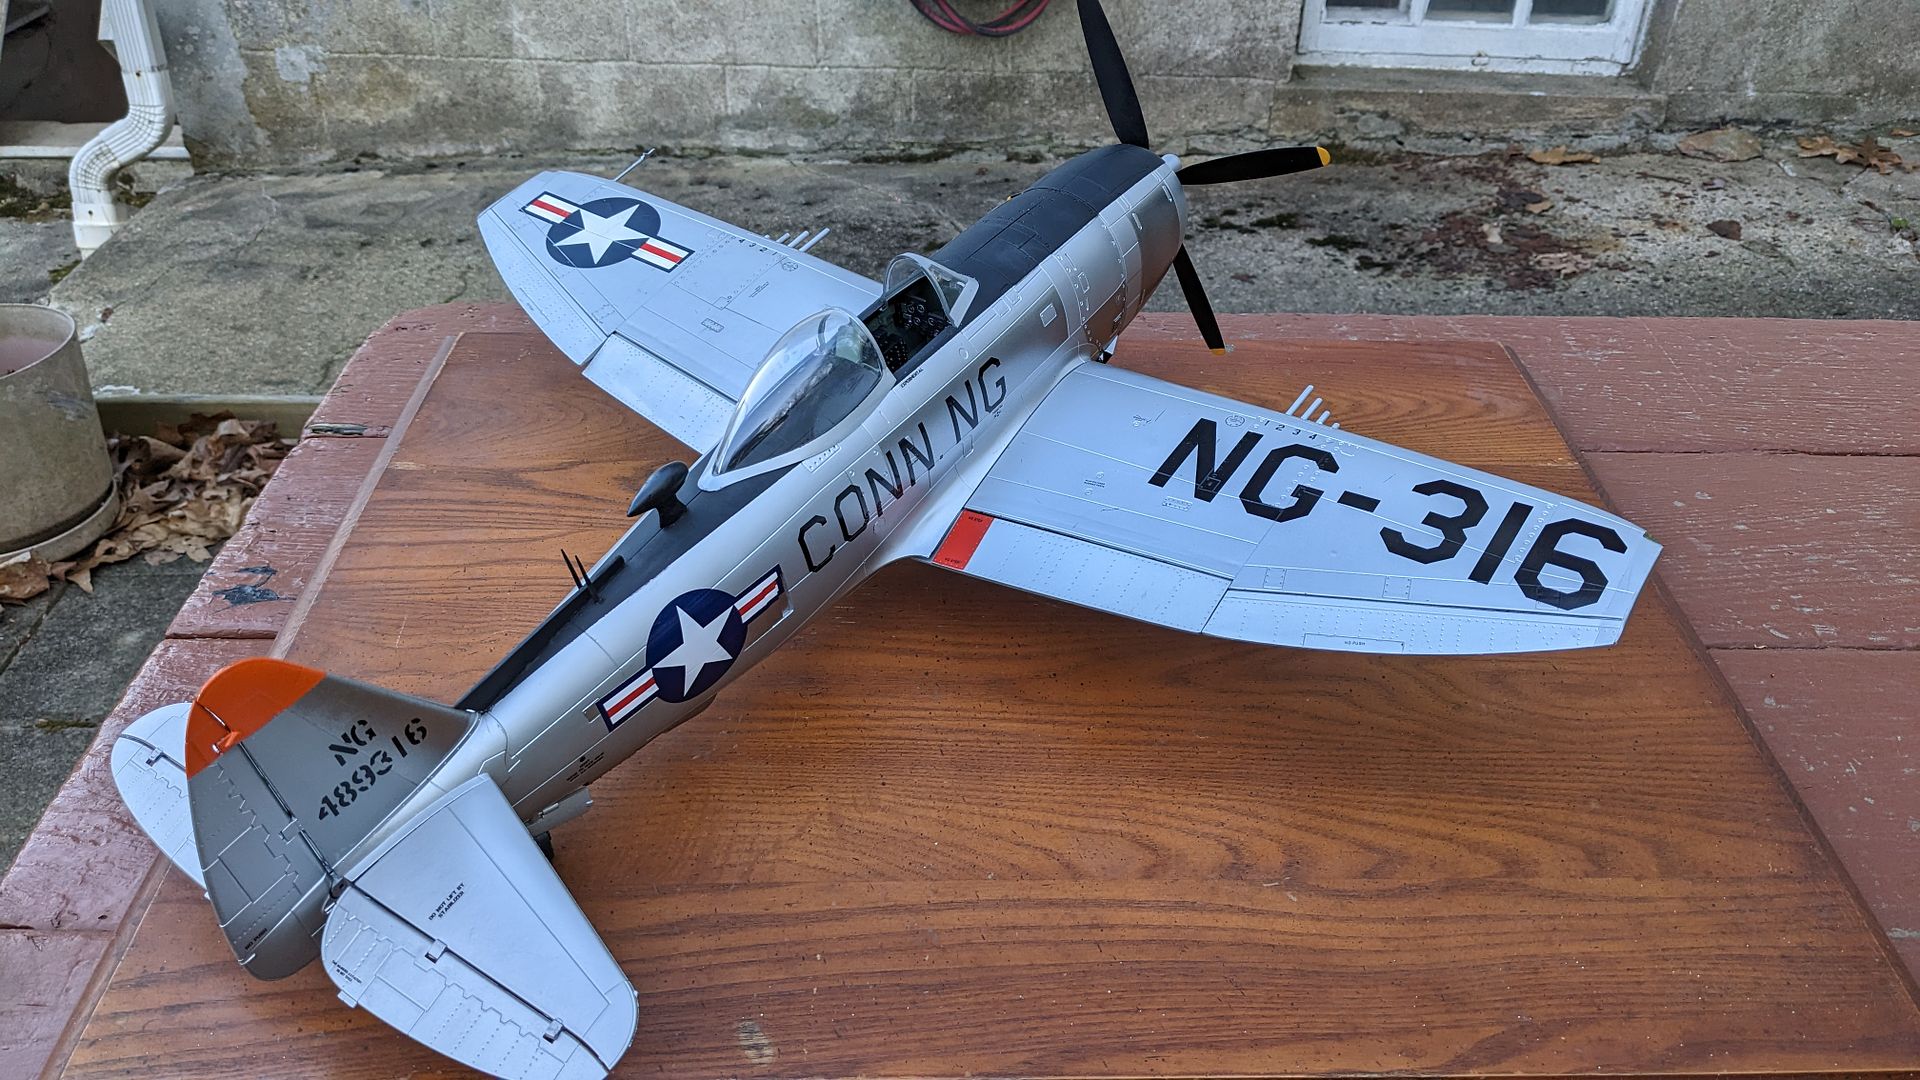
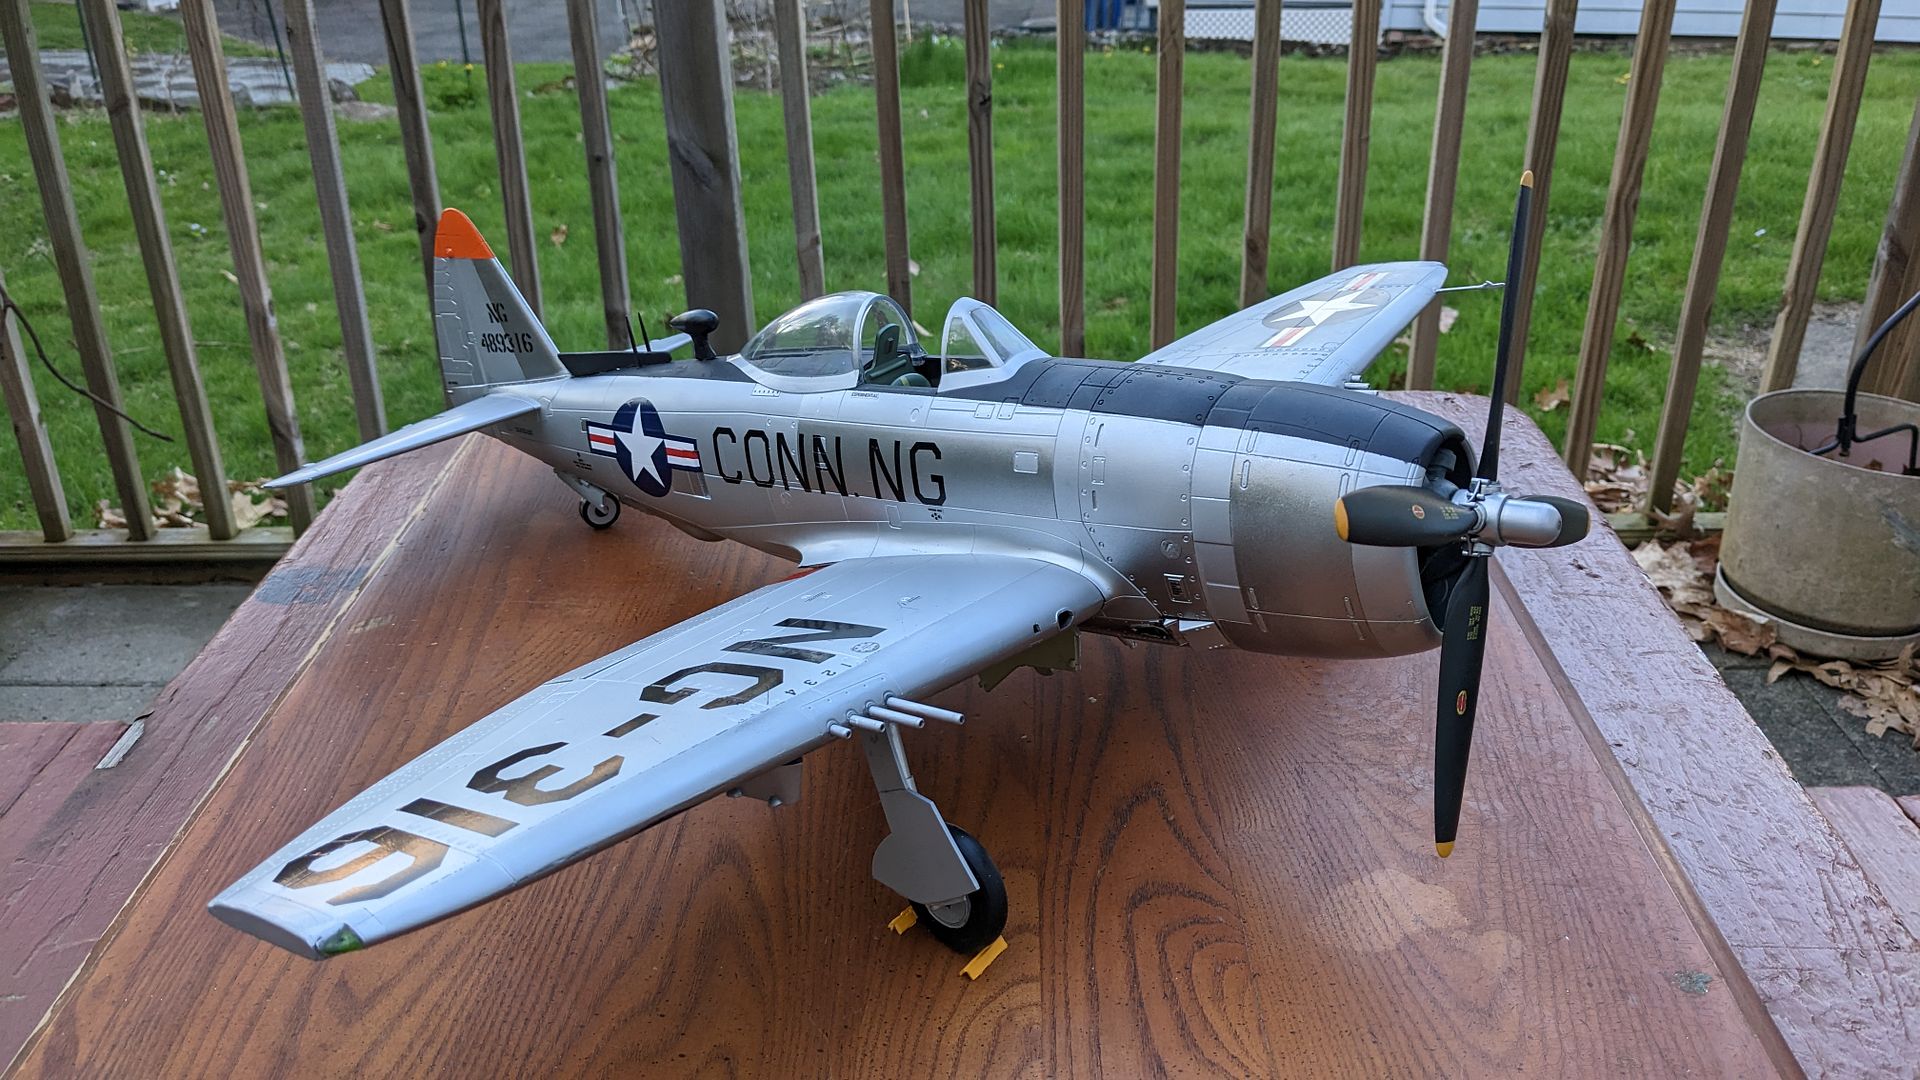
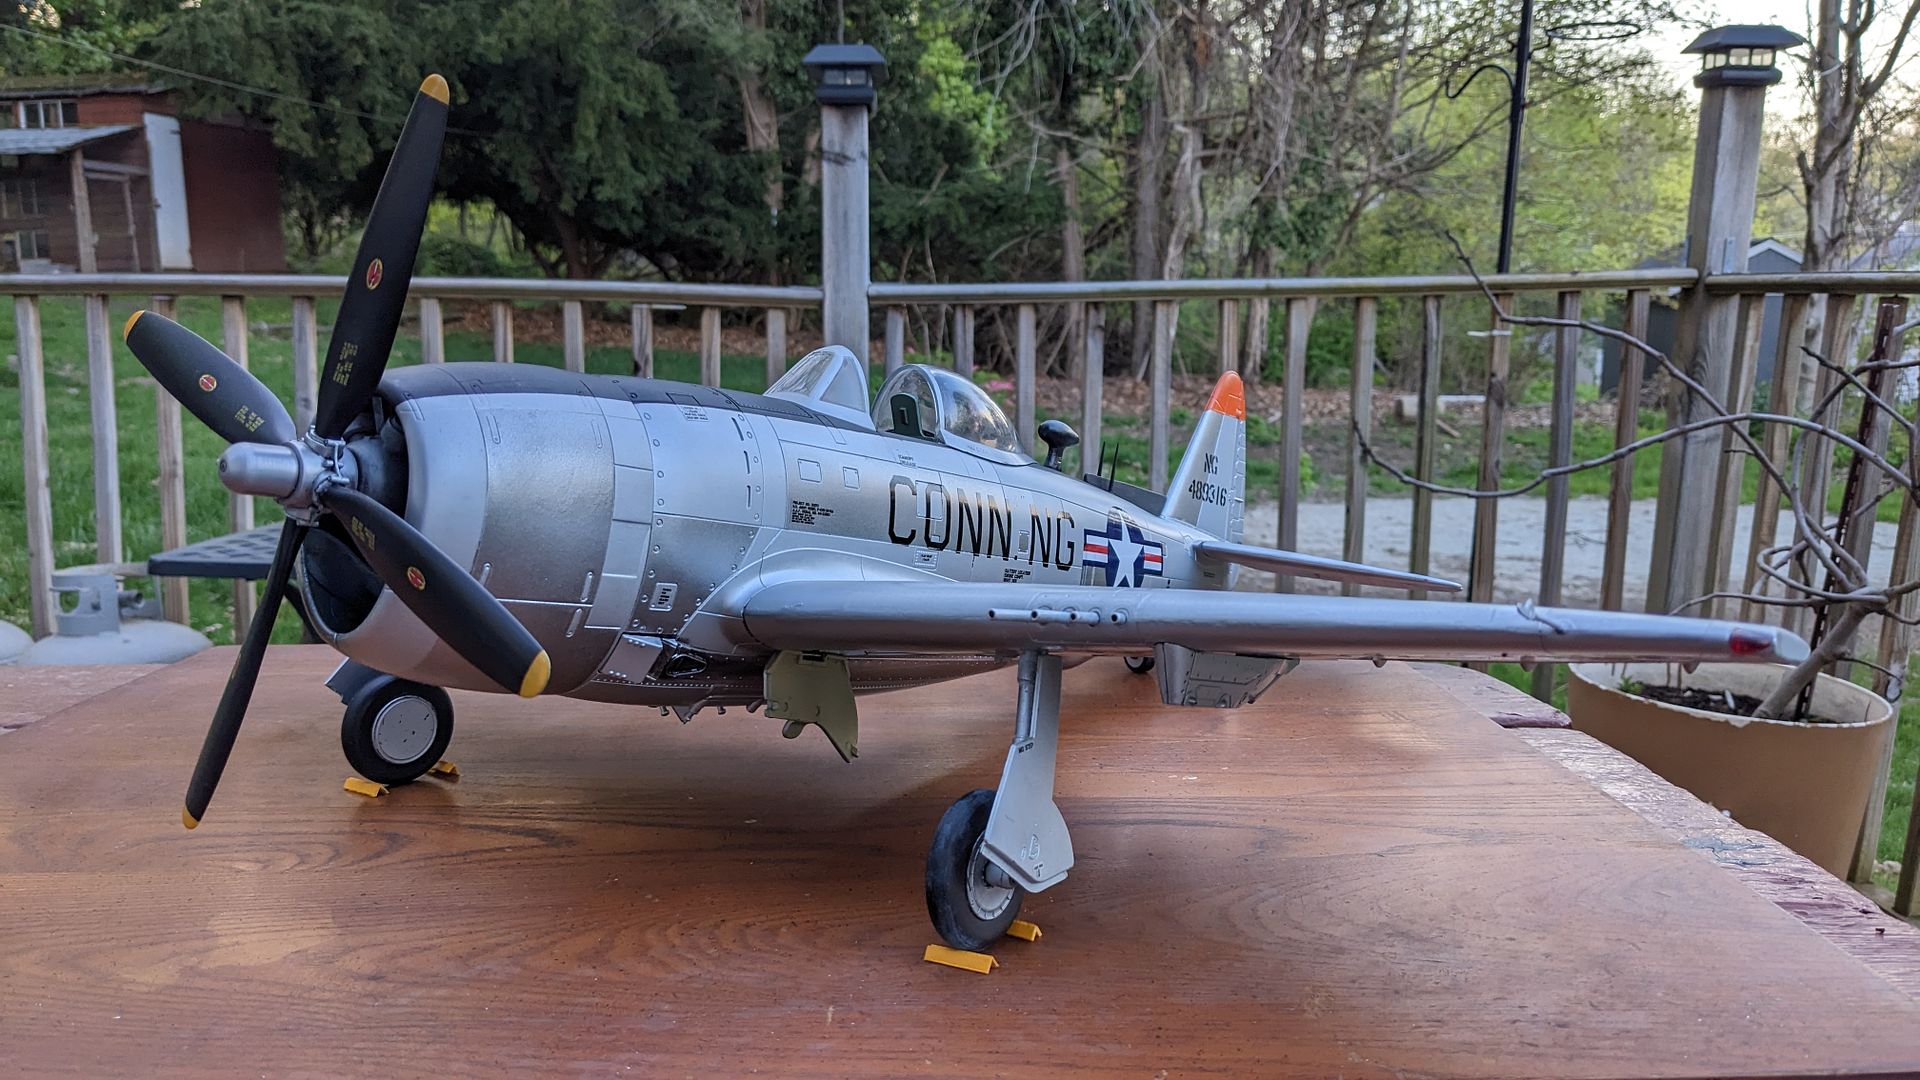
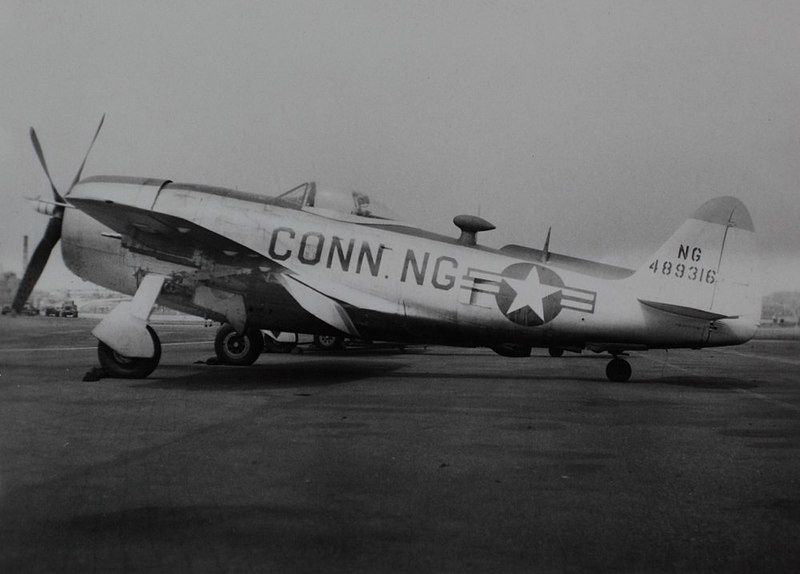
P-47D to P-47NAfter discovering a picture of this P-47N used by the Connecticut Air National Guard back in the 50's, I became a little obsessed with modeling this plane. I first started on this 1/18th model originally, but due to a lack of spare parts, I shelved it. I eventually moved onto recreating this plane in 1/144th and 1/72nd scale but am now back!
_p1.png)
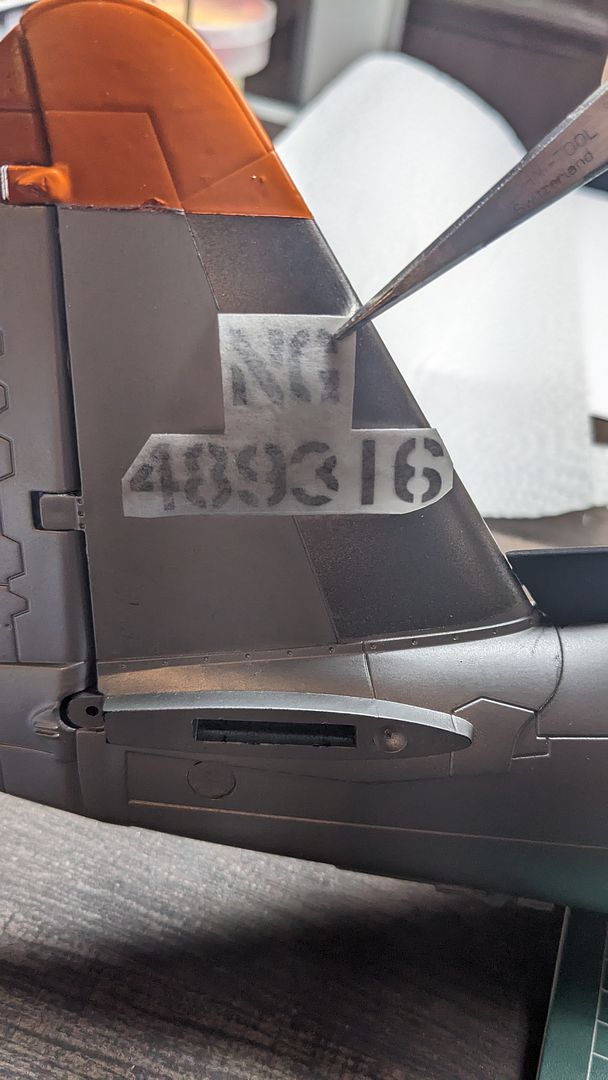
Republic P-47N Thunderbolt P-47N-25-RE, 44-89316. 118th FS, 103rd FG, Connecticut National Guard. The modern Connecticut ANG received federal recognition on 7 August 7, 1946 as the 103d Fighter Group at Bradley Army Airfield, Windsor Locks. The mission of the 103d Fighter Group was the air defense of Connecticut. It was assigned the 118th Fighter Squadron, equipped with F-47D Thunderbolts. September 18, 1947, however, is considered the Connecticut Air National Guard's official birth concurrent with the establishment of the United States Air Force as a separate branch of the United States military under the National Security Act. According to JoeBaugher.com this aircraft had an accident on Feb 6, 1947 while landing in bad weather at Hill Field, UT; 118th FS, 103rd FG, Connecticut Air National Guard, Bradley Field, Windsor Locks, CT; Damaged Aug 9, 1950 while taxying at Groton Field, CT; 118th Fighter-Interceptor Squadron, 4709th Defense Wing, Air Defense Command, Suffolk County AFB, Westhampton, NY; Crashed Apr 18, 1952 after losing control 3 miles SE of Flanders, Long Island, NY; Pilot killed.
The lack of spare parts (starboard landing gear, door, and hard point) caused me to not continue, but thankfully I recently found someone willing to model the needed parts and 3D print them. Something I've been waiting for awhile now. With the parts being made, I decided to take stock of this old project, and see what I could do jump start it!
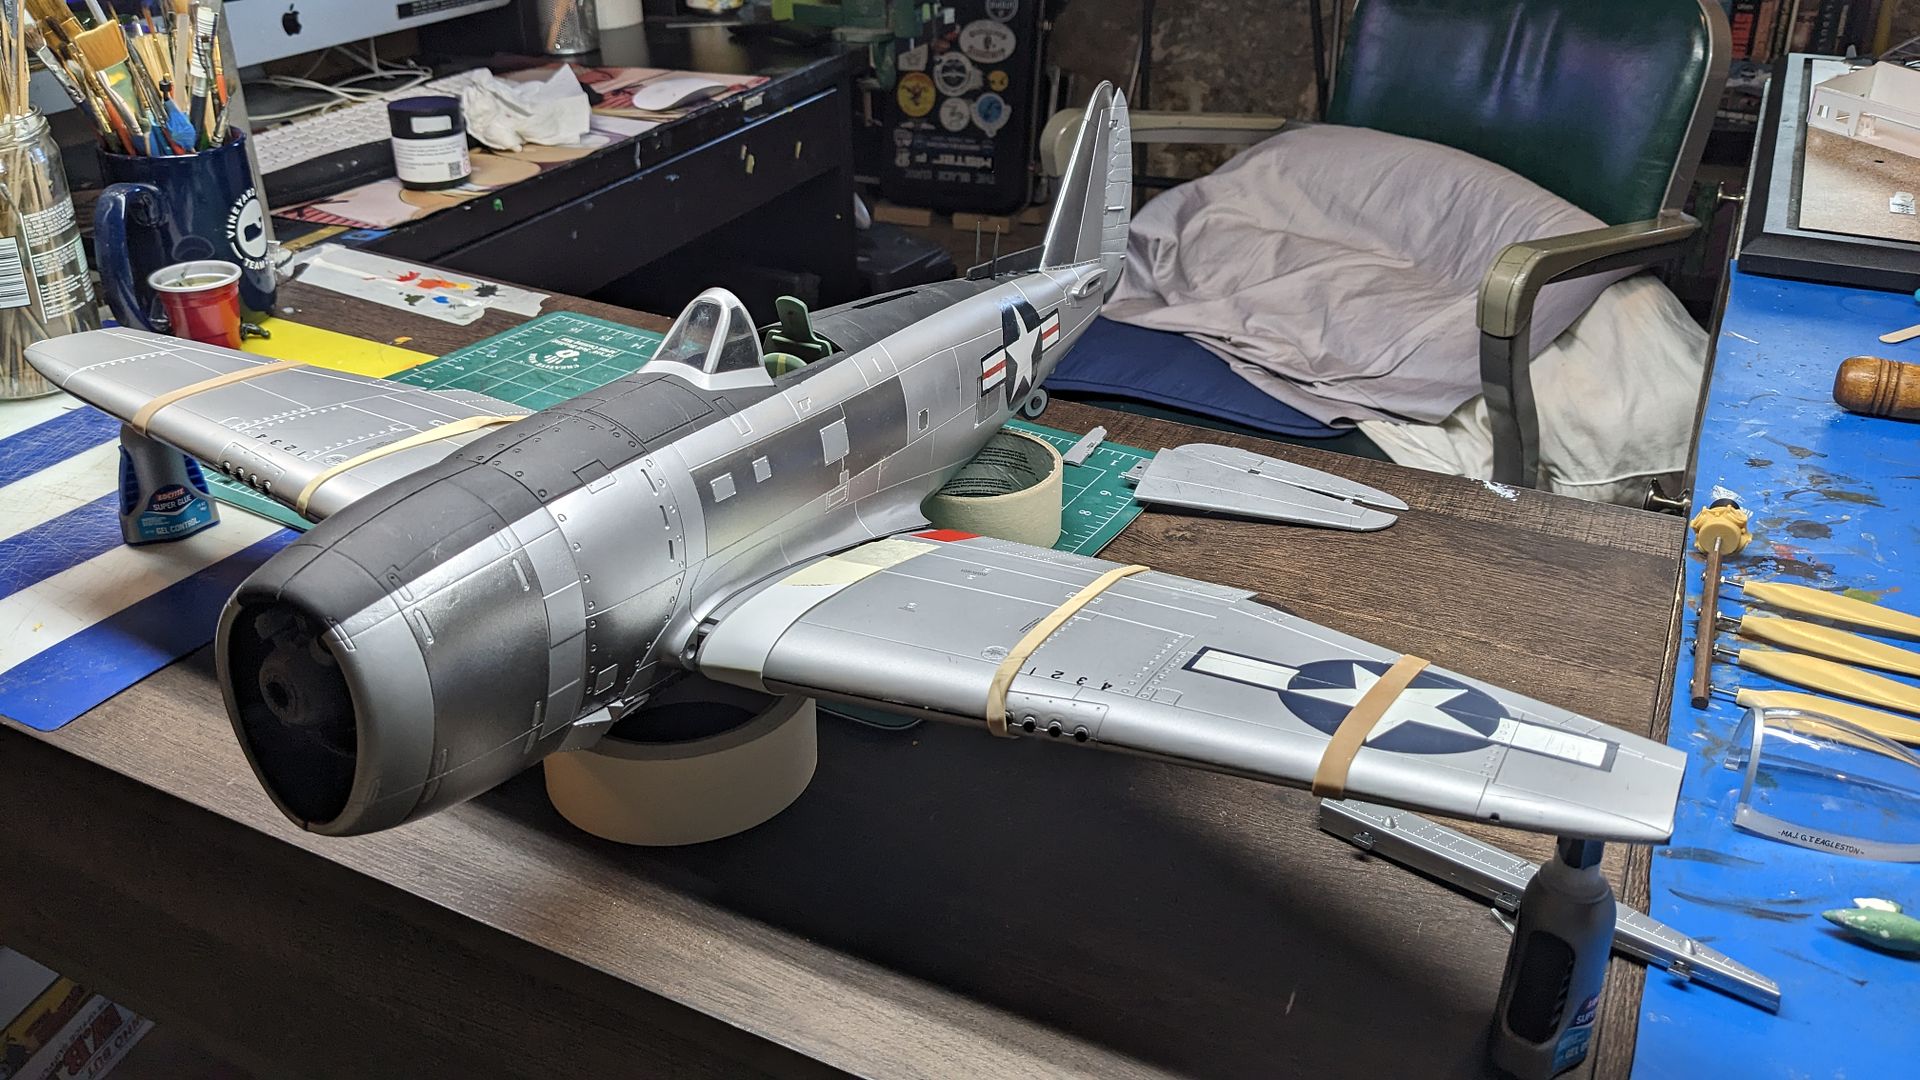
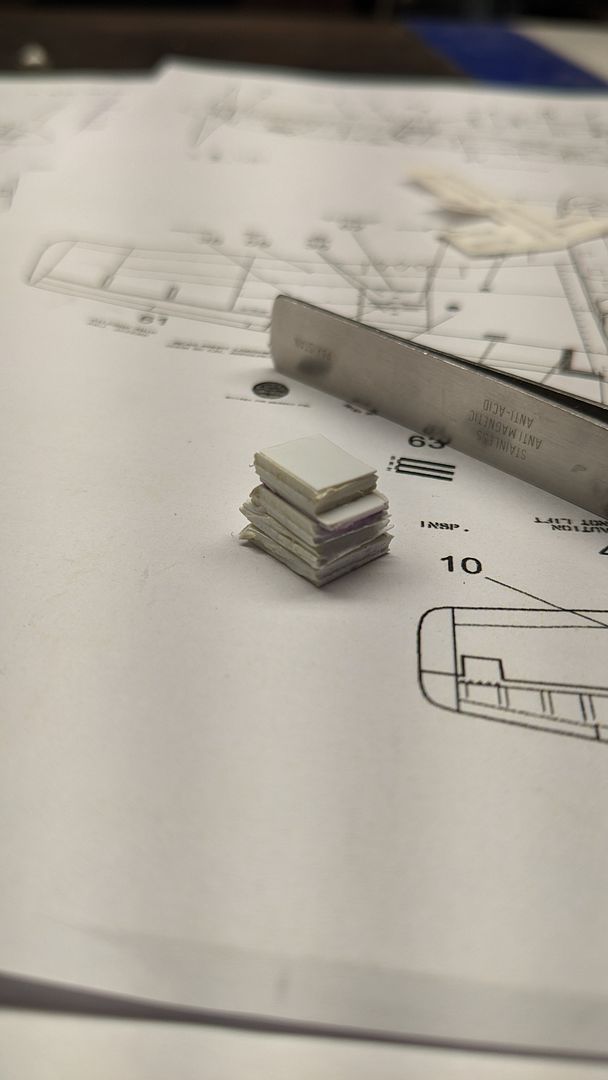
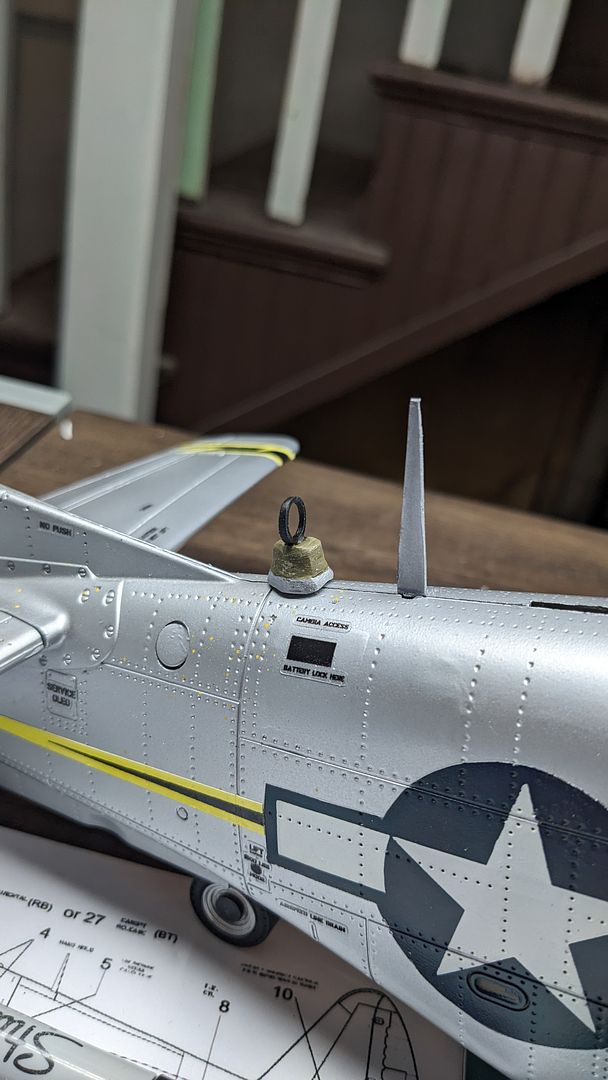
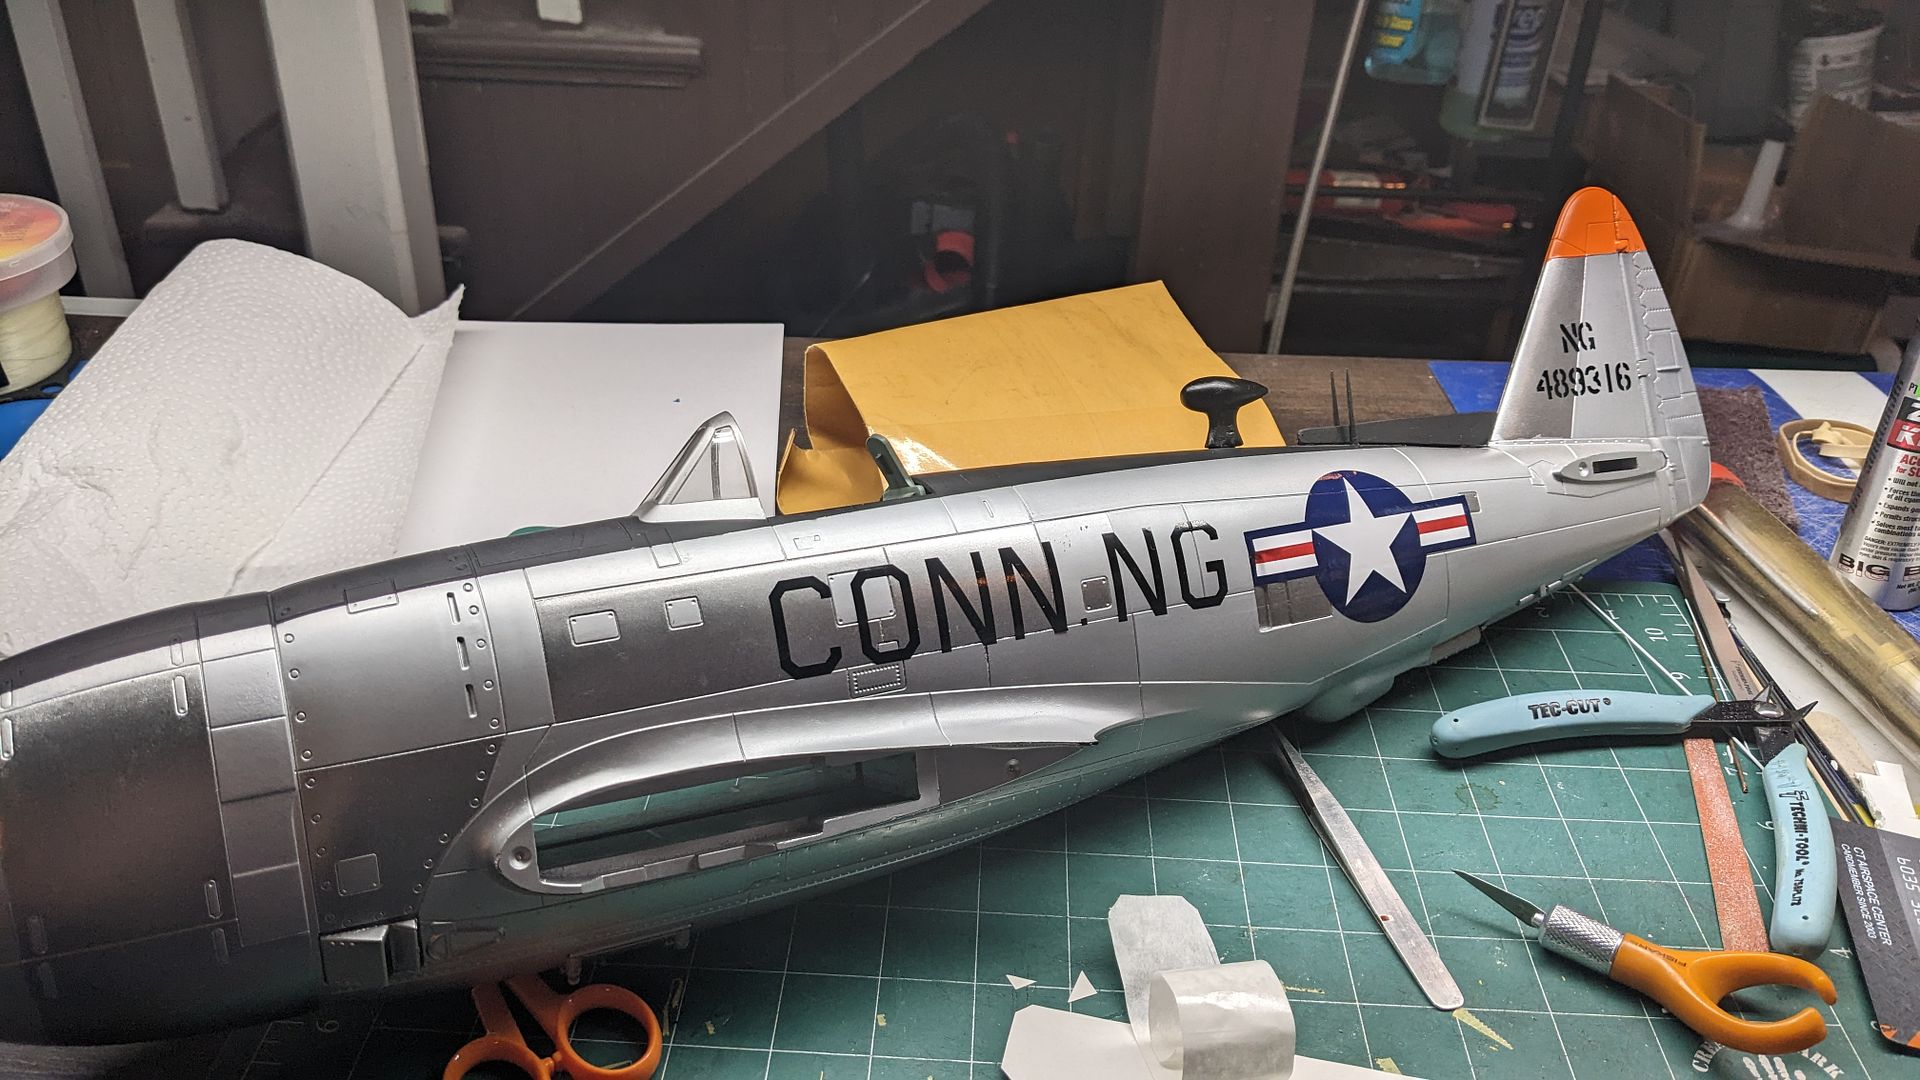
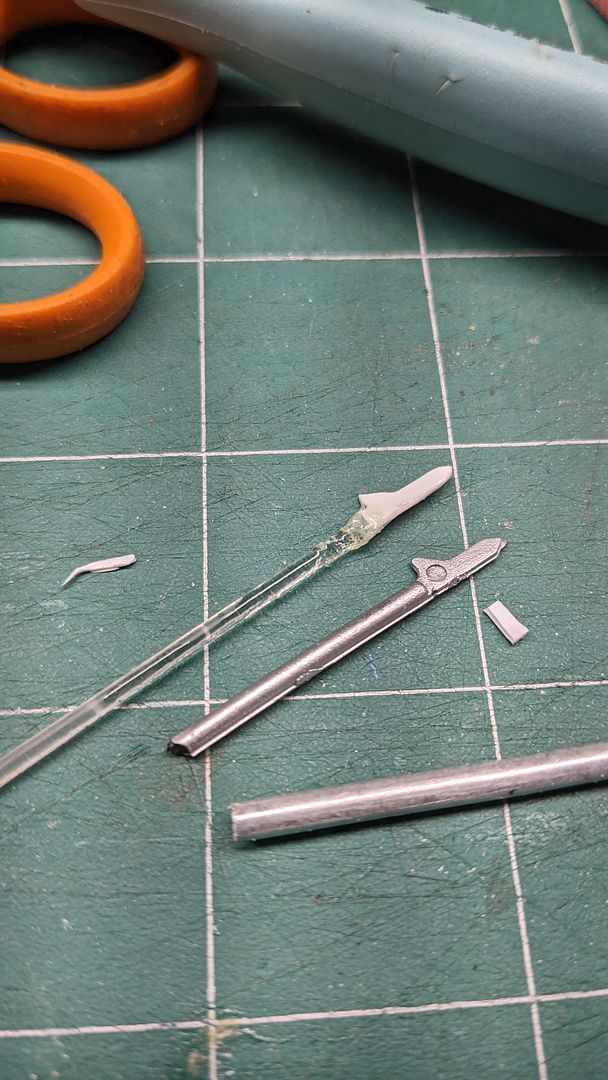
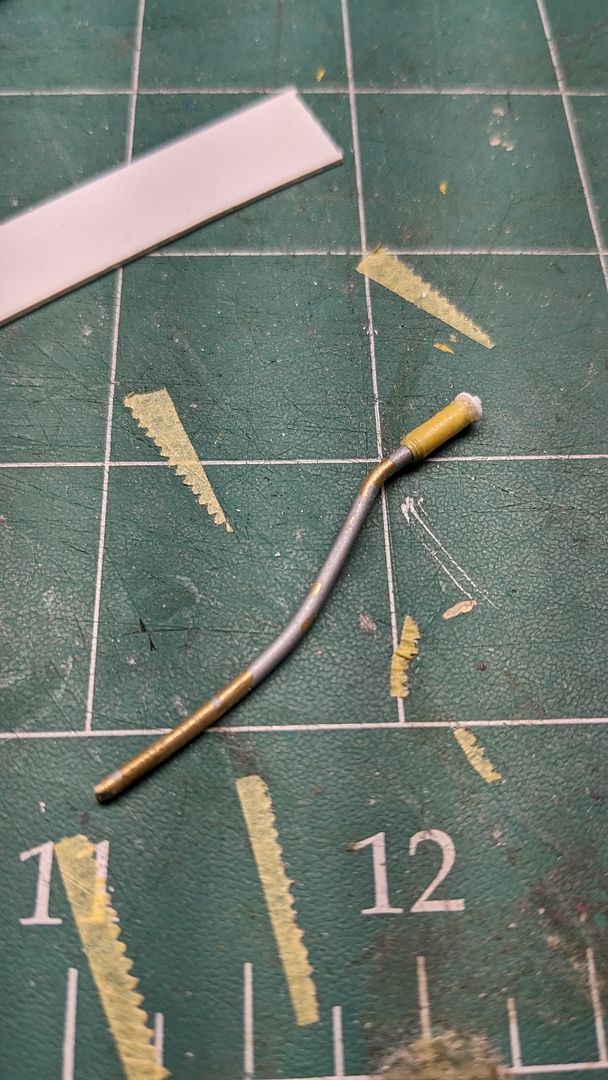
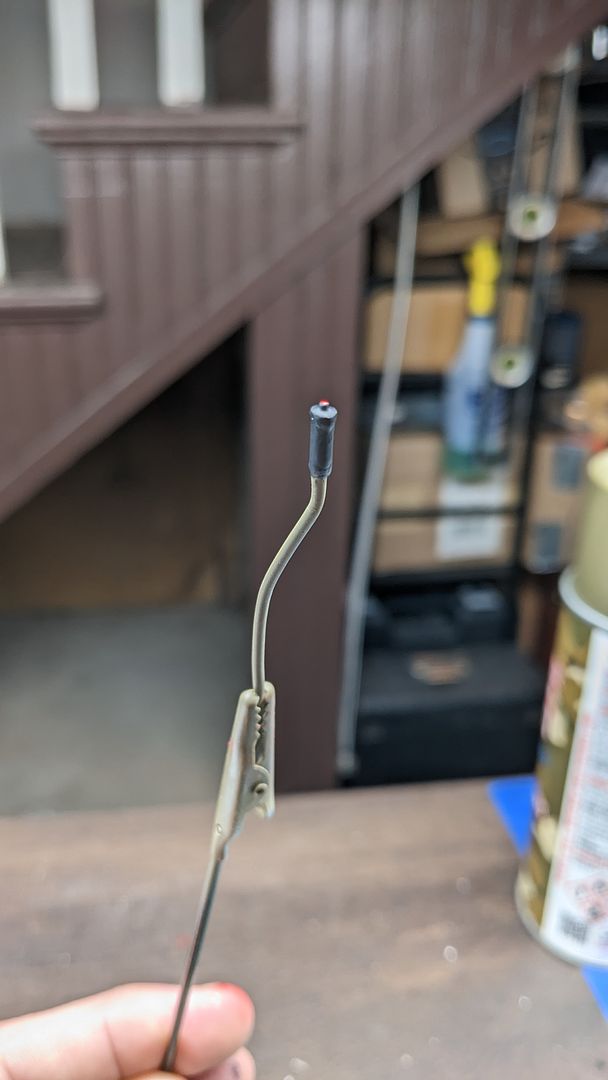
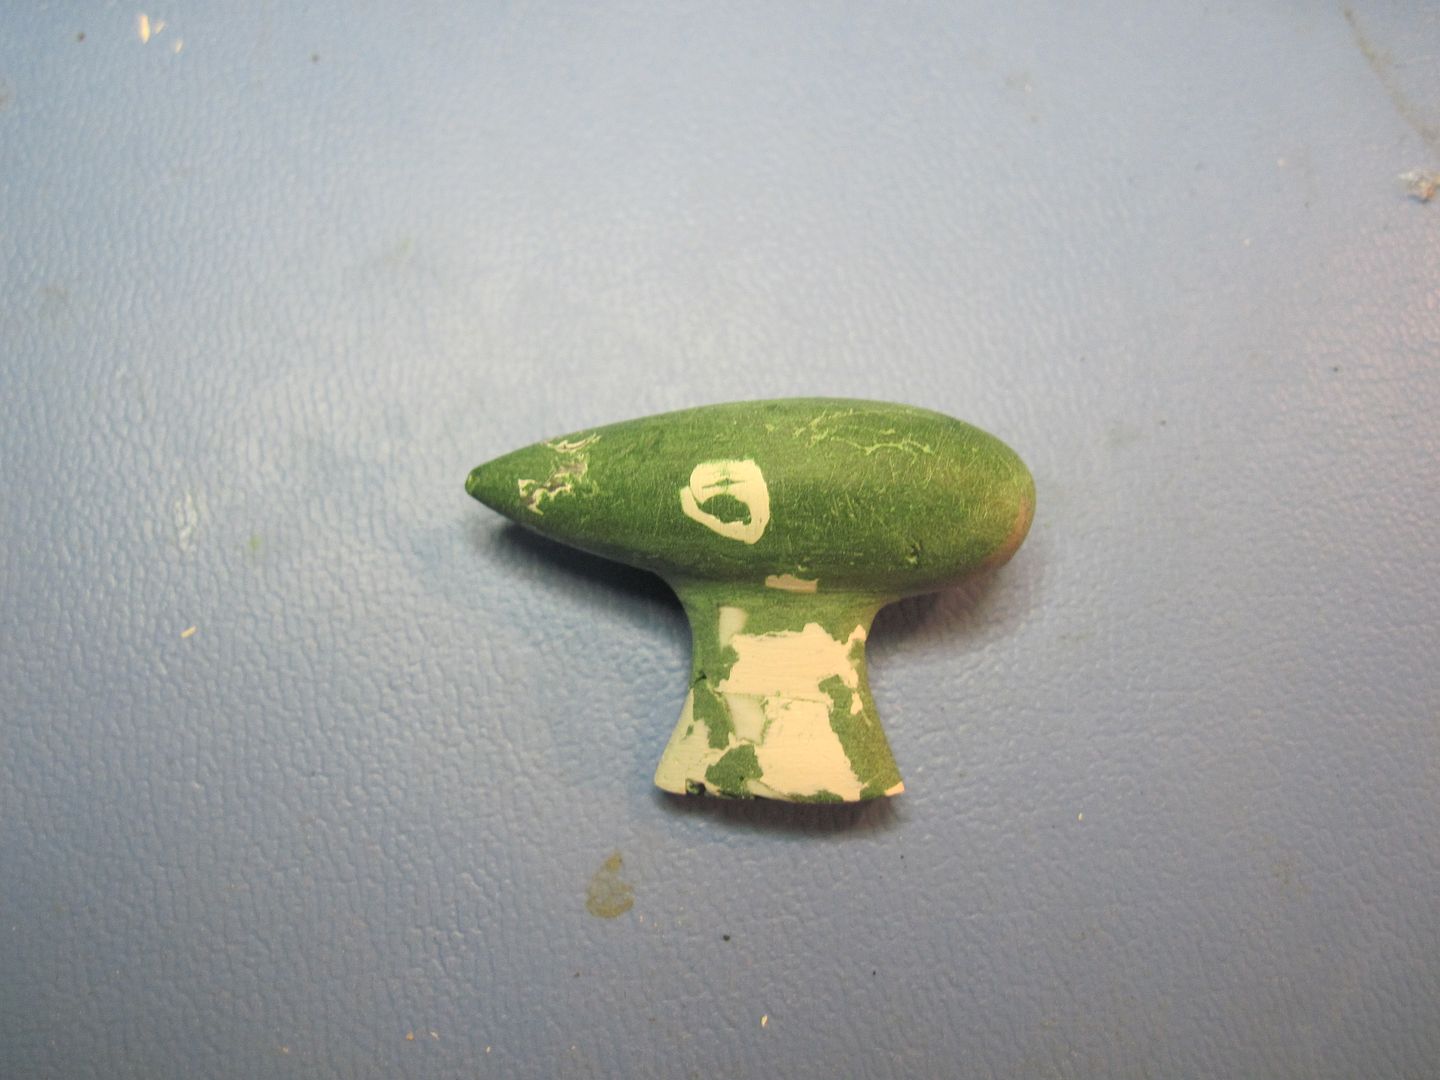
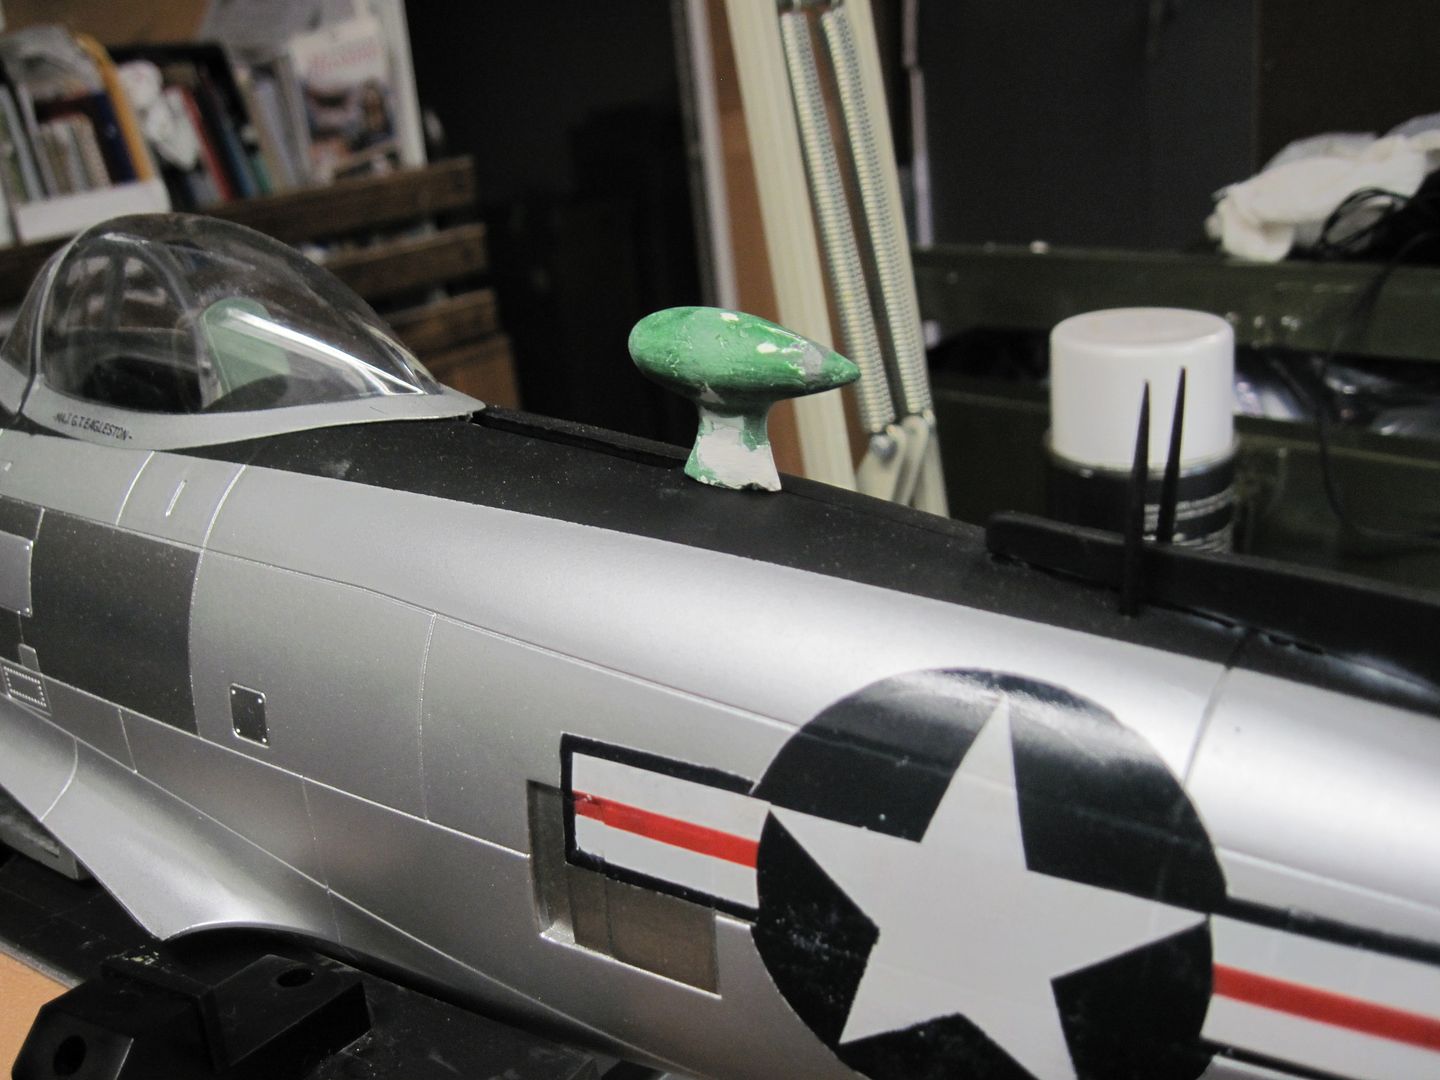
I had already repainted the fuselage silver, and masked and painted different parts a different metal color, along with a black antiglare panel. I also cut and sanded a piece of styrene for the rake spine on the tail, create two radio masts out of tooth picks, and scratchbuilt a ADF Football out of plastic and putty.
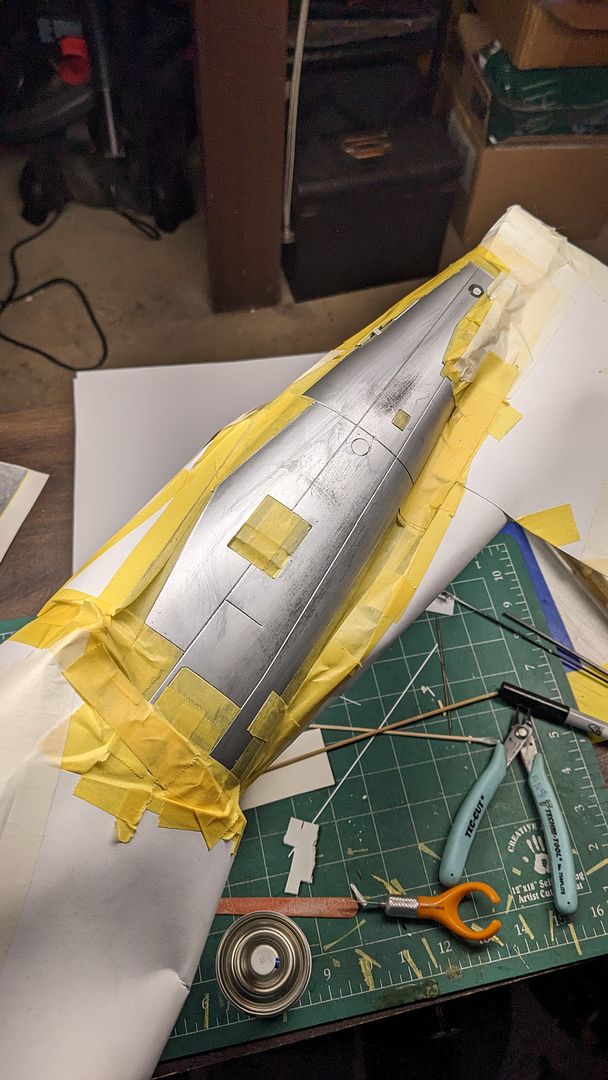
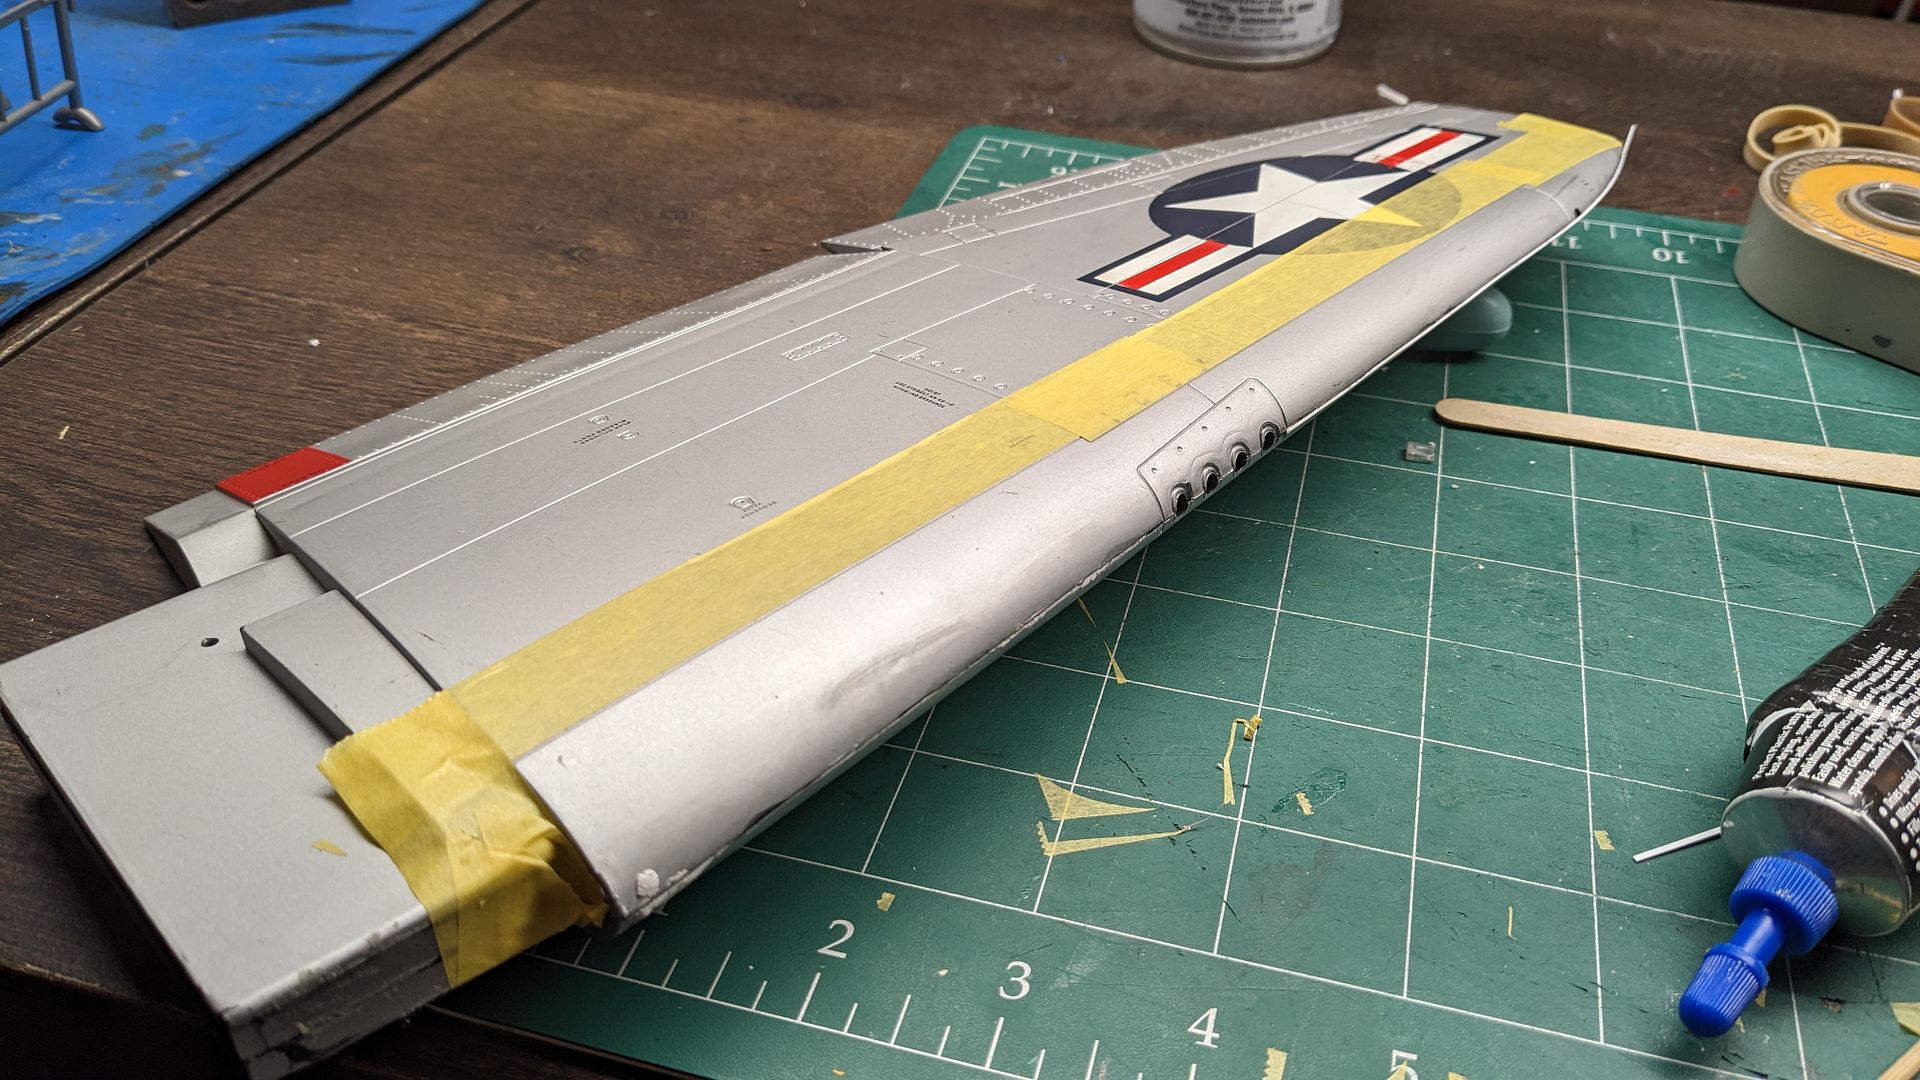
You can see in these shots, cut pieces of thin styrene taped onto the wings, to better help shape the plastic. These strips were to become the extensions needed for the P-47N's wing. As the N model's wingspan was winder for longer range in the pacific. I decided since I am on a deadline for May 7th, that I wasn't going to try and do the heavy modification needed (especially with the undercarriage / landing gear bay) and just keep the D model sized wings for now. I may go back in the future and correct this issue, or better yet, someone 3D scan both halves of the original wings, and modify them in the computer, and just add the necessary length into the model and print it!
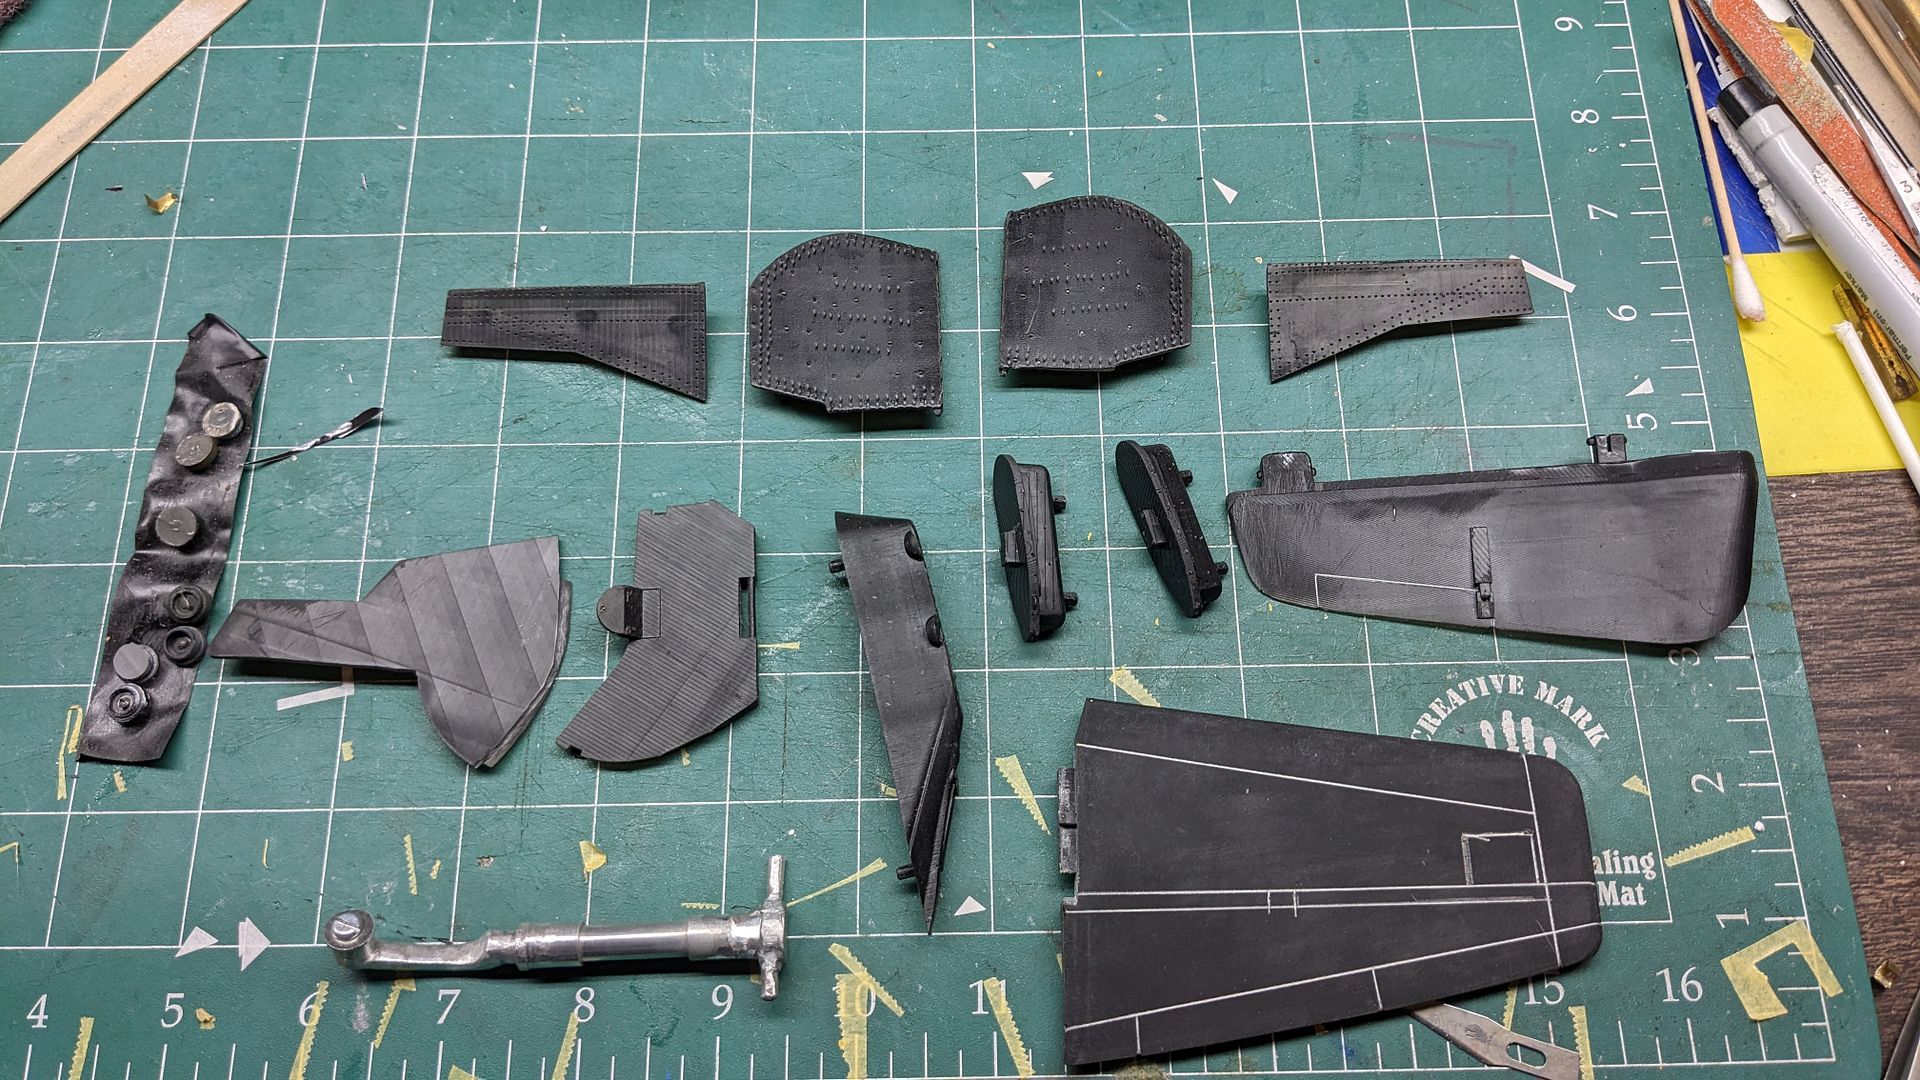
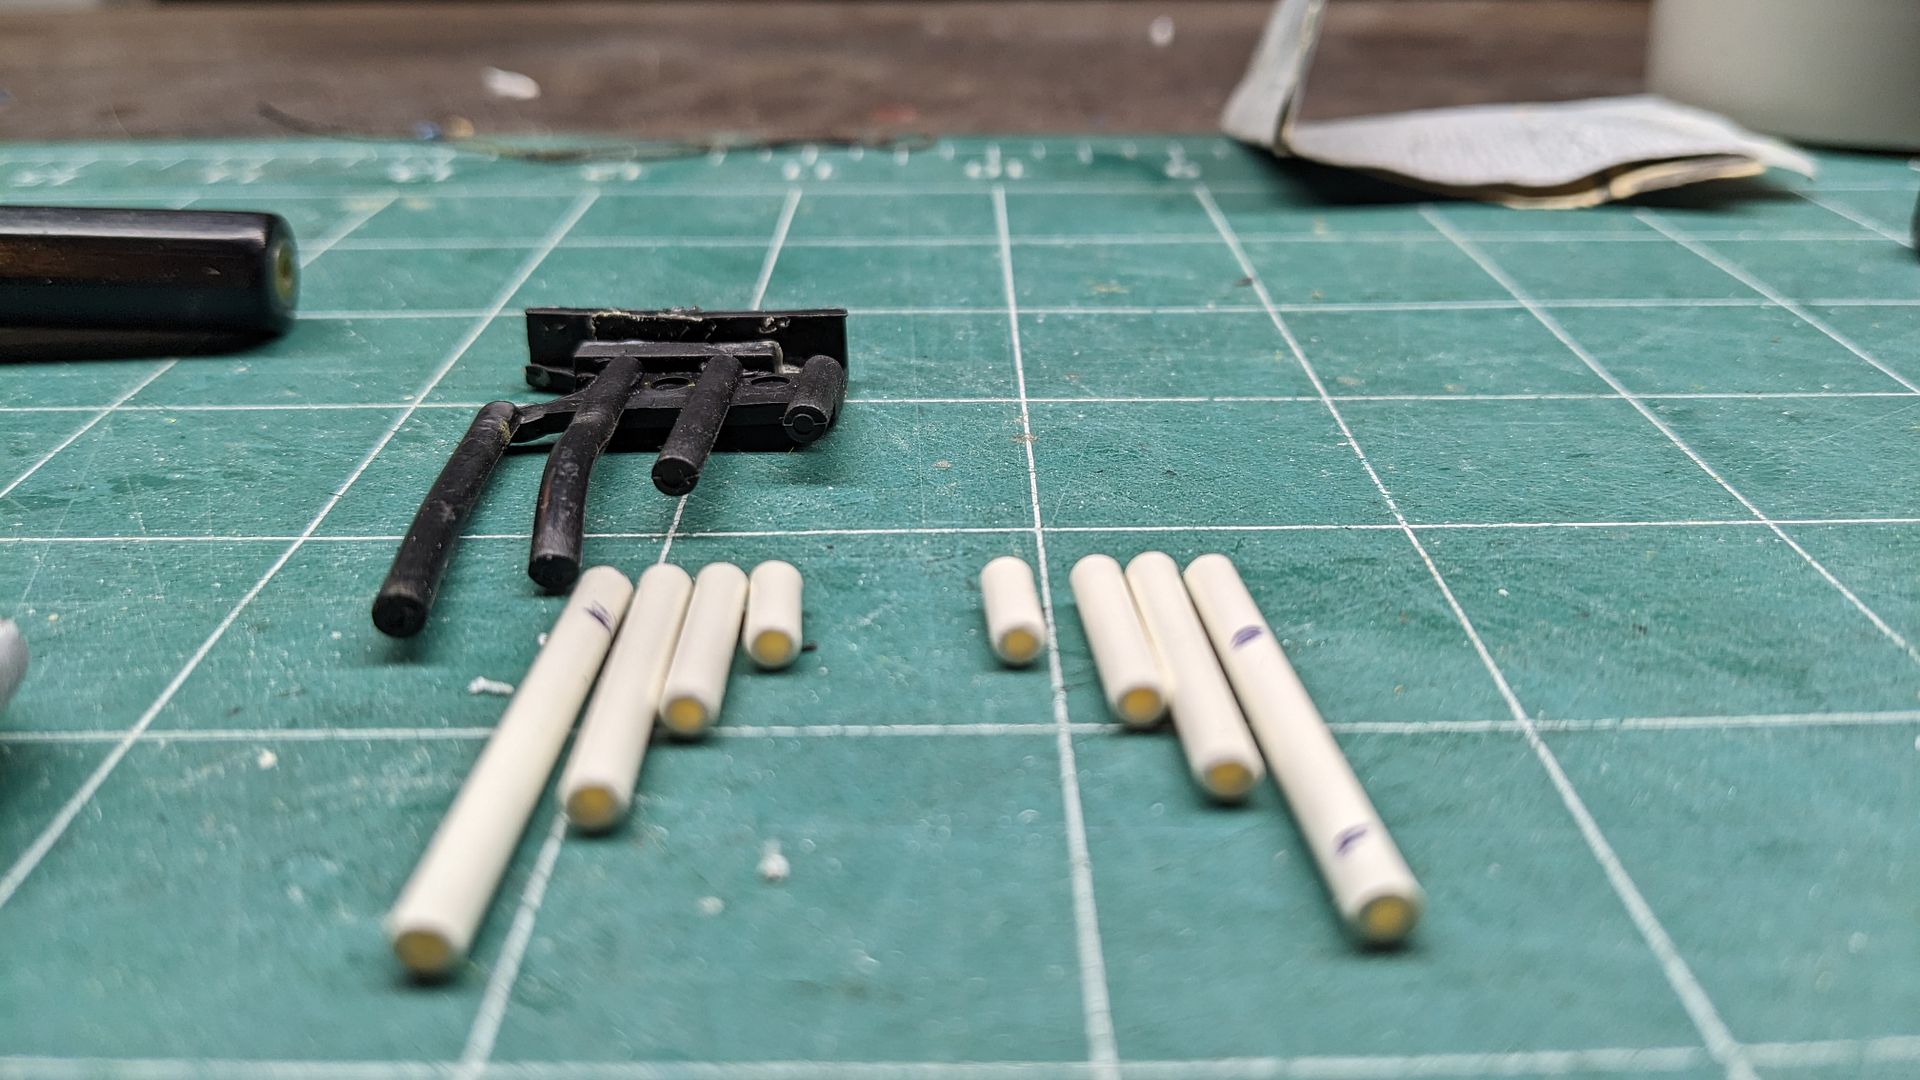
This shot shows the layout of all the parts and pieces I currently have for the project. I cut the wingtips off of each wing with the intention of gluing and sanding new squared off wingtips that can be found on the N model. Since I finally found someone to make me all the replacement parts I needed:
- Starboard Landing Gear
- Starboard Landing Gear Door
- Starboard Inner Landing Gear Door
(Actually for another stock P-47D I have hanging up)- Hard Point
Here are a couple of shots from the designer of the new parts being made in CAD.
_335791086_165353043039150_6673794255205913803_n.png)
_335566711_1082101429180545_881515110032280539_n.png)
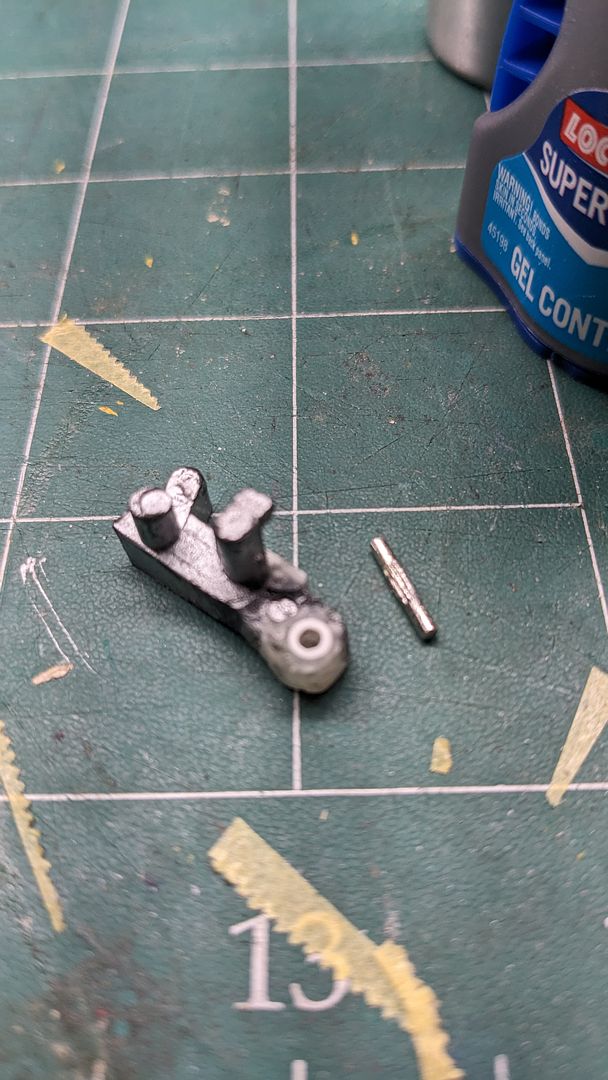
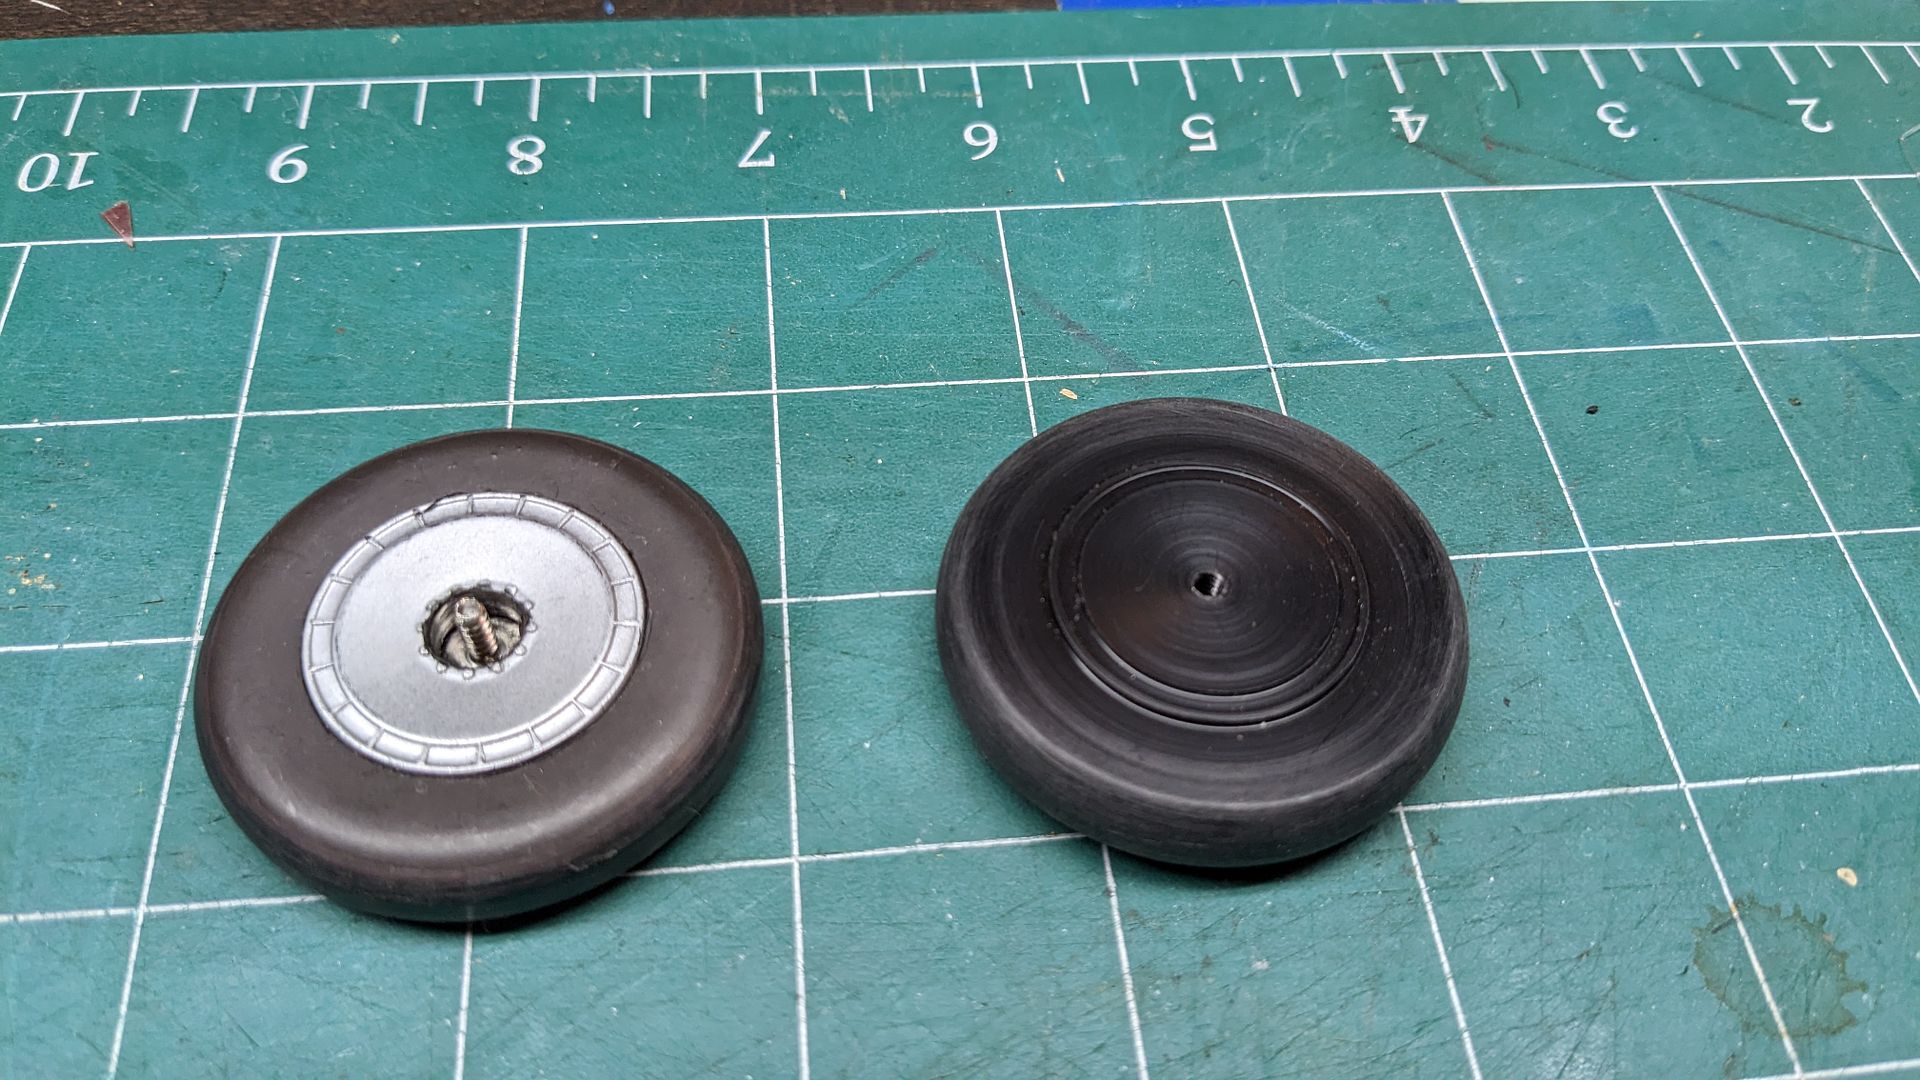
My father was kind enough to make a replacement wheel years ago for this project. Now it will finally get used!
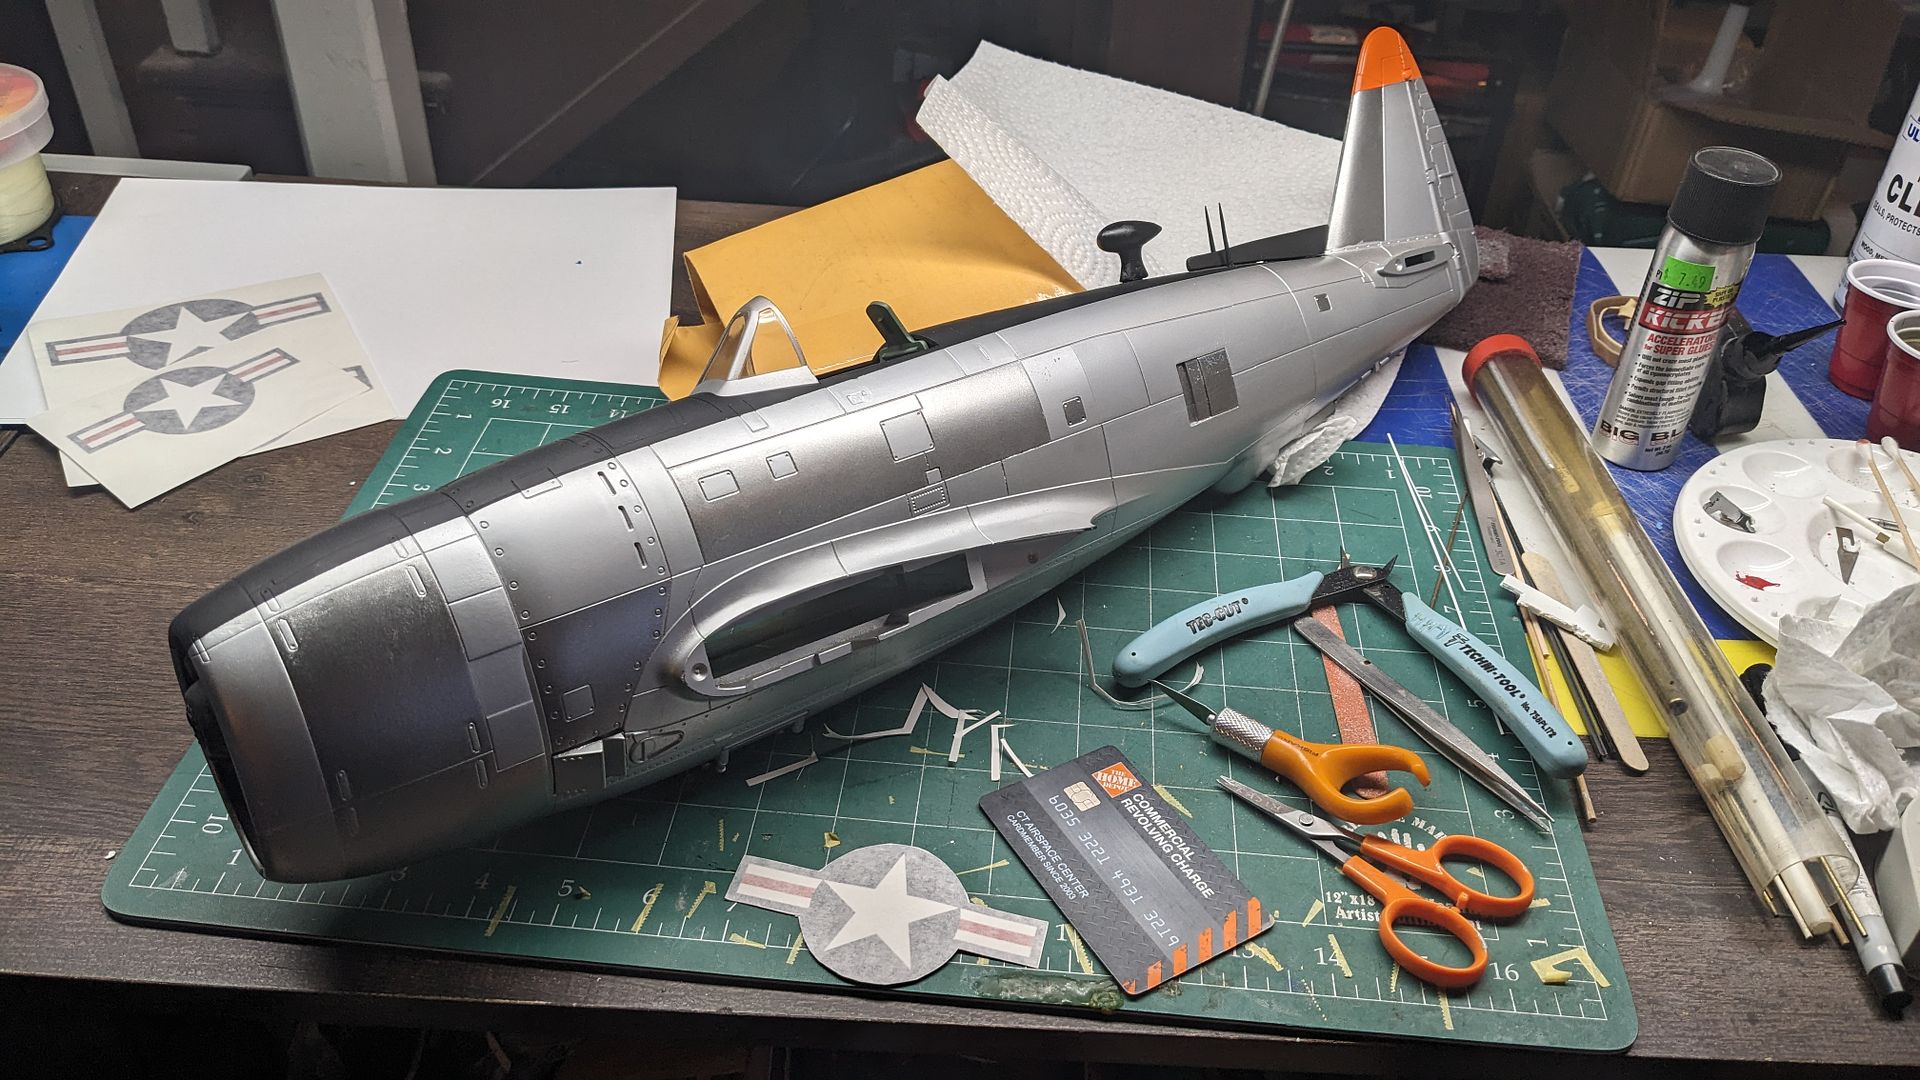
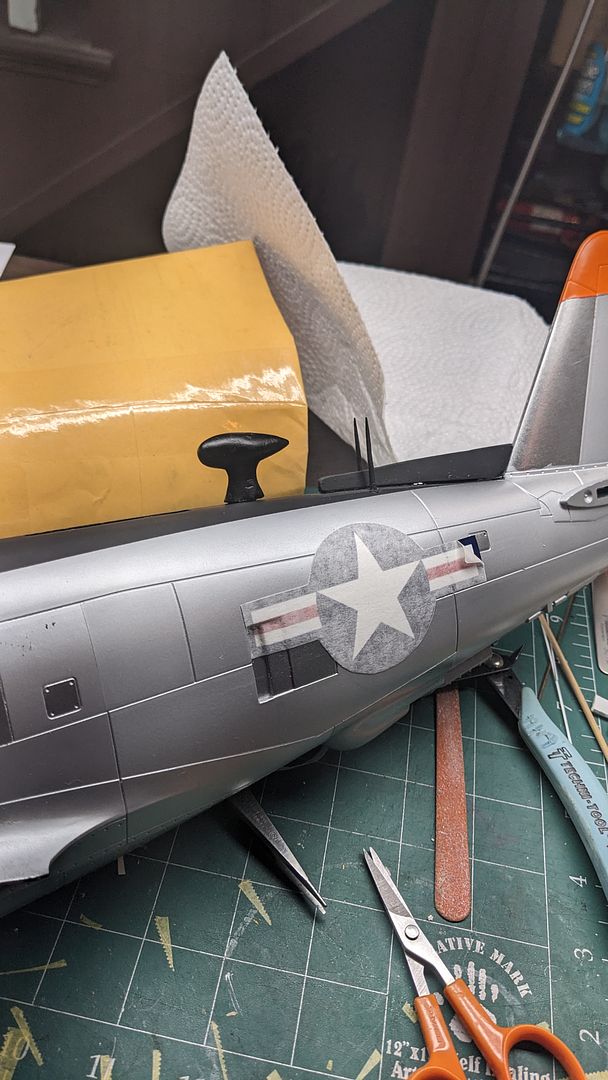
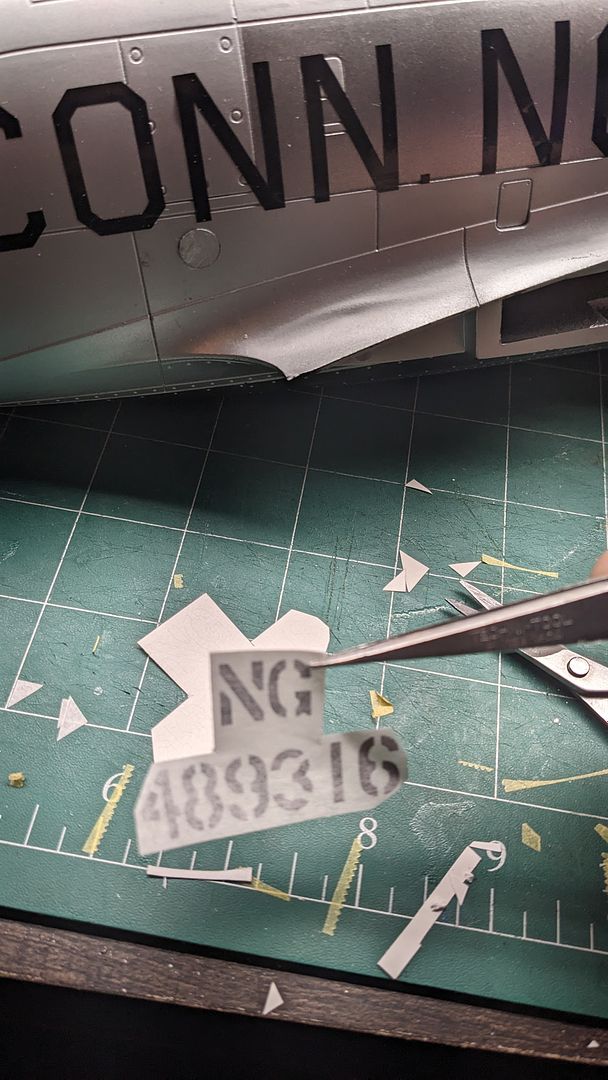
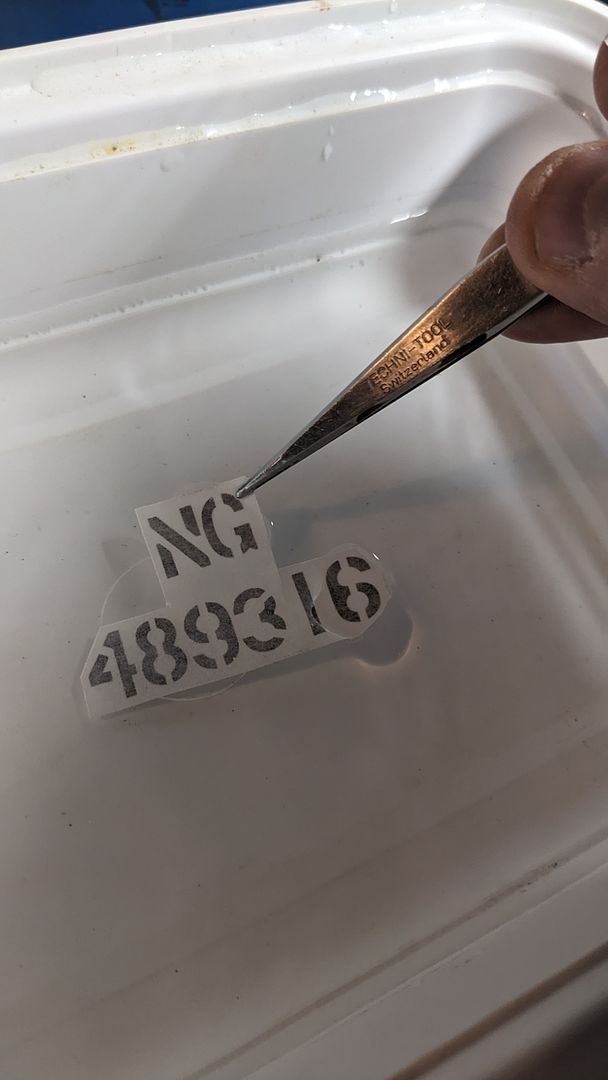
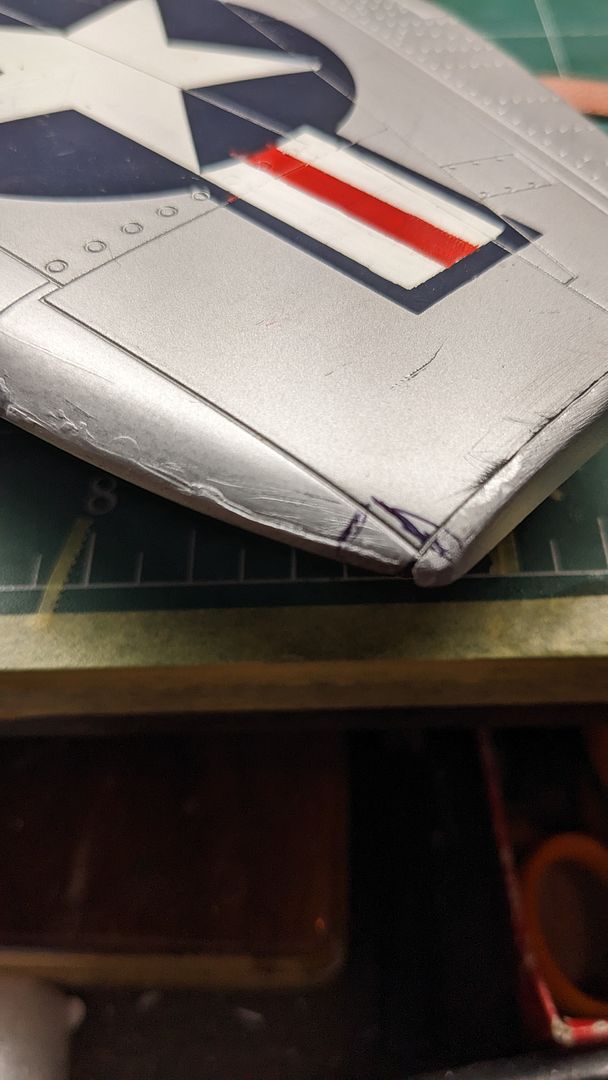
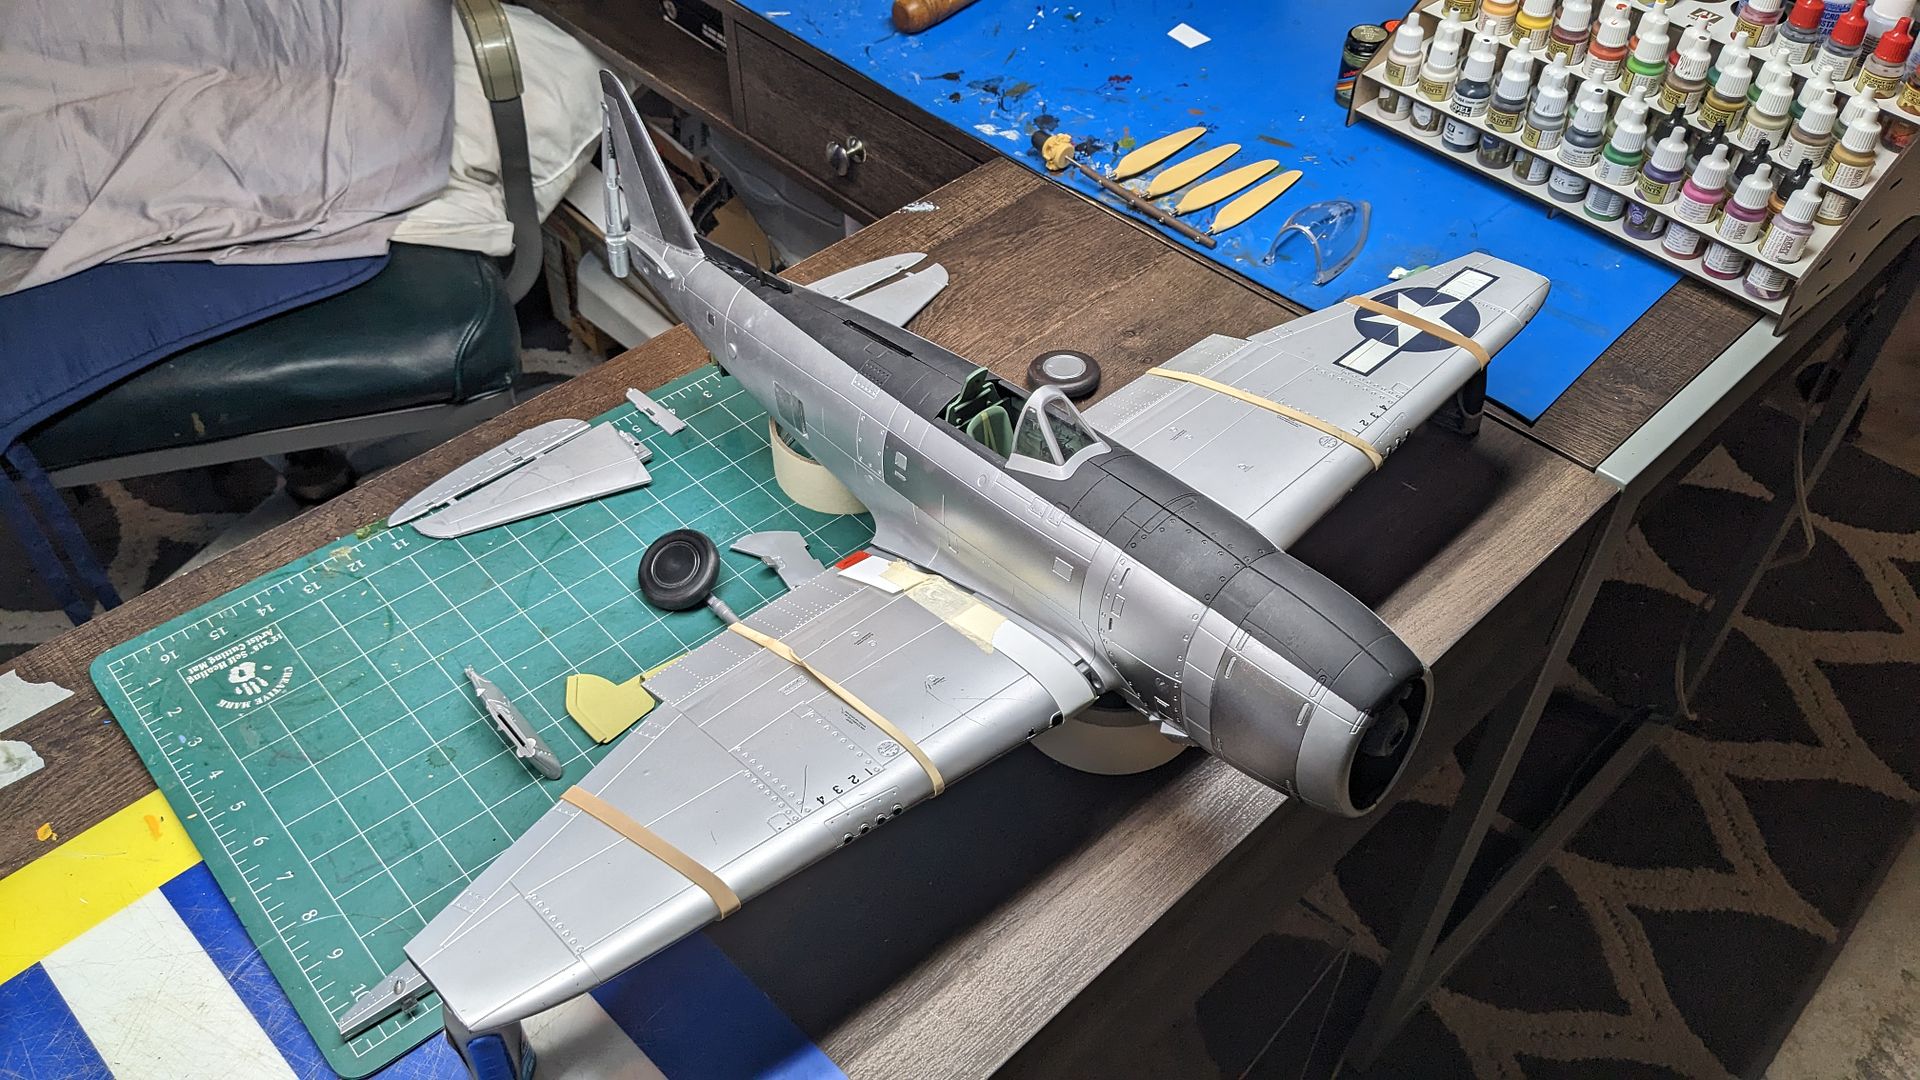
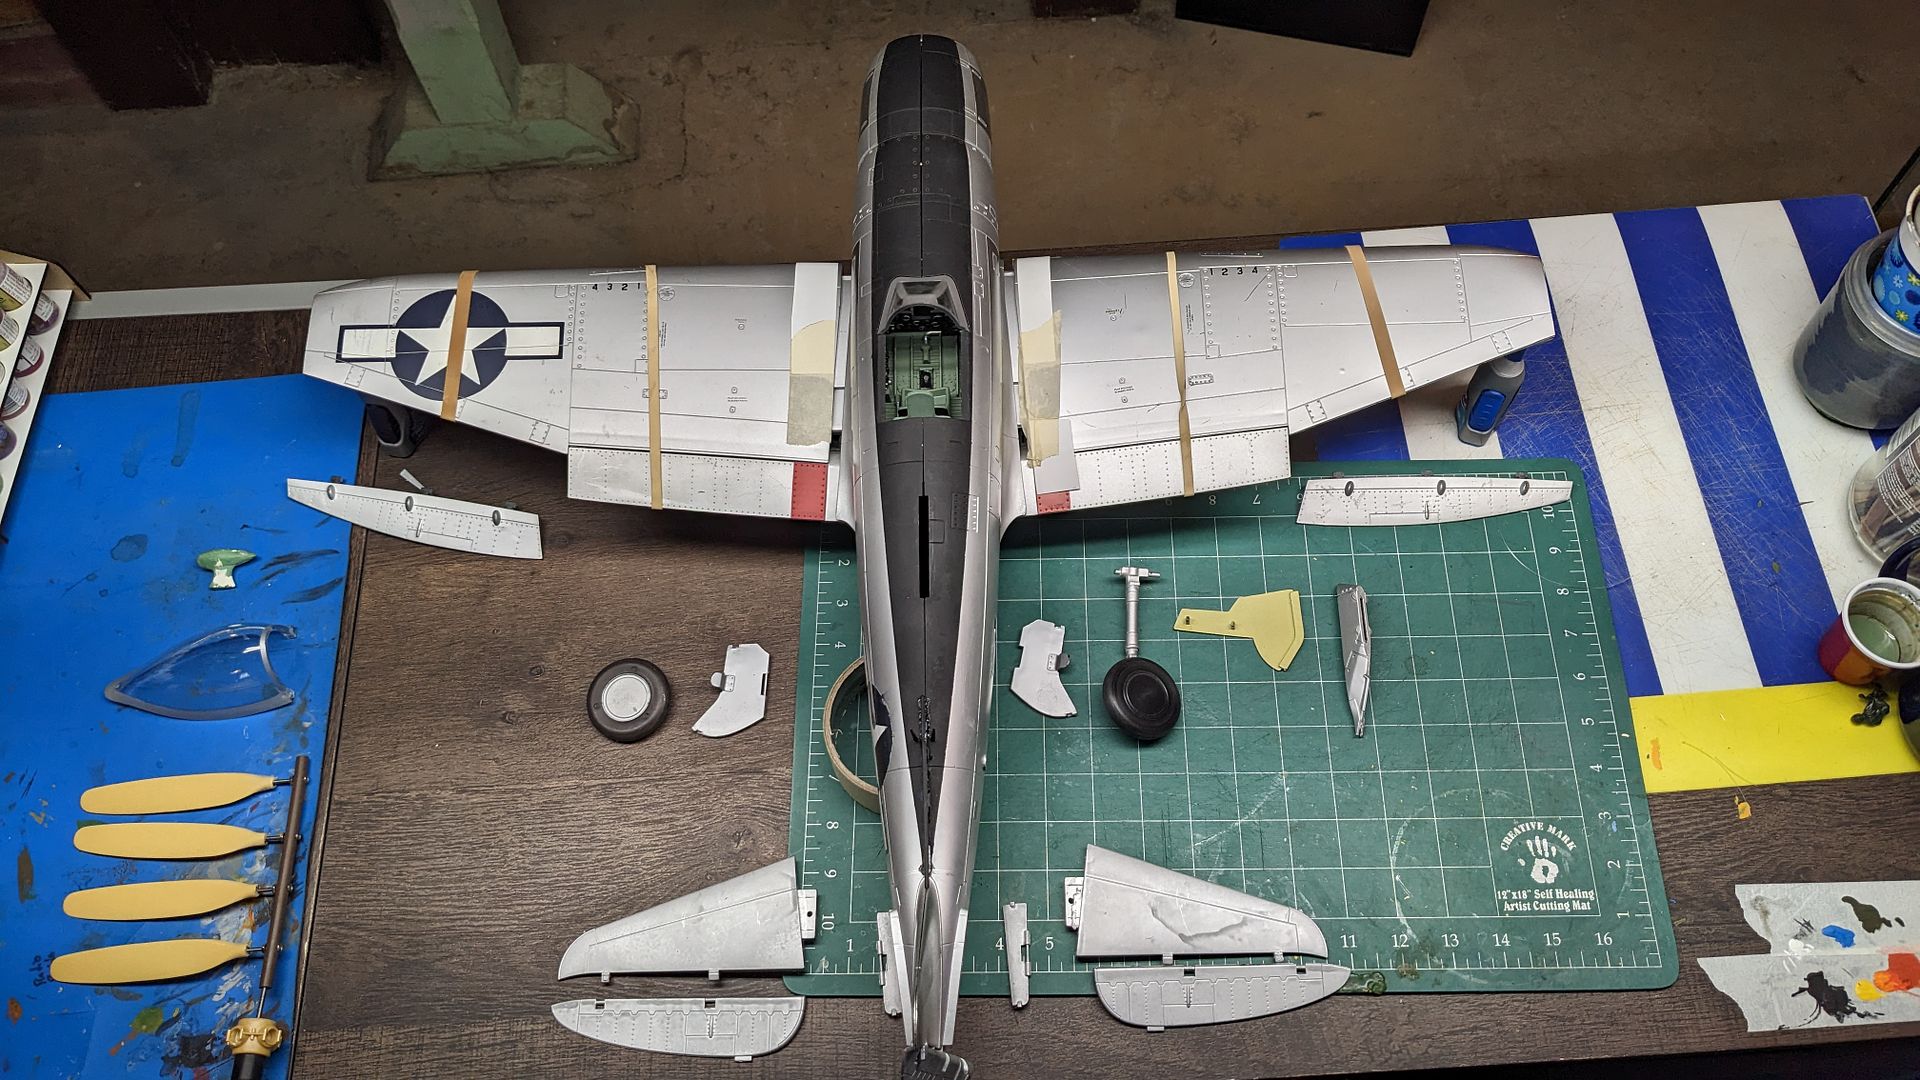
Since I had all the parts needed for the port wing, I decided to install the original landing gear and button it up. I put the four screws in, and also ran a thin bit of superglue along the seems to help the wing stay as one. The gentlemen making me the parts is also providing me some spare plugs to go over the screw holes. I repaired the inner gear door, as the original thin rod that attached it to the hinge was broken. I drilled out two holes, and replaced it with some thin wire. I've since added a wingtip that I've been sanding and shaping it. I think I might add another piece to fill it out and get the more correct shape. I'll get more pictures of that process in the future. I've decided not to repaint the wings, as I think the color looks pretty close to the fuselage, and the placement of the stars appears to be accurate. I'm just going to need to mask it off and spray paint some red bars onto them. Not to mention the large NG-316 numbers.
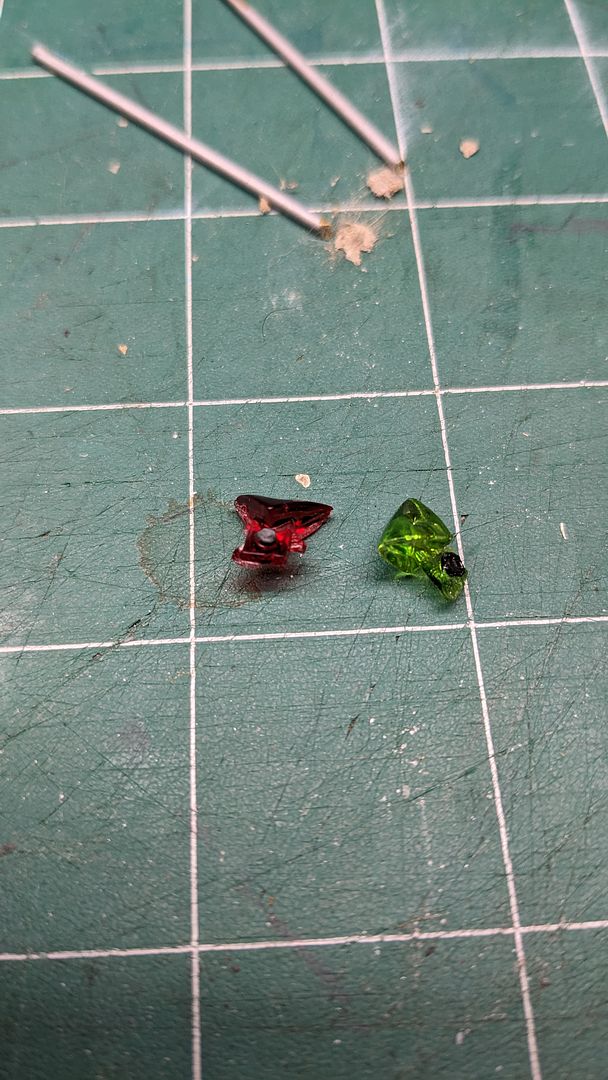
As I wait for the replacement parts, I still have plenty to do. My next goal is to repaint the horizontal stabilizers, and rudder. I can then mask off the tails and paint the orange / red tip on the tail. I also have the matter of the canopy, which has a GIANT crack through it. Any good leads on products that would help glue clear acrylic together and make cracks disappear?
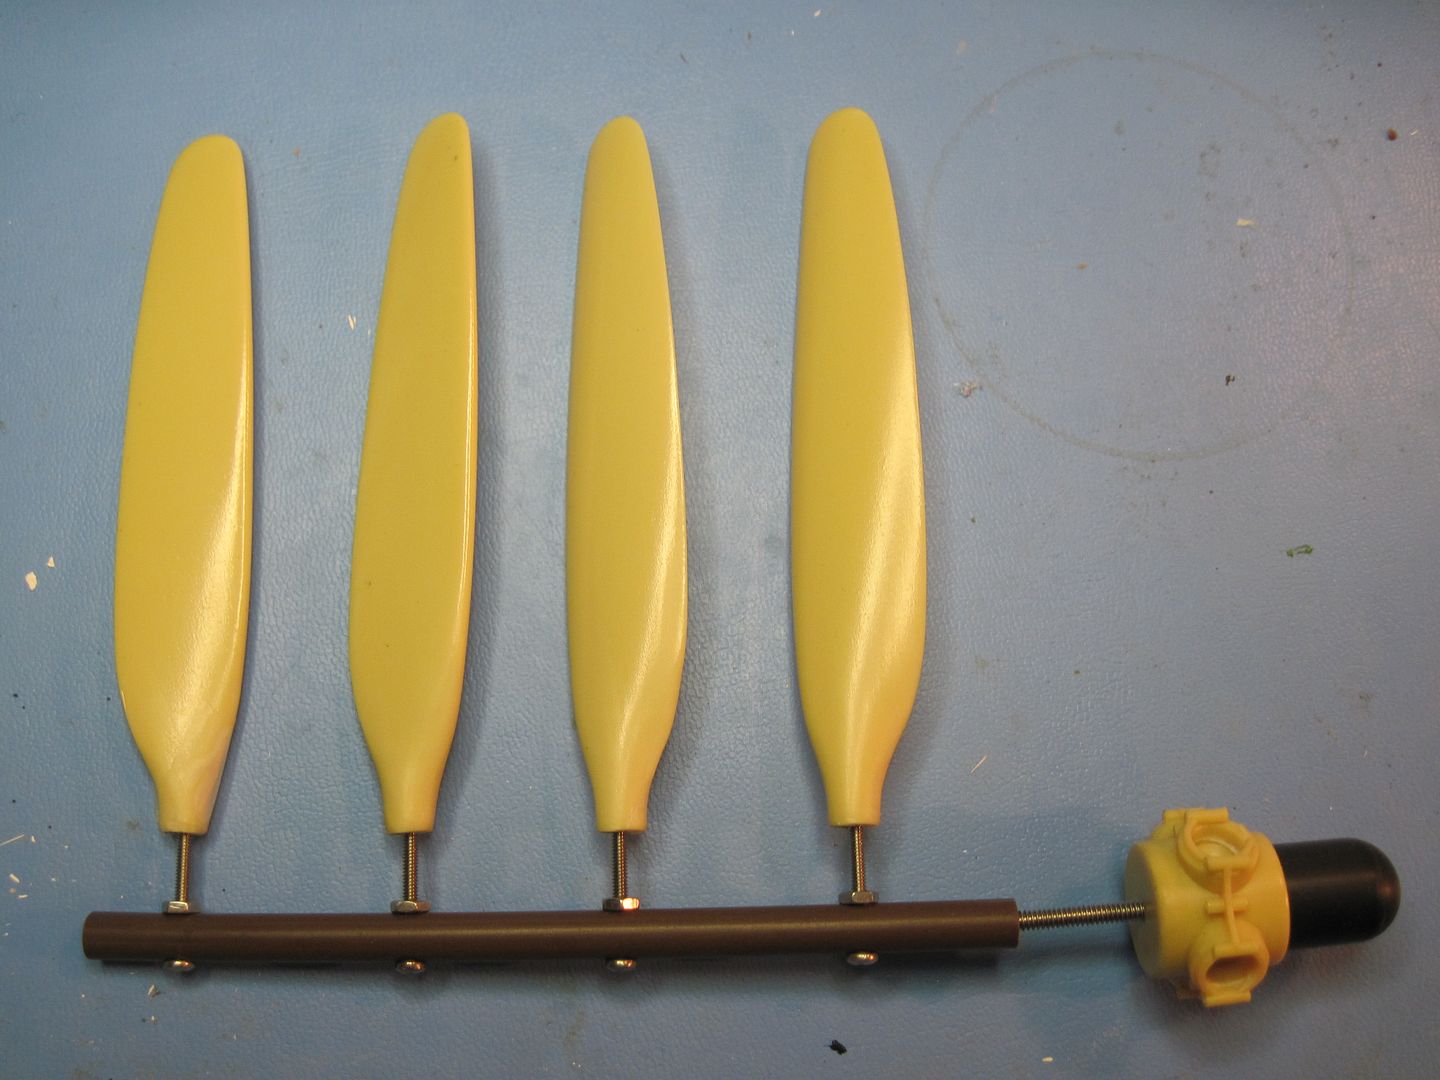
And then there are the props and hub. Now from the original pictures it's clear that this P-47N was still using the Curtiss Electric Propeller setup. The model came with two of the original props, and my father had already made a new Curtiss hub on the lathe years ago. So I now just need two more replacement props, which I intend on sourcing eventually. But being from Connecticut and the home of Hamilton Standard for years, I figured it would be neat to see a HS prop on her too! But where to find one? After doing some digging, I came across HPH models, which builds exquisite museum quality models. Including a range of very expensive 1/18th scale models. I saw that they had made 1/18th scale F4U-4 and -5 Corsairs and figured that the four bladed setup would suffice. After finding an email, engaging in some dialog, and a paypal order that I wish was less, I had my own H&S prop setup! More to come on this later.
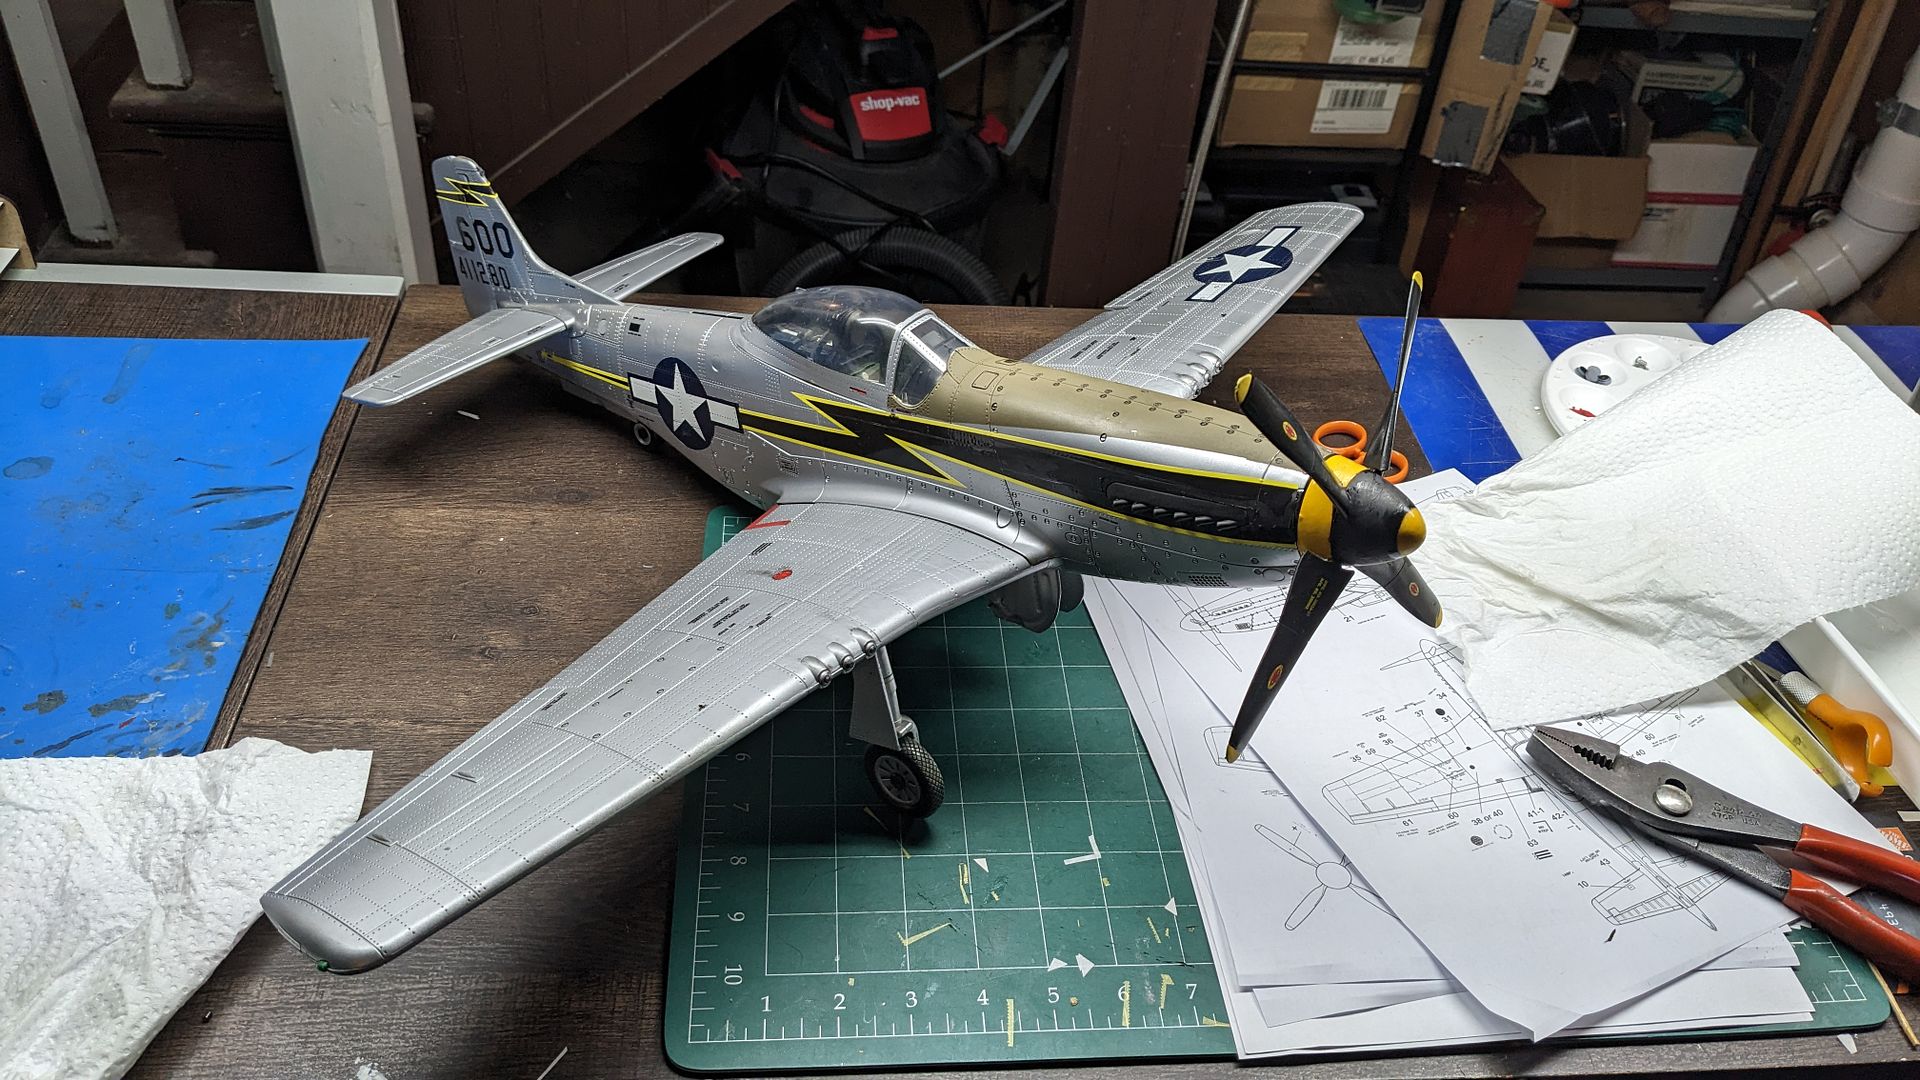
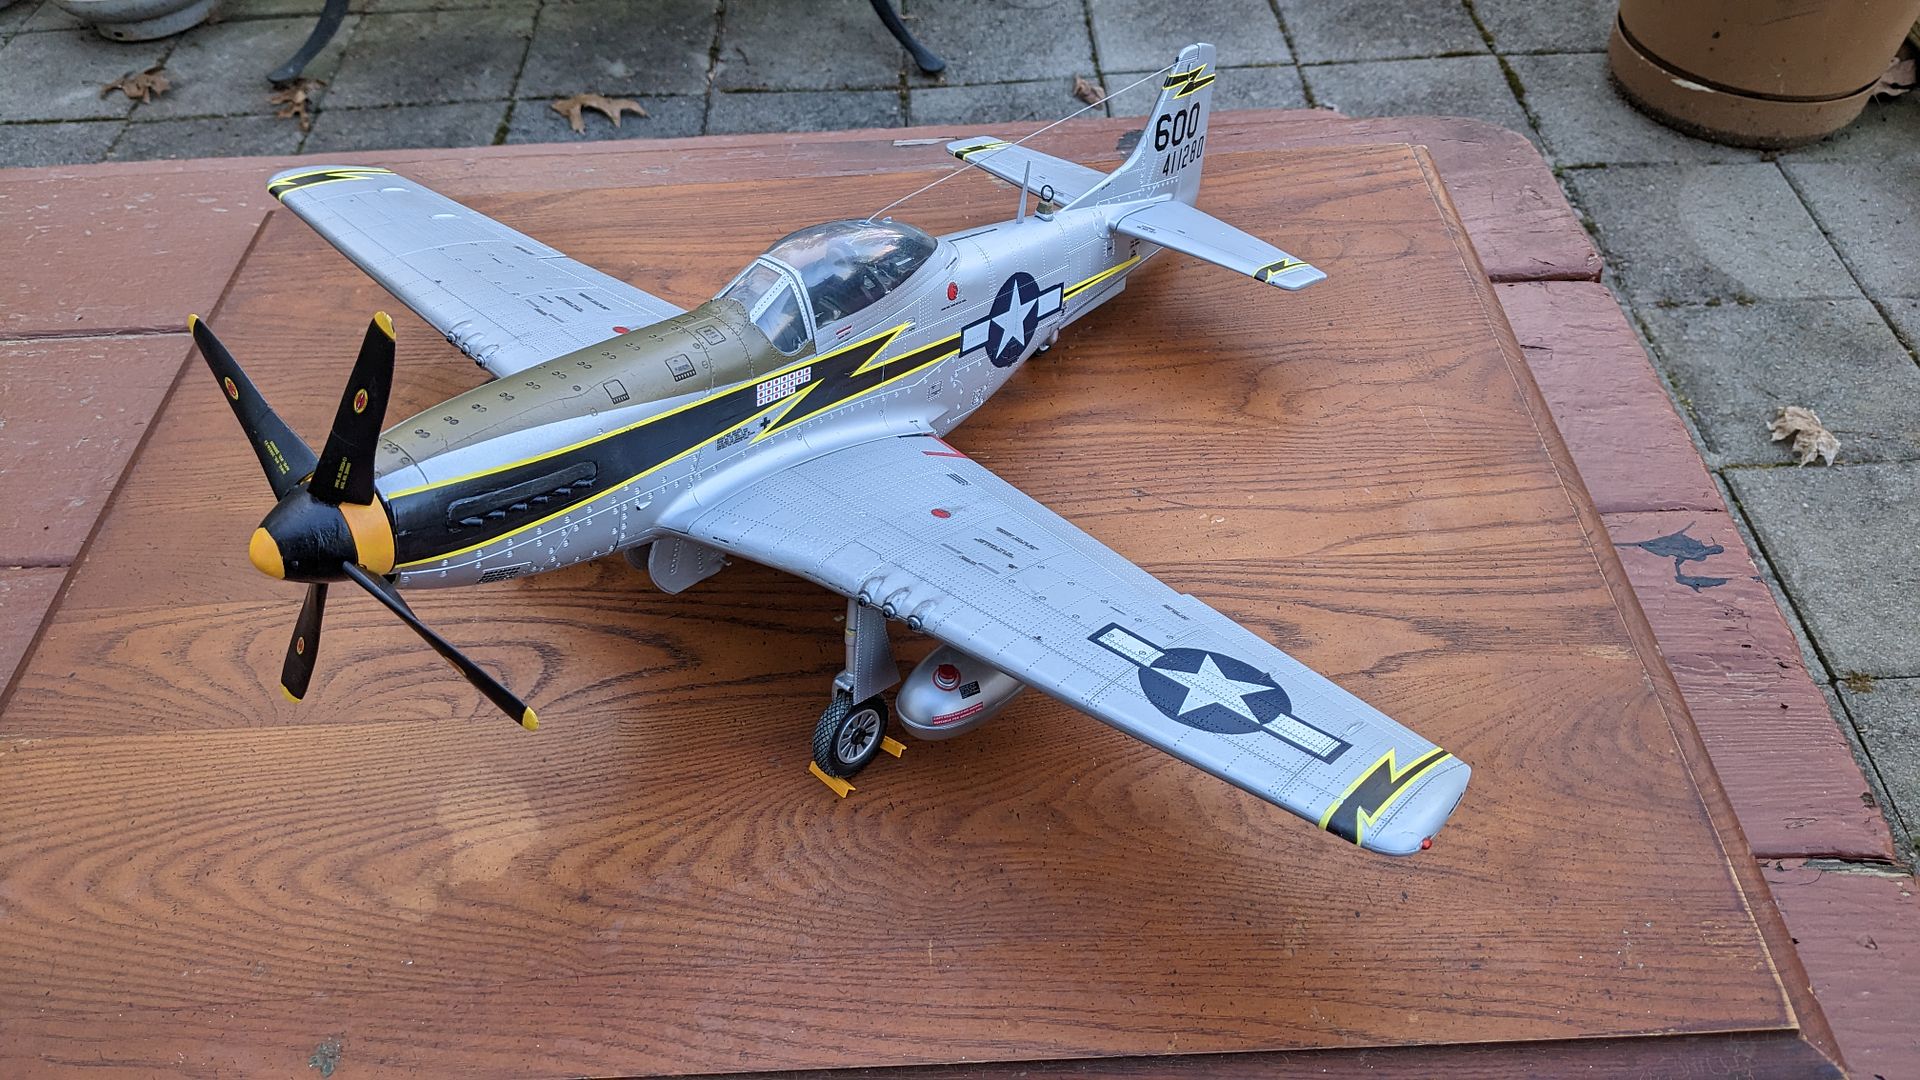
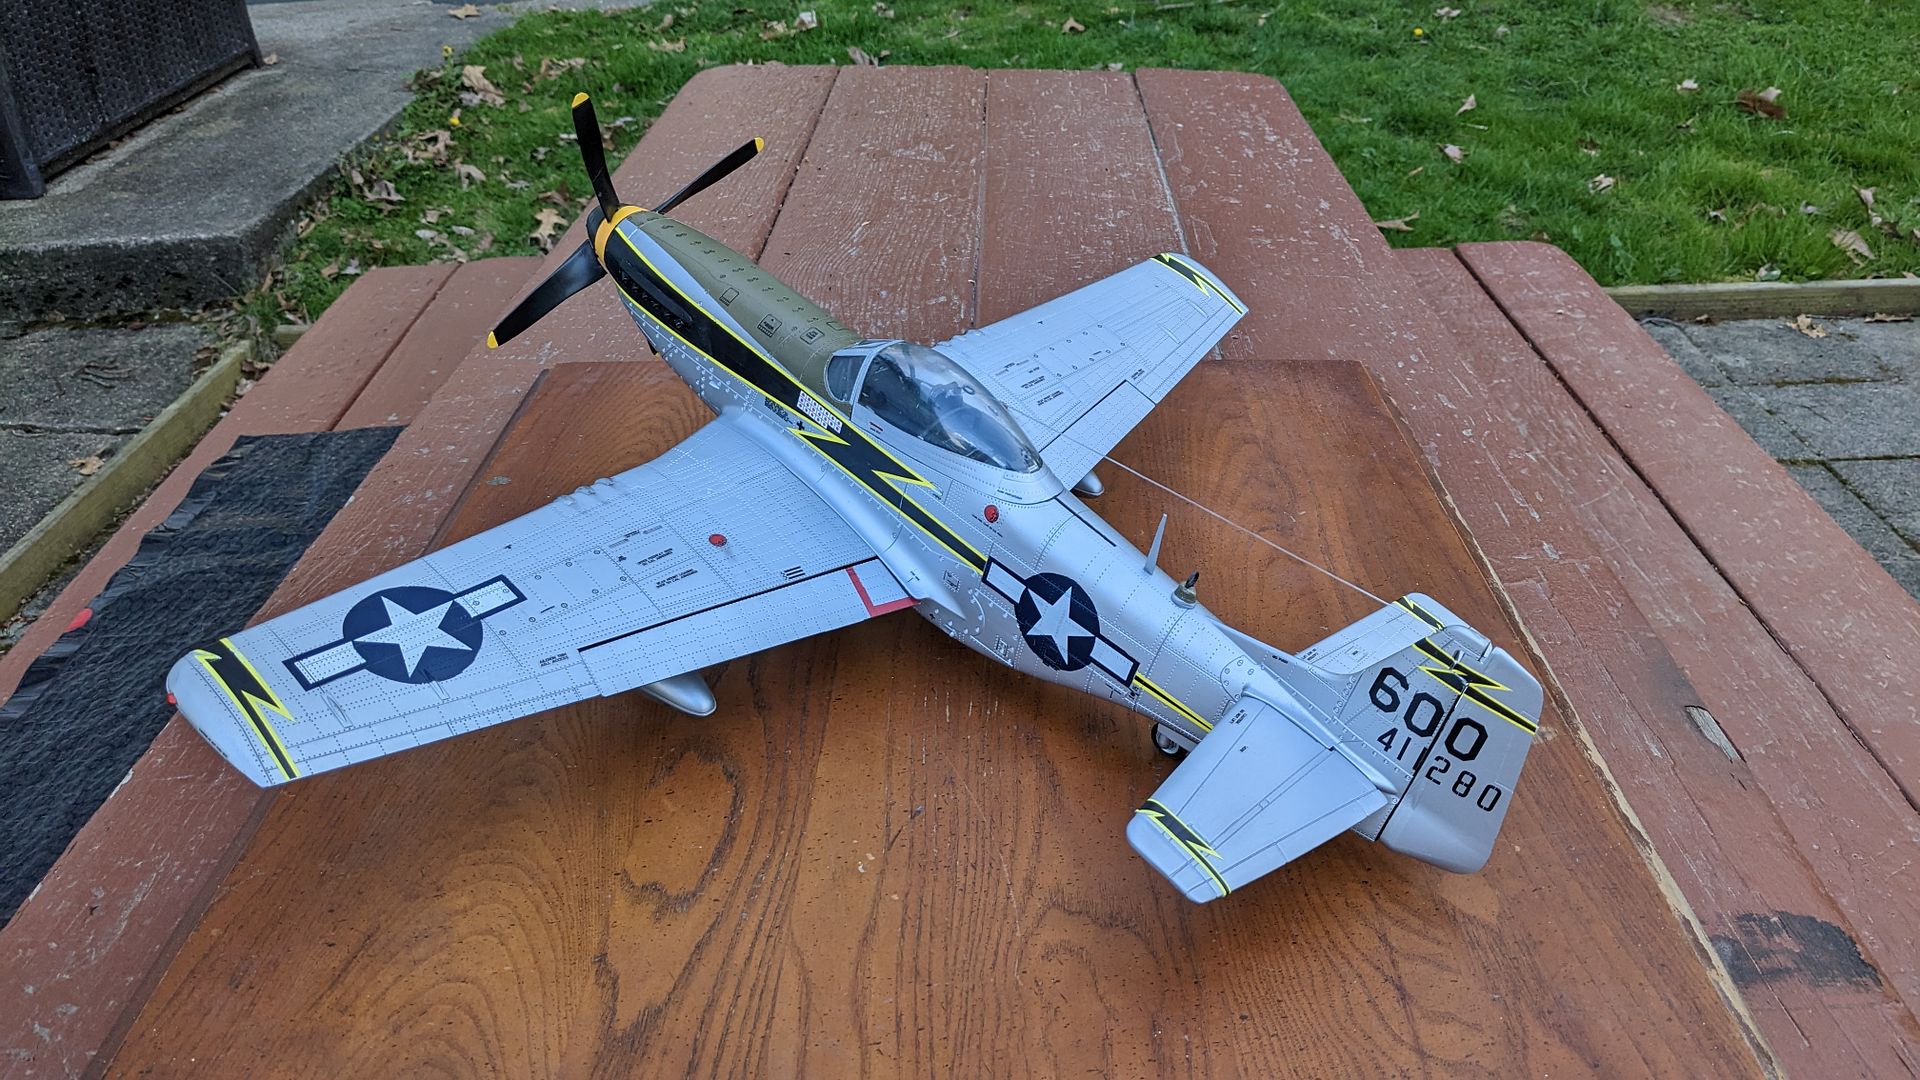
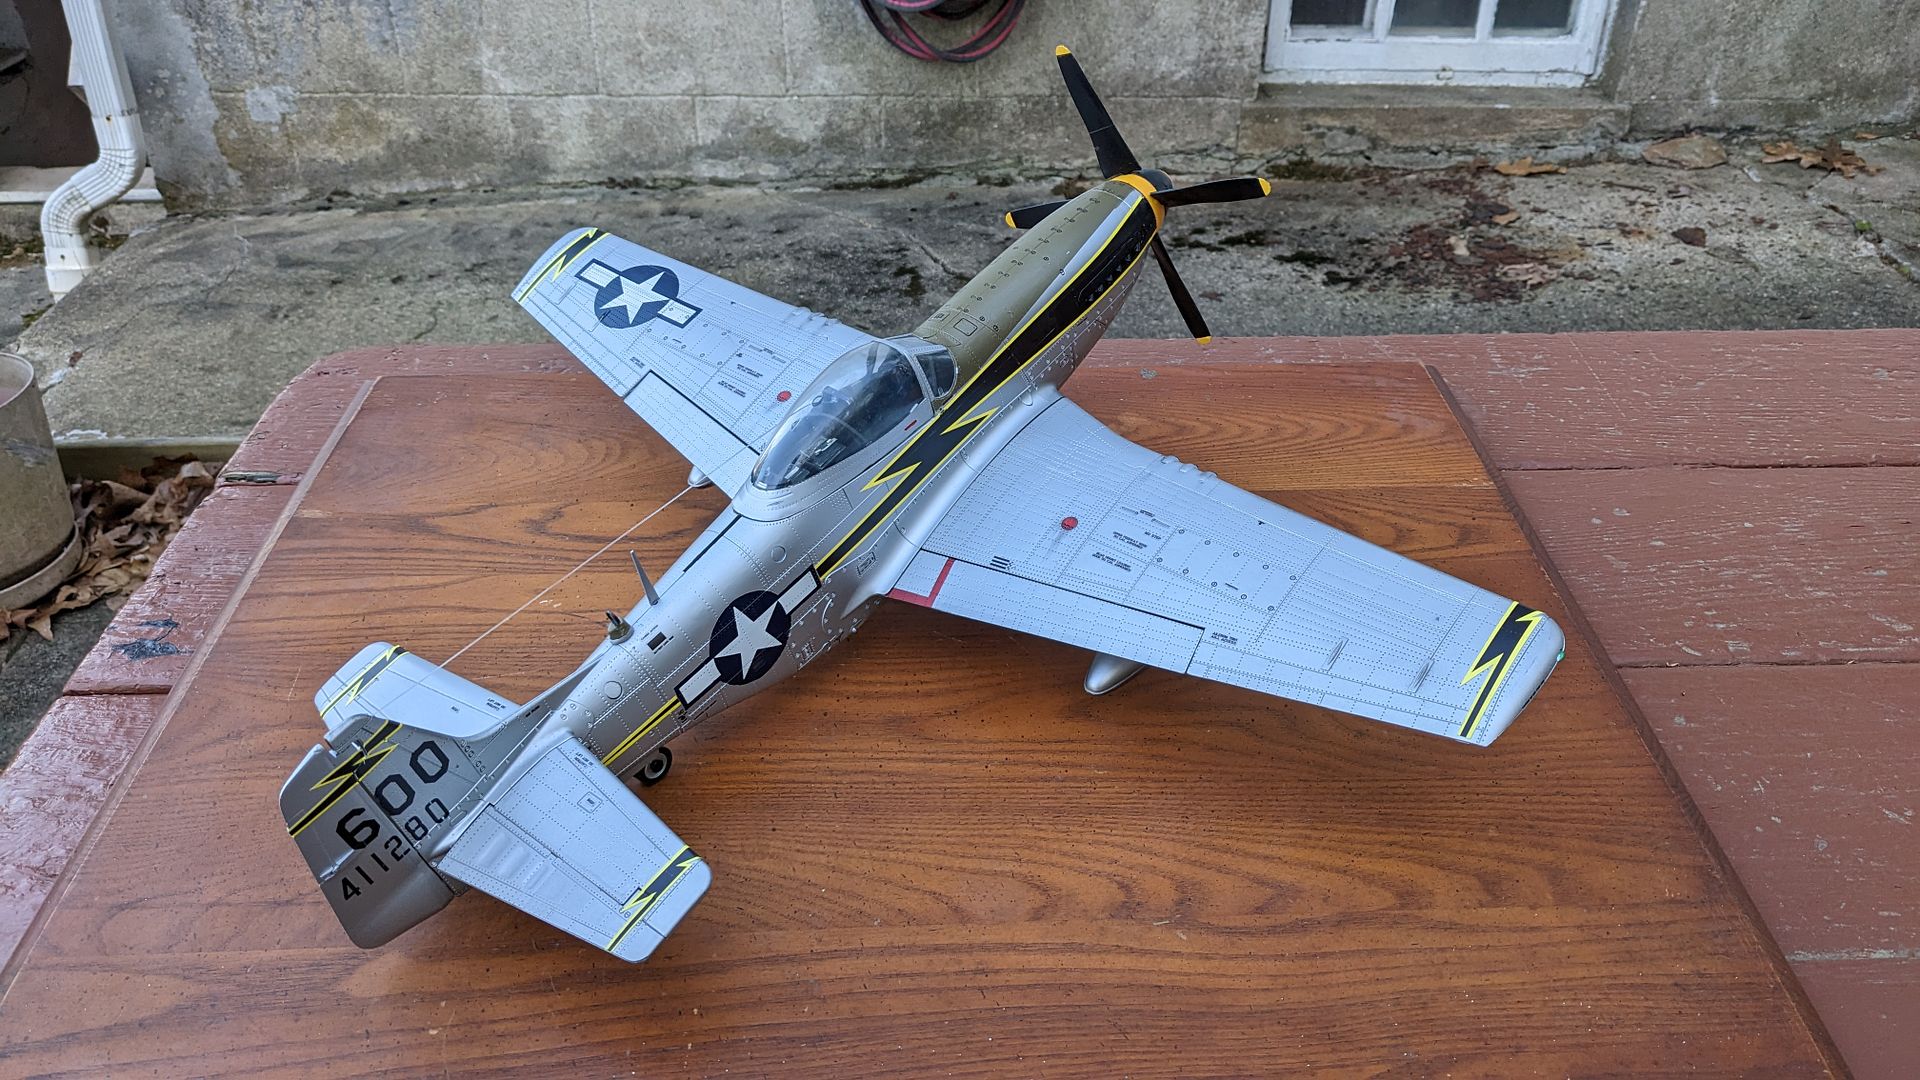
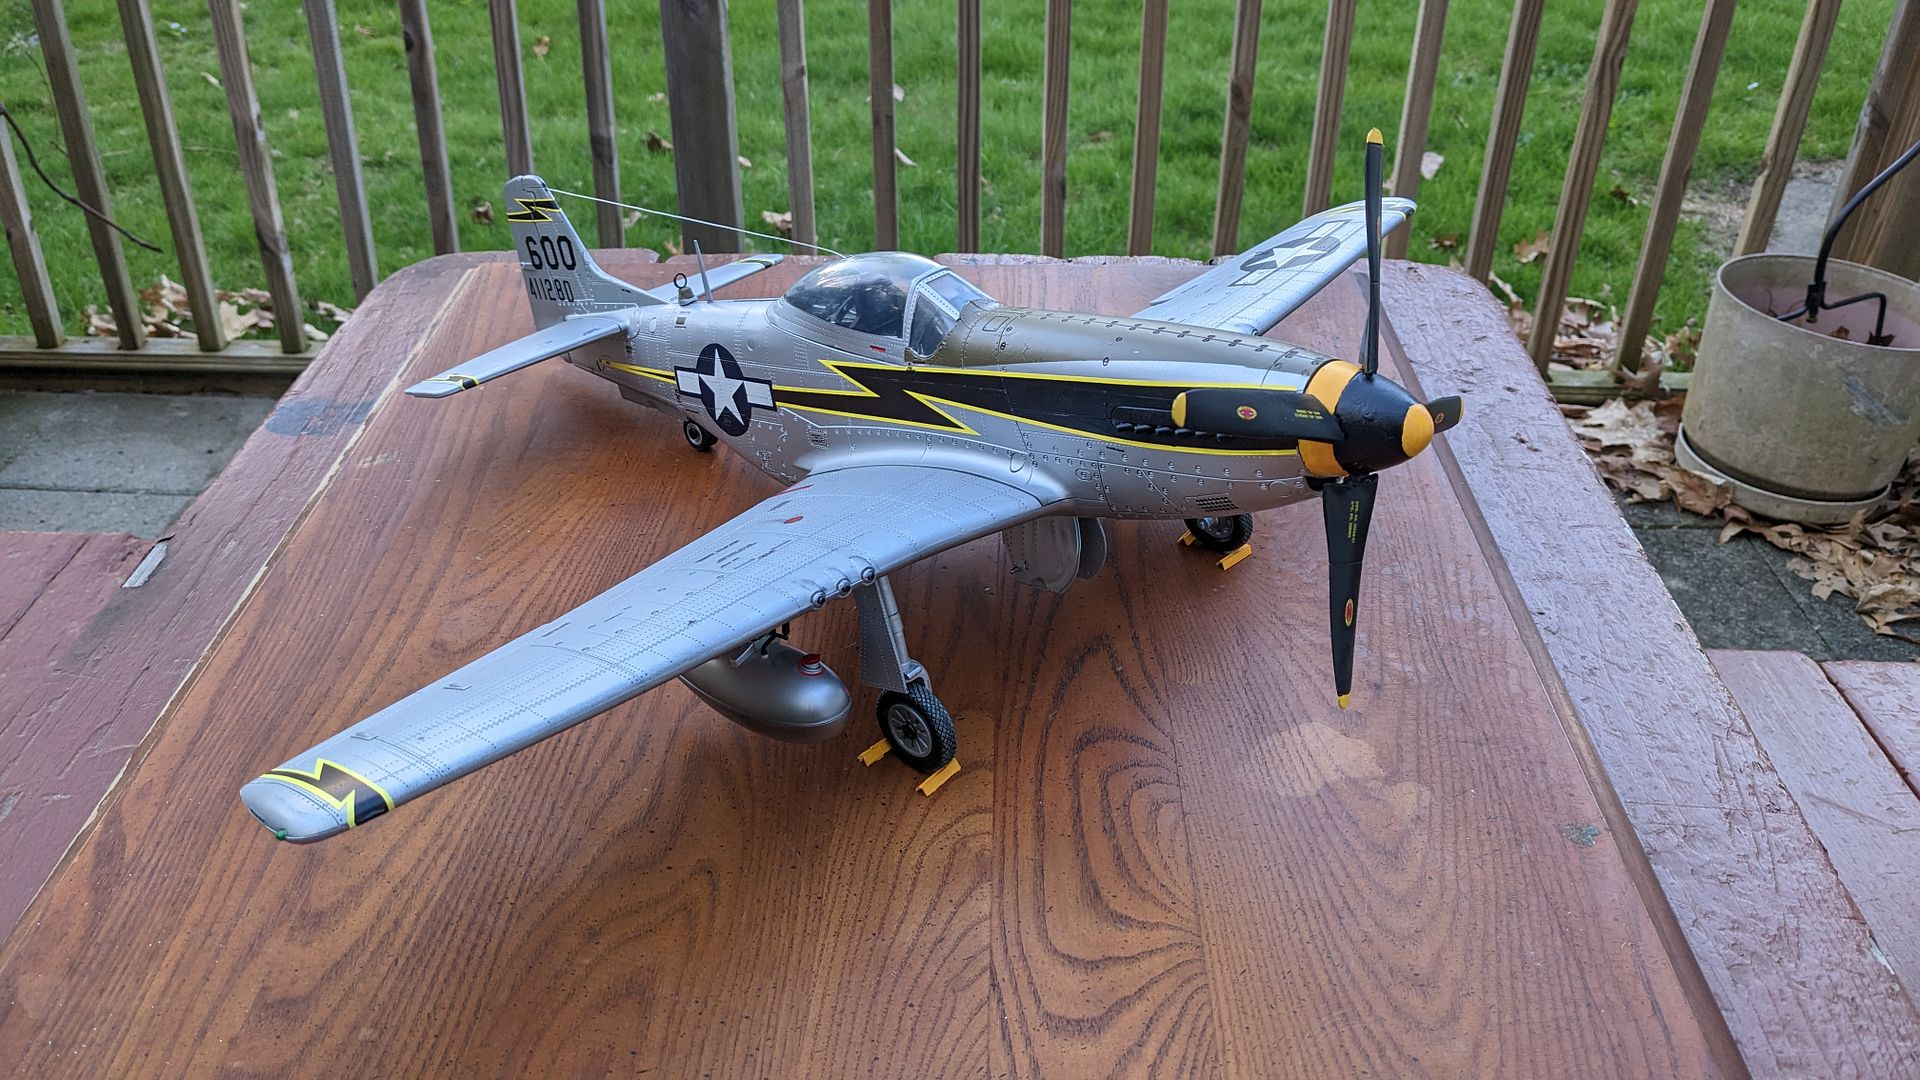
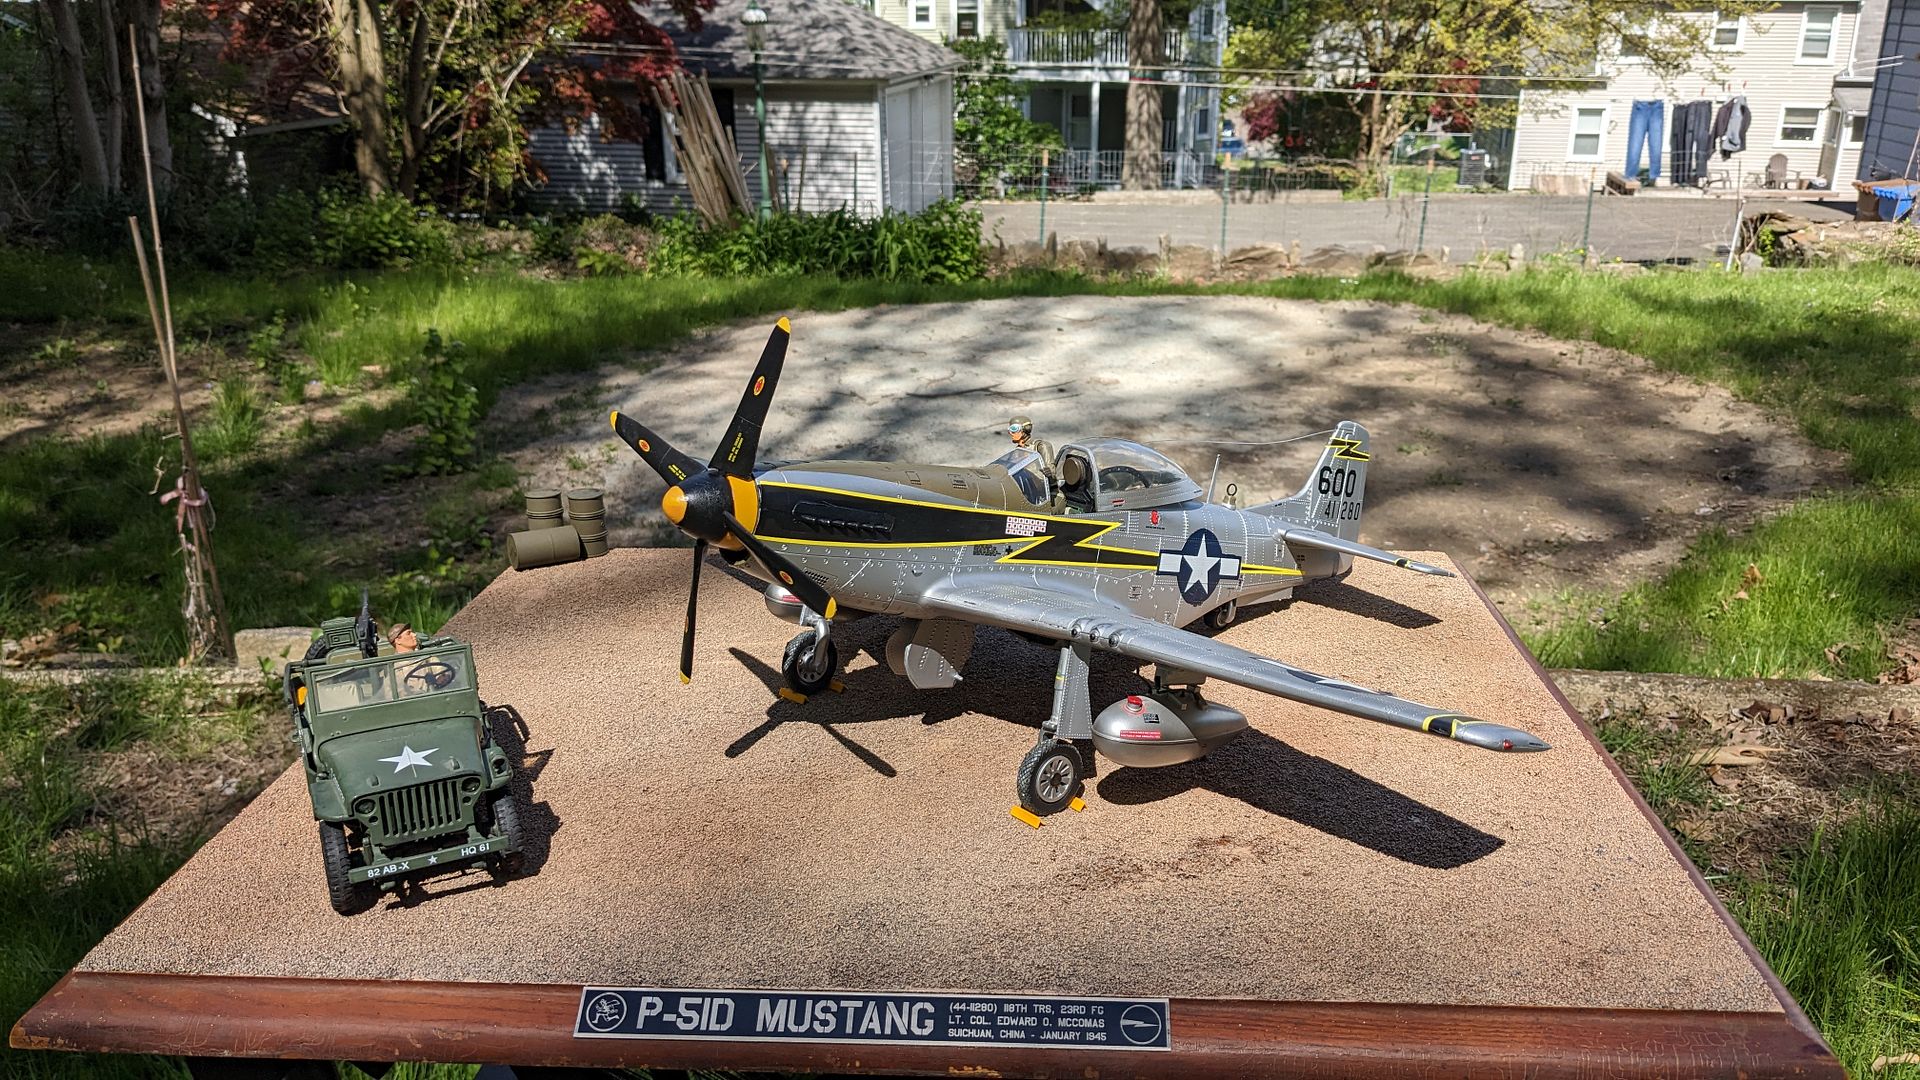
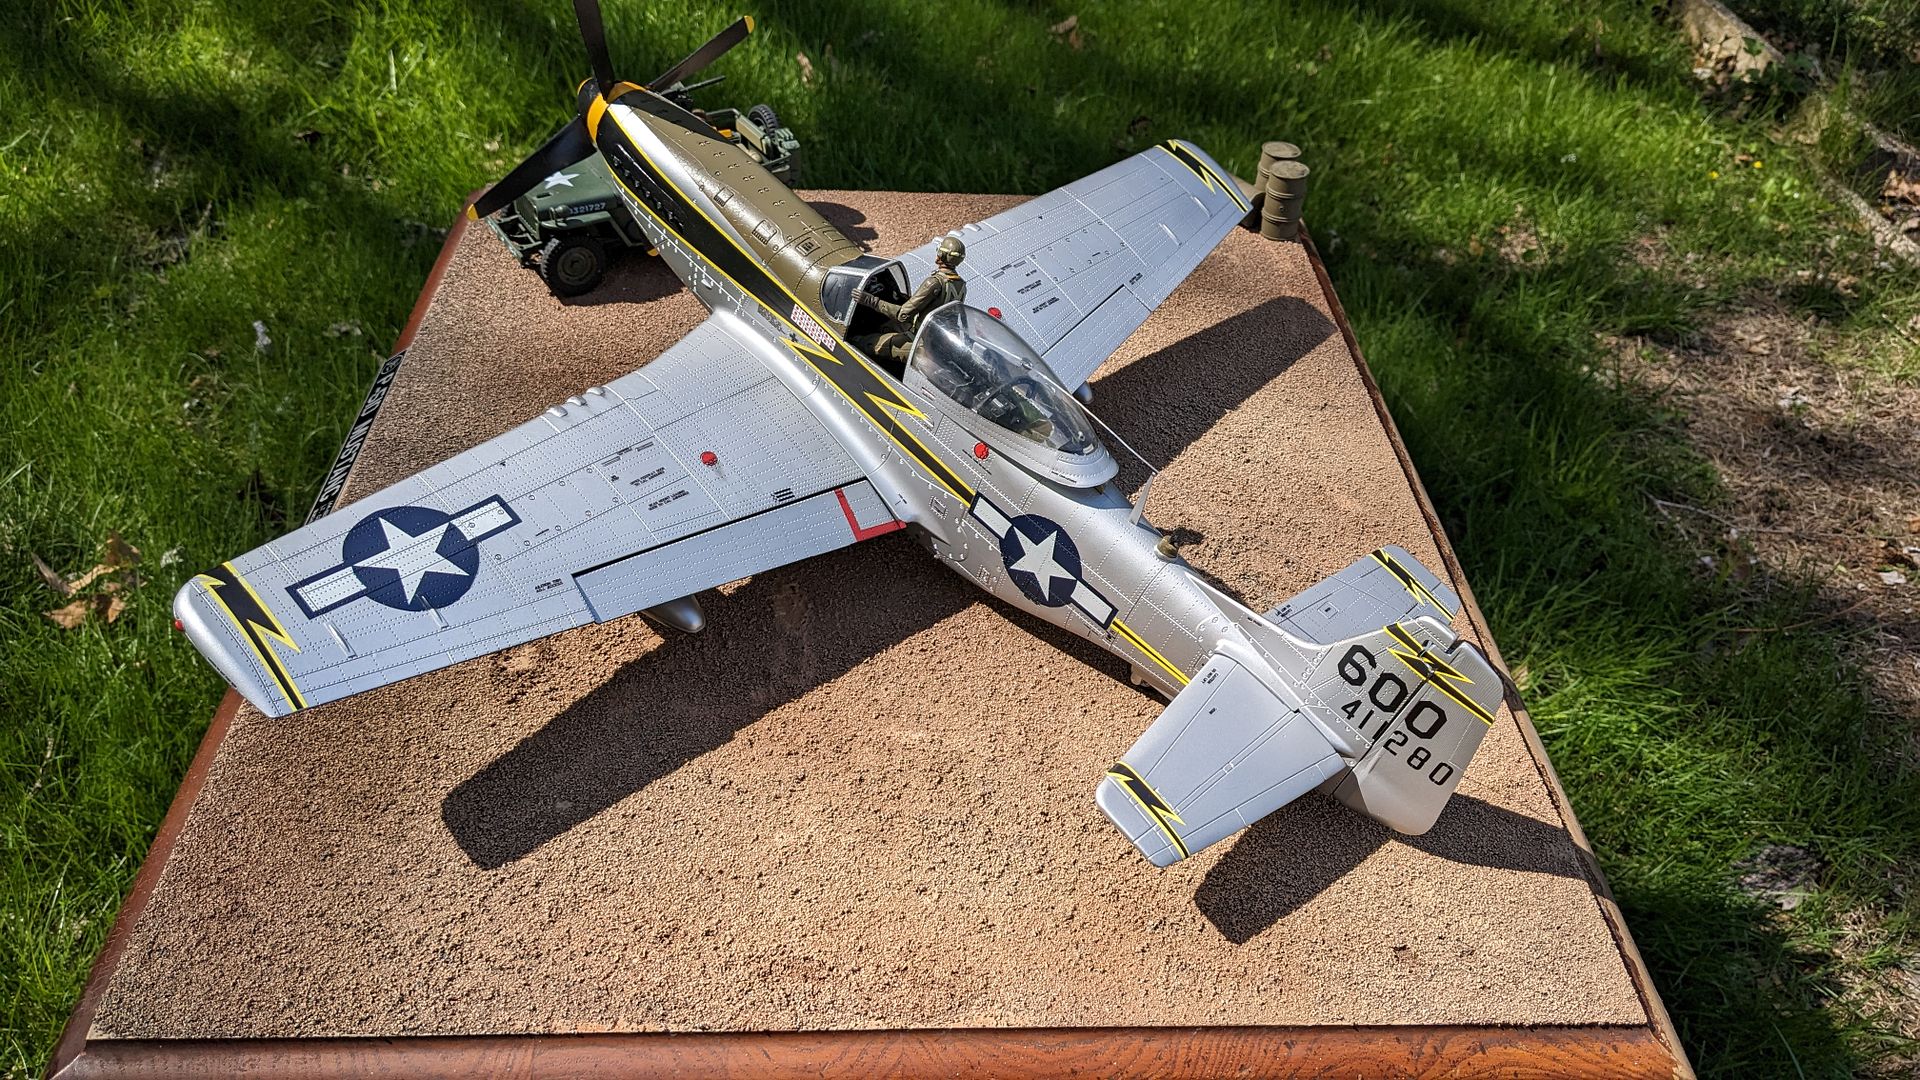
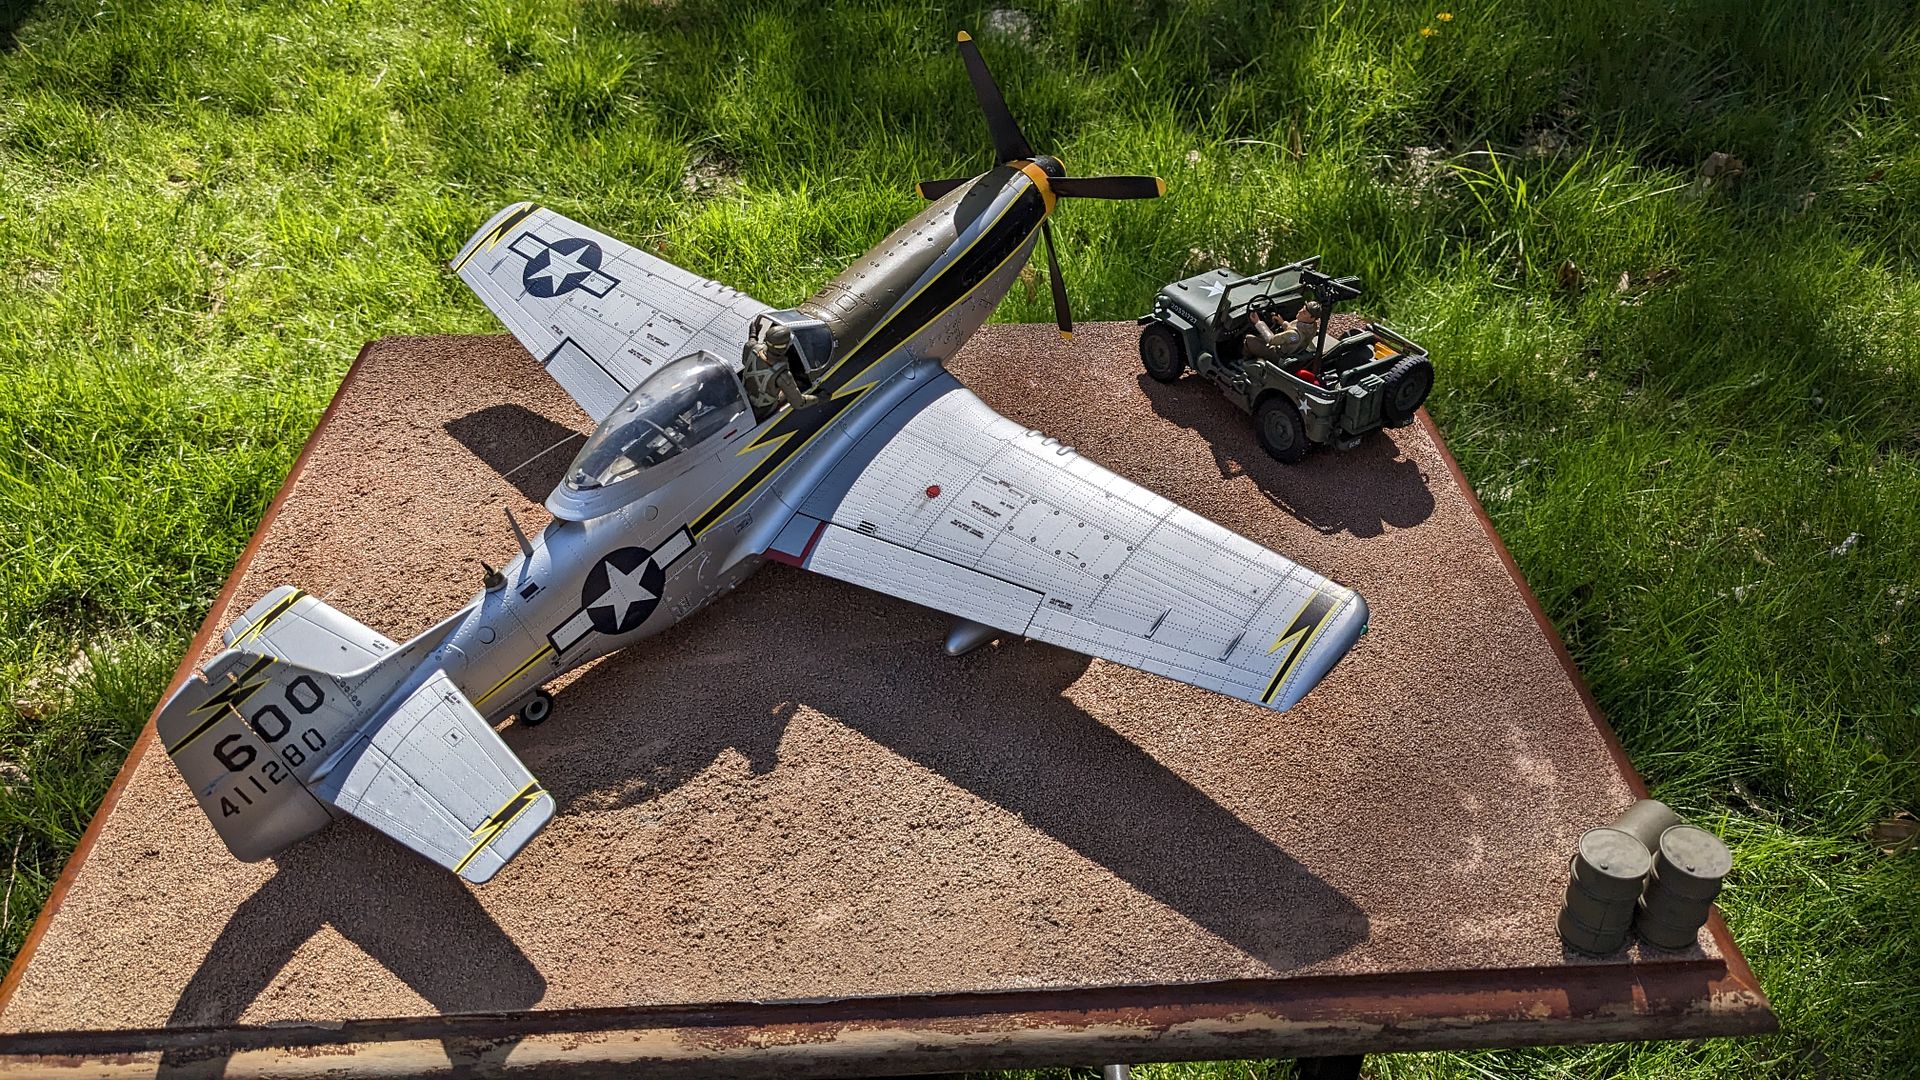
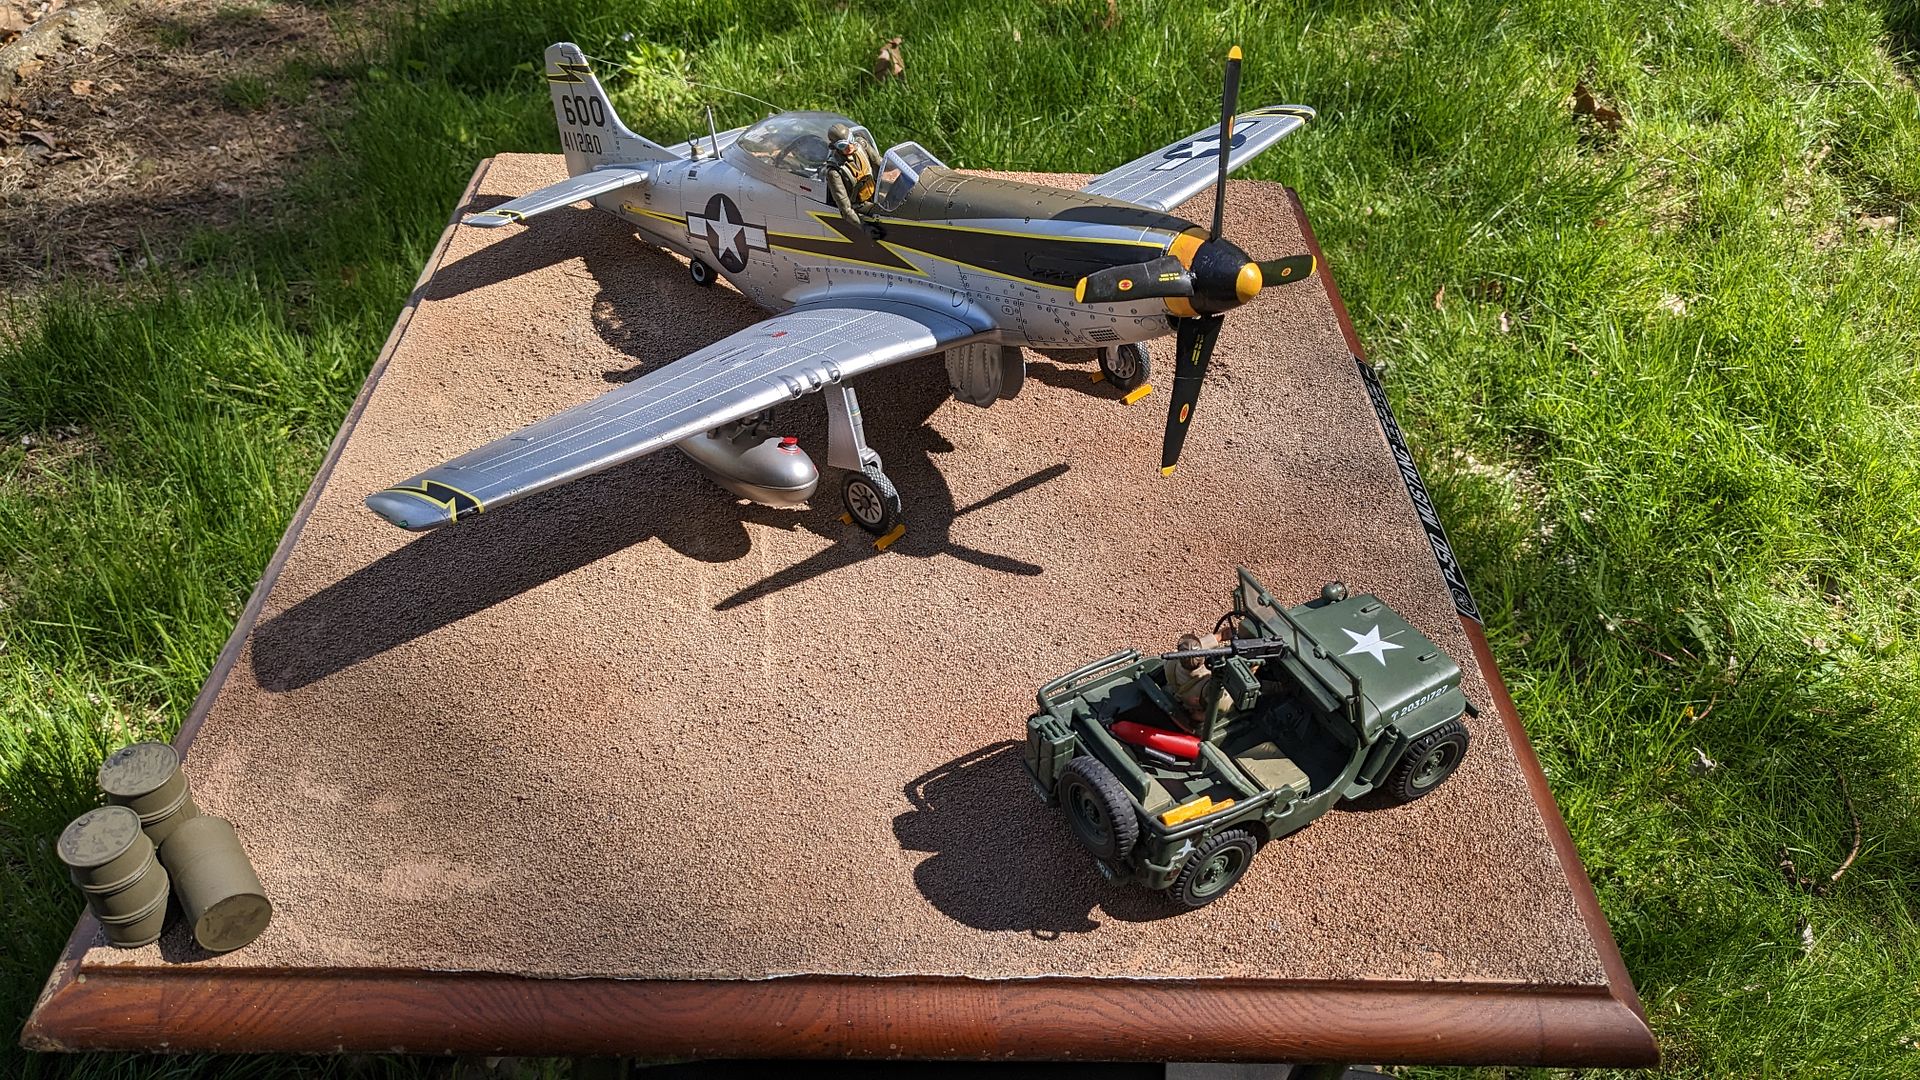
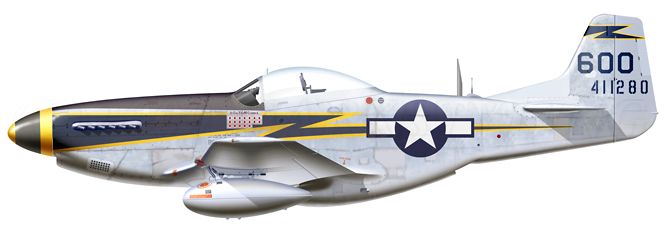
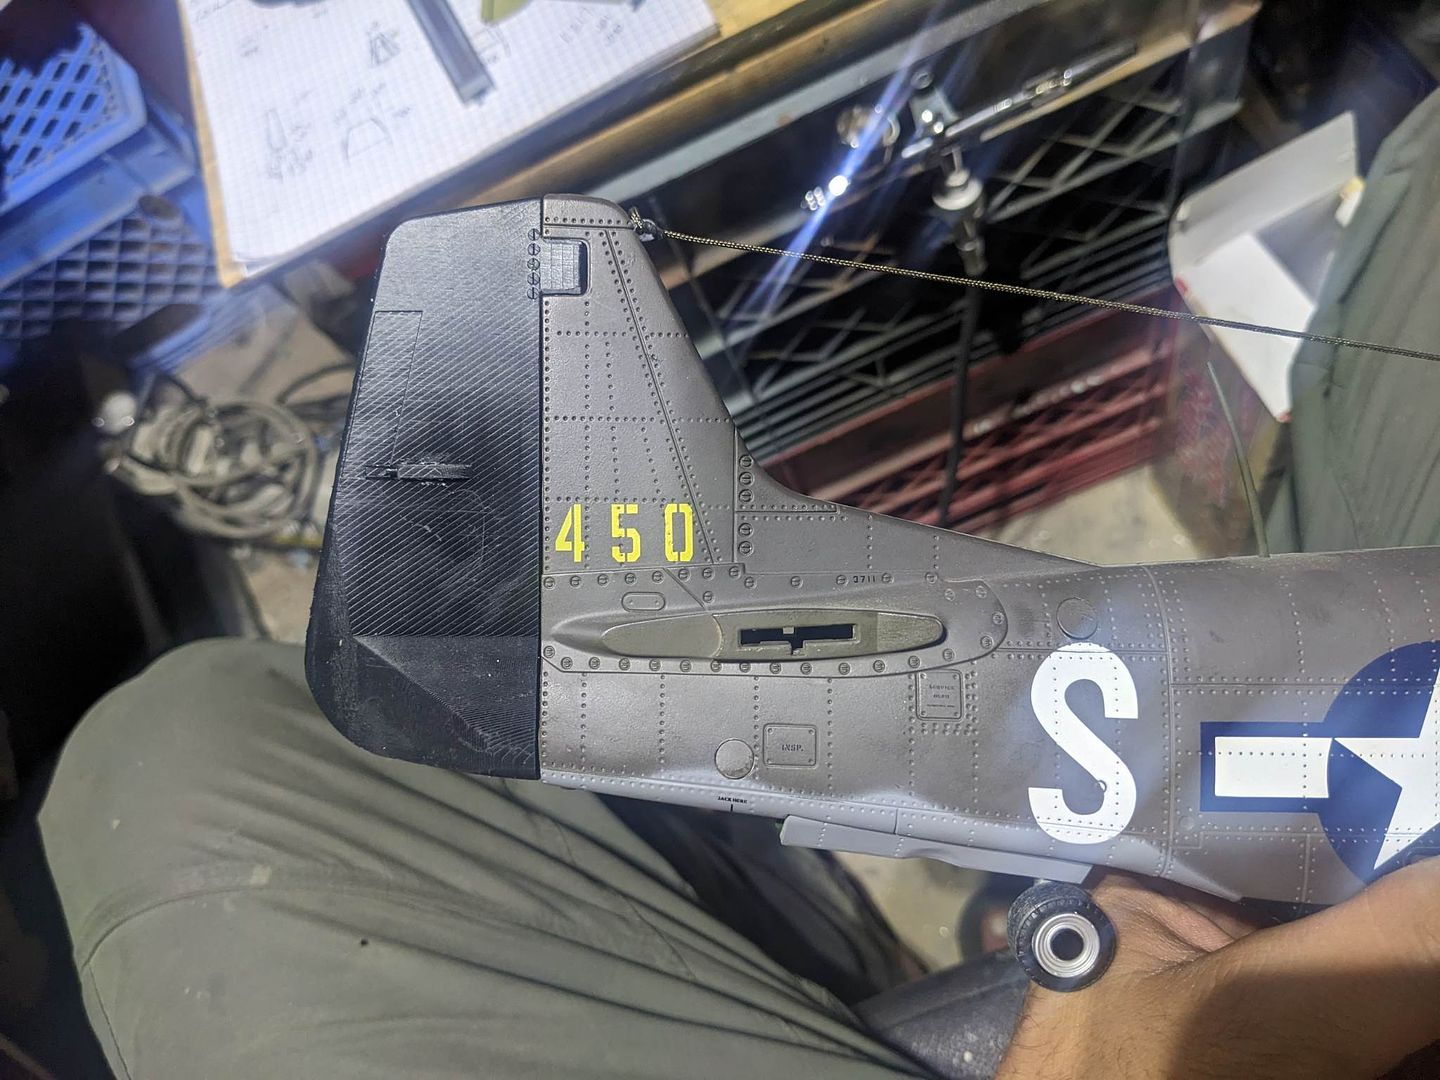
 P-51D 44-11280
The other model I wanted to replicate was of Pilot Lt Col Edward O. McComas' P-51D of the 118th TRS 23rd FG.
The 118th Tactical Reconnaissance Squadron began World War Two as the 118th Observation Squadron, Connecticut National Guard, whose lineage dated back to the 118th Aero Squadron and duty in France in World War One. The 118th was called into federal service in February 1941, and at the time of Pearl Harbor, was stationed in Jacksonville, Florida, after having been on maneuvers with the Army ground forces for most of that year.
Redesignated the 118th Tactical Reconnaissance Squadron in August 1943, the squadron was commanded by Major Edward O. McComas served in China for only fifteen and one-half months and was engaged in strenuous combat for just a little more than six of those months (from mid June 1944 to late January 1945), but it compiled a truly enviable record during that relatively short period. Three of the squadron’s pilots achieved "Ace" status; Ed McComas, with 14 enemy aircraft destroyed in the air and four on the ground; and Oran S. Watts and Russell D. Williams each with five destroyed in the air and one on the ground. Squadron commanders in China, in addition to Ed McComas, were Oran Watts from late January until mid May, Charles C. Simpson from mid May until early June, and Marv Lubner (an Ace with six victories from a previous tour with the 76th FS in China) from early June until the squadron ceased to function as a combat unit in late September or early October 1945.
Here is a nice shot of McComa's newly arrived P-51D he received after becoming an: "Ace in a Day". He would go on to score 14 air to air kills by the end of the war in 1945. But you might be more familiar with the 118th TRS Mustangs from this incredible scene from Speilberg's film: Empire of the Sun.
https://www.youtube.com/watch?v=8SifFmsTF1c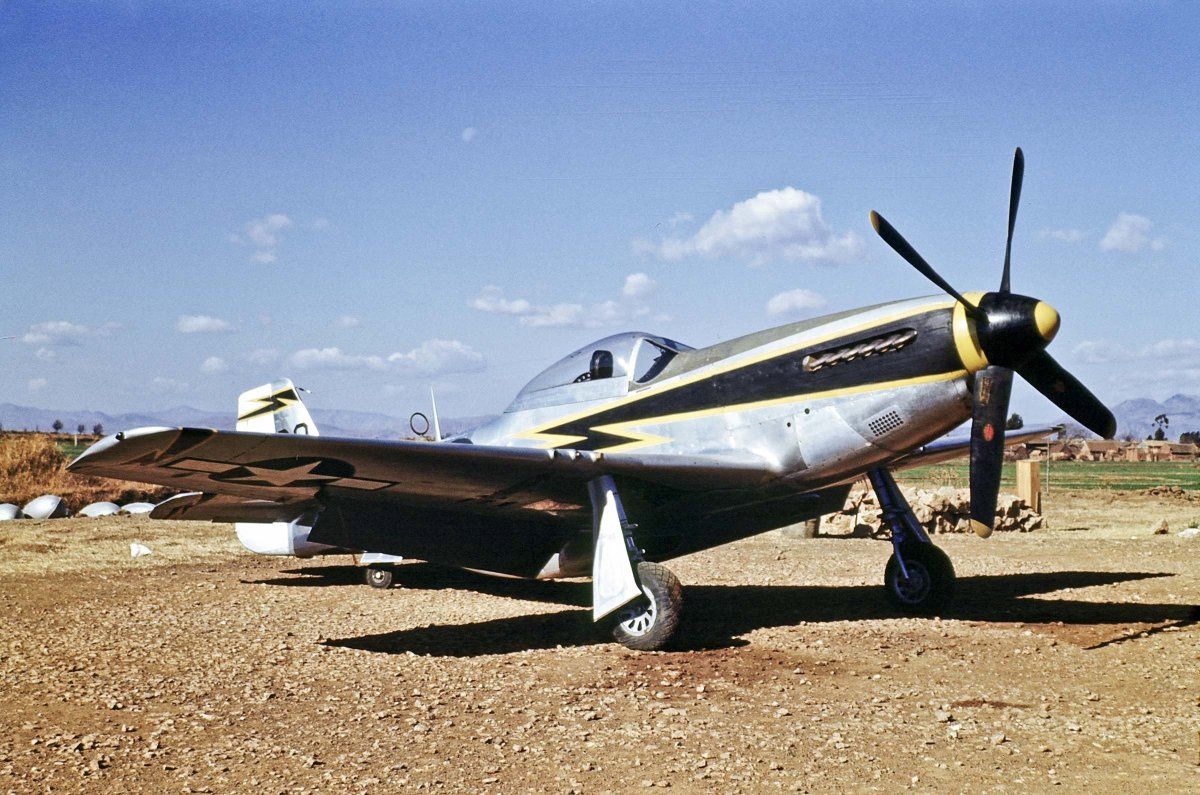
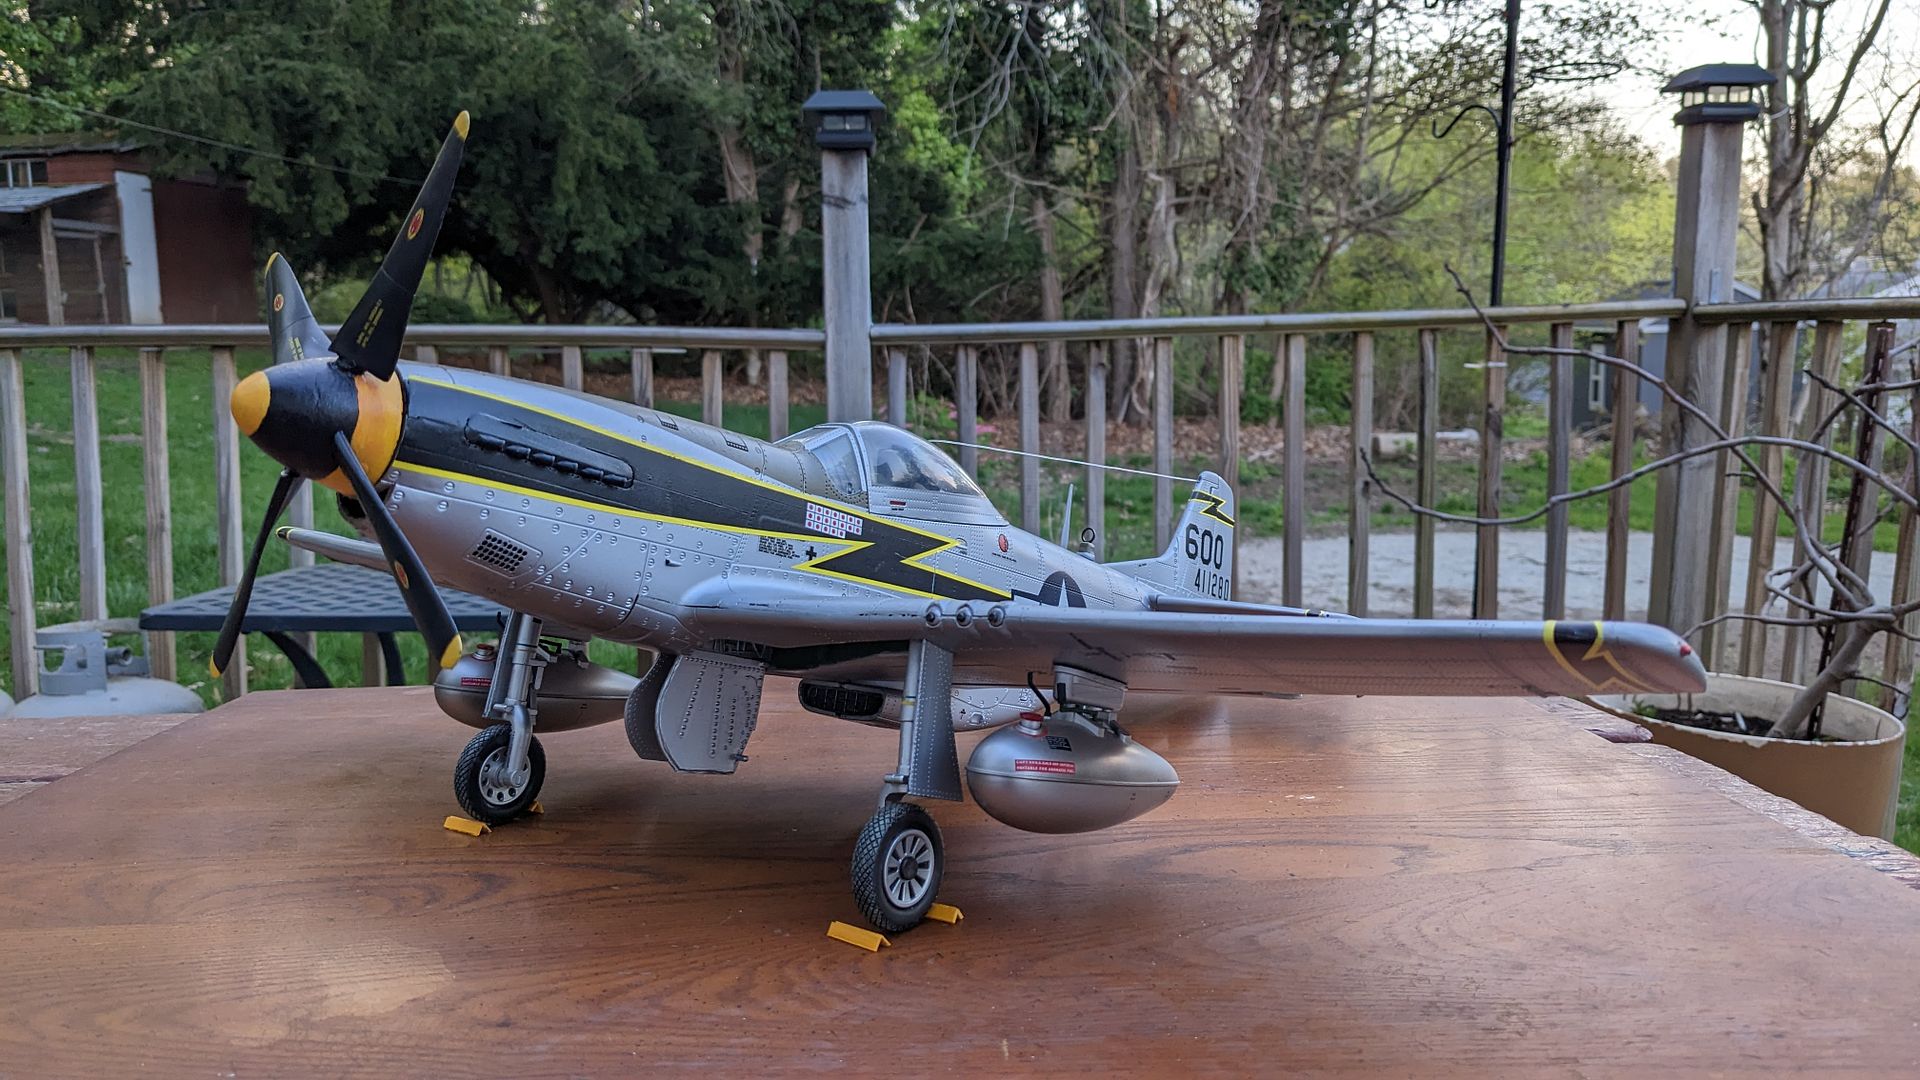
Ever since purchasing a busted up BBI P-51D in the markings of "Old Crow", I've always wanted to replicate this noteworthy scheme. But like the P-47, I needed to source some replacement parts.
- Starboard Landing Gear Door
- Port Landing Gear Door
- Port Inner Gear Door
- Hard points x2
- Rudder
- Port Horizontal Stabilizer
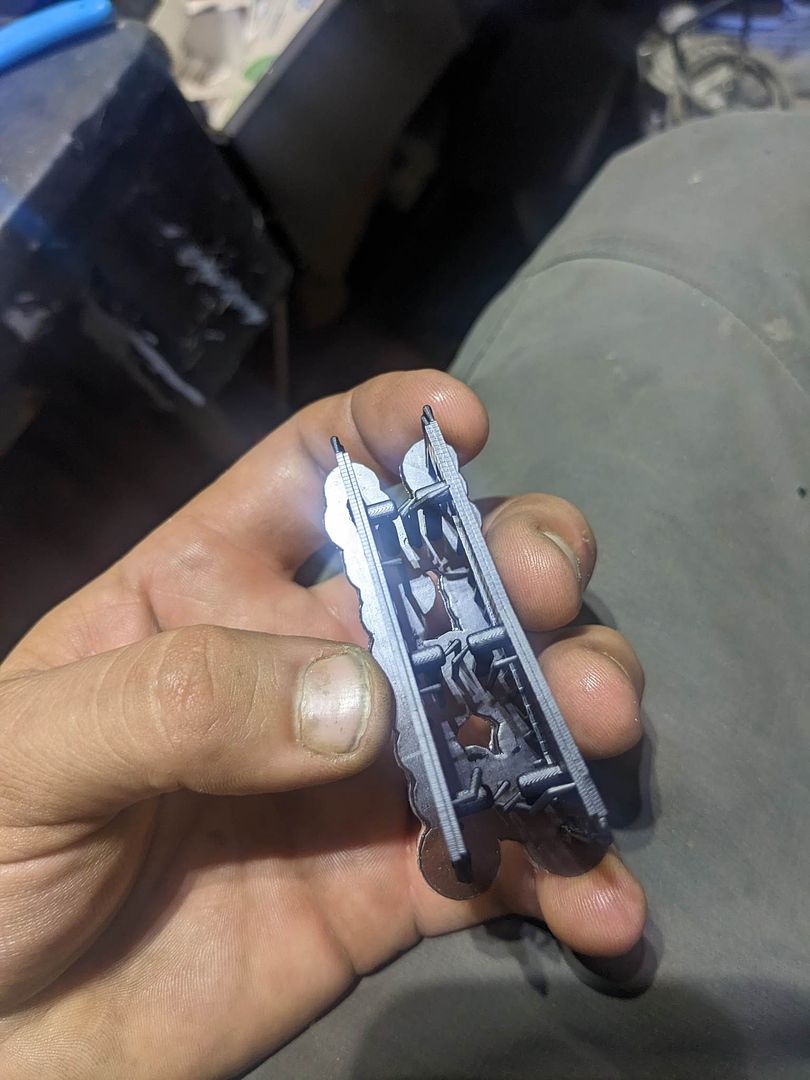
Here is a shot of the gear doors being recreated in CAD...
_335959178_1258315144774513_7250556474531860712_n.png)
...and the printed result!
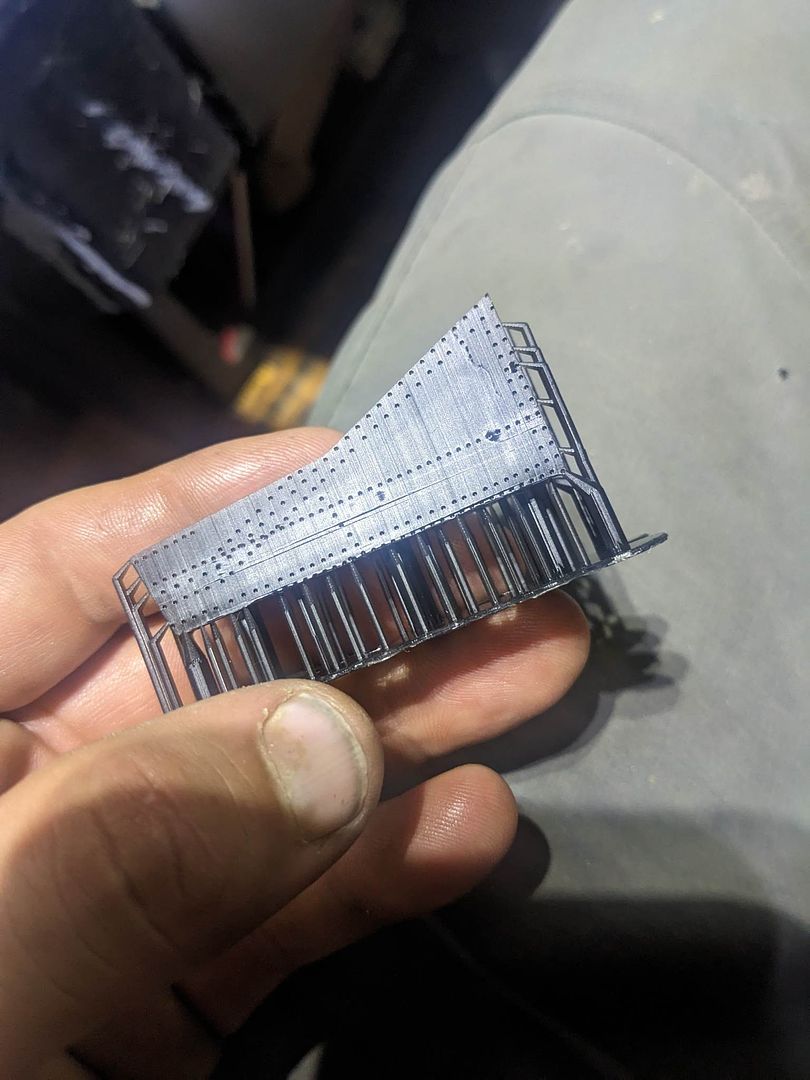
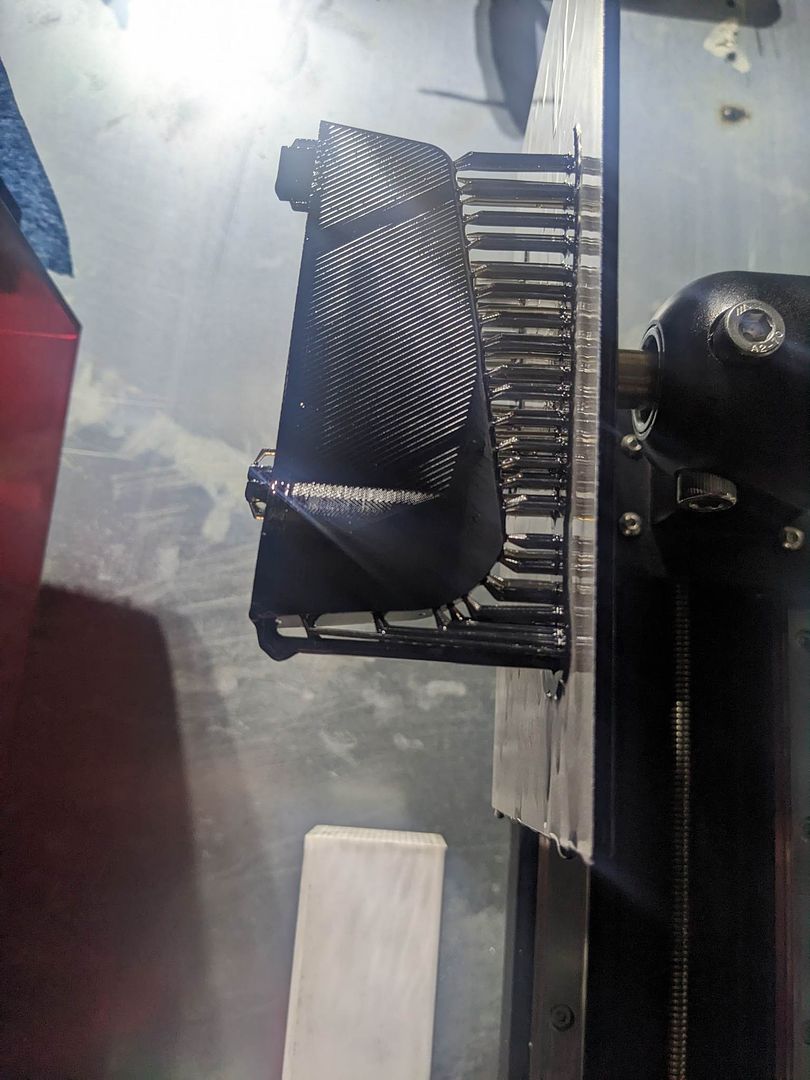
And now for the rudder!
Test fitted on the designer's own Old Crow. It helps when the designer already has his own collection of 1/18th planes to use for reference!
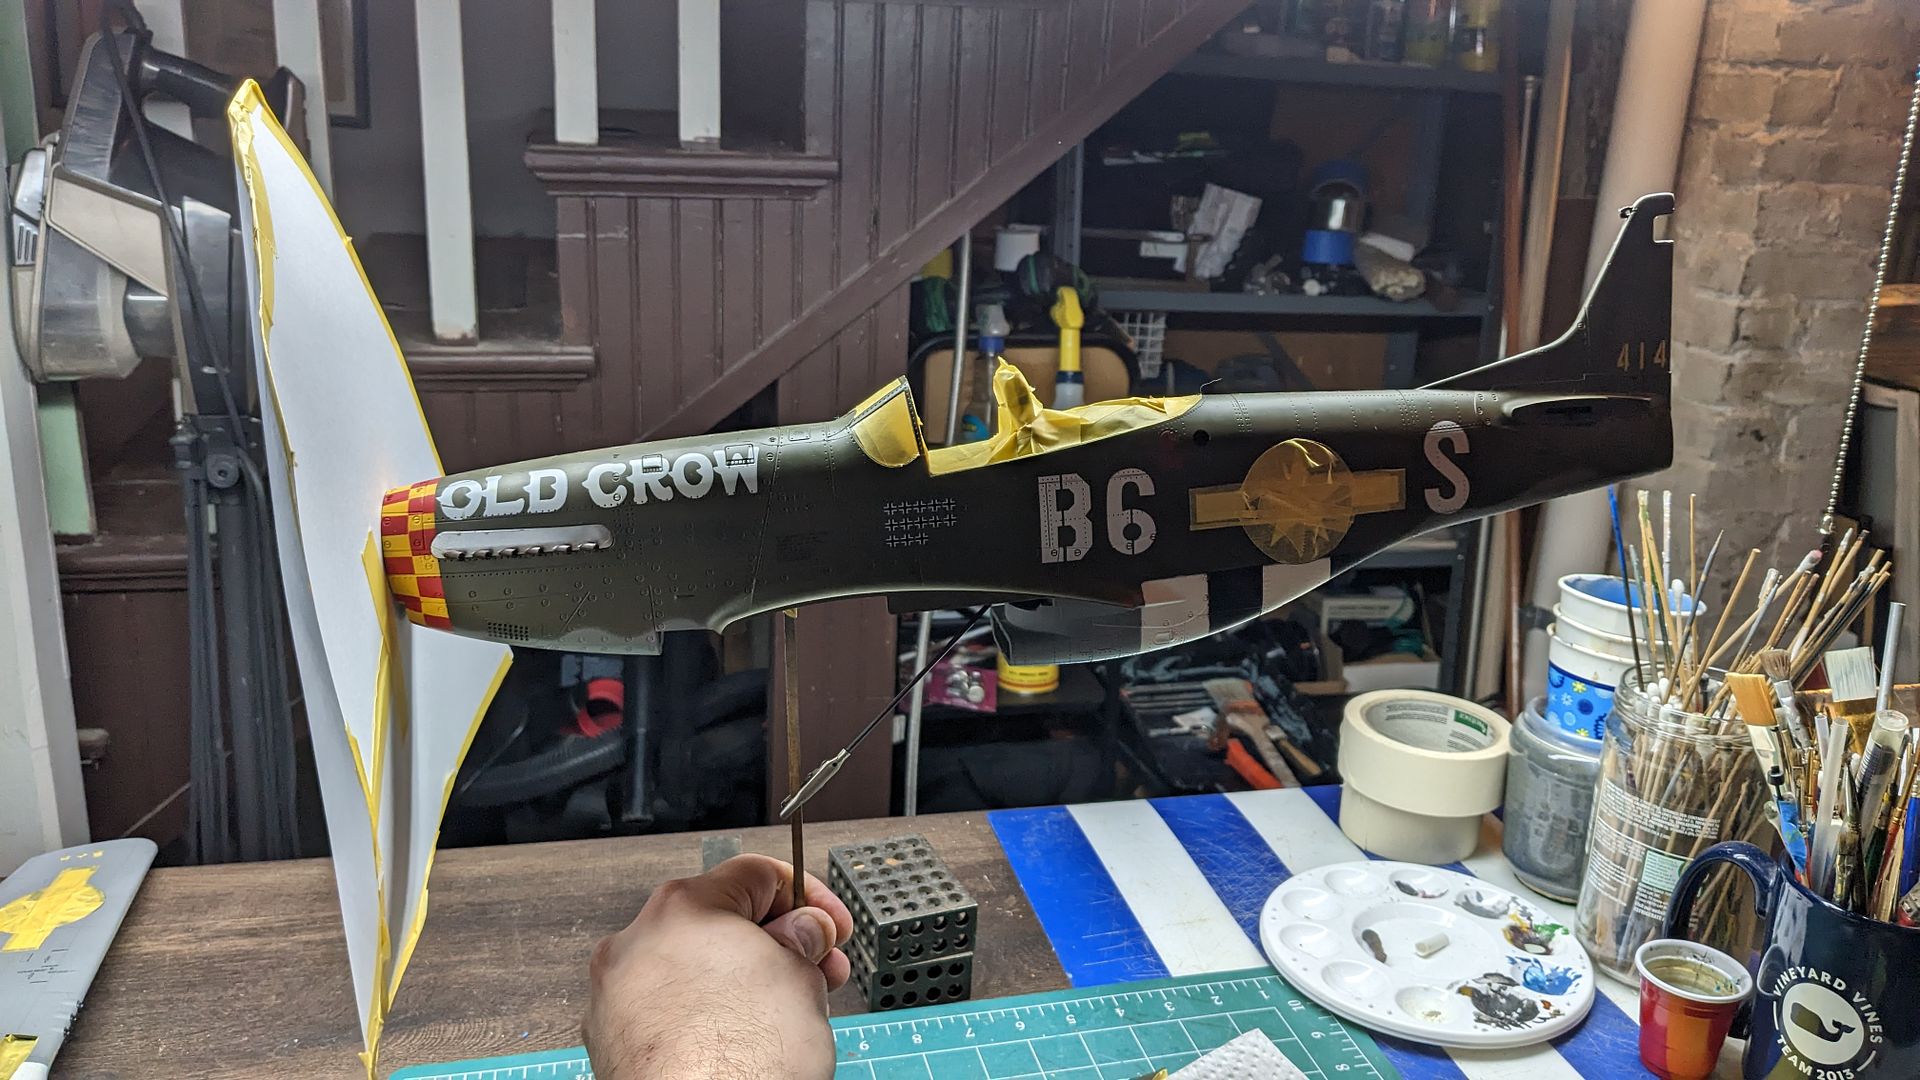
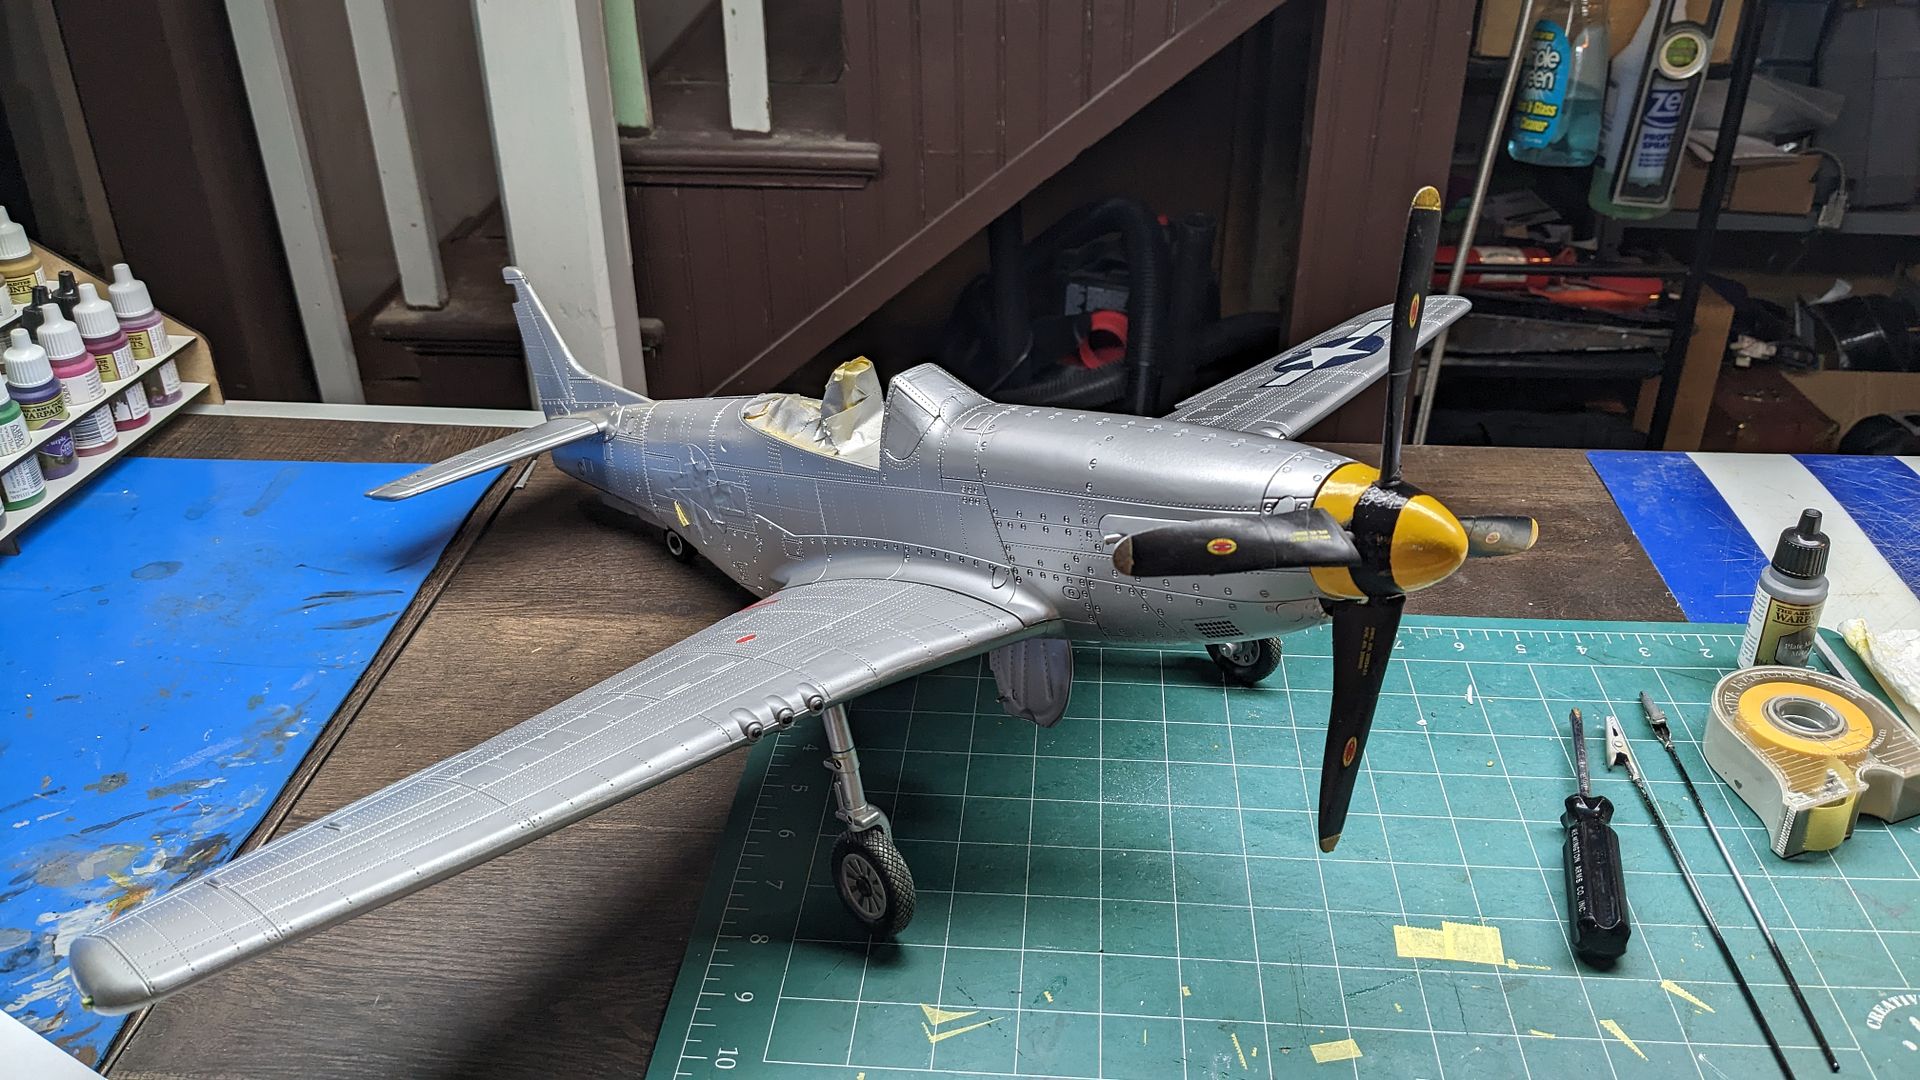
This was the starting point after wiping it down with some proclean. I first glued the bent prop back into place and cut off the original flimsy antenna mast and thick gauge wire on the tail. I'll eventually replace the mast with a new one, along with a scratchbuilt loop mast found on McComa's aircraft.
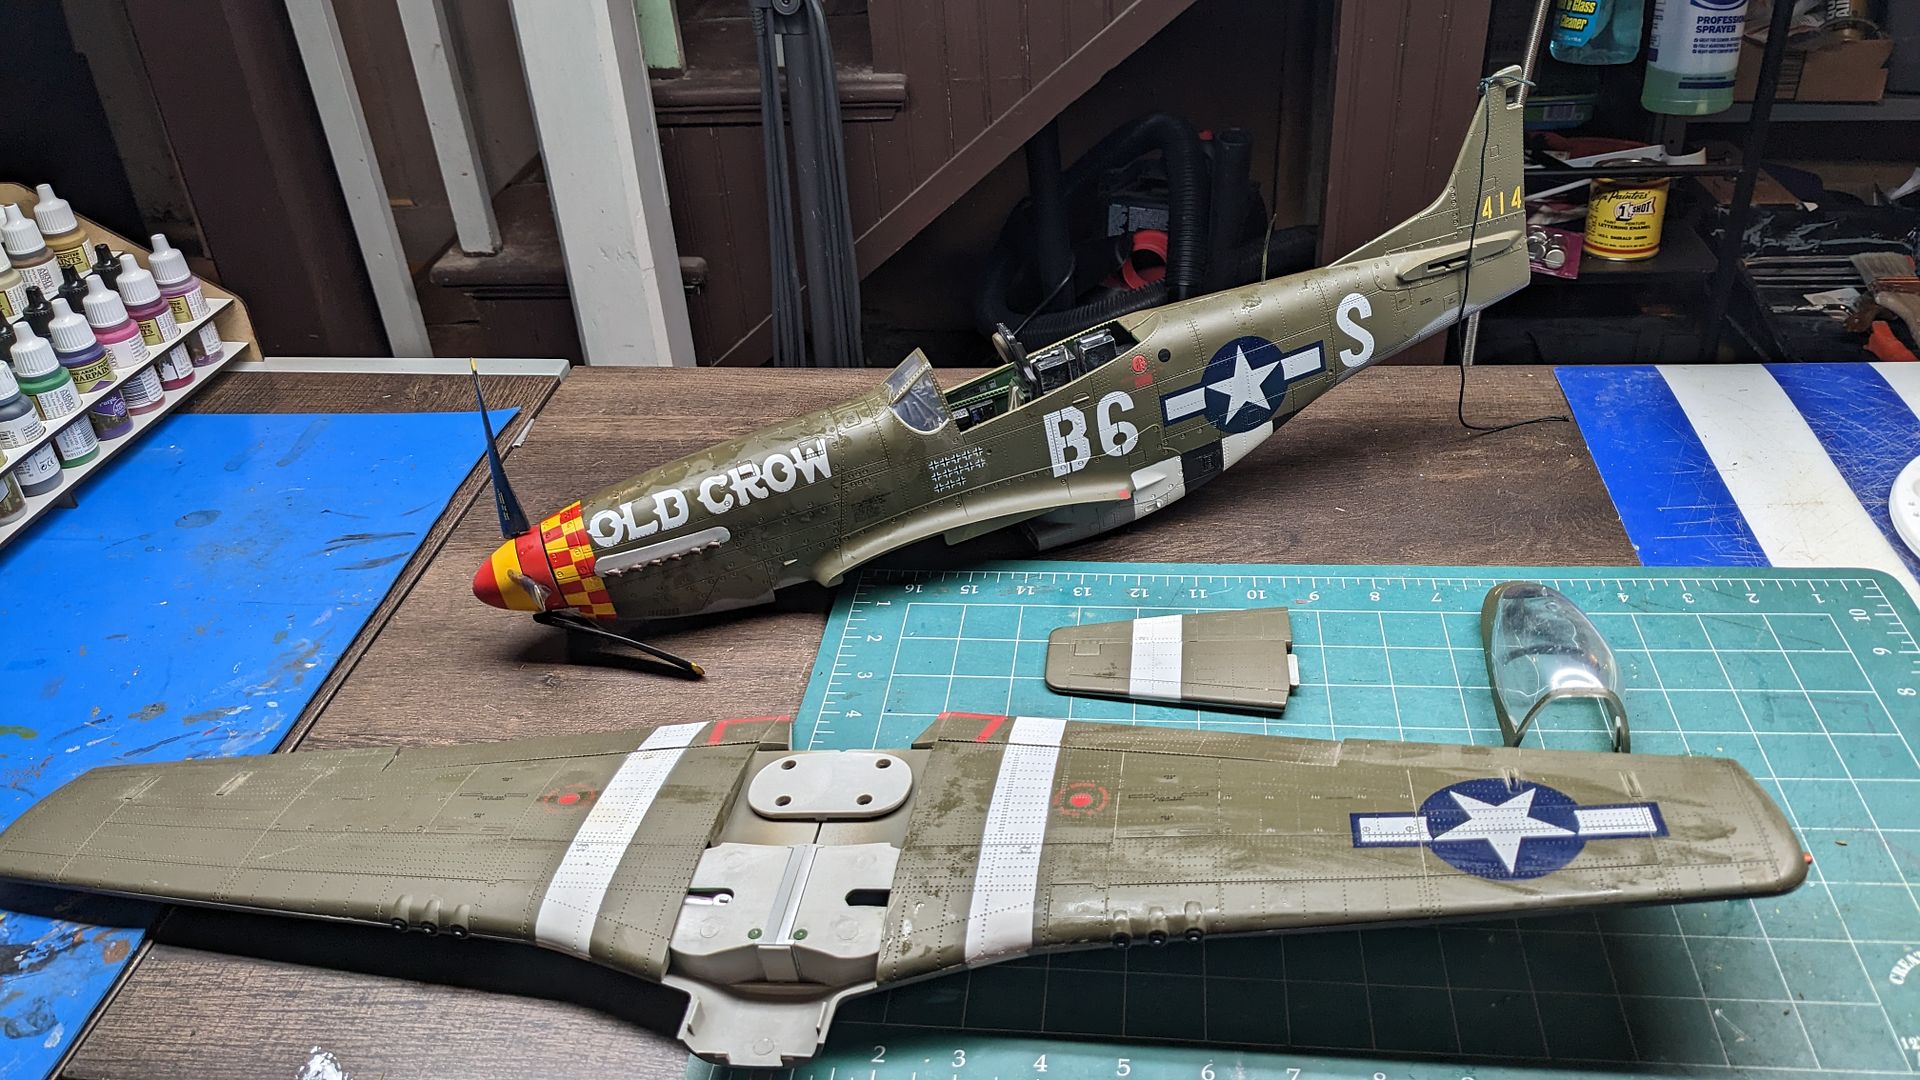
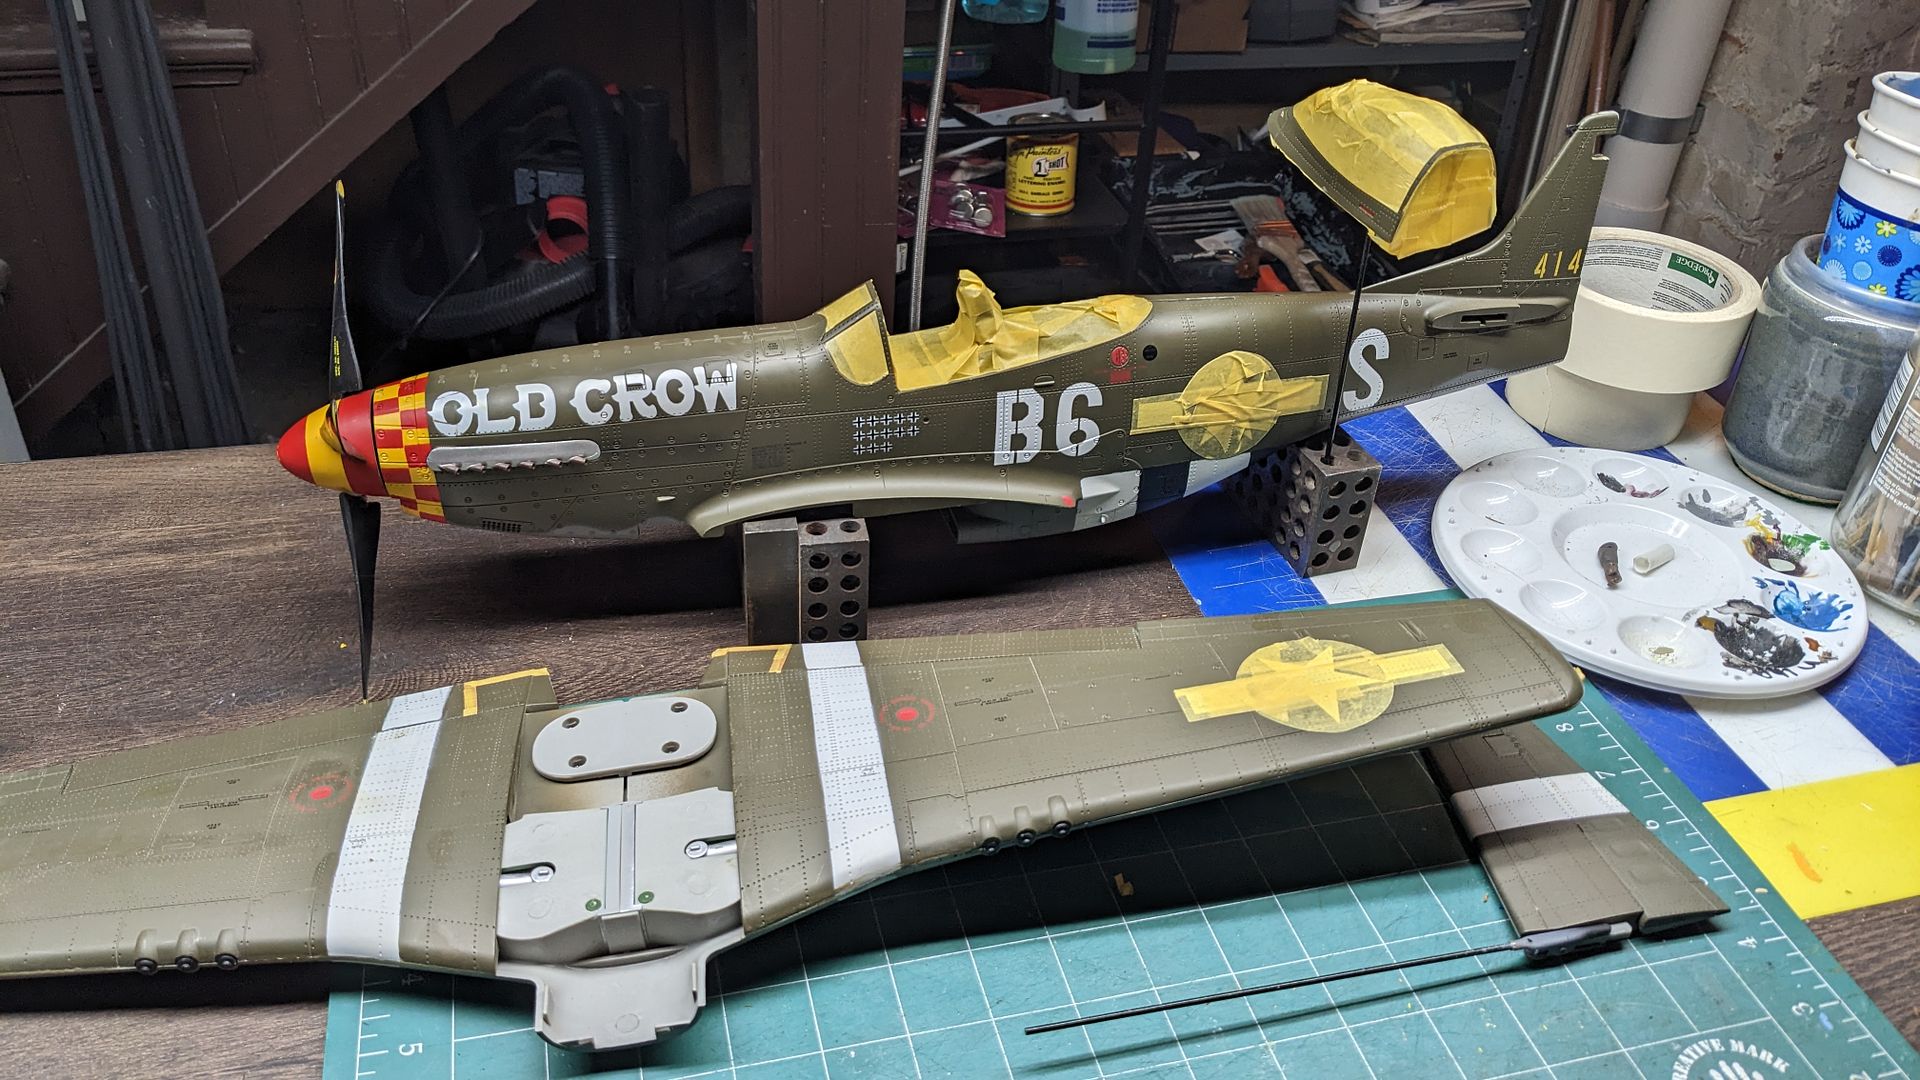
I thought the stars were nice enough to save, so I masked over them, along with the exposed gear bays, cockpit, and prop and hub. This is how it looked.
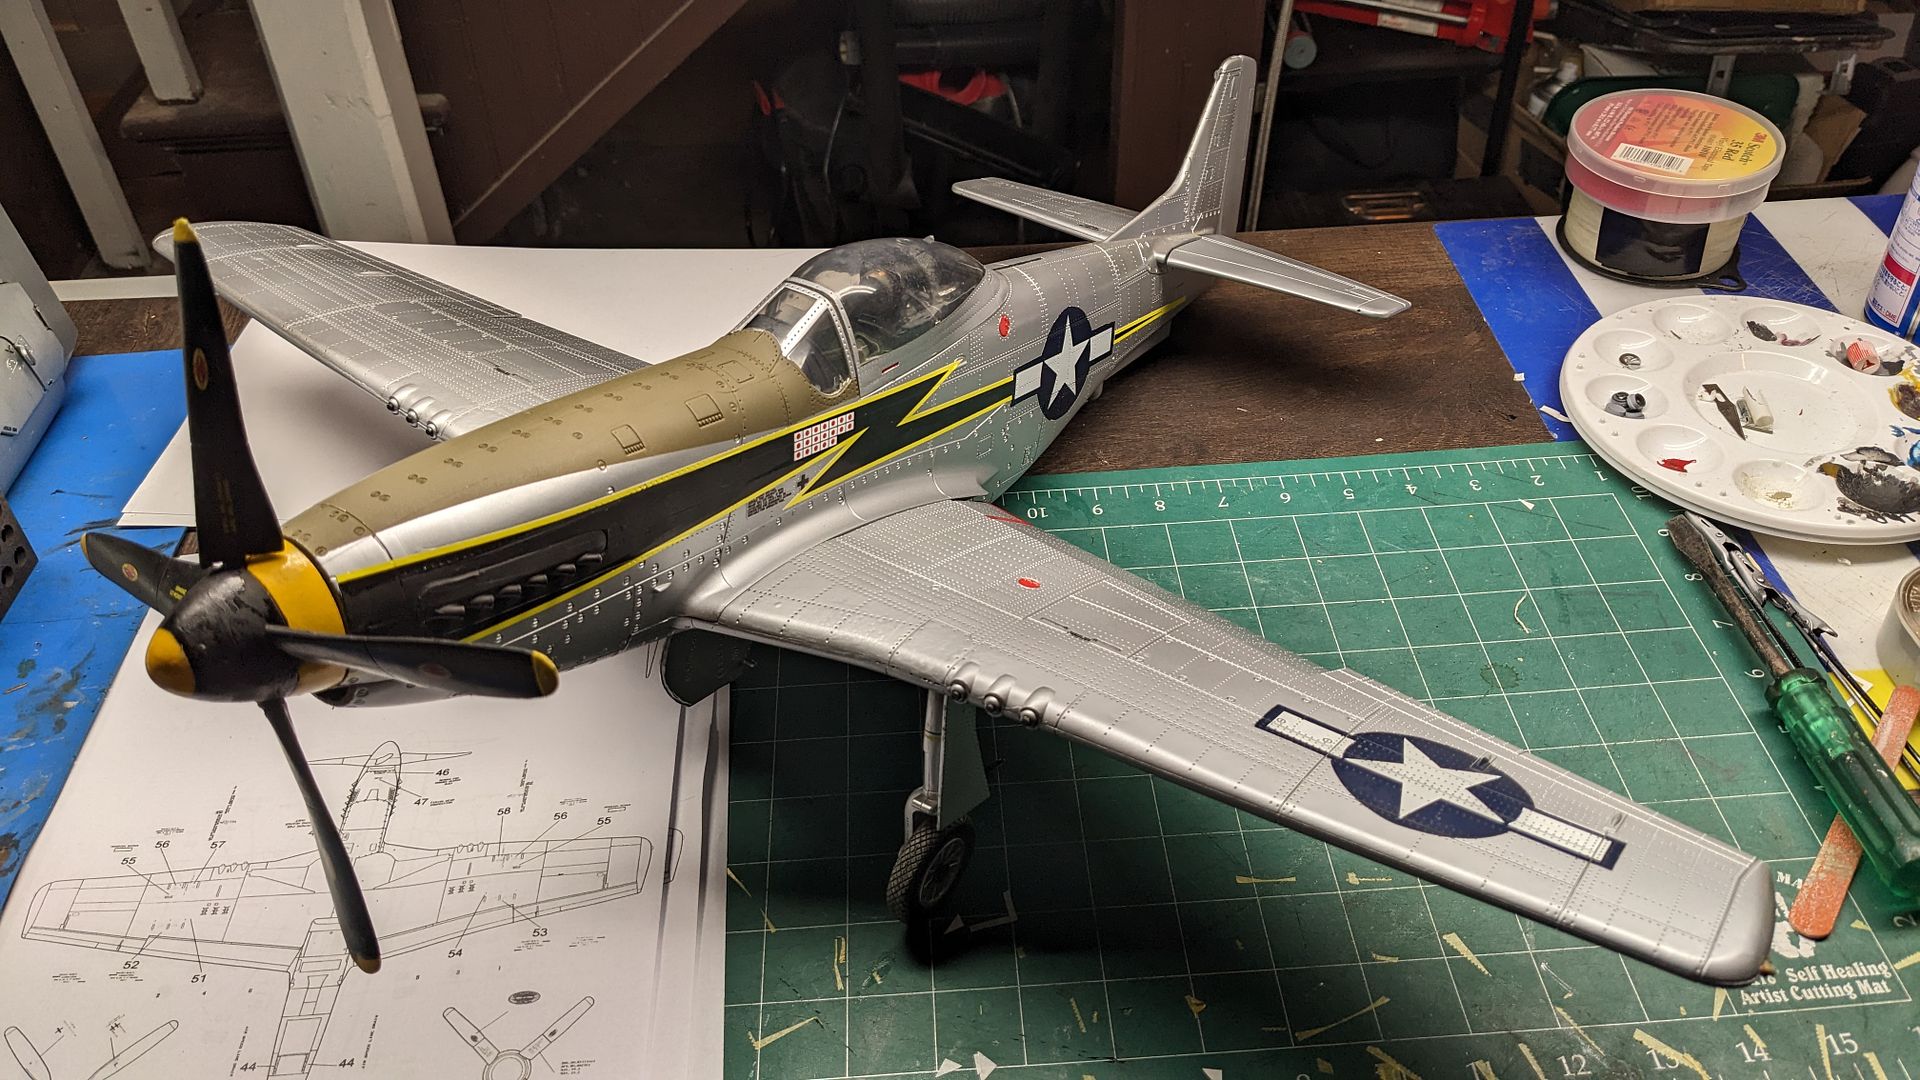
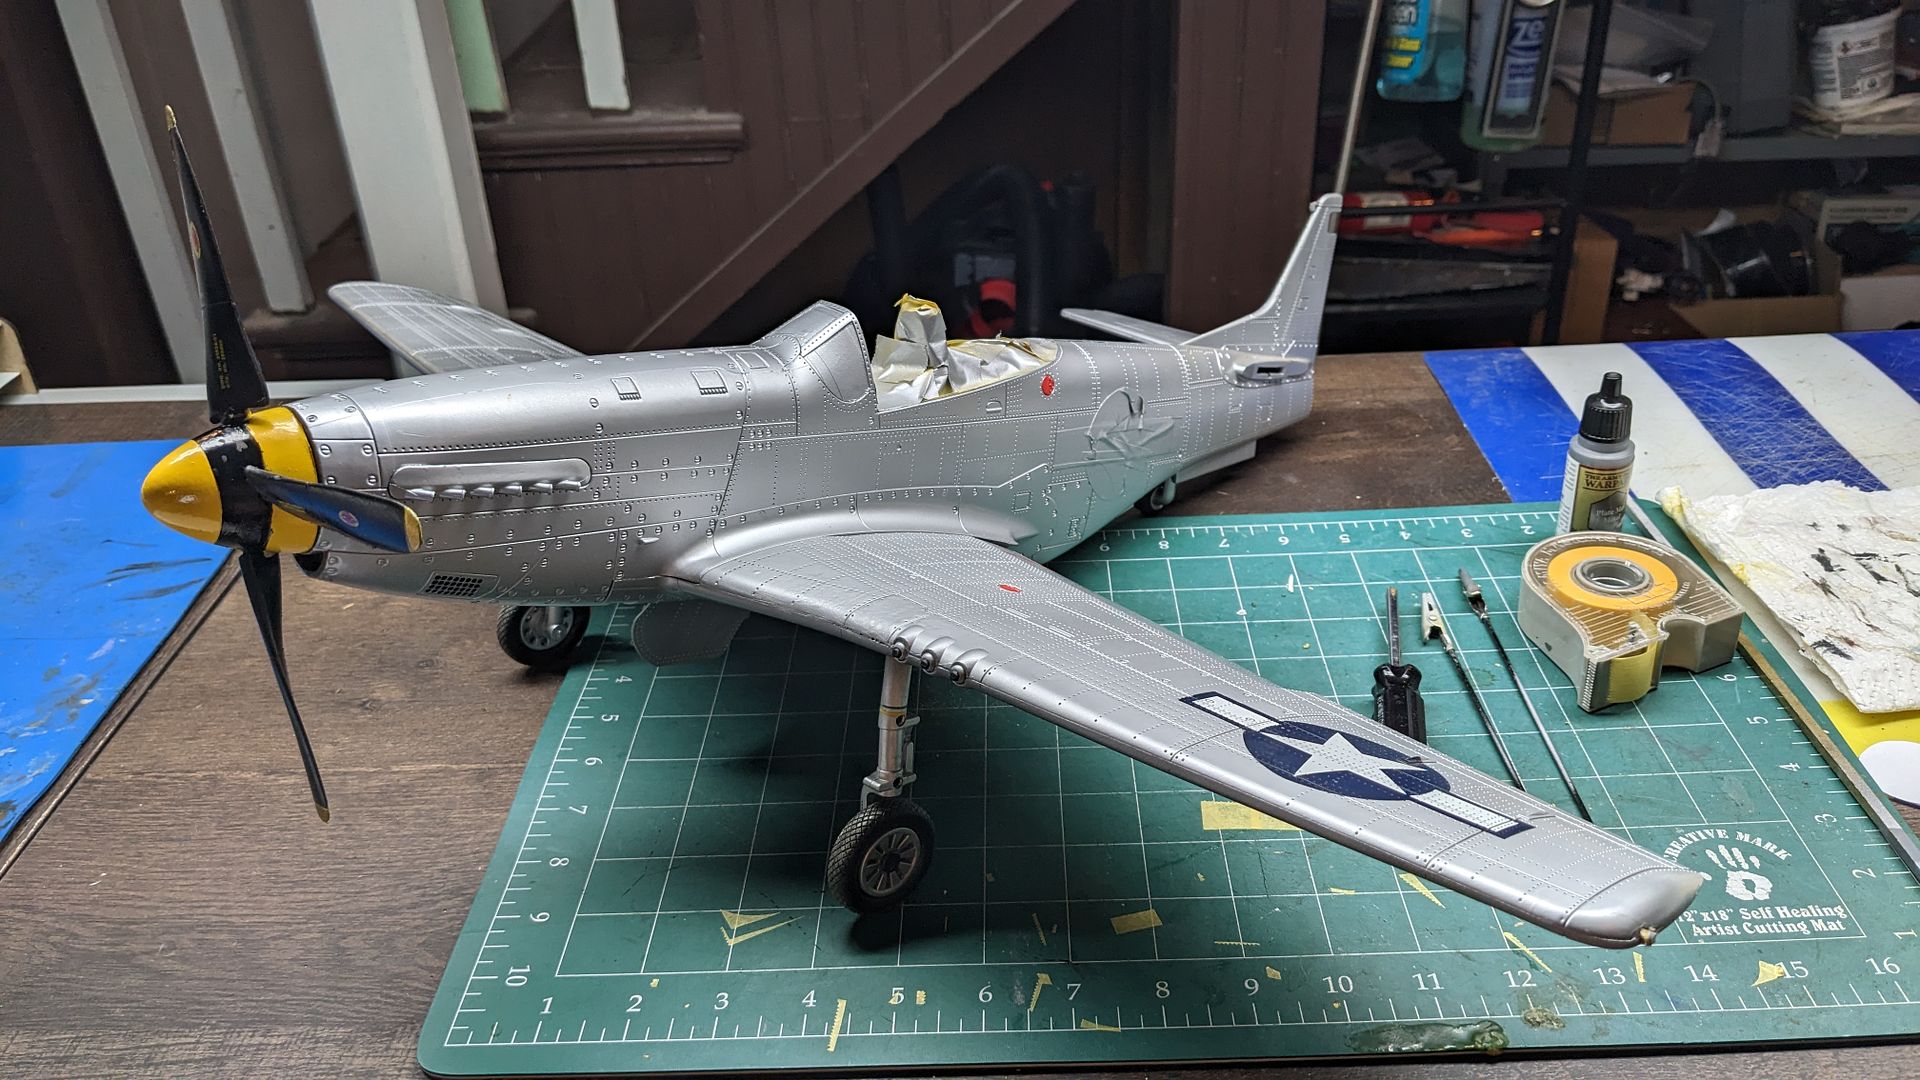
I applied about three coats of Tamiya 86512 AS-12 Spray Bare Metal Silver before I started seeing the Old Crow markings disappear. Overall I was most pleased with the results.
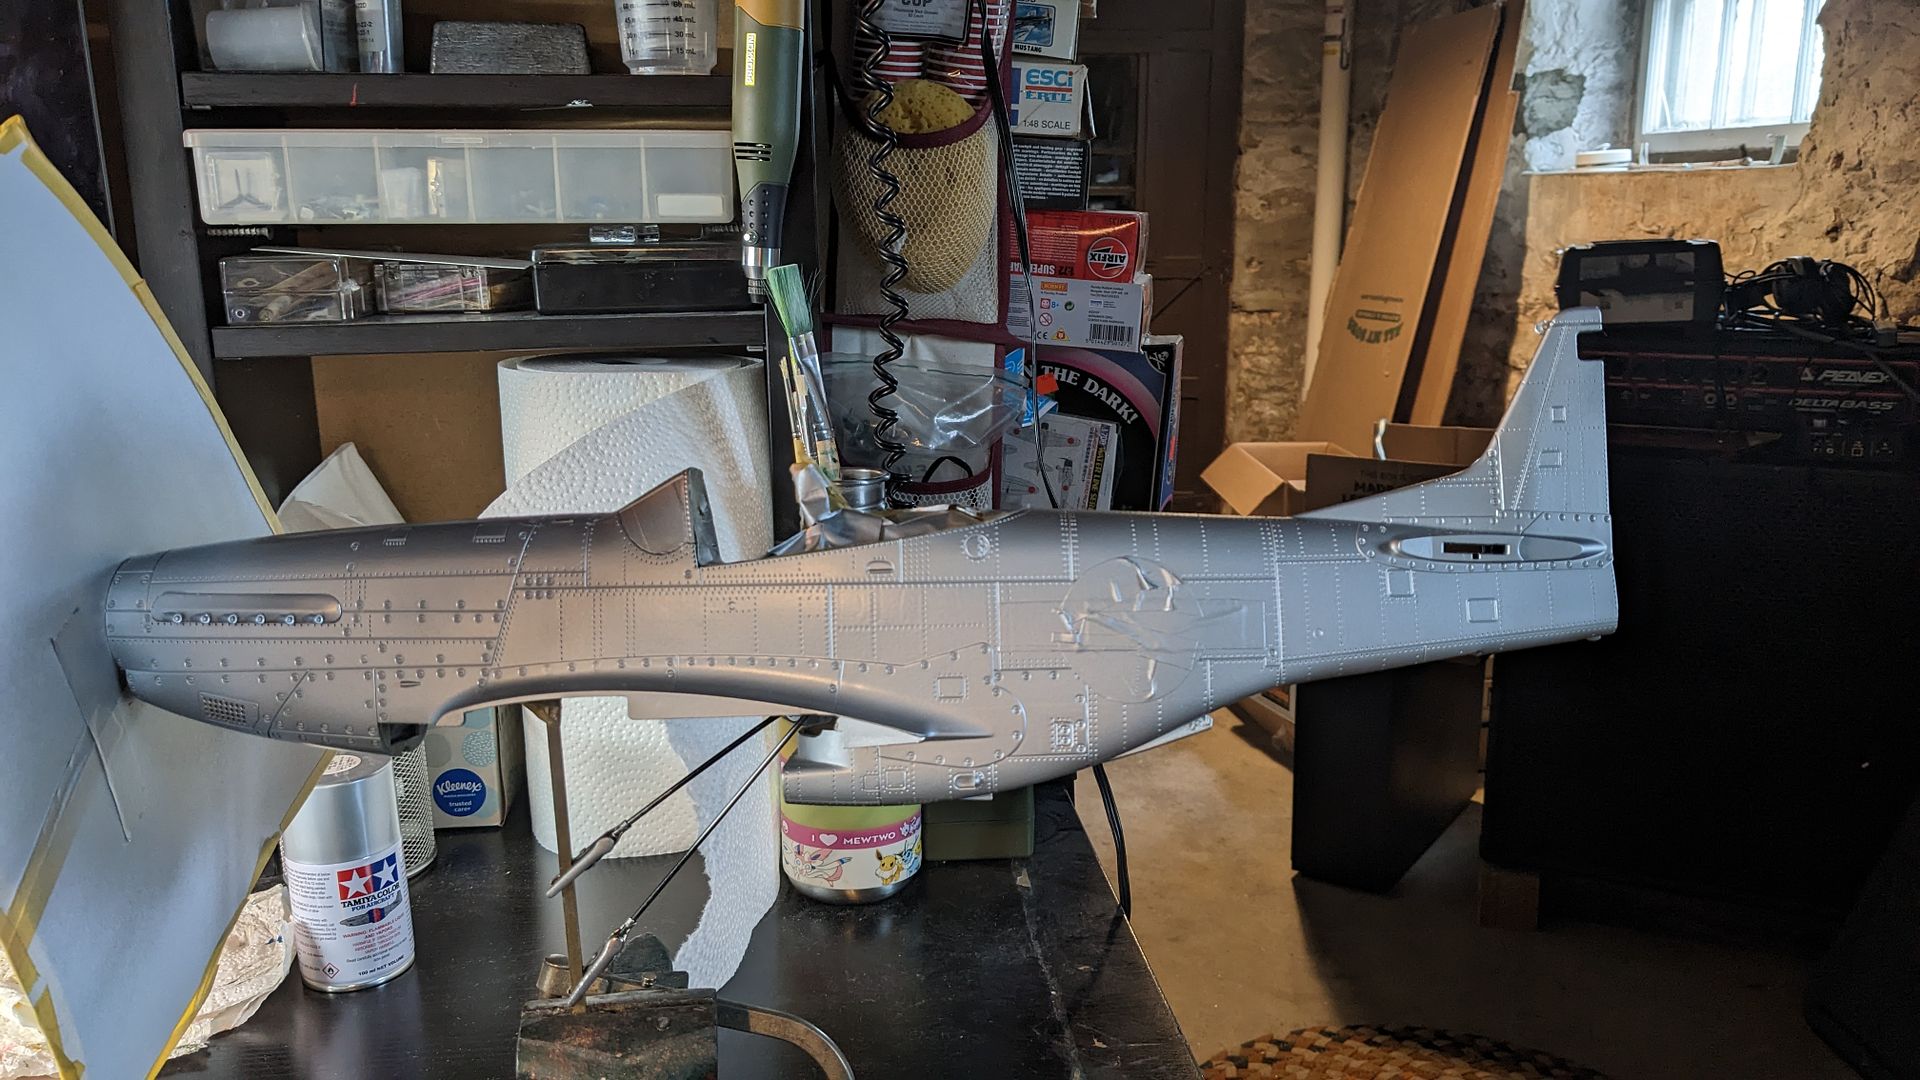
I decided to keep the fuselage stars covered for the time being and shifted my attention to the wings. After applying 2 to 3 coats, I removed the masks off of the stars and red "Do Not Step" right angles near the wing roots. I painted in the fuel tank ports, guns, and am now just waiting for the spare parts and decals to arrive. After not finding success with removing the spinner and props, I decided to mask and paint them in situ. I first painted the yellow on the entire hub using an old and (soon to be) sorely missed spray can of Model Master Insignia Yellow. I then masked over the yellow, and spray painted the black ontop with Tamiya Black. I was shocked to come back and find the black paint had cracked ontop of the yellow. Definitely not good! I went back and covered the area with Mr. Surfacer 3000 a couple of times, and then went back with the black. Which seemed to do the trick. But in my haste, I didn't double check my references! The middle black section should extend towards the tip of the spinner more. So I'll have to do that, and mask for the OD anti glare part on the top. Then just touch ups and I think I'll be pretty much caught up for now. I might still go with stencils and paint the Black Lighting markings onto the model instead of decals, but I'll wait off on that decision for now.
I will say this, one thing that continues to bug me about this model is the landing gear, and the fact they appear to be at full extension, as if the plane was coming in on final approach to landing. I MIGHT consider doing some modification to cut the oleo strut down to a more accurate height, so the whole plane sits at a more normal attitude. But that's if I have extra time before May 7th. So far I'm happy with the progress I'm making on both birds, and hope to keep the momentum up to get them done ASAP. As I've got other projects for the museum with deadlines as well!
Hope you enjoyed the process so far! I realize this isn't a full model build or anything, and mostly just some repaints, but I hope you found them interesting nonetheless!
Stay tuned...