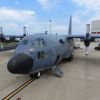
Okay, here's a photo update for everyone. With the busier than usual schedule, I've not taken the amount of photos I probably should have, so you may have to fill in the blanks a little bit here......
Scott continued working on the fuselage patch, just forward of the entry door. He went as far as he could by himself, but eventually needed help. He recruited his wife, Ellen. This was the first time she'd ever bucked rivets, so they started out with a practice piece.......

And before you knew it, they were making noise inside the airplane. Sure, there were some glitches here and there, but they got them all corrected. And I must say, for a married couple, they acutally work together much better than expected........


The two Air Force guys that came down for a couple of days, Mark and Tom, spent their second day inside the airplane fabricating new fuel drain lines for us. I had relocated the drains on the fuselage to a more "comfortable" location (especially for us short folks), and these new lines were a part of that modification. It was great to have those guys here, and I hope to see them back in the next week or two to help get this thing finished........


During the entire reconfiguration project of this airplane, there are only a small handful of events that have occurred that would be piled in the "great stroke of luck" category. For example, the acquisition of the bomb doors & racks is something I consider us to be quite lucky about (thanks Questmasters). Well, late last week, we stumbled into another small stroke of good luck. As you all know, I've been struggling since this project began, to find any photos, drawings, parts, or pieces of anything that goes in the tailgunner's section. And you've seen how making everything from scratch has been consuming time like the B-29 consumes fuel and engines.

Anyway, the latest debaccle was trying to figure out how I was going to make the gun mount for the tail position. I've looked and looked, but the most detailed drawing I've got of it is this........

Nice, huh?

I mean, it's quality is fine, but there's just not much to go by to built it. How tall is it? What angle is that mount at? Etc., etc. It was obvious to me that the yoke that attaches to the gun was much different from the other ones we had. I was not sure how I wanted to make it, as it was going to need to be quite strong to hold the gun up at such a steep angle (the yokes for the other guns are much shorter and have no angle to them).
Well, a week or so ago, Carl Scholl had called and said he found a goofy looking item, which he thought might be a gun mount of some sort and said he sent it to me just in case I could modify it to work with our guns. I really didn't give it a second thought until it showed up on Friday. As soon as I opened the box, I knew we had somehow stumbled upon some good luck.
Do you reckon this is pretty close?

...............

I was very excited about this find and drug everyone from their work areas to come and see. It doesn't take much these days to make me happy or mad (I'm an emotional wreck)...but that was definitely one happy moment for me. I was now able to continue with the assembly of the tailgunner's gun and get it ready for installation.


Once it was assembled, I just placed it on the work stand so that I'll not have to drag it in and out of the airplane while fabricating the base for the gun mount. Plus, it just made the work stand look cool........


While all of this was going on, I was also able to start painting one of the National insignias on the airplane. I started with the one on the R/H side of the fuselage. Again, I didn't take the detailed pictures I normally would have, but will try to remember to do so on the next insignia. Here it is with the star and surrounding blue painted on.......


I was hoping for the blue to be completely cured by the time I got here this morning (which was late for me), but it was still tacky. I've just not had much luck with my painting during this whole project, so I wasn't even a little bit surprised by this. I still needed to get the red dot (or "meatball") painted on, so I just figured out a way to work around the tacky paint.
The first step was to lay out the circle (which I'll show y'all that procedure with the next insignia), and to put the border tape around the pencil line.....

Then, since I couldn't just lay paper down over the blue part of the insignia, I just made a little dam with the tape. I'd done this years ago with great results, and frankly, was surprised I remembered to do it this time. It basically just funnels the air/paint mixture straight back out and away from the airplane as you spray it. I use a HVLP (High Volume, Low Pressure) gun, and kept the spray down to a minimun, so it ended up working out fairly well...........


Unmasked and finished.......


I've been a bit under the weather, so to speak, for the last couple of days, and today isn't much better. So my productivity has been slowed down. However, I'm still trying to get as much work done as possible. I will be glad when this is finished, but until then.....if you're gonna be dumb, you gotta be tough.
Gary


 Gary, Fantastic Job!!!!!!!!!! Just wish I had the time and money to come to Midland and lend a hand. But between helping get our BT back in the air and the National Mustang Show it ha been a little busy. Keep up the FANTASTIC WORK and this goes for all the other voluteers as well!!!