Multi-tasking today...Corsair Div.: (oh yeah, I also assembled and mounted two new front tires for a certain tug for a certain jet-type guy I know)
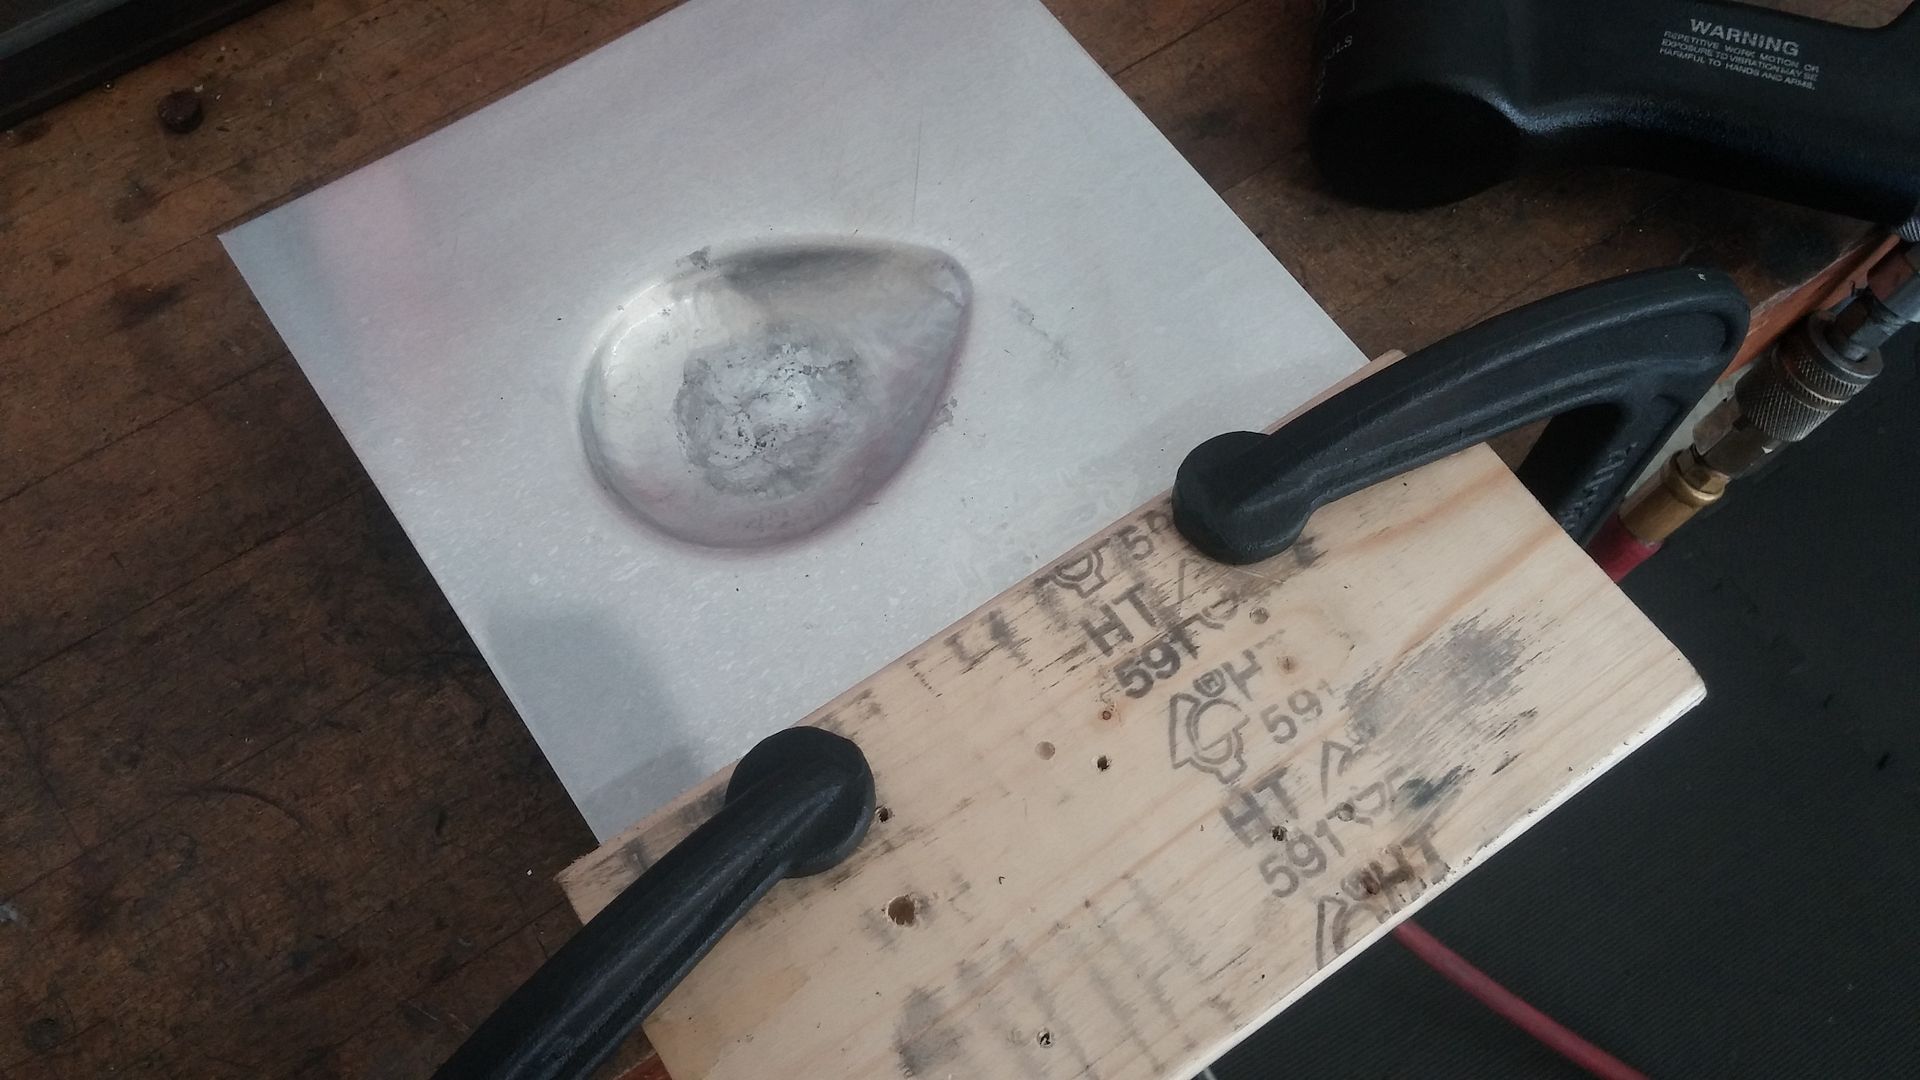
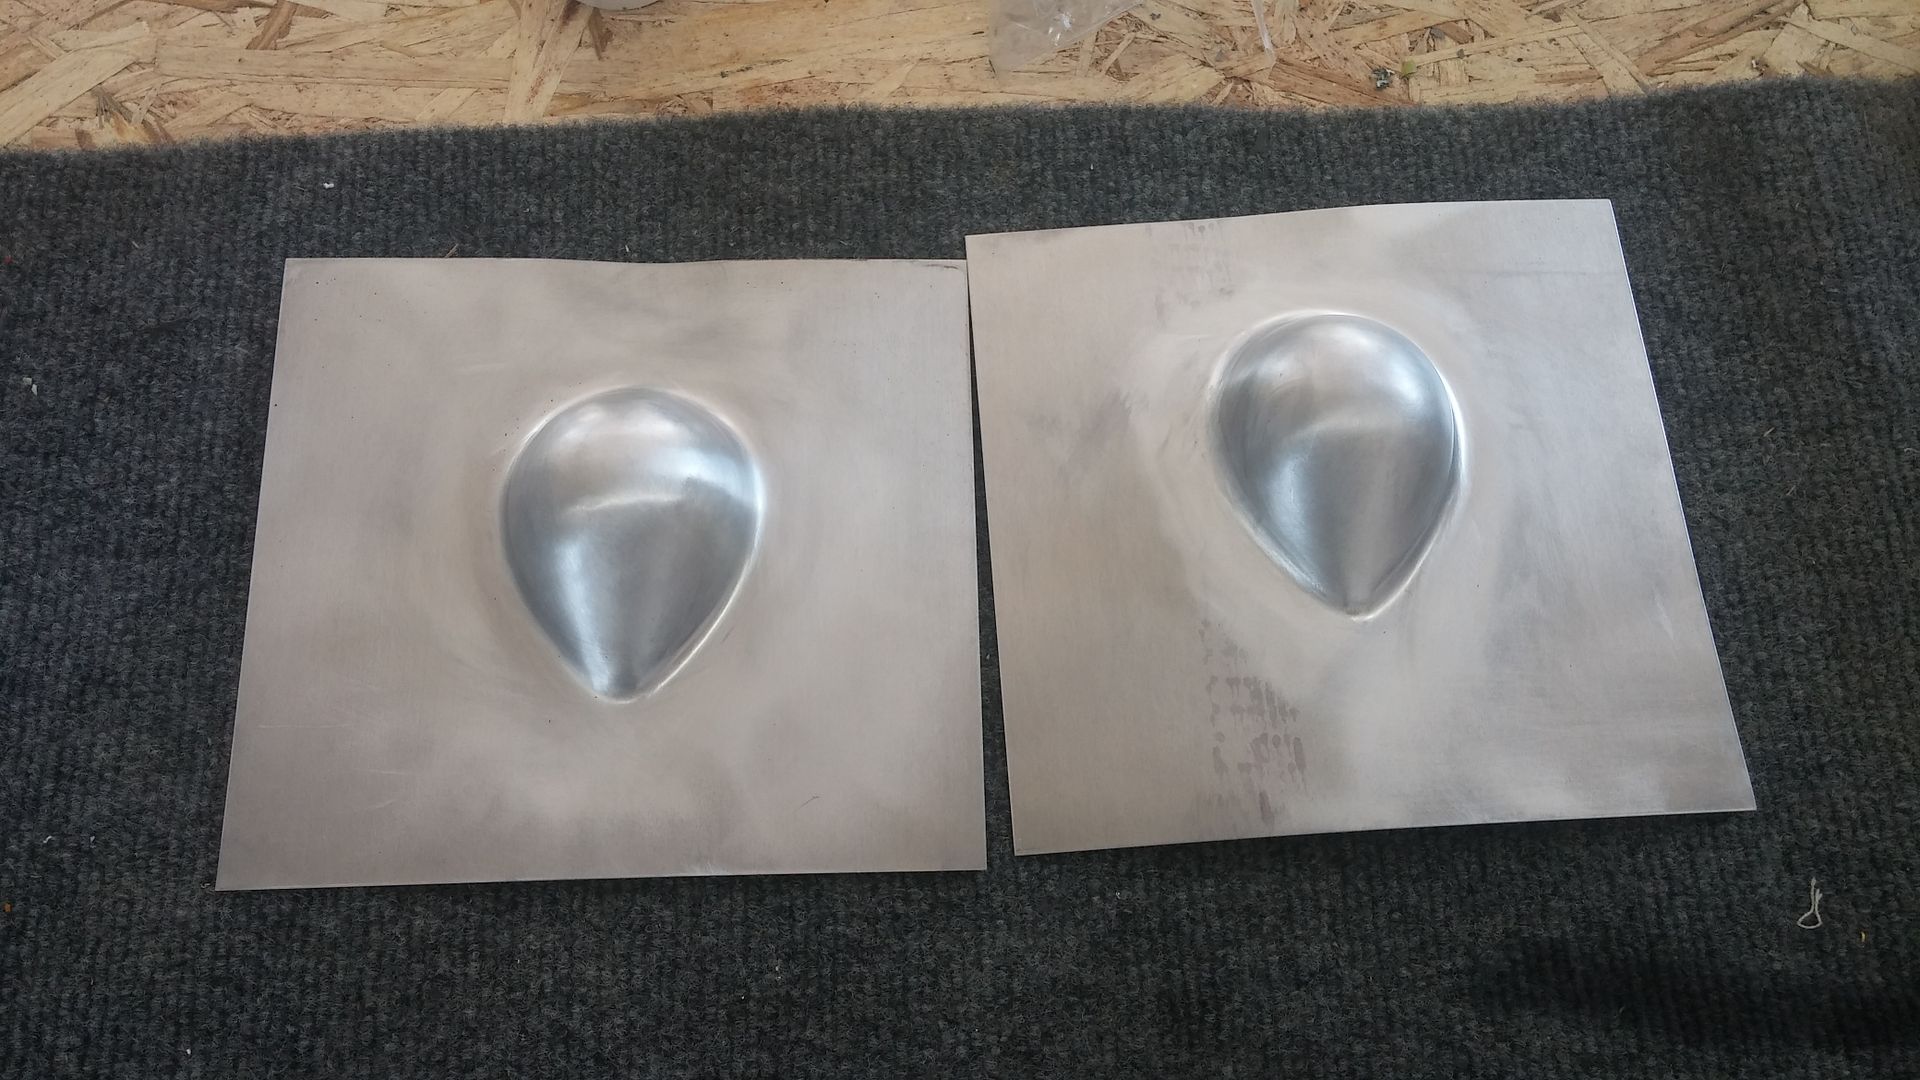
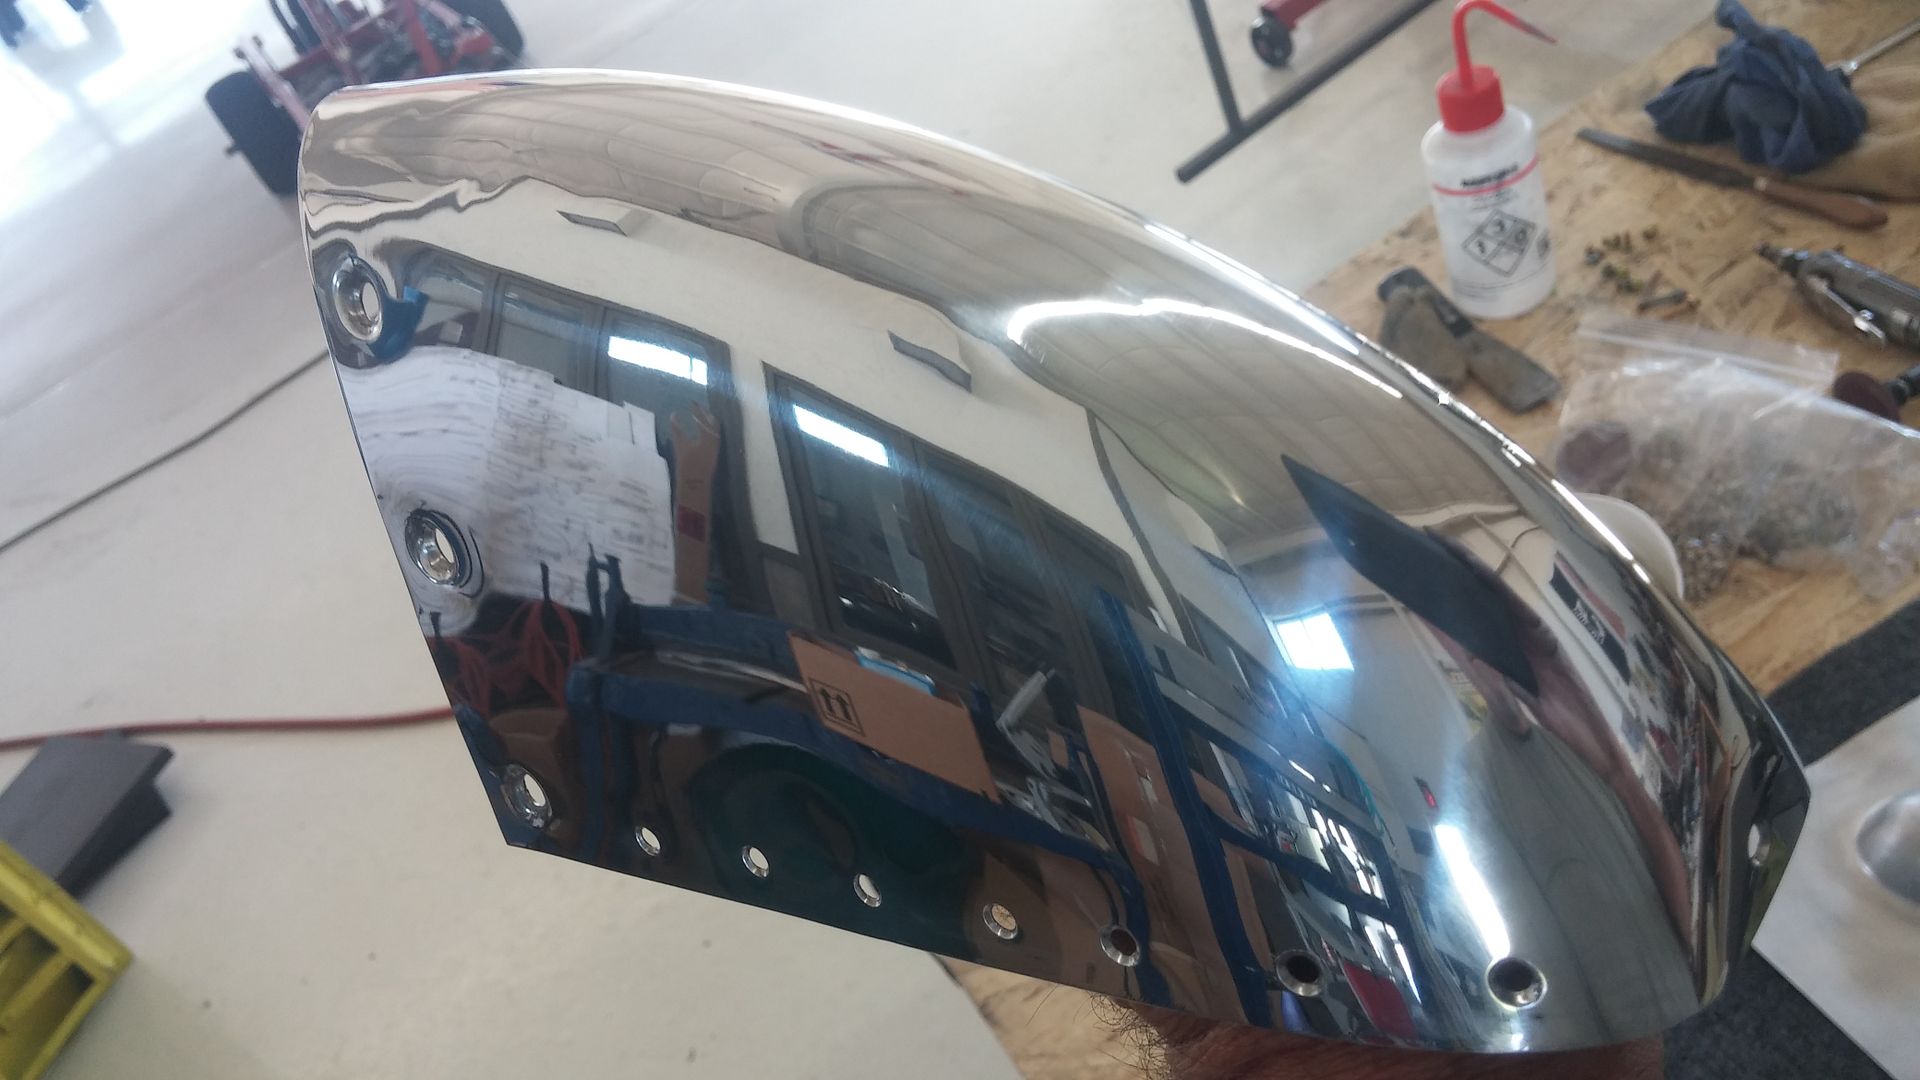
So, I remembered to take some process shots while making the second tear drop cover today. Missed the first shot but essentially, I outline the boundary and go to the Pullmax first to stretch and raise the dome some. Then to the flow form and start working from the edges down toward the center a little at a time. Then back to the Pullmax to work and stretch some more, then flow form some more.
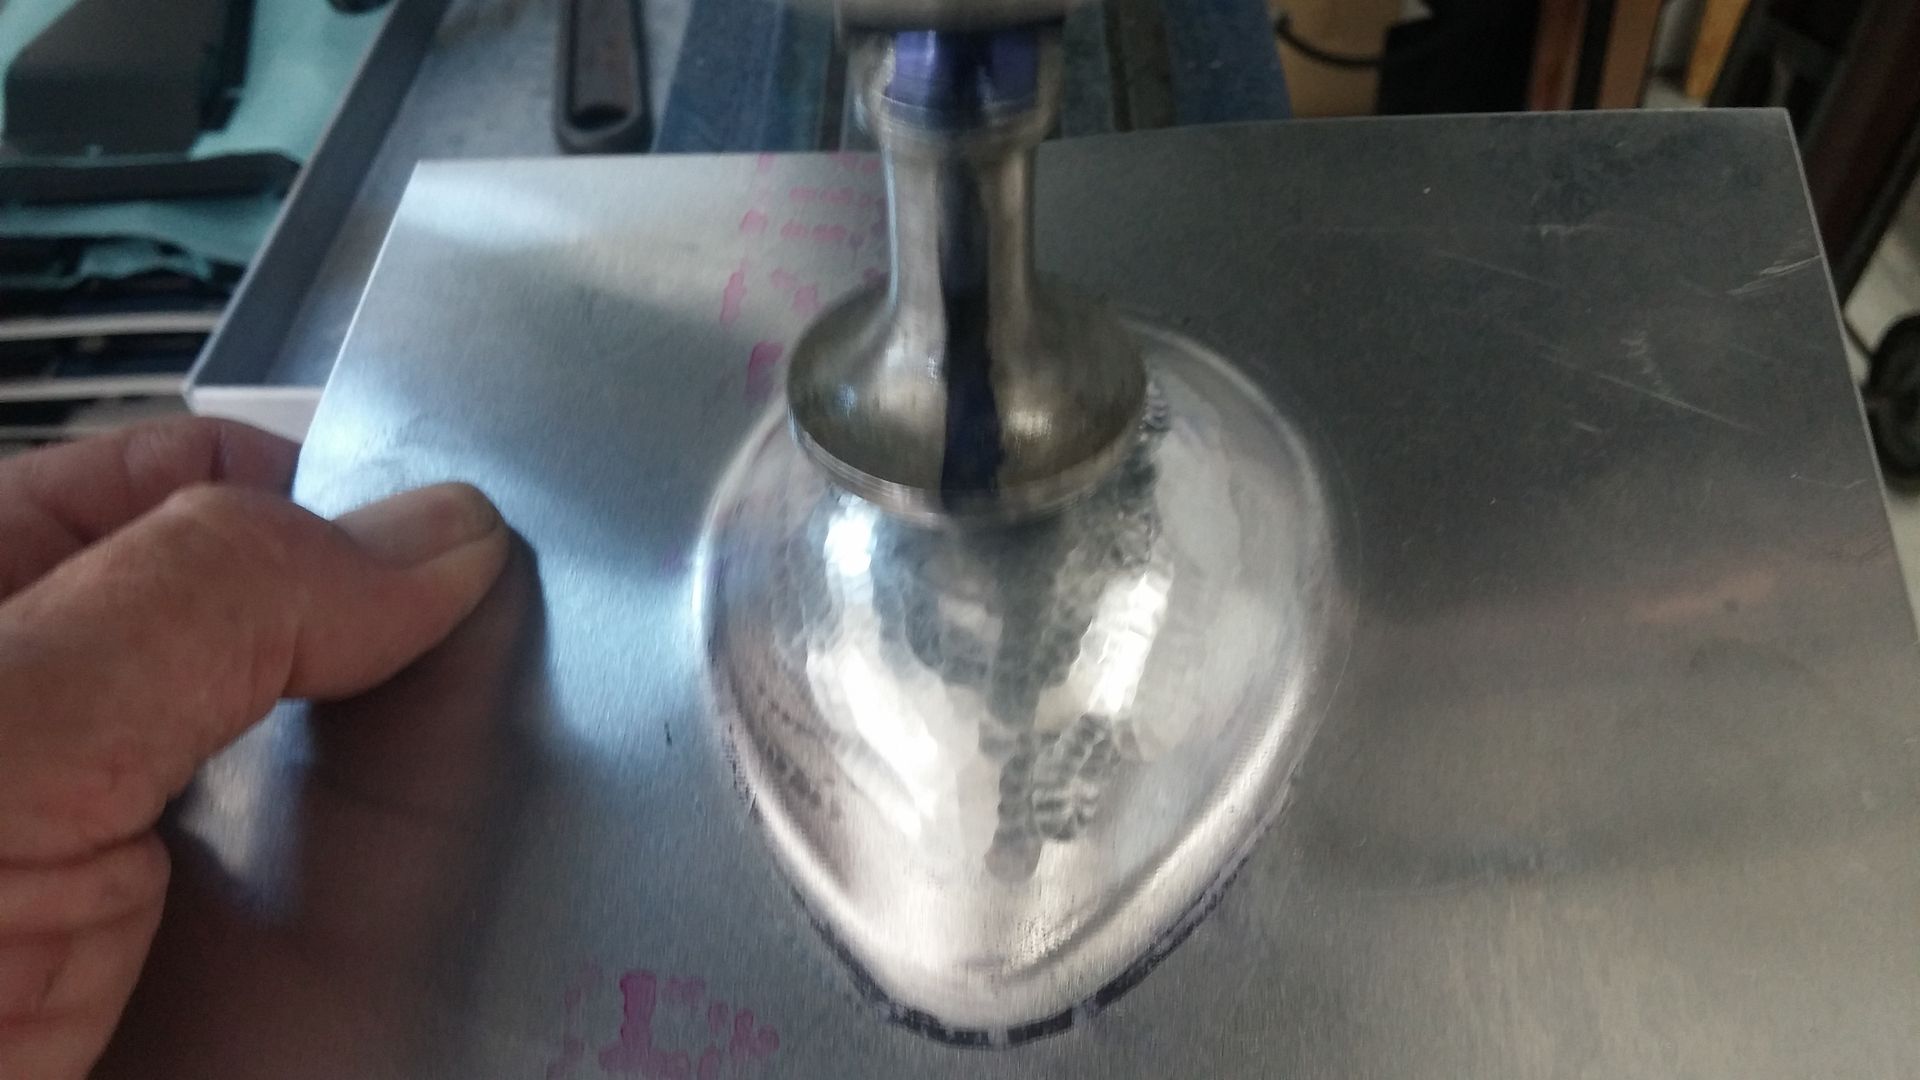
When I am about 90% to final size in the female dish form, I work the balance carefully with a tear drop poly hammer. Then hand finish the piece. Next will come trimming the blank to print, finishing bolt holes and dimples, then heat treating.
First lap through the Pullmax to raise and stretch the dome then first pass through flow forming to work the edges
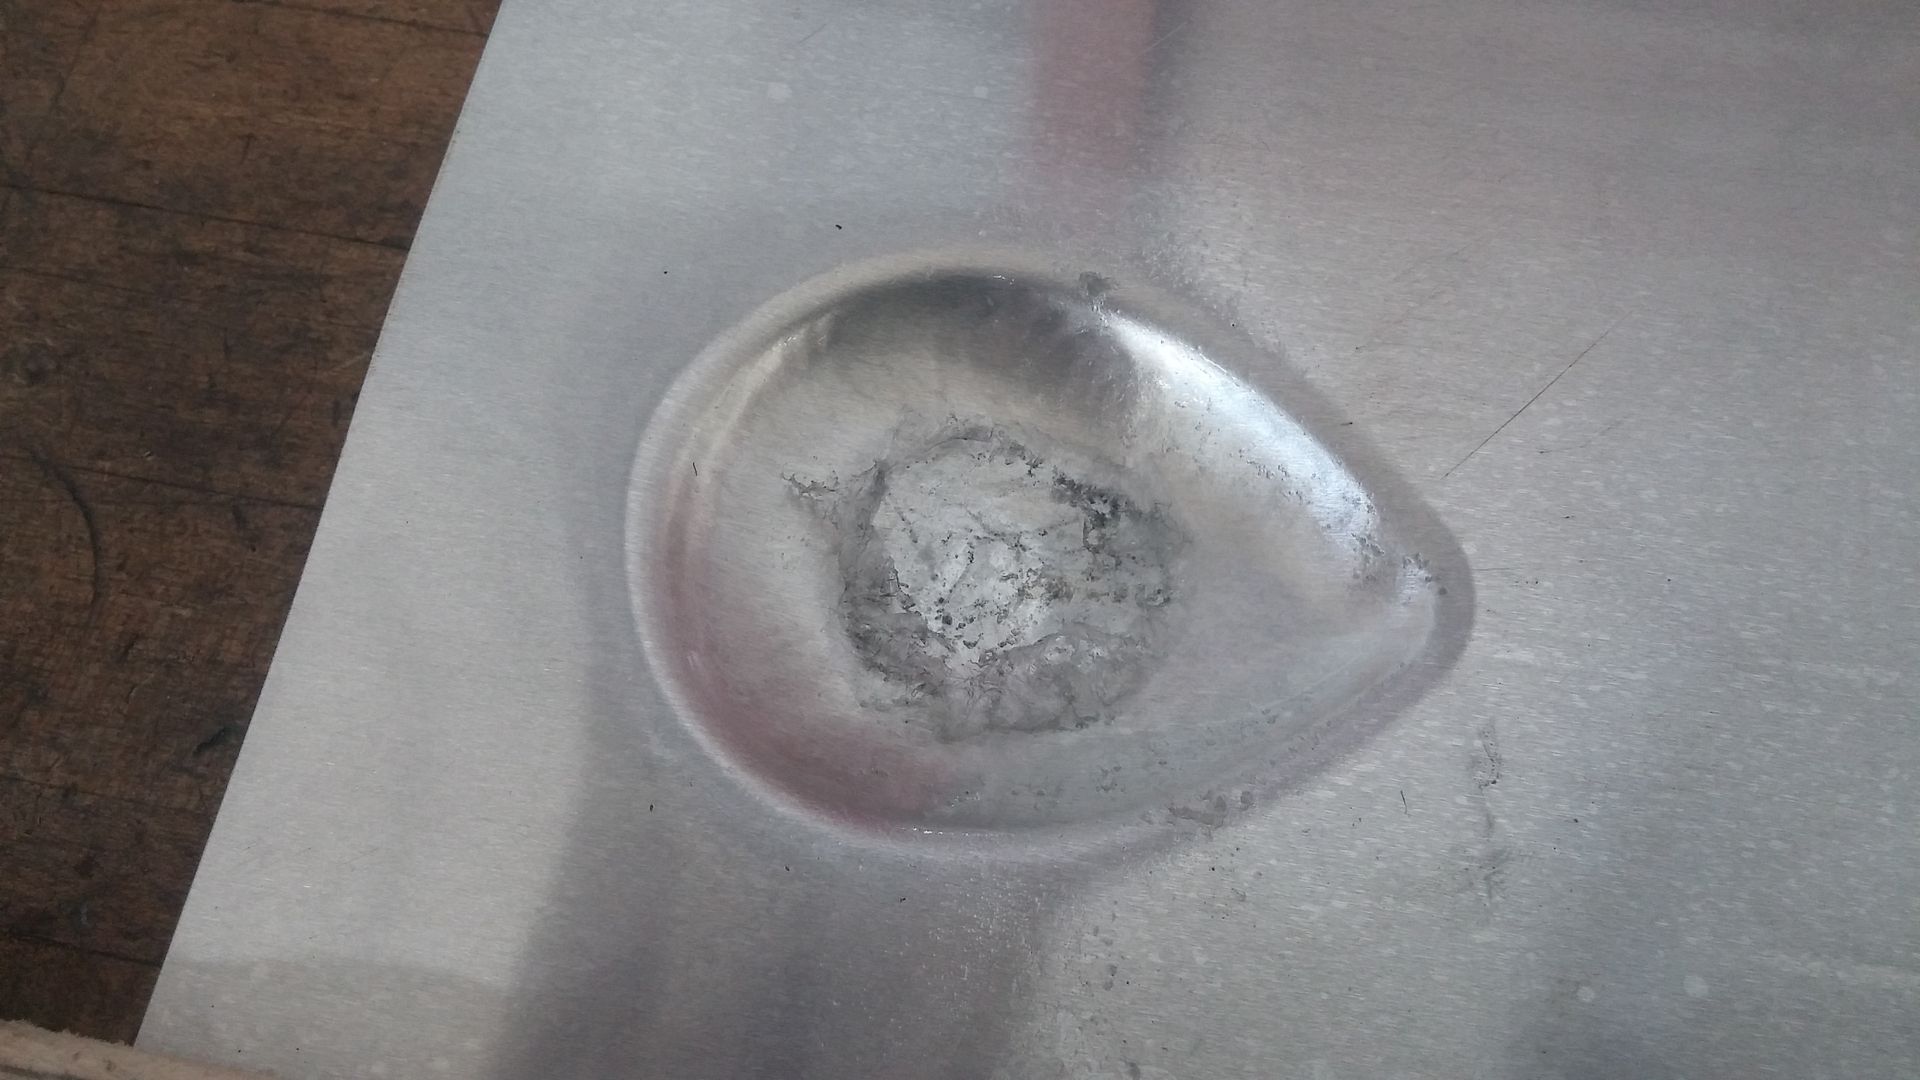
Flow forming the edges but not the bottom
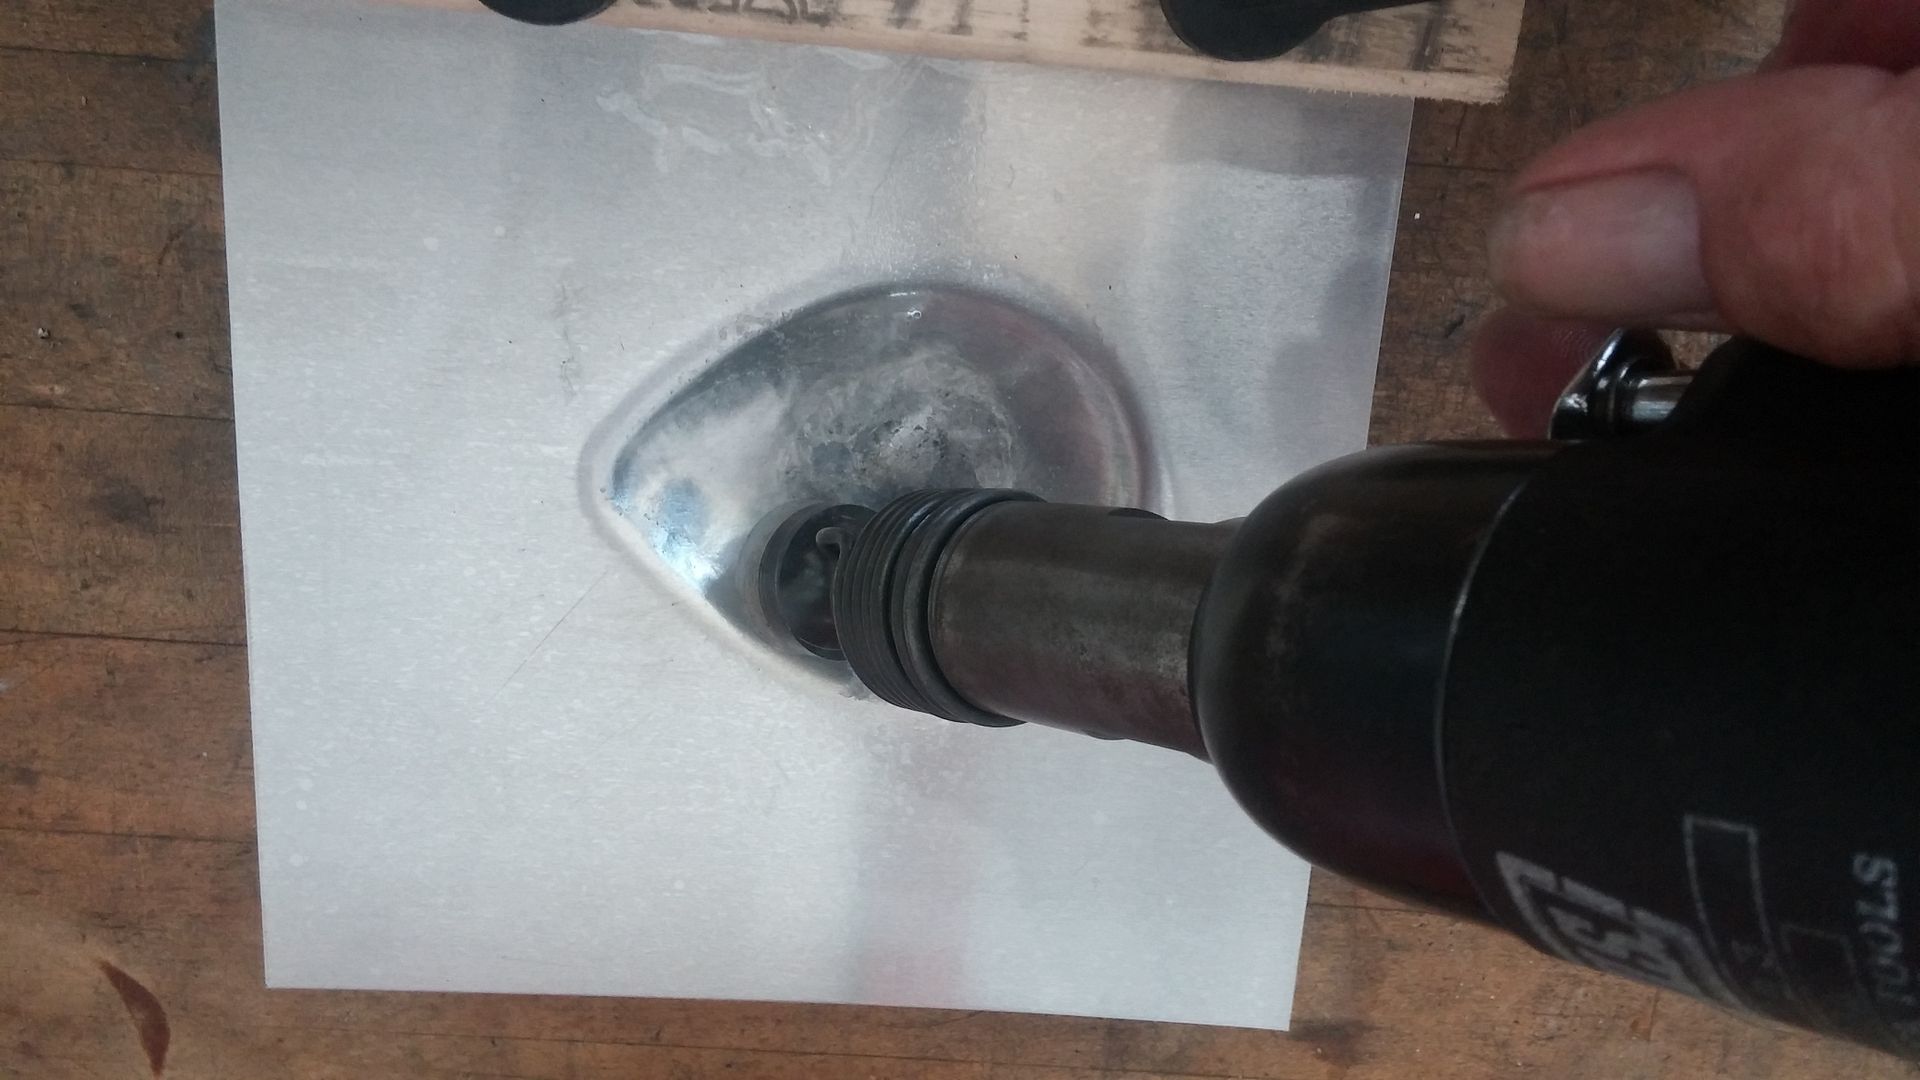
Clamped to the flow form block only on one side to allow metal to move as freely as possible as this is a deep draw. I may be wrong in process but it worked for me rather than a full perimeter clamp.
More Pullmax raising and stretching
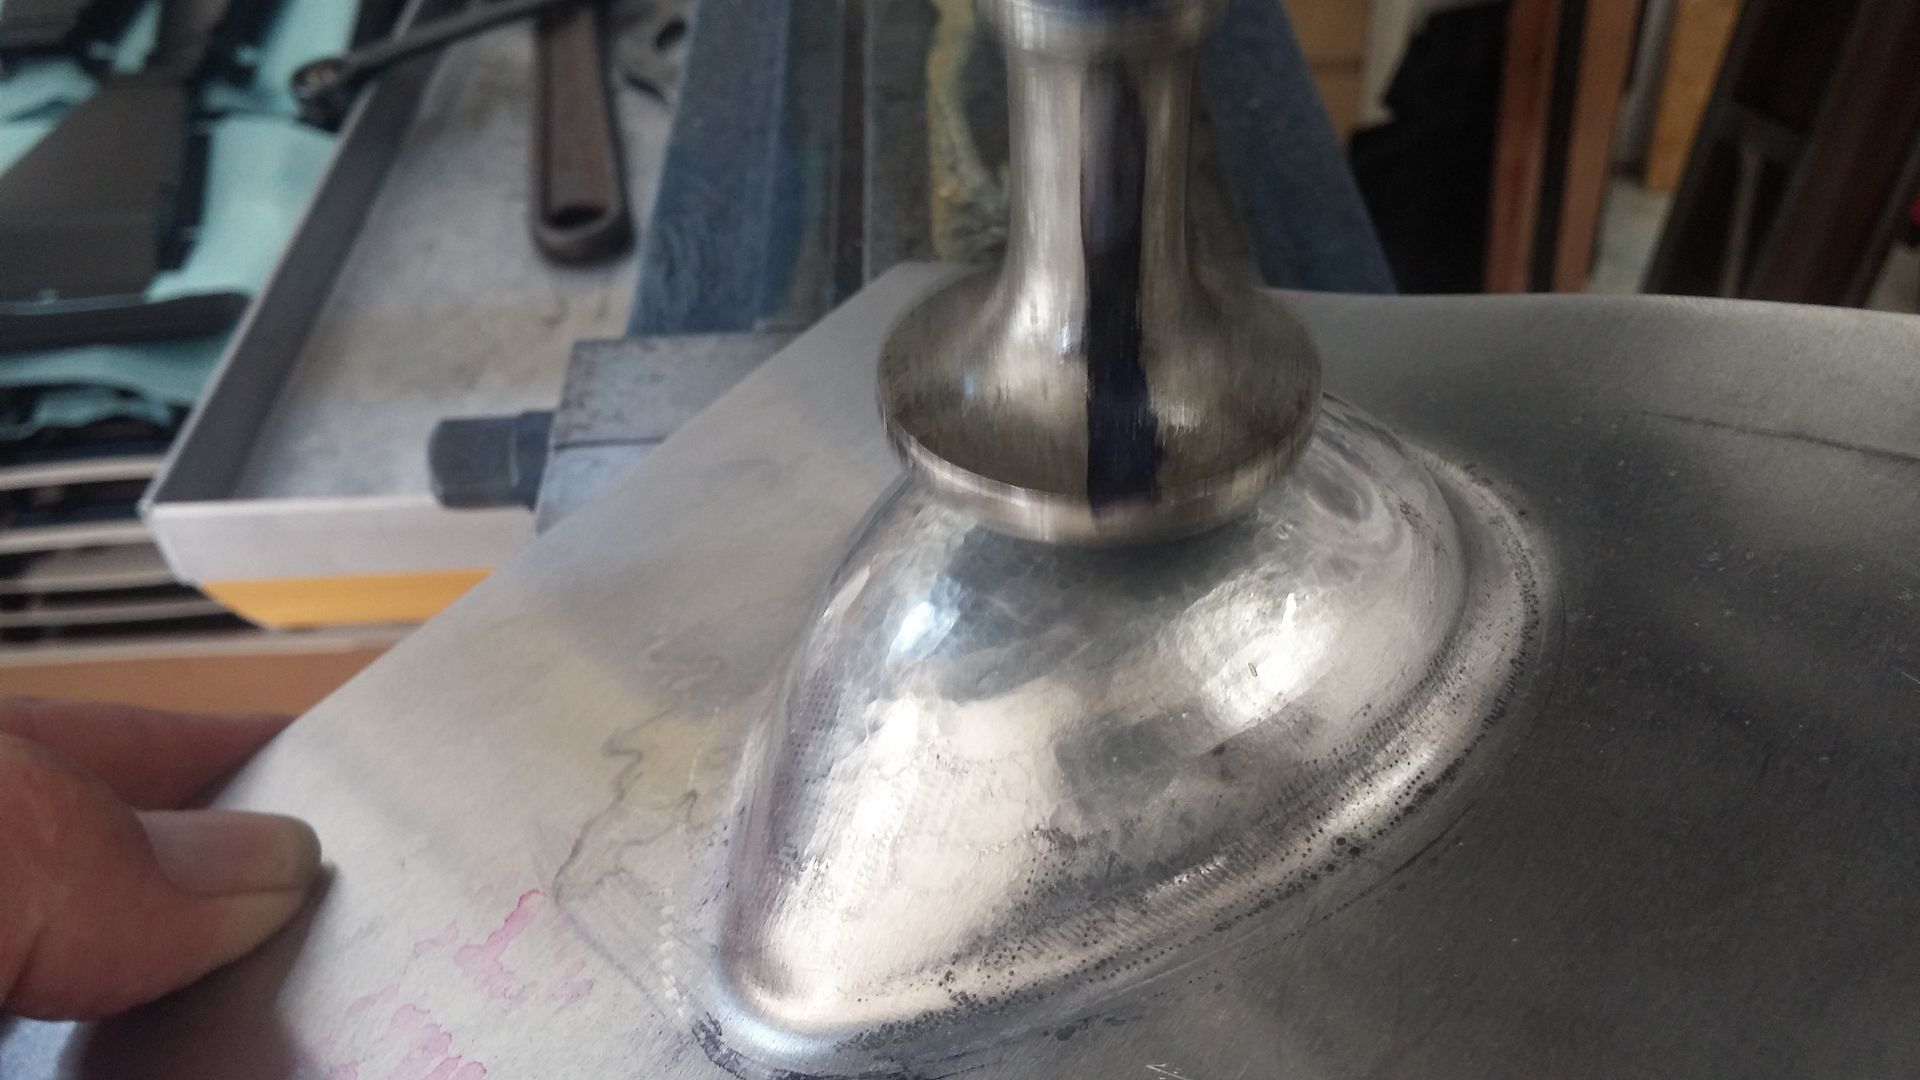
Then a couple more cycles like that and I finish in the female flow form with a tear drop poly hammer, some planishing by hand, hand surface finishing and now I have two.
Then back to the "figure 8" rivets to fill in rivet holes in a highly visible rib at the intake opening. I previously filled the #30 rivet holes that were actually drilled properly. These remaining required oversize. Then, when finished and painted, will look great from 5000 feet.

Random because I don't seem to have enough to do...div:

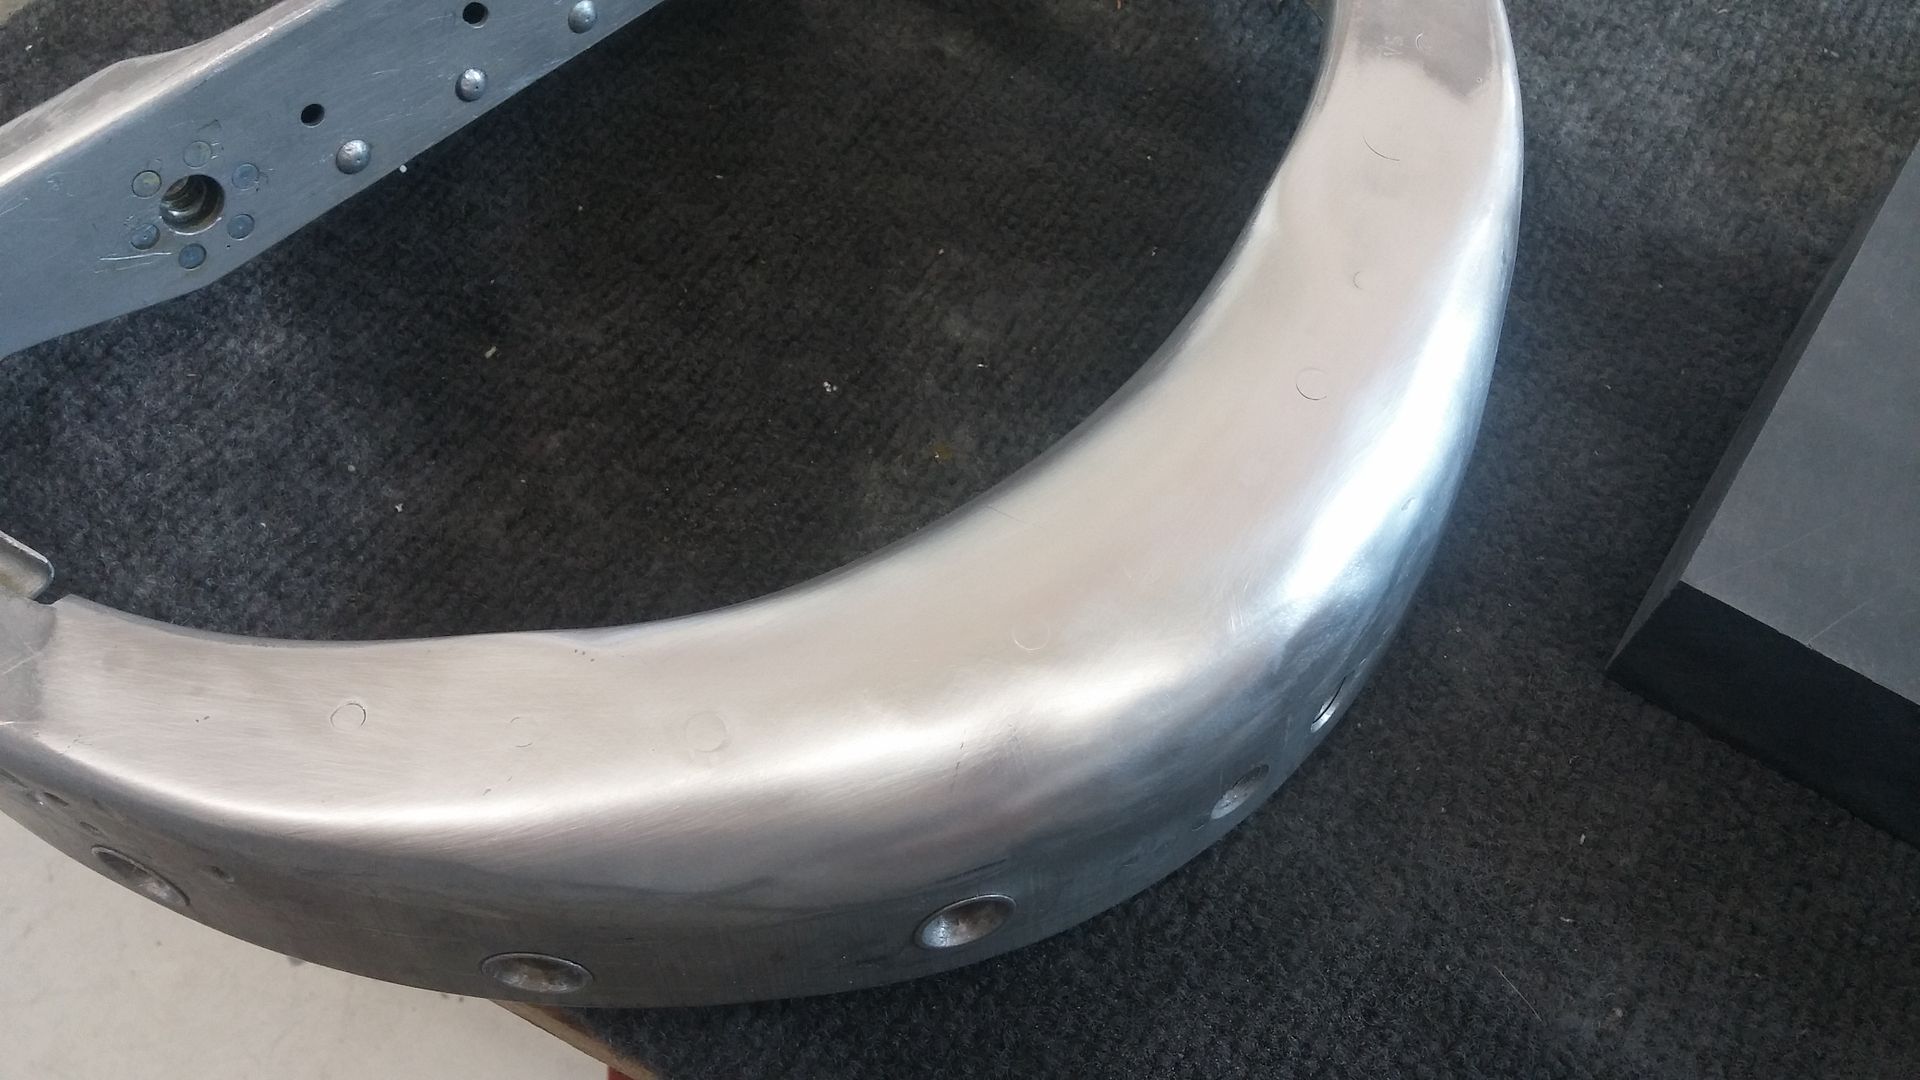
Hail damage wing tip leading edges.

This is the easy one as it is not too damaged. The owner will only accept perfection so we'll try this one to see
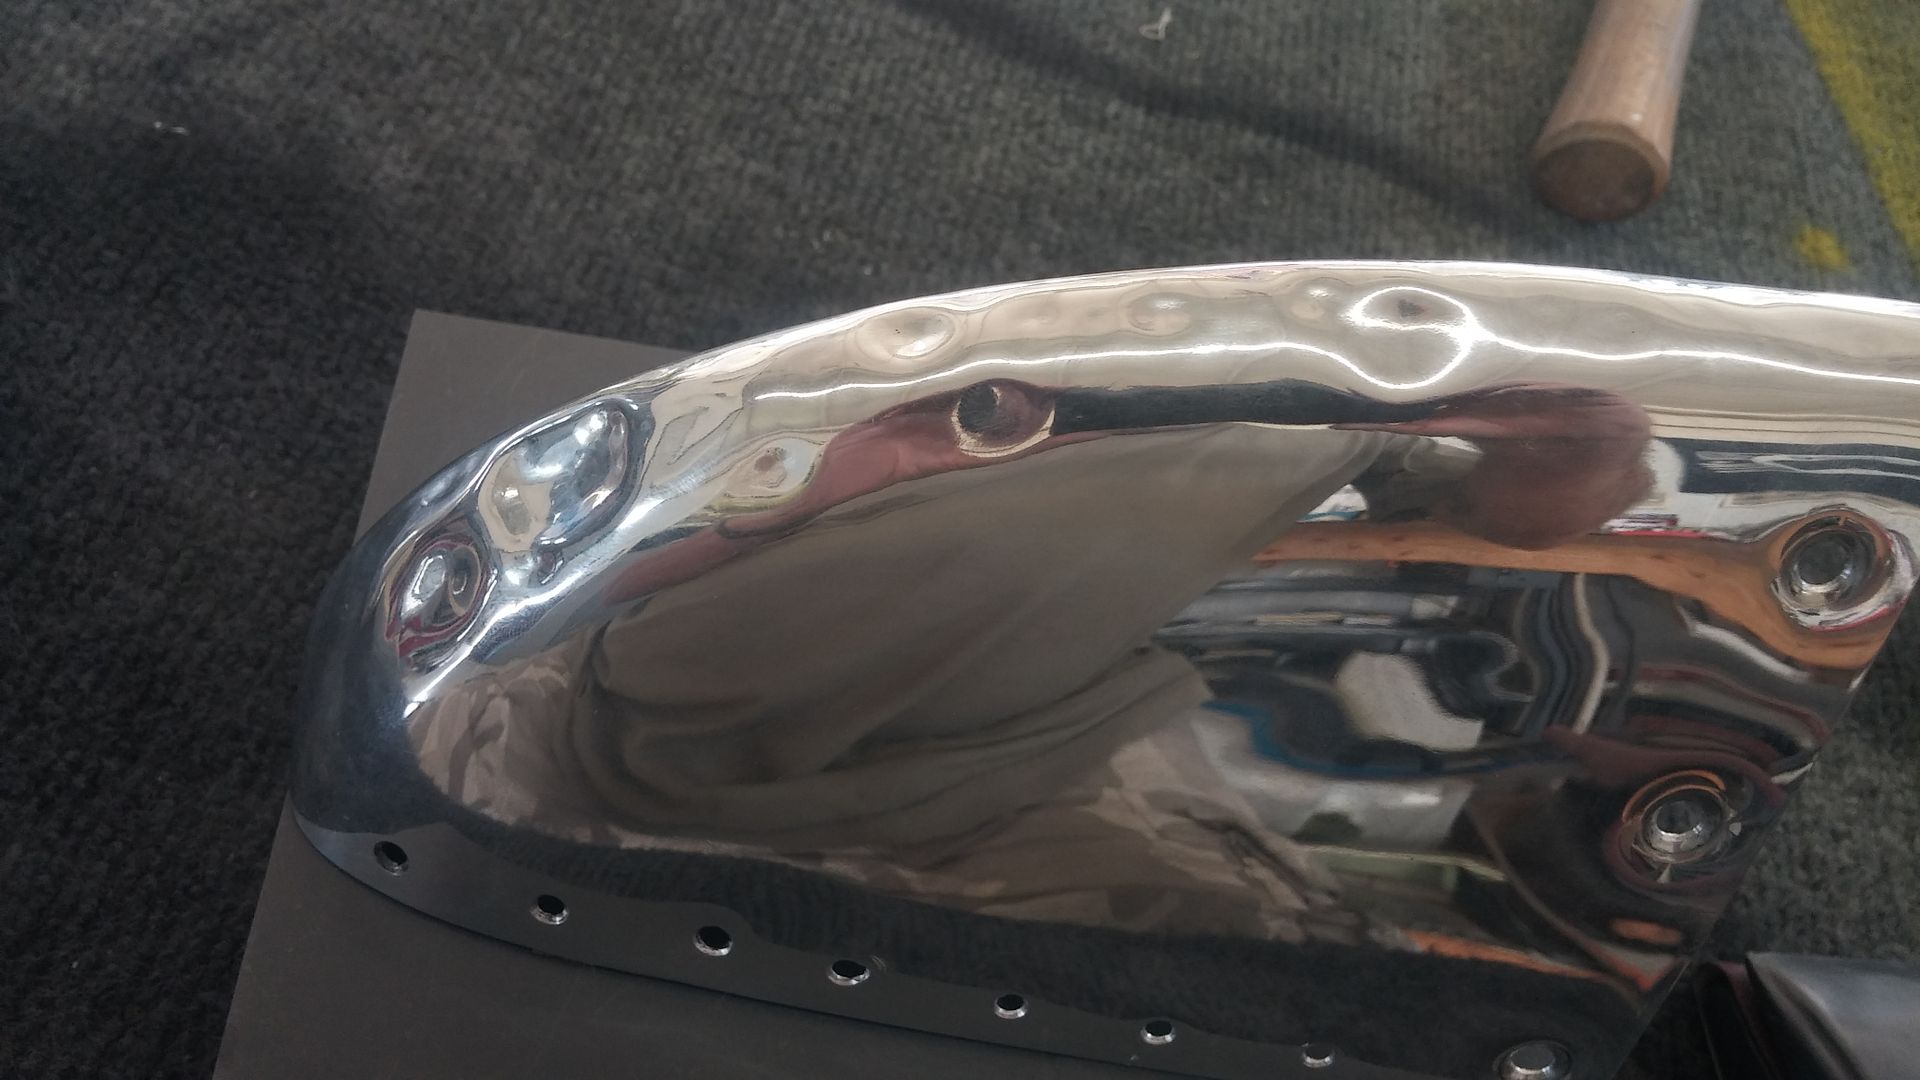
So far, so good
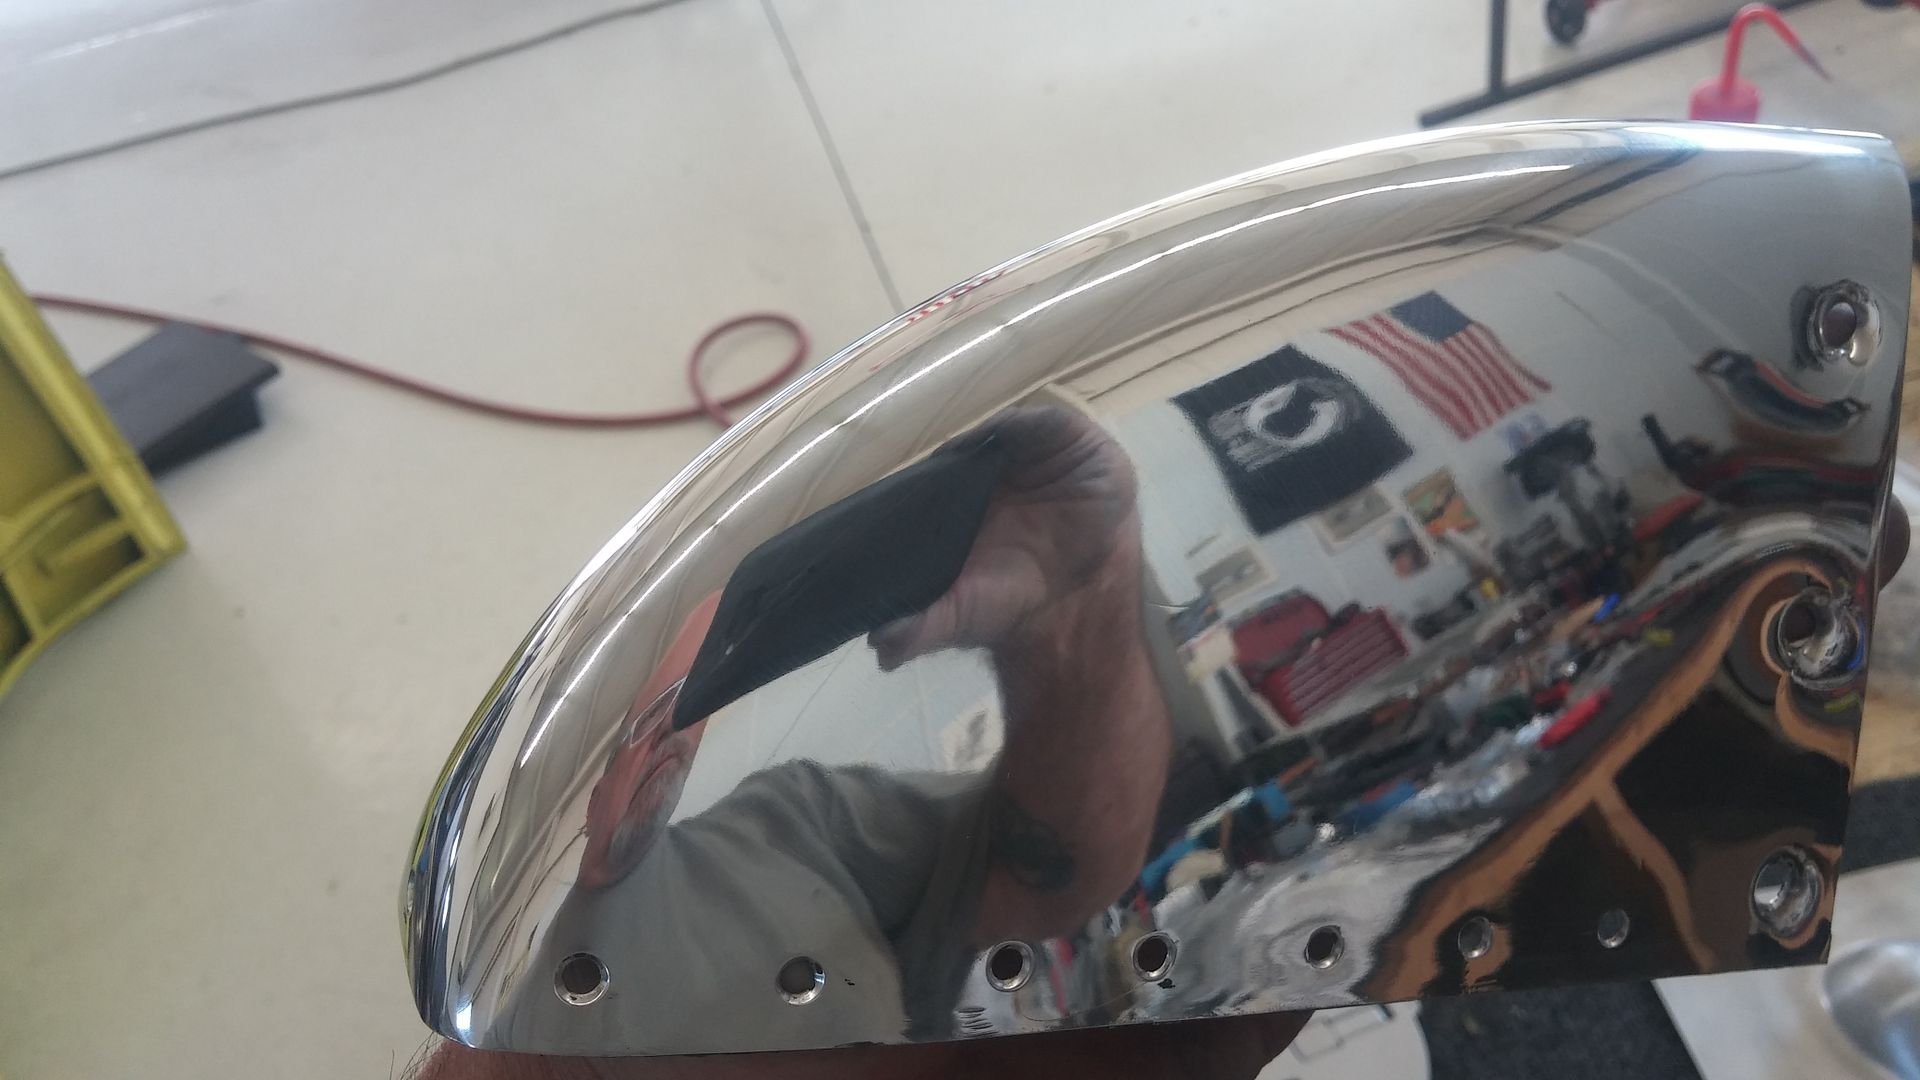
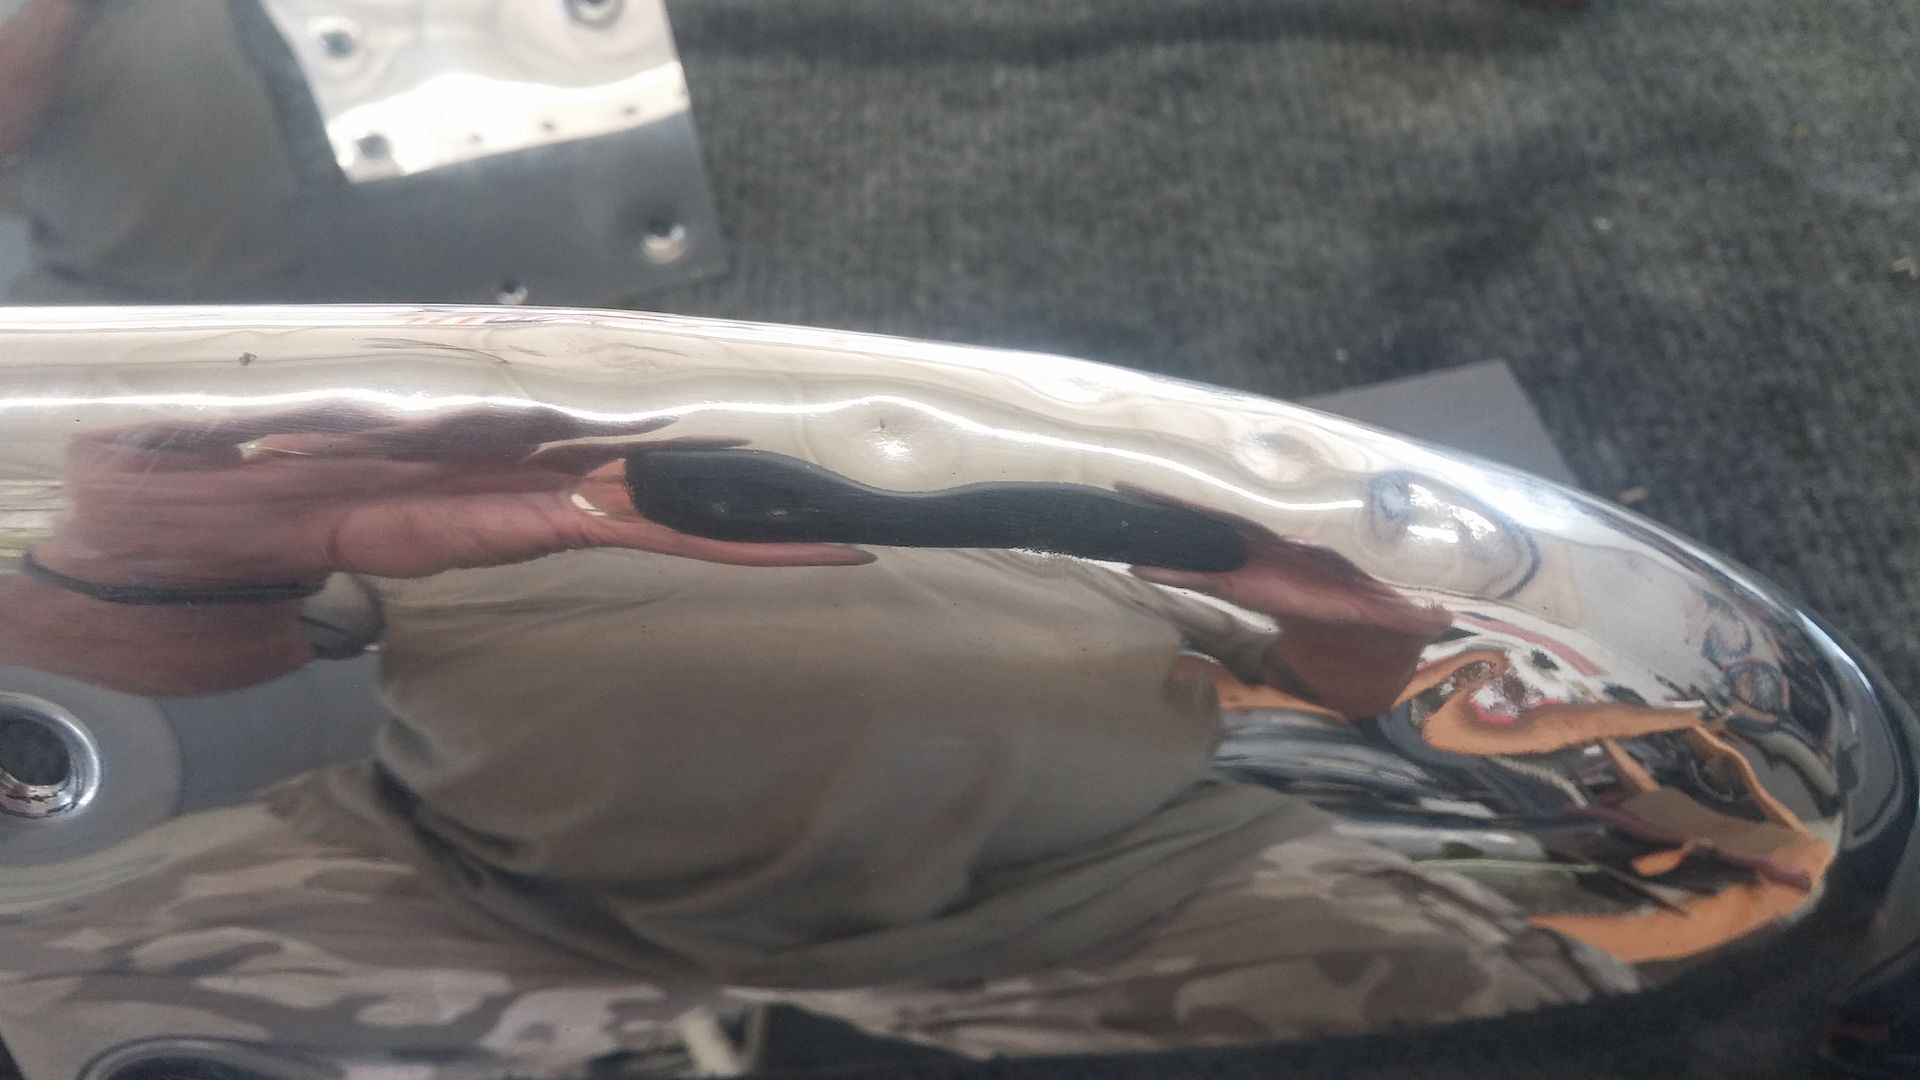
Gooder as new...

Next, the hard one, film at 11.