Re: Not sure, anybody interested?
Mon Jul 27, 2015 10:30 pm
B45 wrote:Hi Scott.
Thanks for that but I think we are at slightly crossed purpose and I think you do deserve the credit! I'm asking about the jigs and bucks you have used for the excellent sheet metal you do.
Ta
I'd have to go back in this thread to see what I have posted on this subject. I try to keep it all simple. I have found that PVC plate has been my best friend for form blocks. It is accurate, works well, can be drilled and tapped and takes reasonable impact much better than MDF and way less cost than aluminum.
Steel fixtures depend on the size of the part for material choice and wall thickness. I am in the smaller side of restoration so my stuff won't get over 1/4" wall usually. I am not making wing jigs or the like. Let me know if you have specific questions I can help you with. bear in mind, only my opinion. Bigger and more experienced and well known shops may have a different idea.
Re: Not sure, anybody interested?
Wed Jul 29, 2015 8:16 pm
Corsair Division:
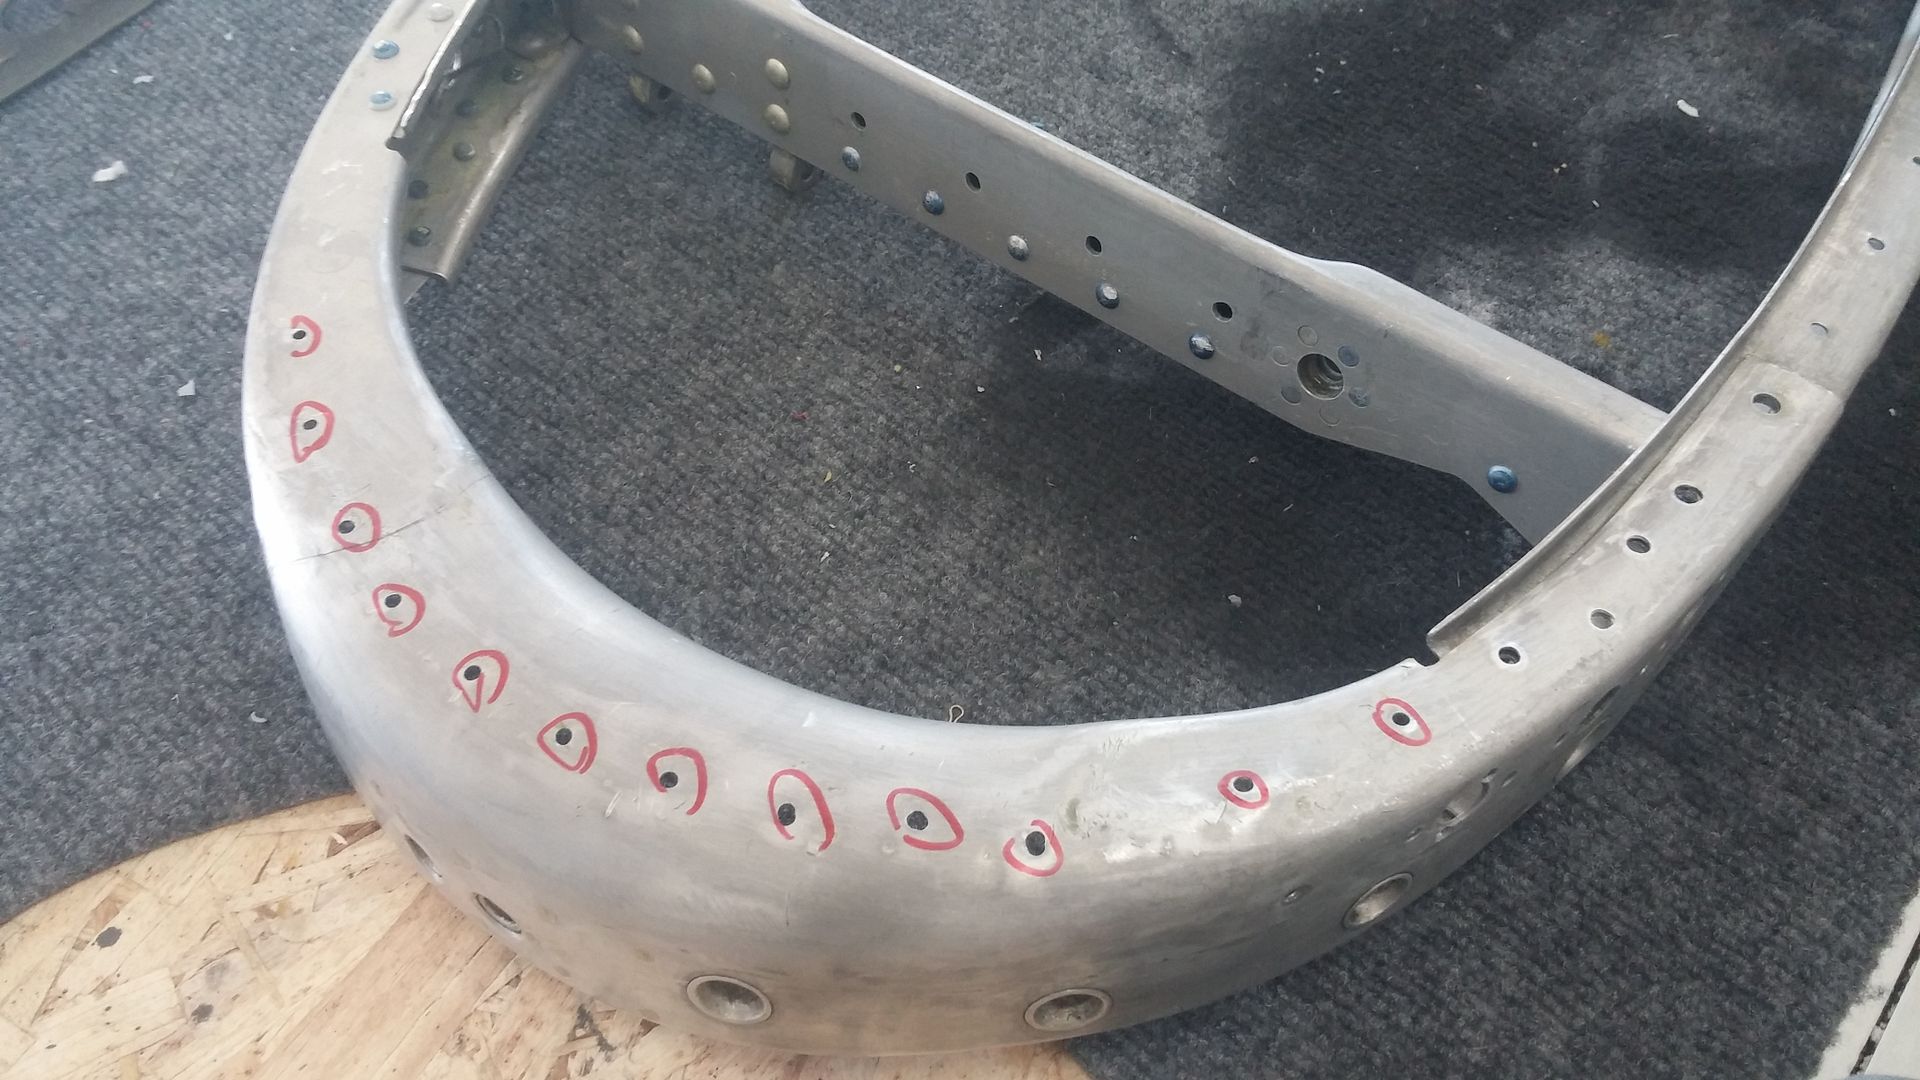
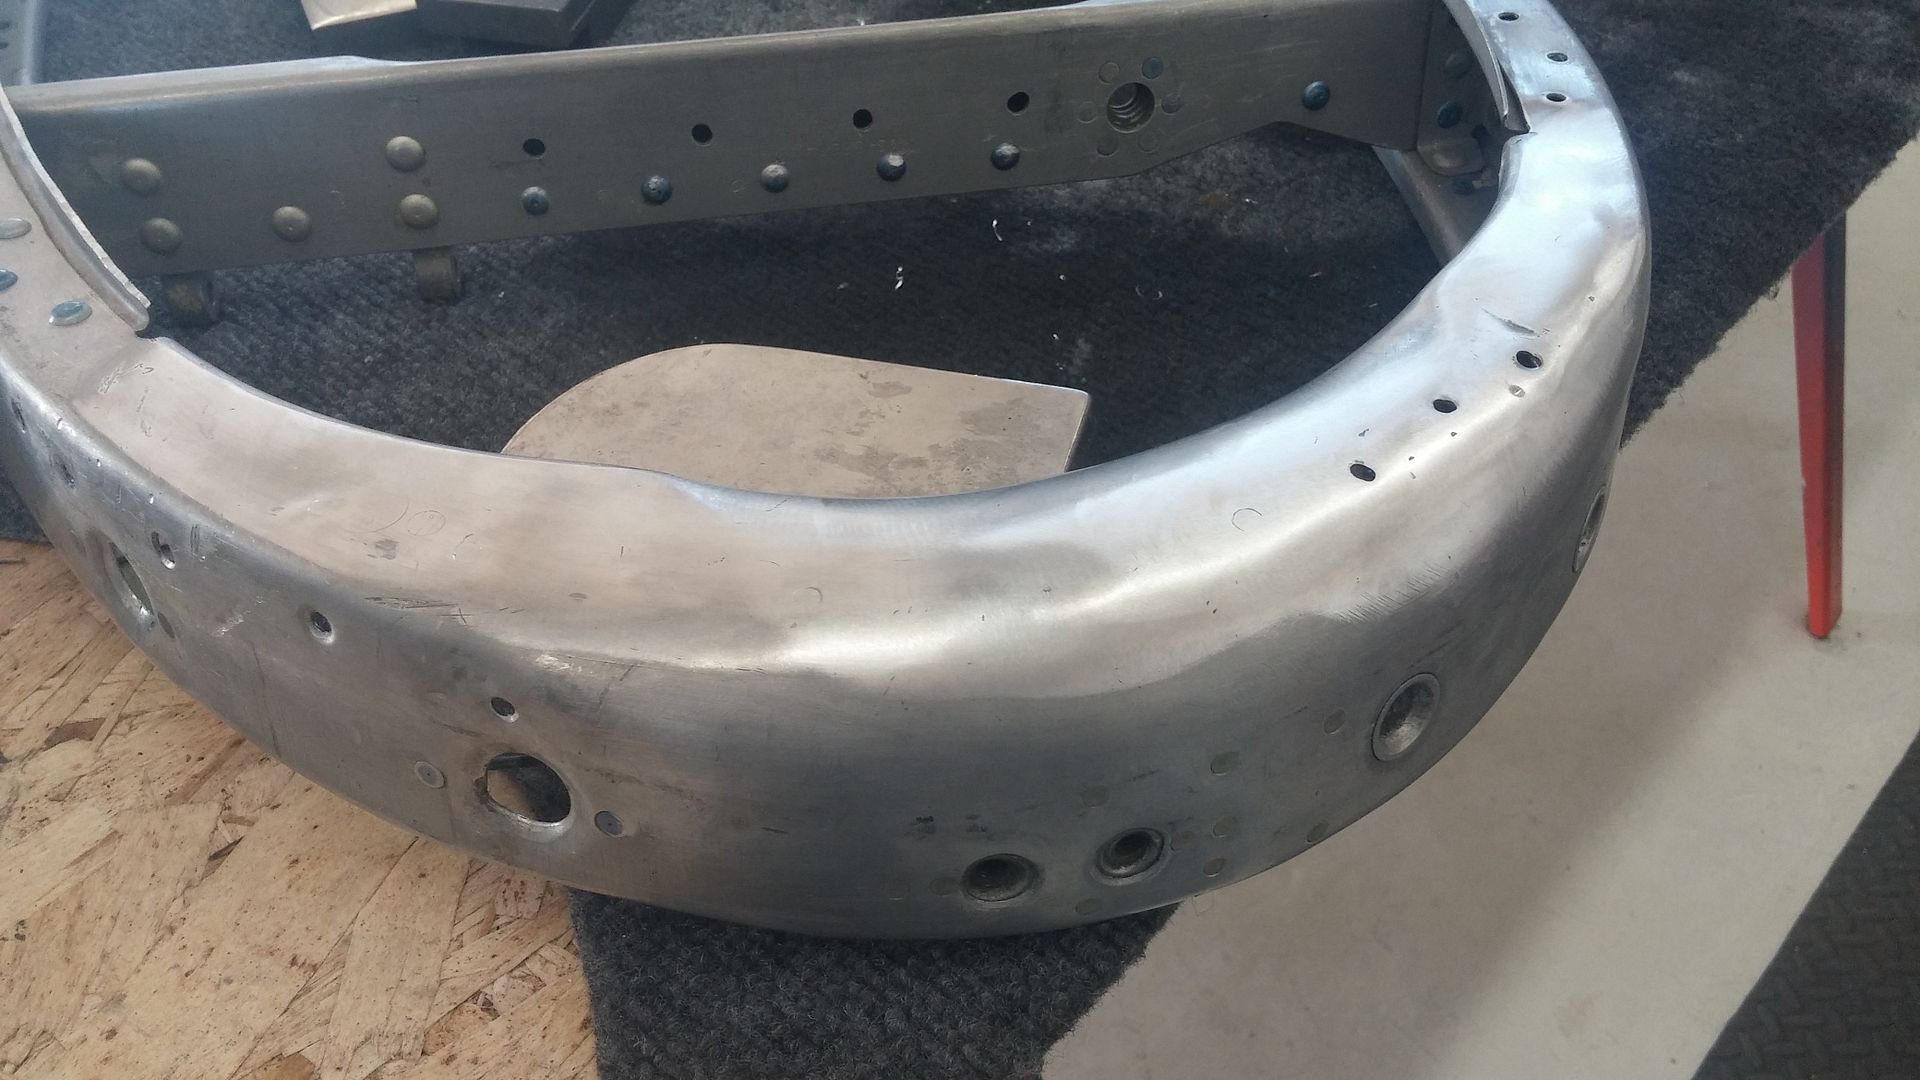
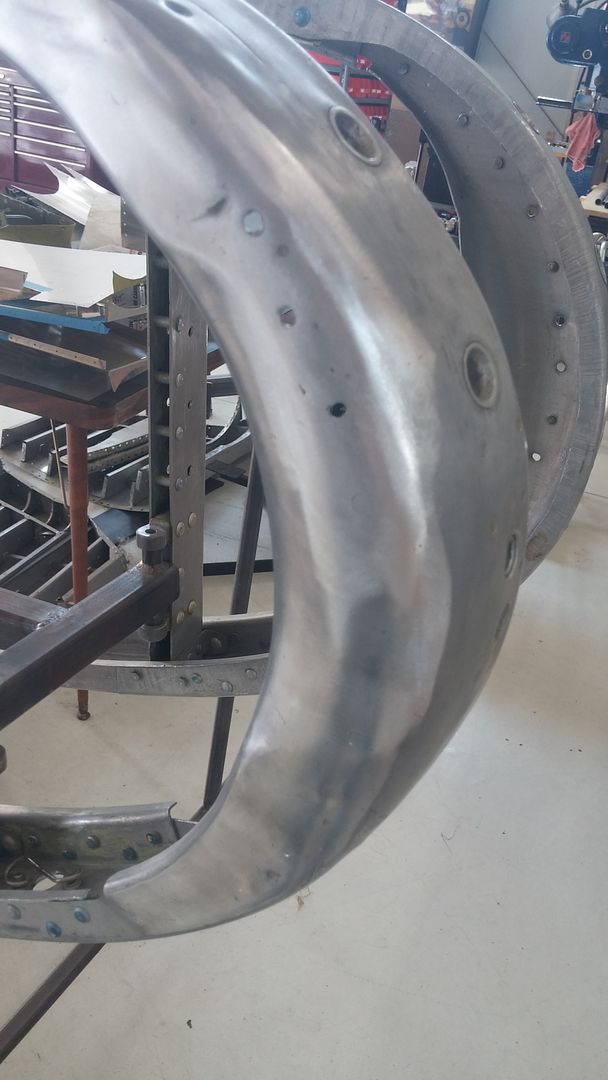
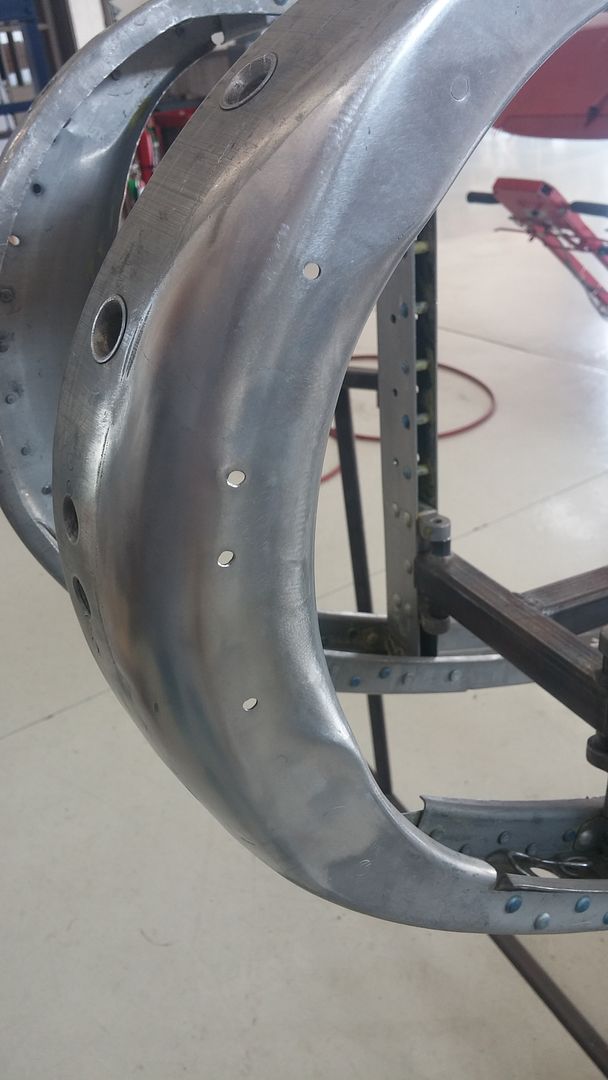
Finishing the inlet section rib requires undoing of the race mods. We decided to fill these extra "lightening holes" and body work the dents as this is a section highly visible when the plane is together. Unfortunately, I had a brain fart and didn't take the after picture tonight but will post it tomorrow.
Still looking for figure eight shank rivets for the holes the racers could not drill on center...
Saber Division:
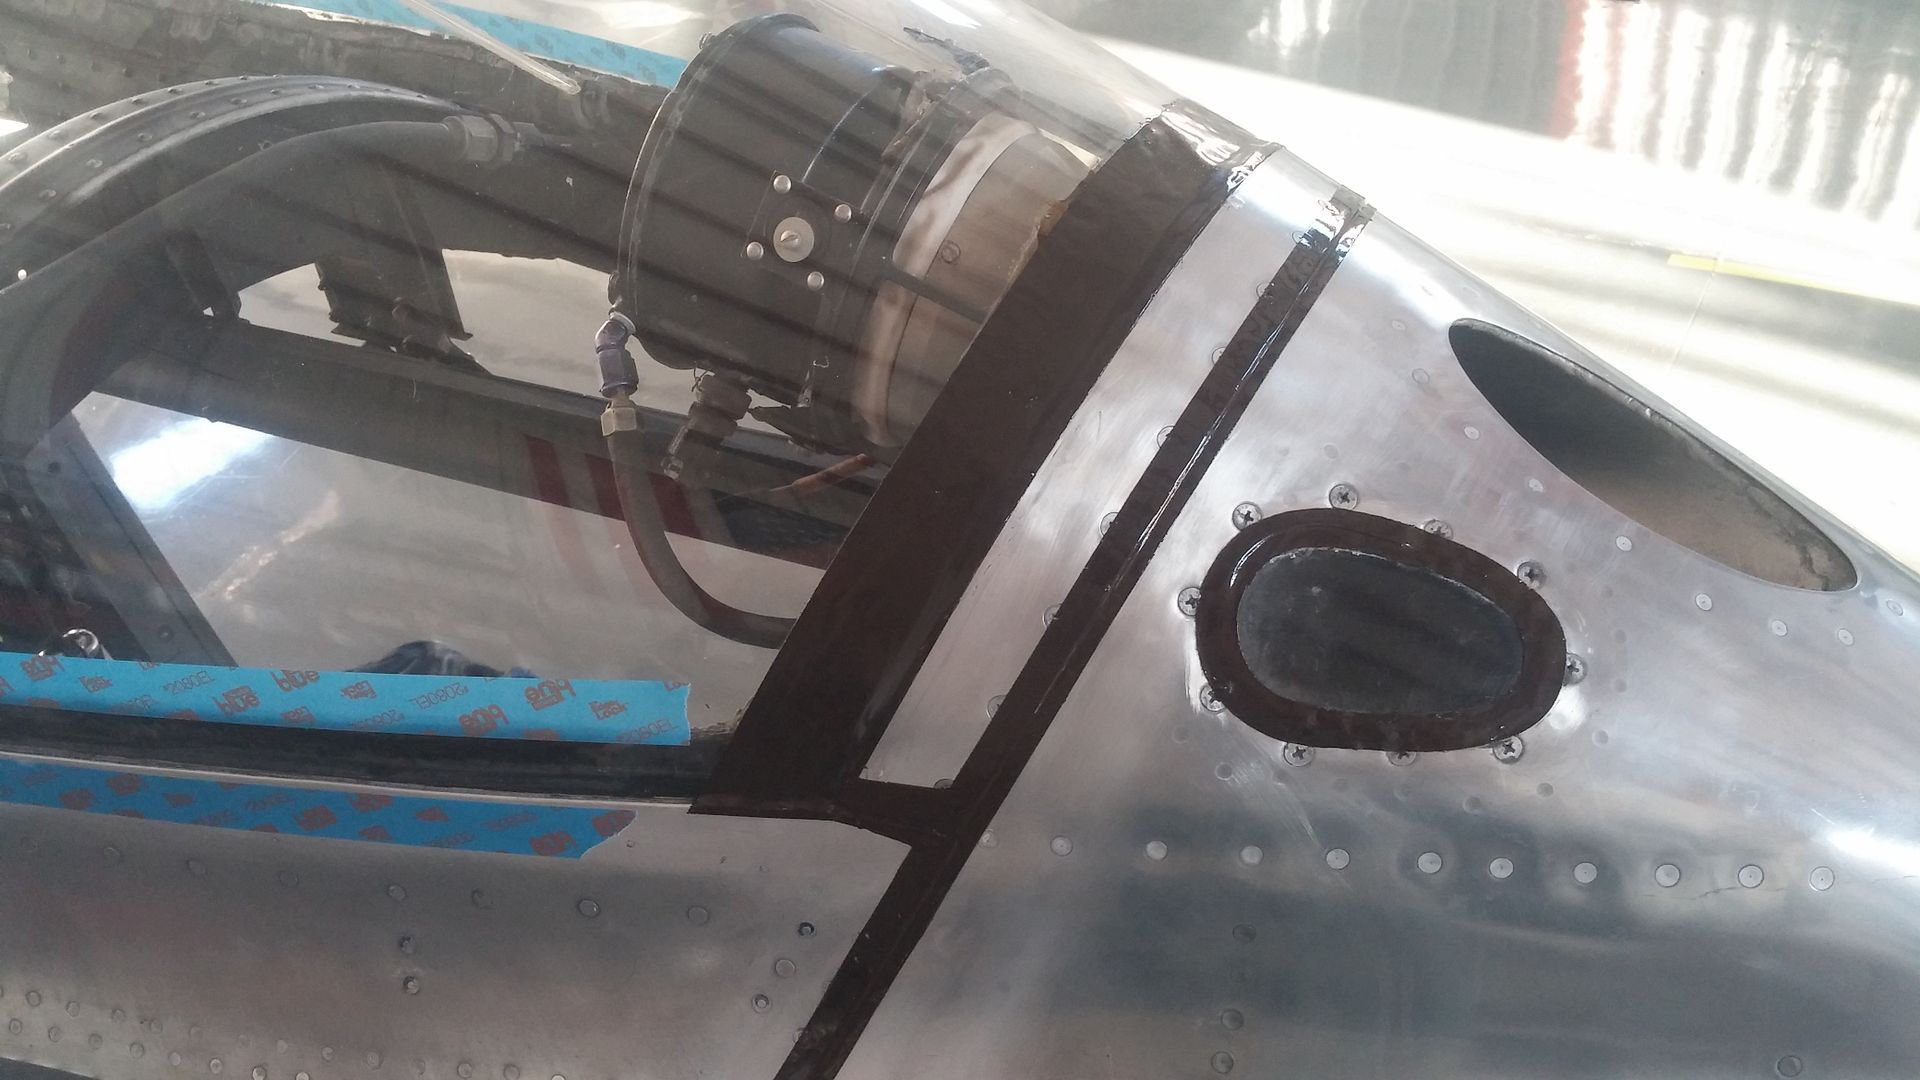
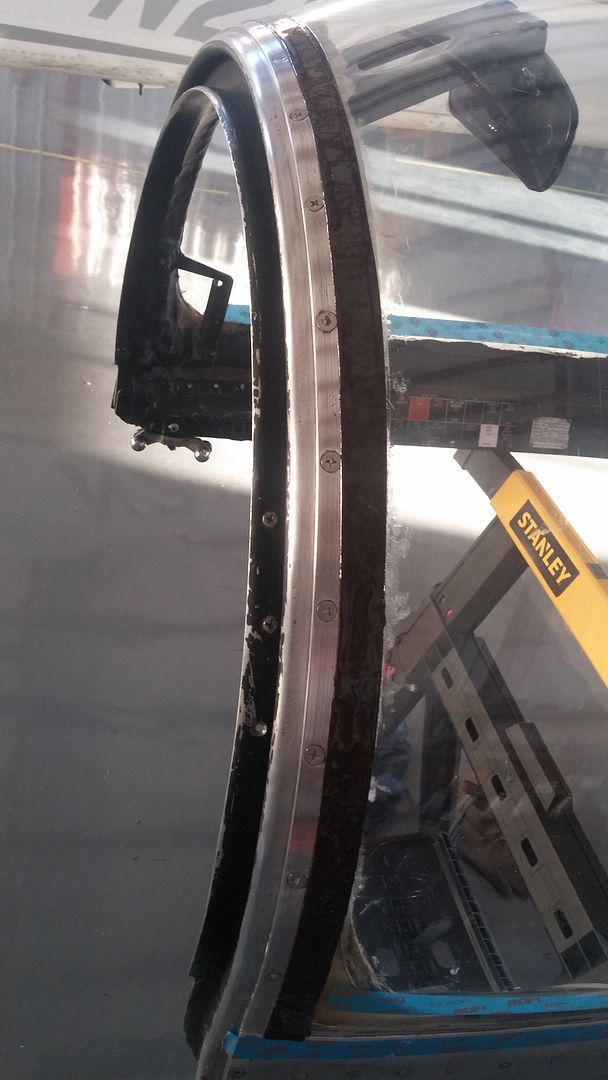
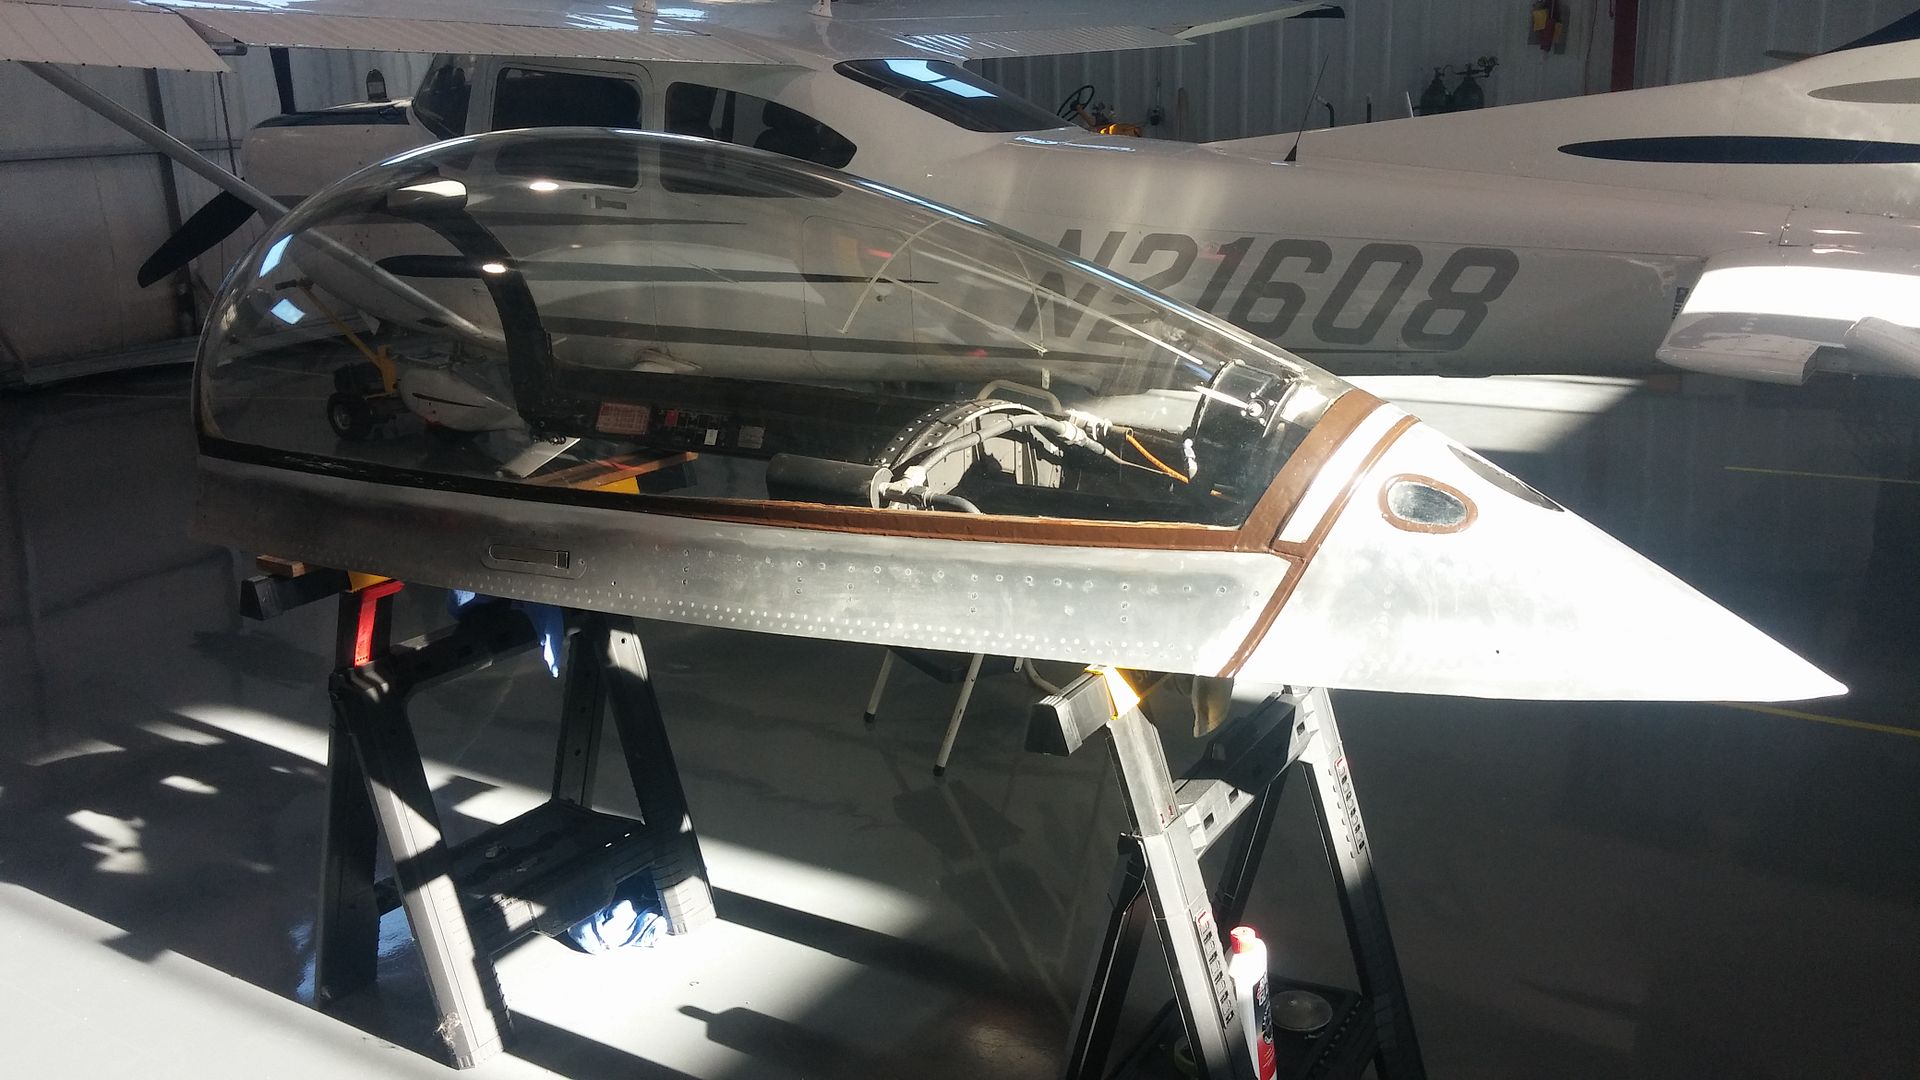
The canopy needs to be resealed where the plexiglass meets the aluminum frame. This is some truly nasty stuff and needs to be thick on the seal but can't be applied too thick as it will run. Multiple coats should work. Masking tape needs to be pulled at the right time before fully hardened and too soft to leave a sharp line.
Finishing the inlet section rib requires undoing of the race mods. We decided to fill these extra "lightening holes" and body work the dents as this is a section highly visible when the plane is together. Unfortunately, I had a brain fart and didn't take the after picture tonight but will post it tomorrow.
Still looking for figure eight shank rivets for the holes the racers could not drill on center...

Saber Division:
The canopy needs to be resealed where the plexiglass meets the aluminum frame. This is some truly nasty stuff and needs to be thick on the seal but can't be applied too thick as it will run. Multiple coats should work. Masking tape needs to be pulled at the right time before fully hardened and too soft to leave a sharp line.


Re: Not sure, anybody interested?
Thu Jul 30, 2015 9:10 pm
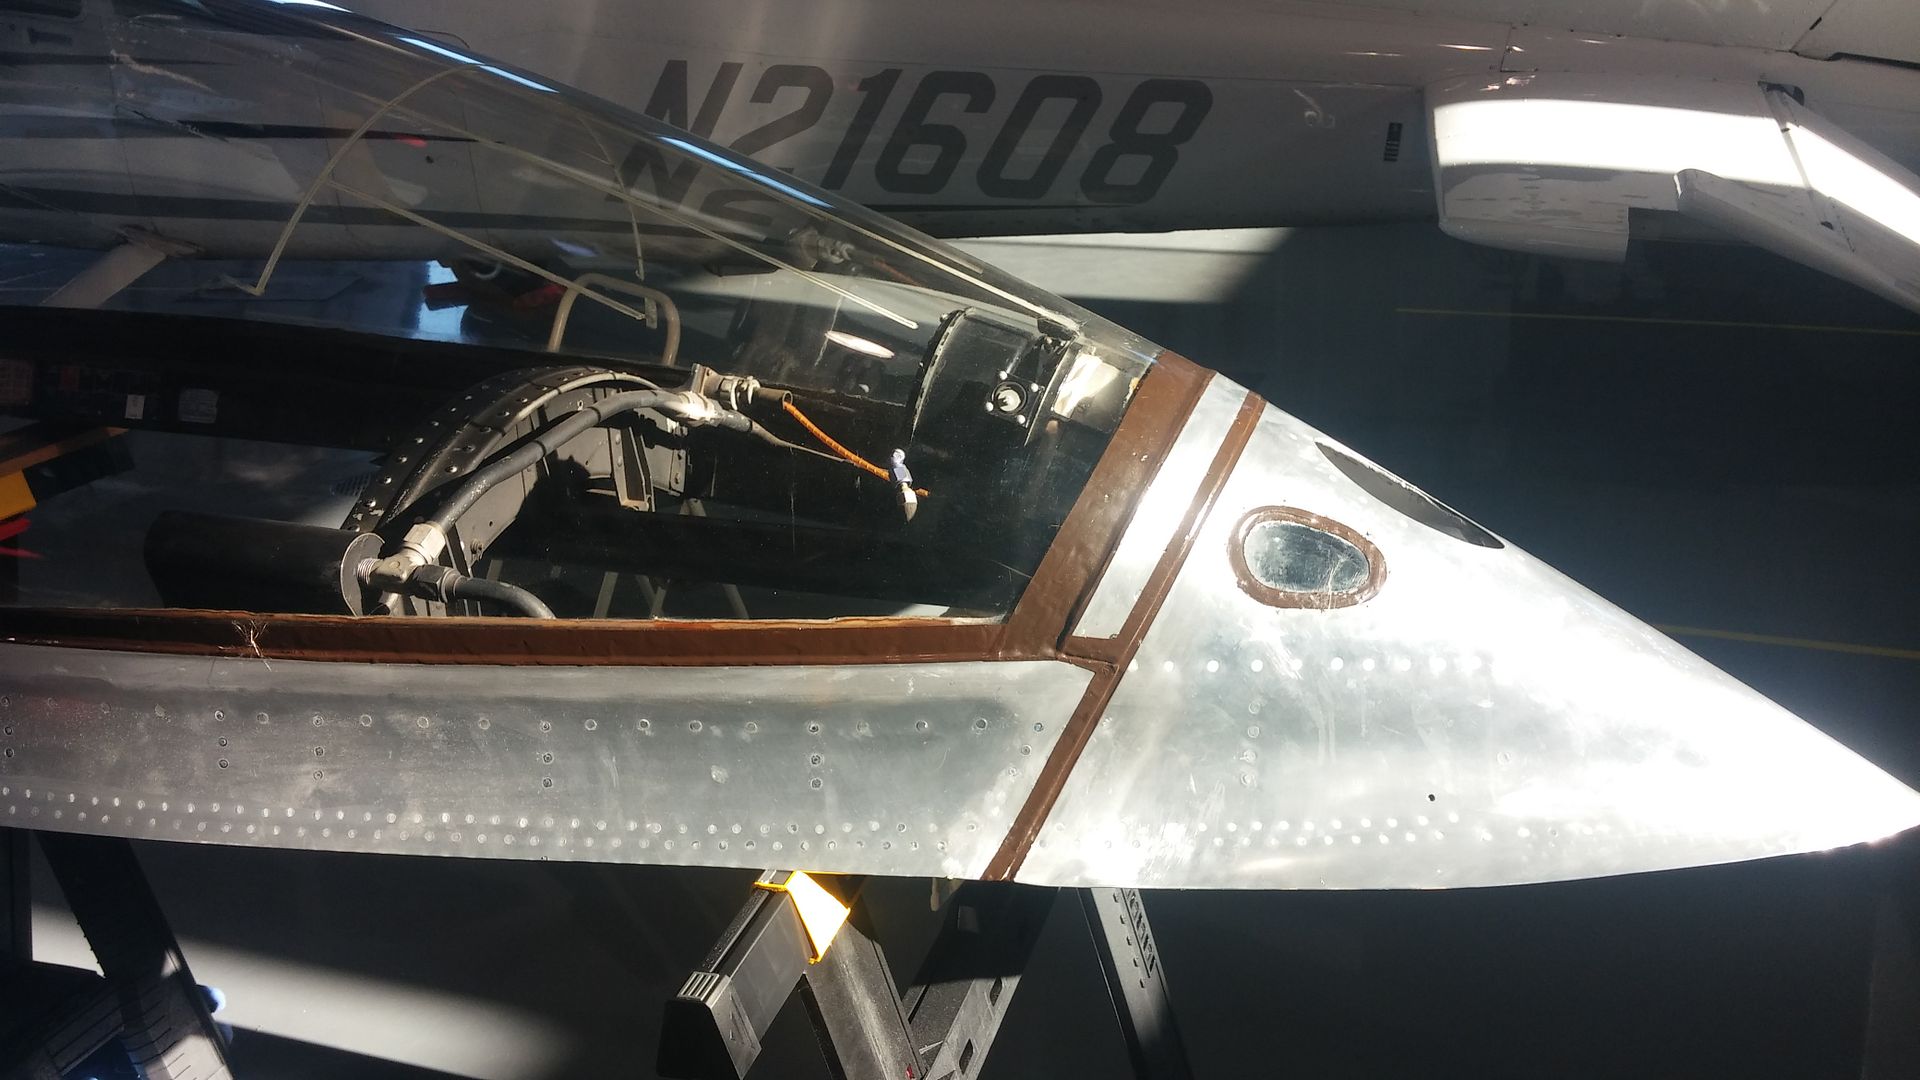
Continuing with the Sabre canopy reseal, it seems that when the stuff cures, it is actually brown as the spec says. Maybe it was the light that made it look darker, sorry if I mislead anyone. No matter as the frame assembly will be all painted red.
Corsair Division:
Waiting for the figure 8 shank rivets to be delivered...but filled all the #30 holes, knocked out dents and damage so these will finish and show nicely. Highly visible on the Corsair and I want ours to look "perfect".
Corsair aileron bits to come. Out outboard hinges were cut off when the ailerons were shortened. So, all new bits made less the outside cover plates. Guess what these may help me do...sorry, no ponies available to the winner.
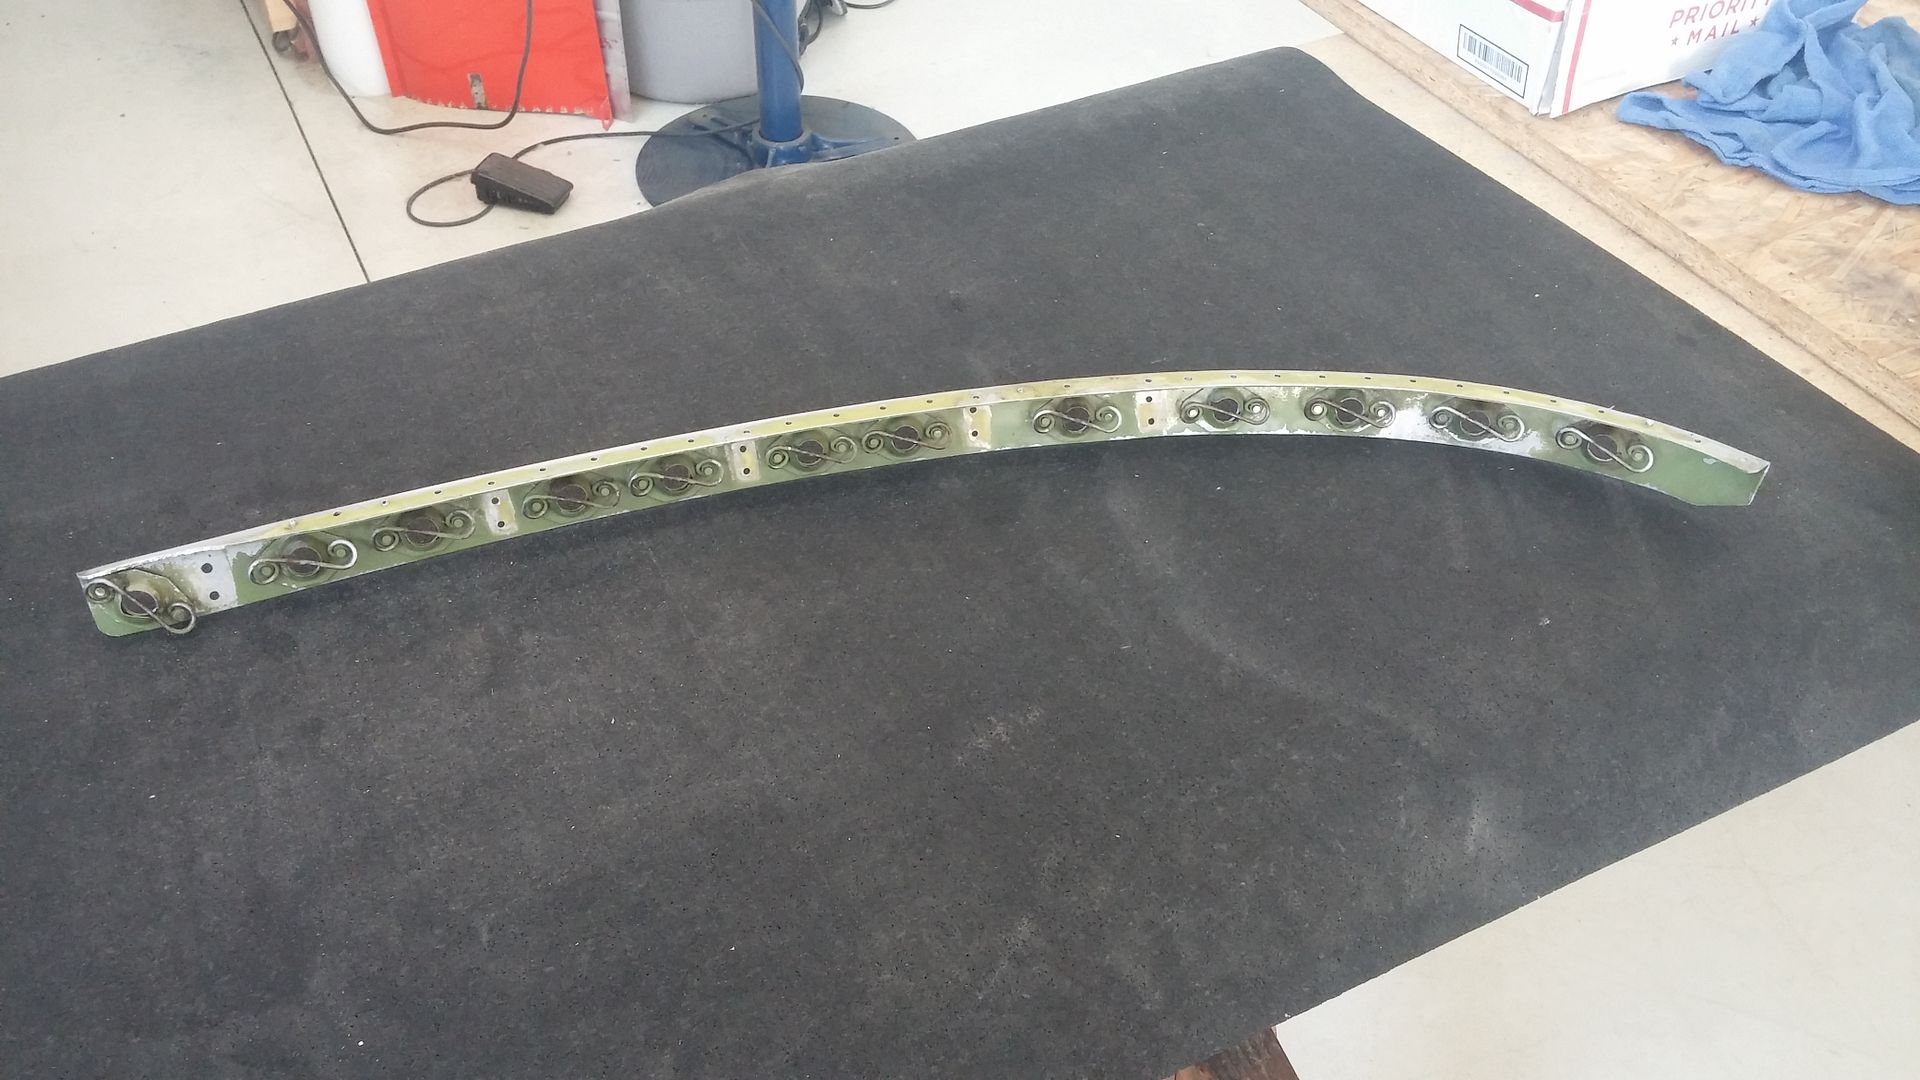
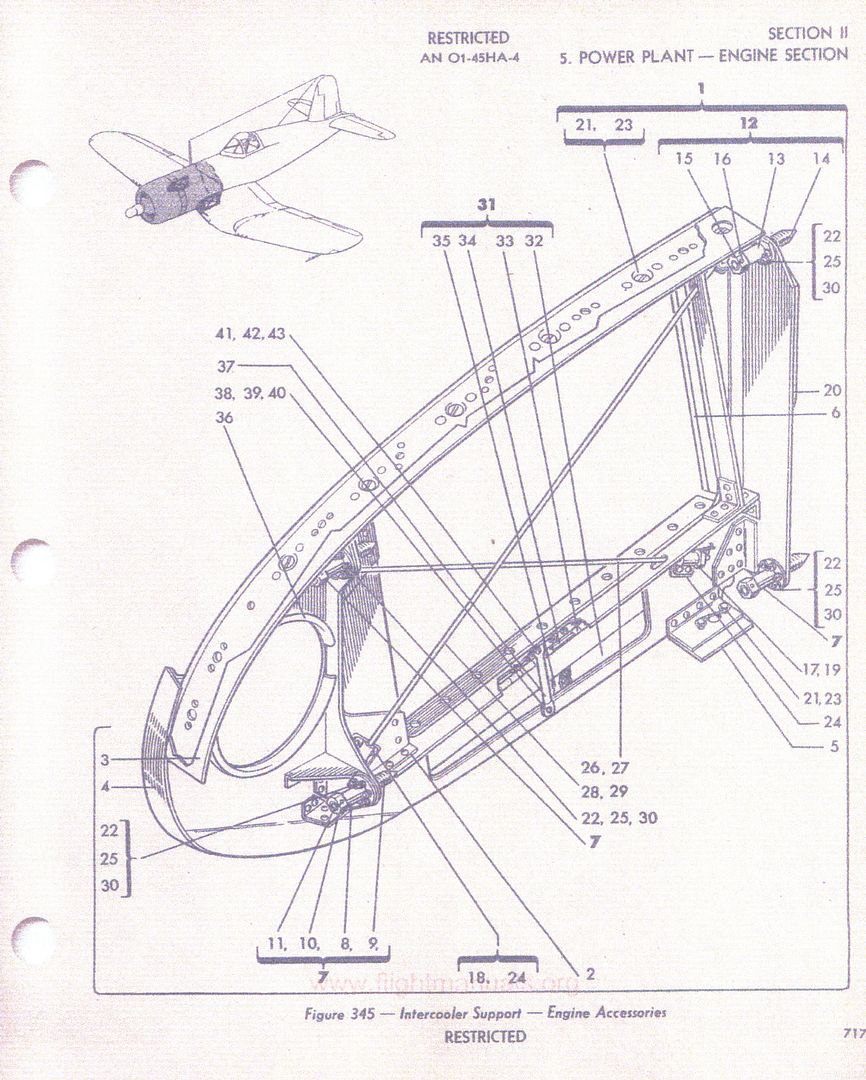
Next is typical of what the center section project has been like. We will need to make the intercooler supports in some variant as we will not be using the intercoolers. However, as I have said about my machining projects, remove everything that doesn't look like the part, in this case, build everything that does look like what we want but...no detail sub-component drawings or parts to copy. Here is what we have to start with, the upper curved angle.
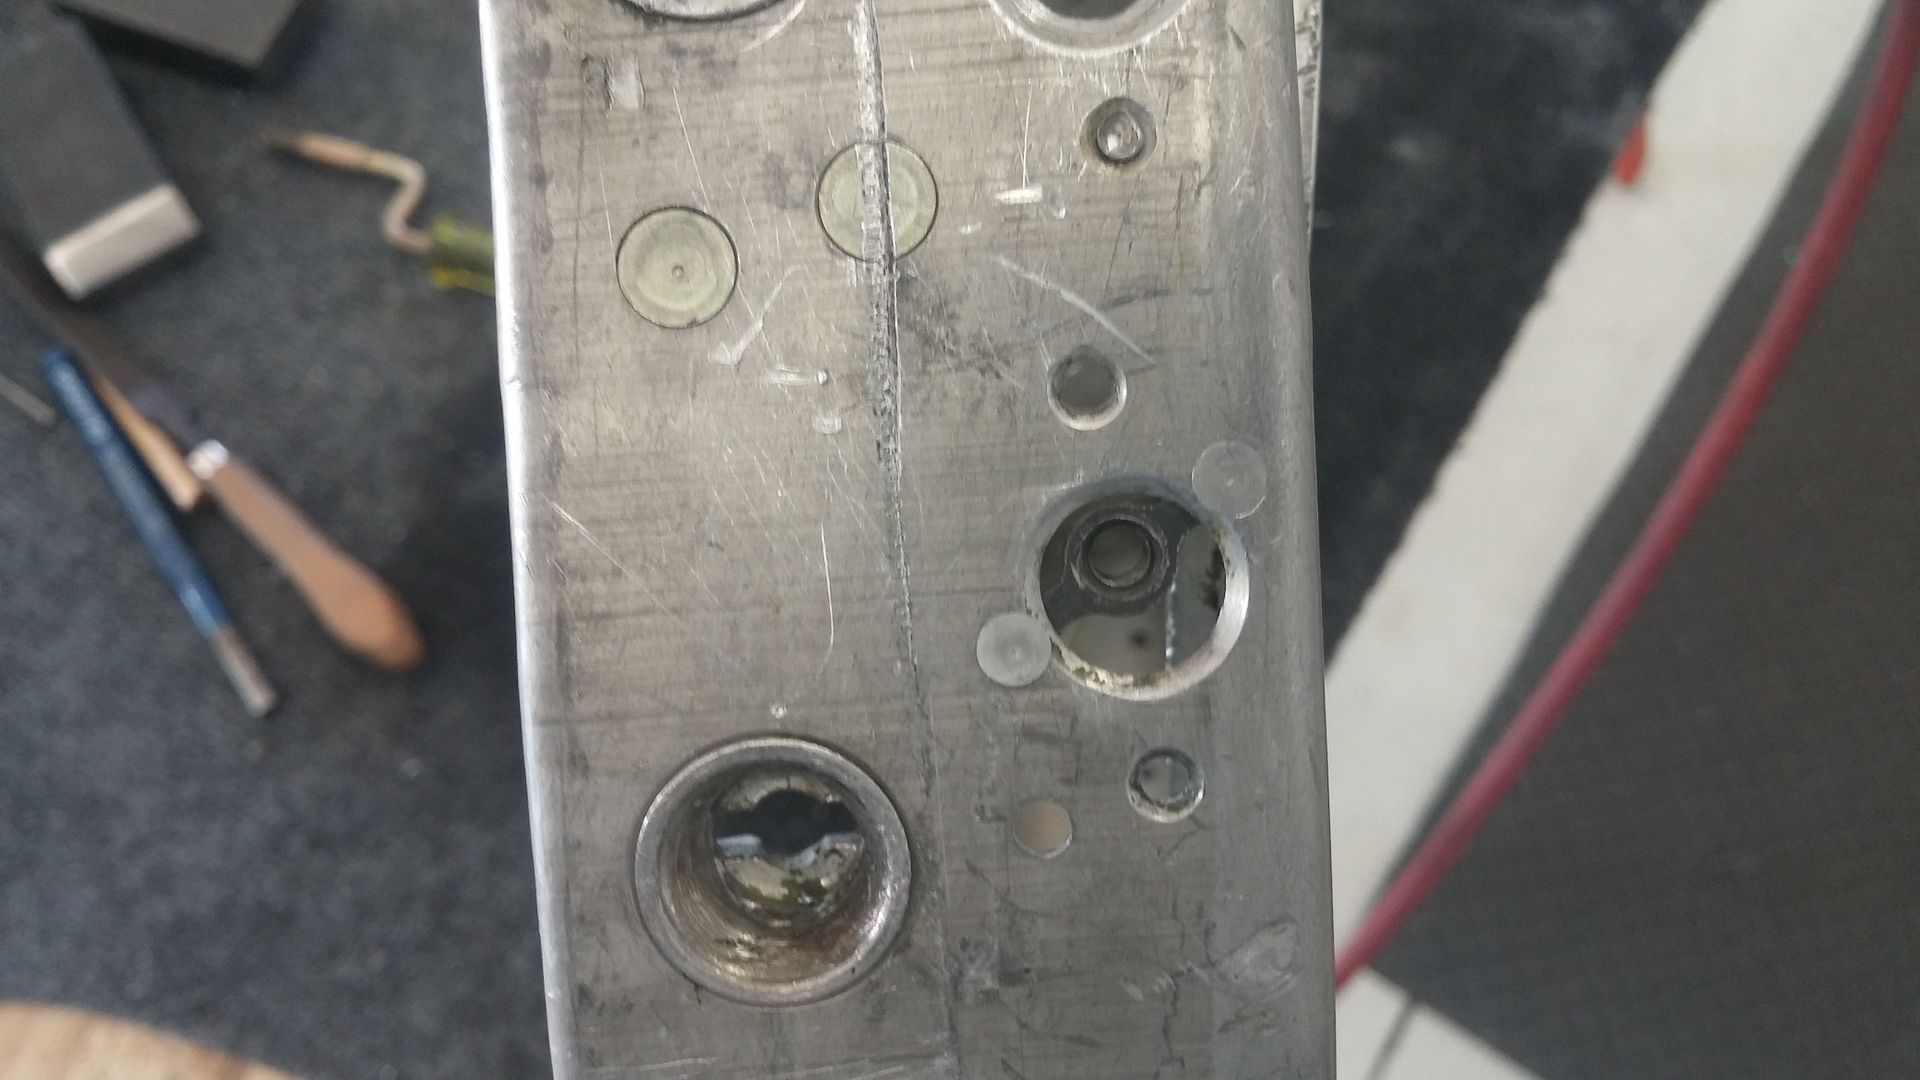
Leave you with a great high strength application of a nut plate for racing...


Corsair Division:
Waiting for the figure 8 shank rivets to be delivered...but filled all the #30 holes, knocked out dents and damage so these will finish and show nicely. Highly visible on the Corsair and I want ours to look "perfect".


Corsair aileron bits to come. Out outboard hinges were cut off when the ailerons were shortened. So, all new bits made less the outside cover plates. Guess what these may help me do...sorry, no ponies available to the winner.

Next is typical of what the center section project has been like. We will need to make the intercooler supports in some variant as we will not be using the intercoolers. However, as I have said about my machining projects, remove everything that doesn't look like the part, in this case, build everything that does look like what we want but...no detail sub-component drawings or parts to copy.


Leave you with a great high strength application of a nut plate for racing...

Re: Not sure, anybody interested?
Fri Jul 31, 2015 8:46 pm
Sabre Div.:
Sorry to use screen shots from a video but, we have a Canadair Mk VI Sabre that did time in South Africa. The ejection seat is made by Goodyear, I think, but tagged Canadair. Our question is about the non-standard angle iron bracket extending above the head rest. The headrest has been cut down and a u shaped cut out made. There is a tube of some sort tying the bracket to the shelf on the head rest. It does not appear to be structural but maybe a conduit for electrical wiring? Is that knob a light? Game on! Thanks.
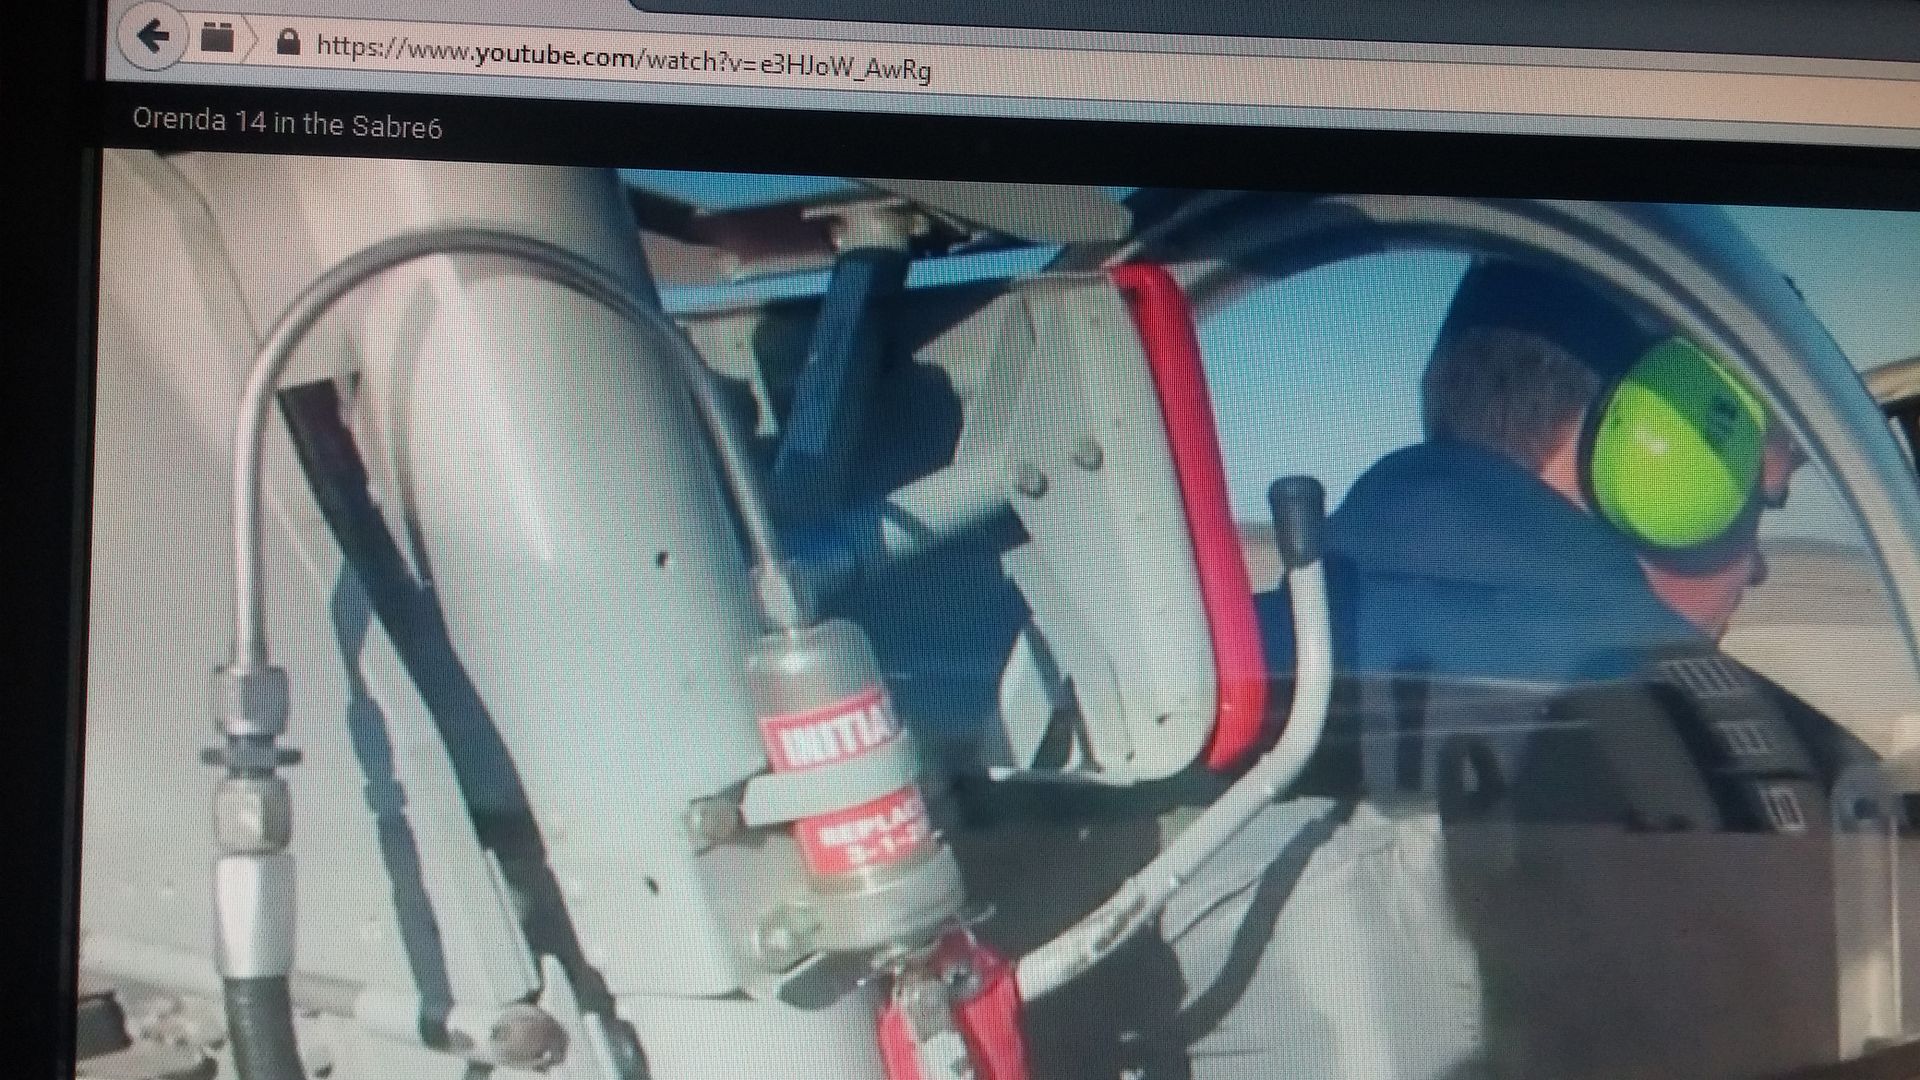
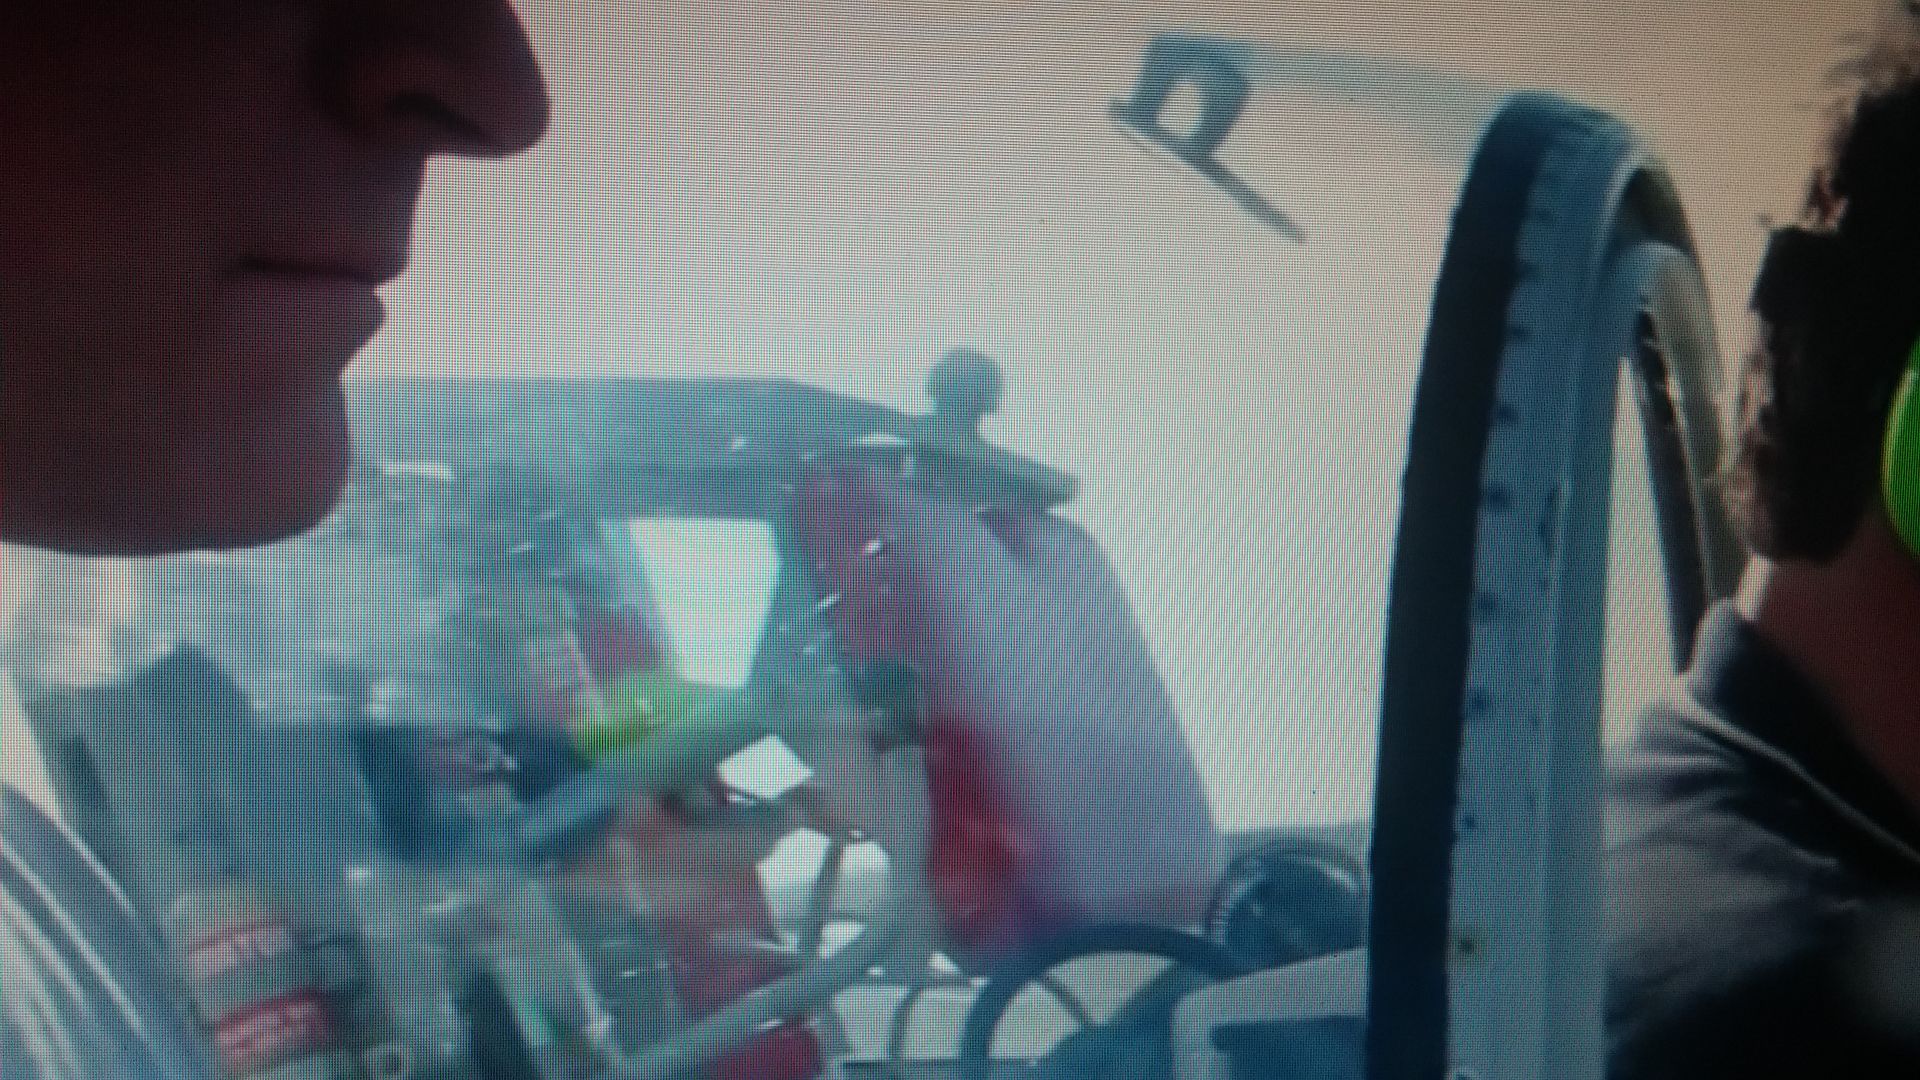
This might be a SA mod. I have a shot of our sister ship with the same and all of these have it.
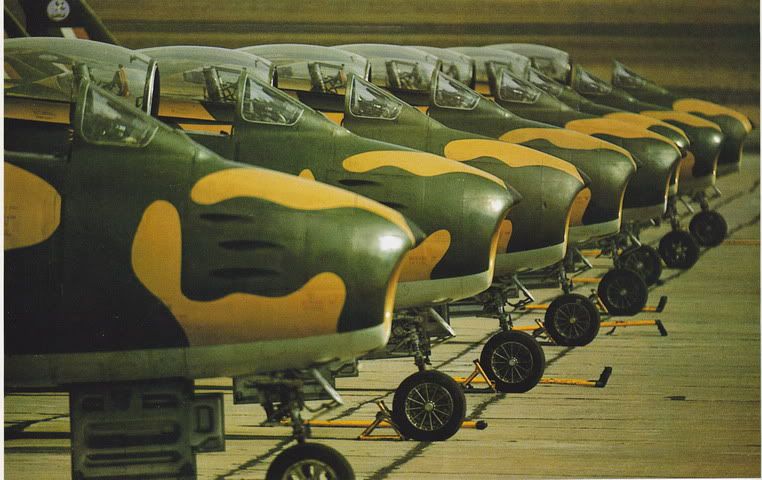
Sorry to use screen shots from a video but, we have a Canadair Mk VI Sabre that did time in South Africa. The ejection seat is made by Goodyear, I think, but tagged Canadair. Our question is about the non-standard angle iron bracket extending above the head rest. The headrest has been cut down and a u shaped cut out made. There is a tube of some sort tying the bracket to the shelf on the head rest. It does not appear to be structural but maybe a conduit for electrical wiring? Is that knob a light? Game on! Thanks.


This might be a SA mod. I have a shot of our sister ship with the same and all of these have it.

Re: Not sure, anybody interested?
Fri Jul 31, 2015 8:52 pm
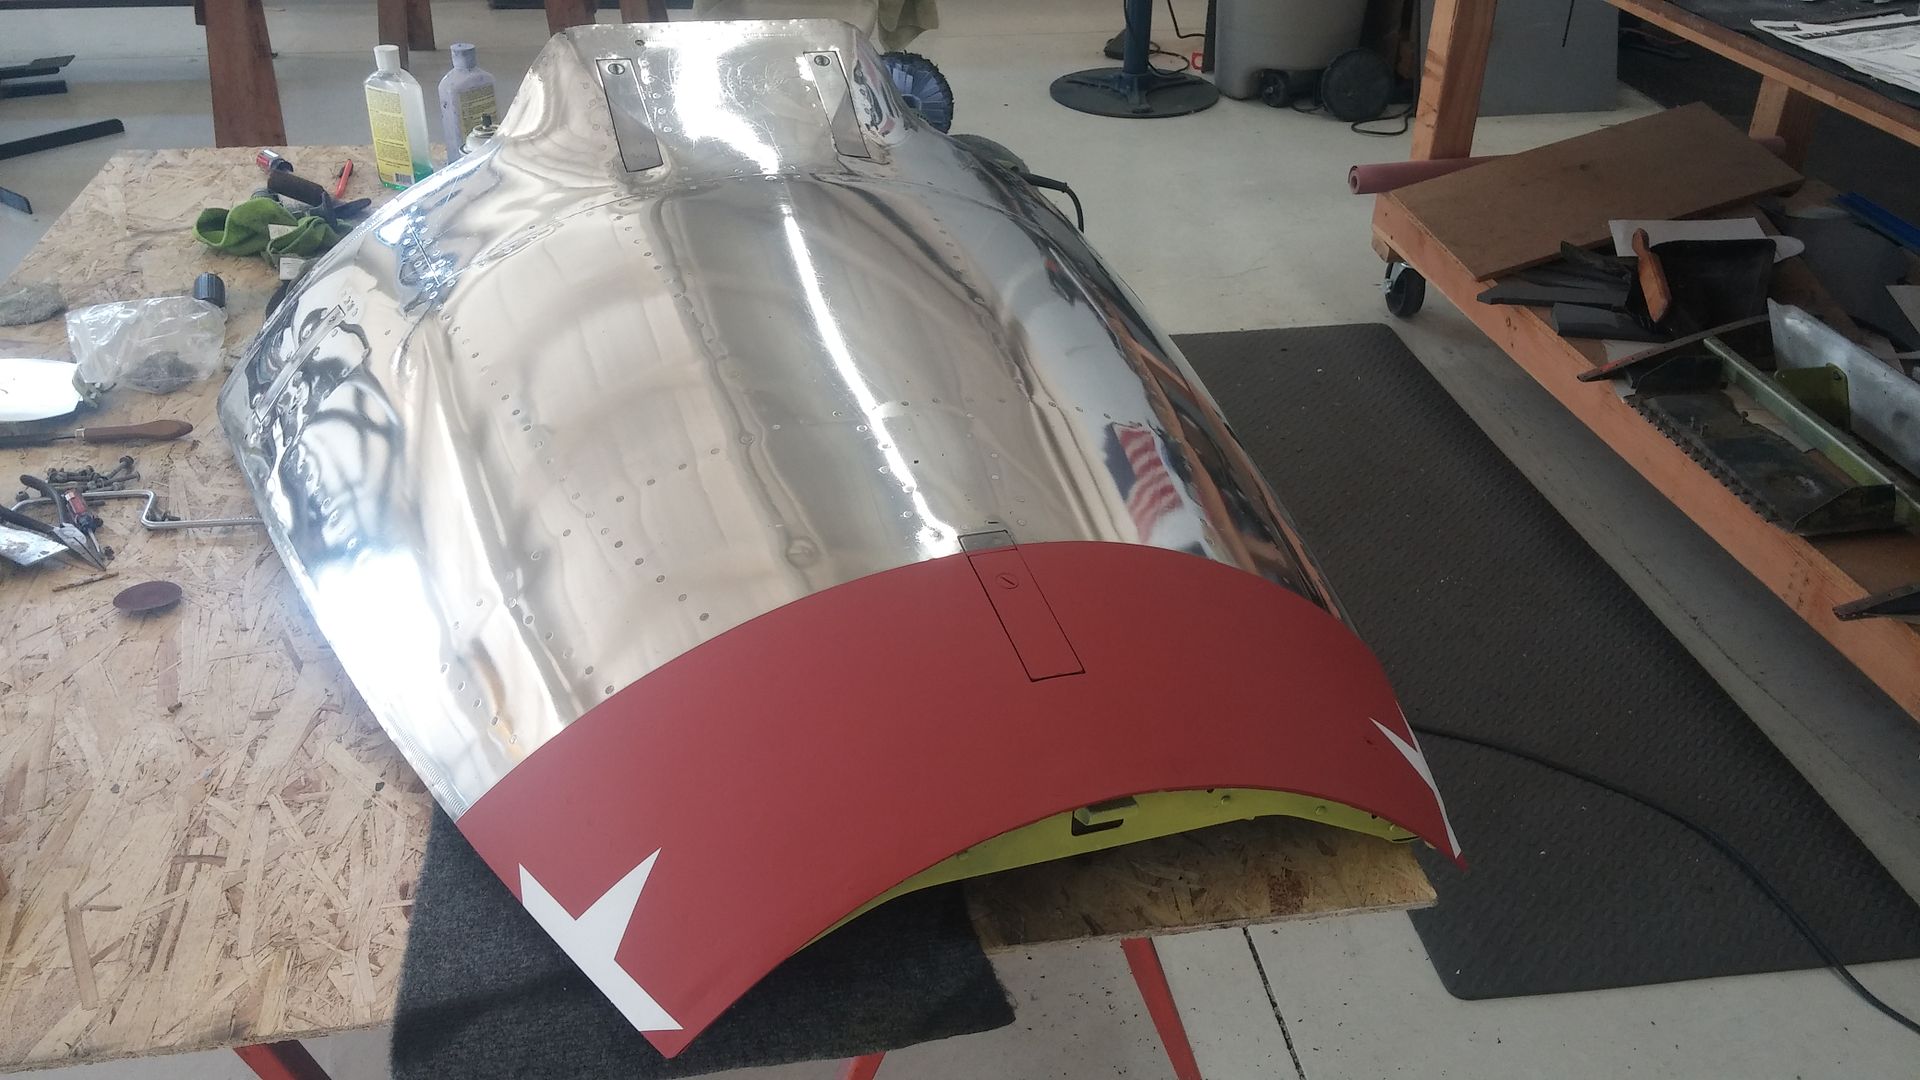
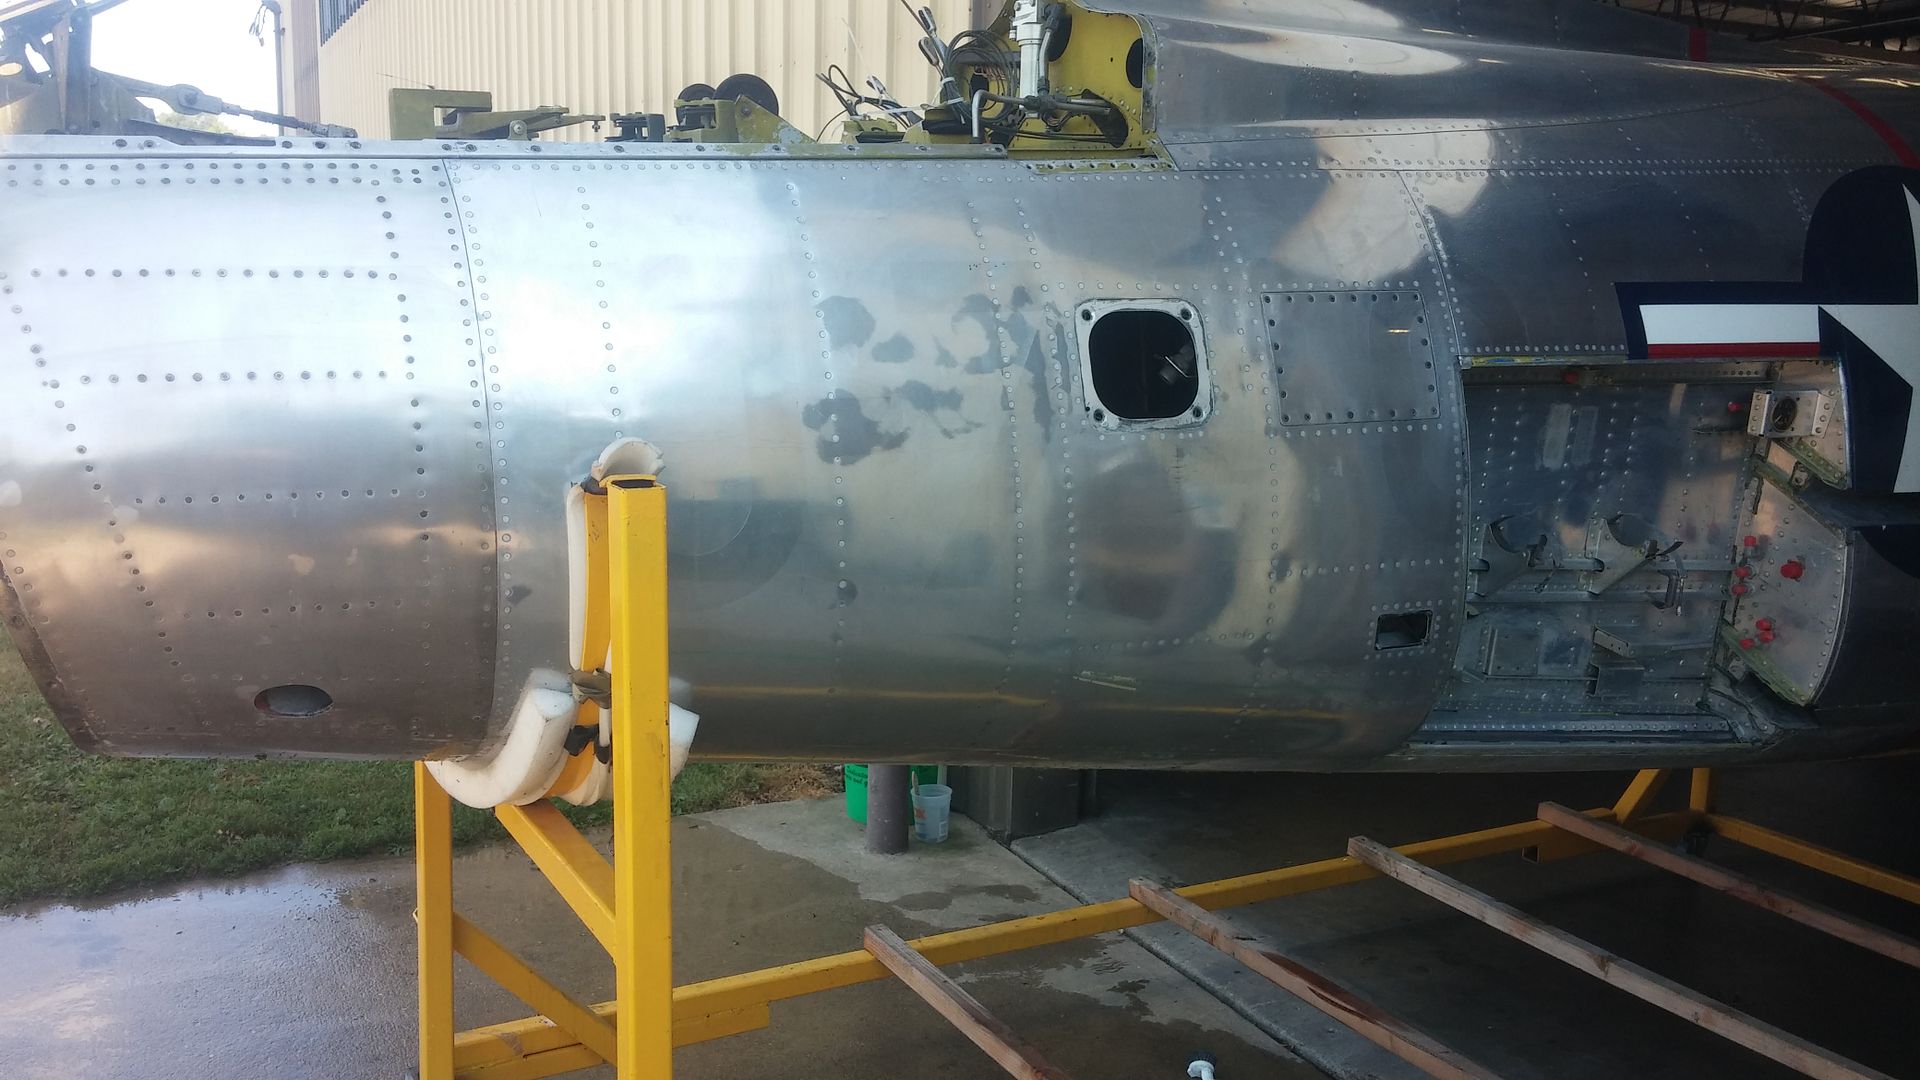
Folks, I'm not a spokesman but I am sure sold on this California Custom aluminum polishing system. This is the nose cowl top for a random Mk VI Sabre. You be the judge. Under $30 for the two bottle system, aluminum deoxidizer and PMP (Purple Metal Polish) Yabba-dabba-doo!
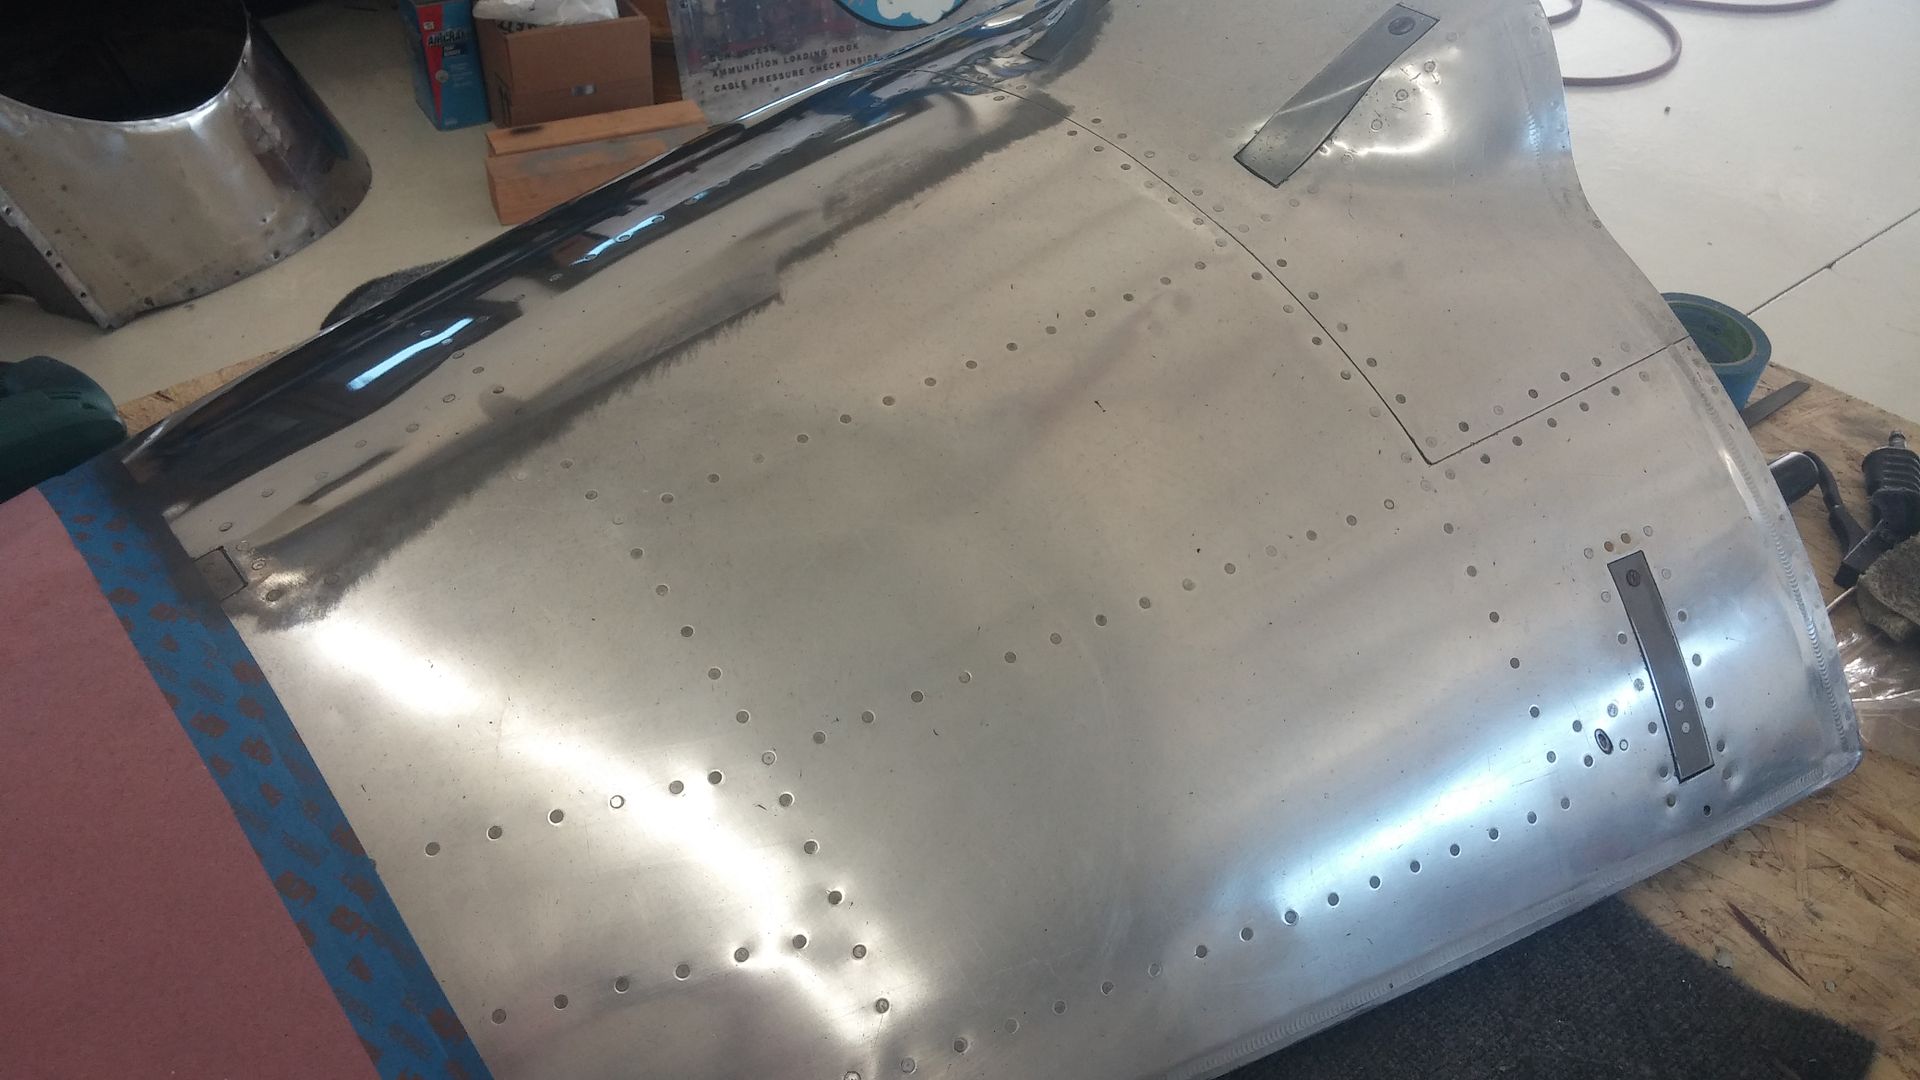
Jack, what is reflected hanging from my ceiling? Picture of a pony to the winner.
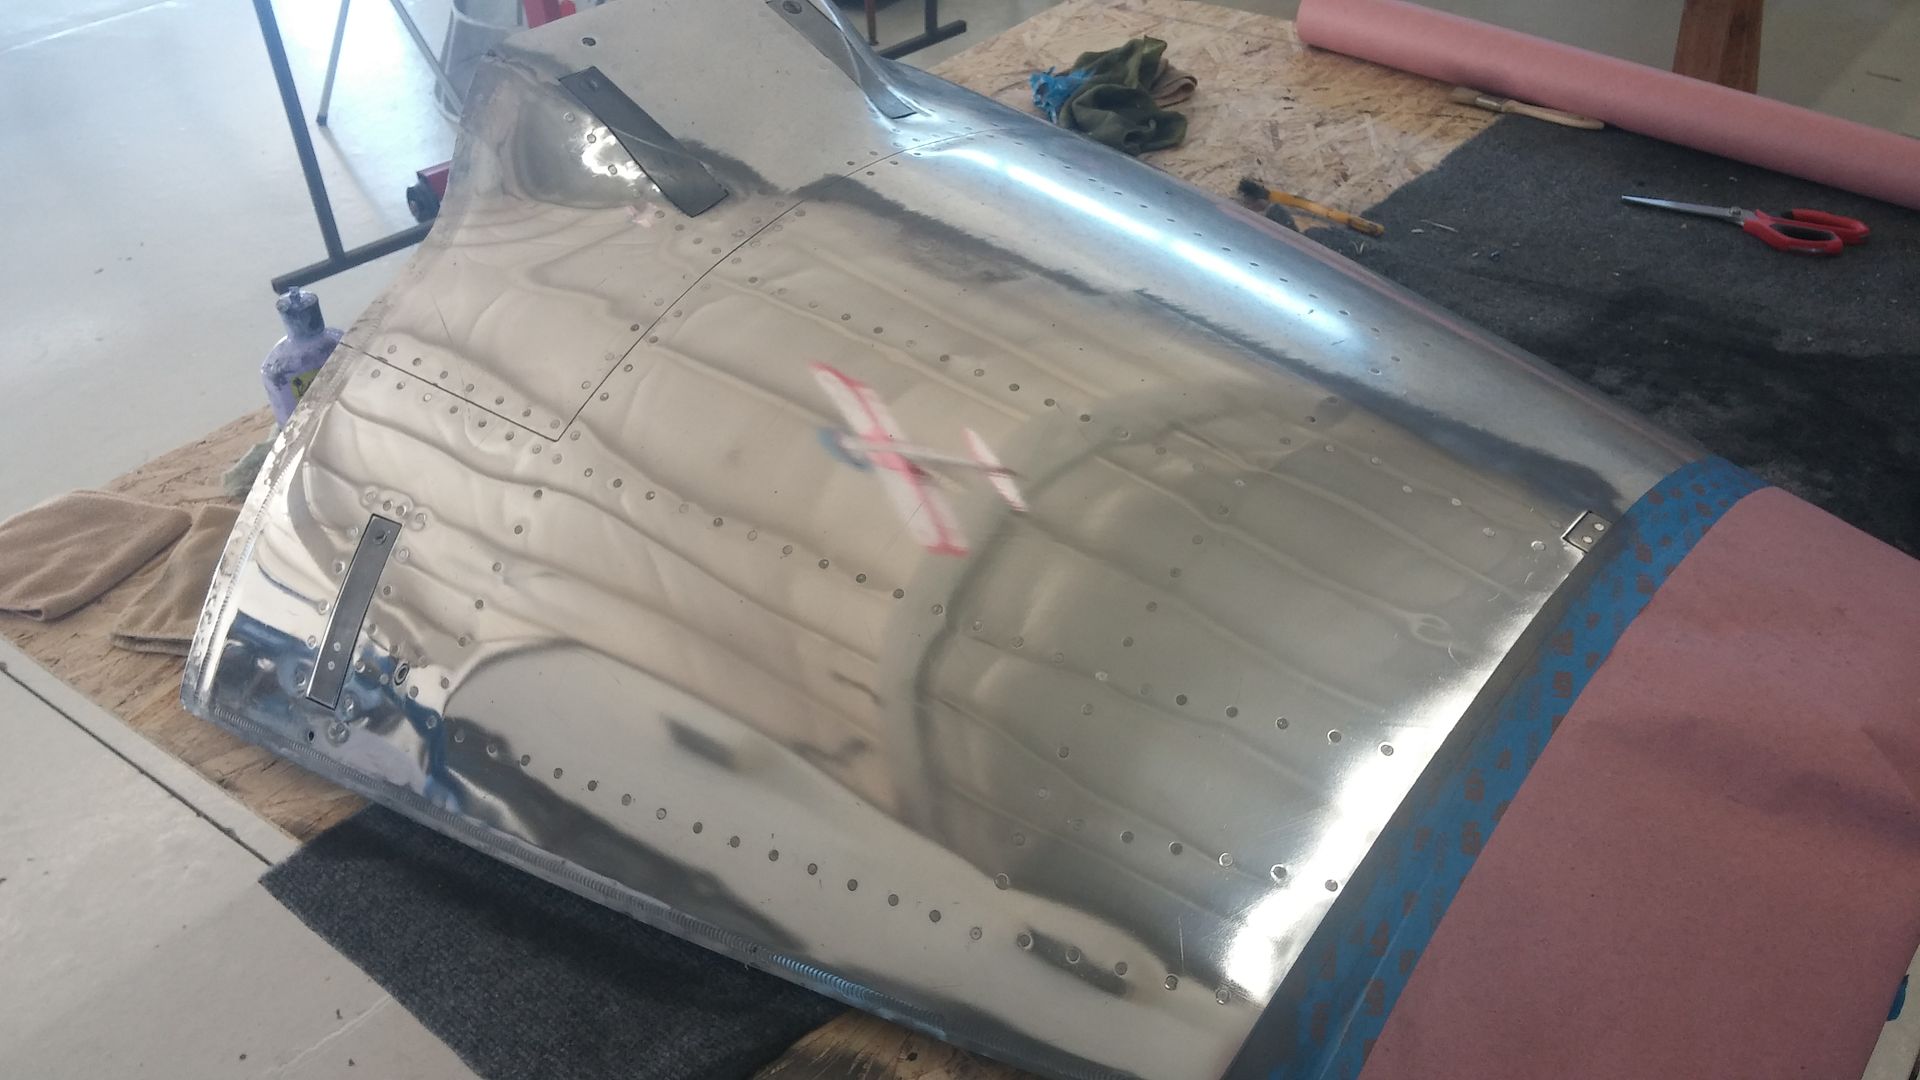
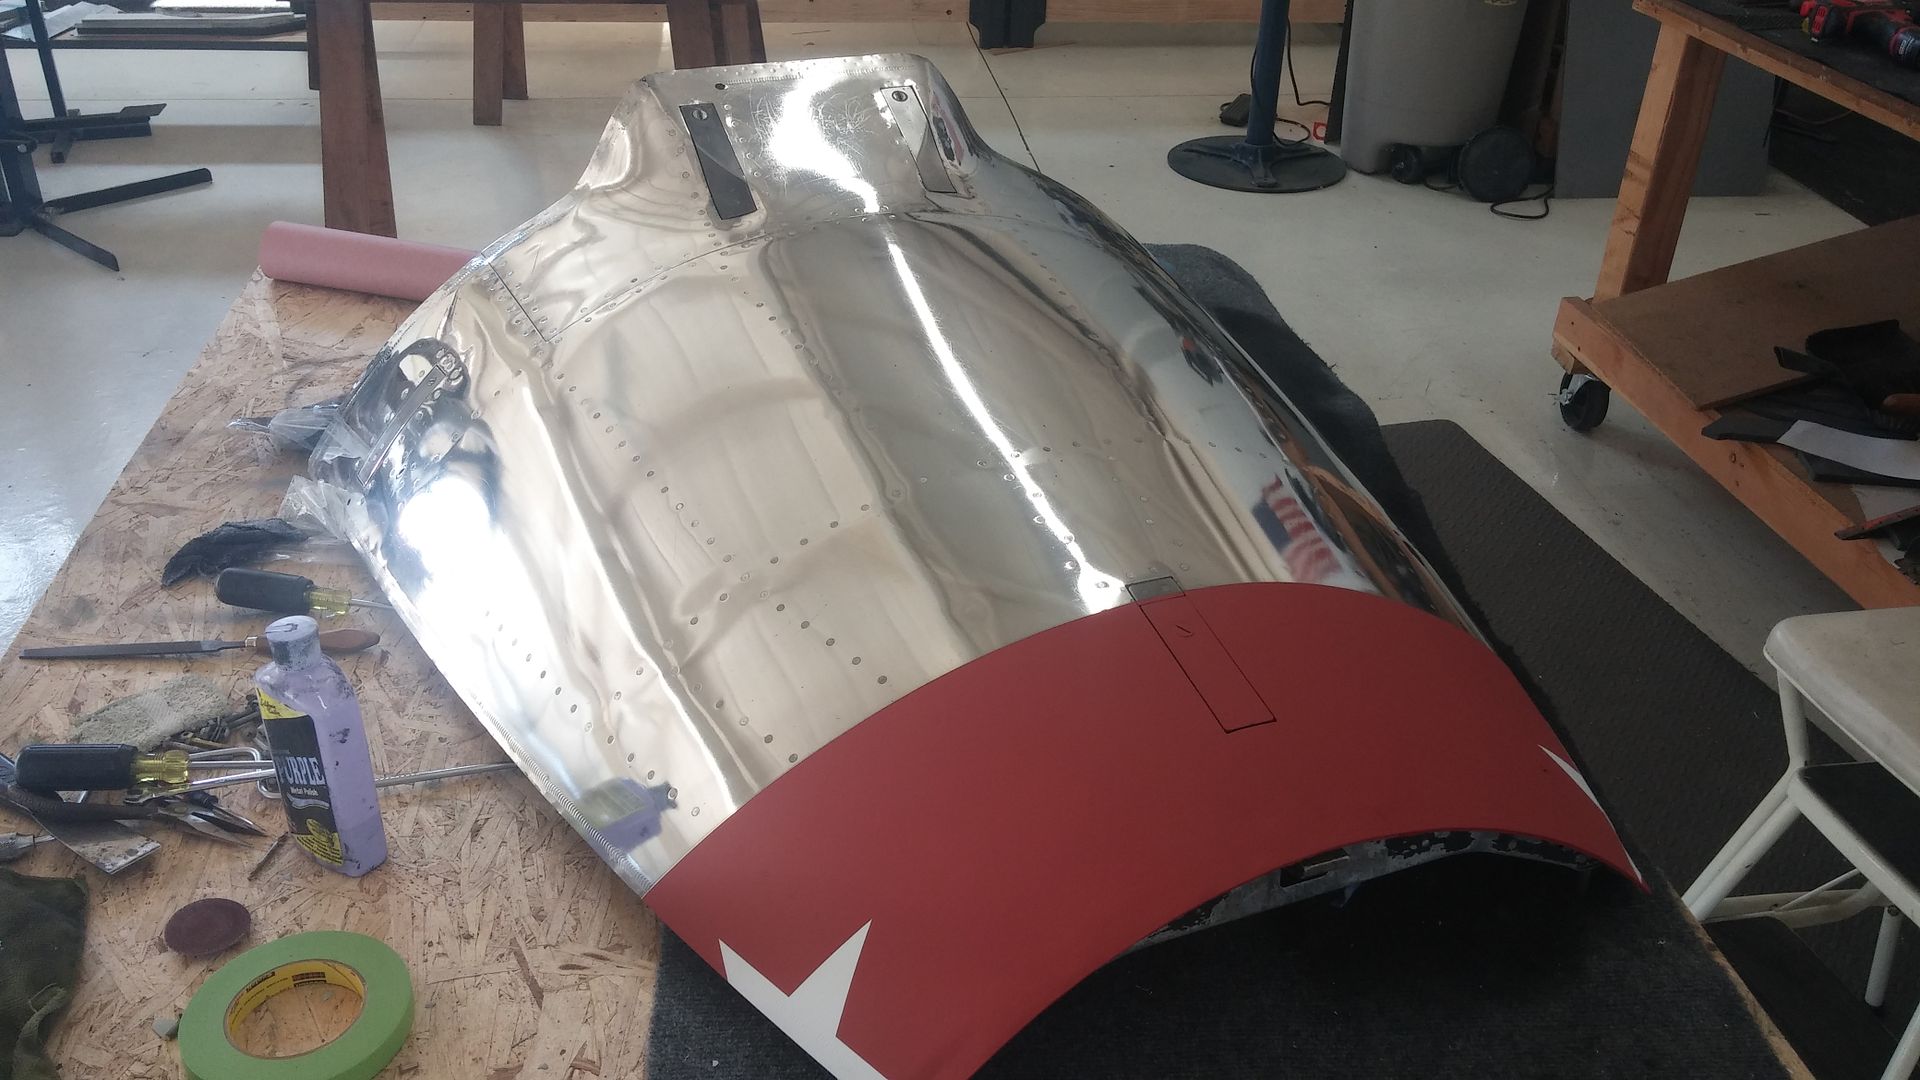
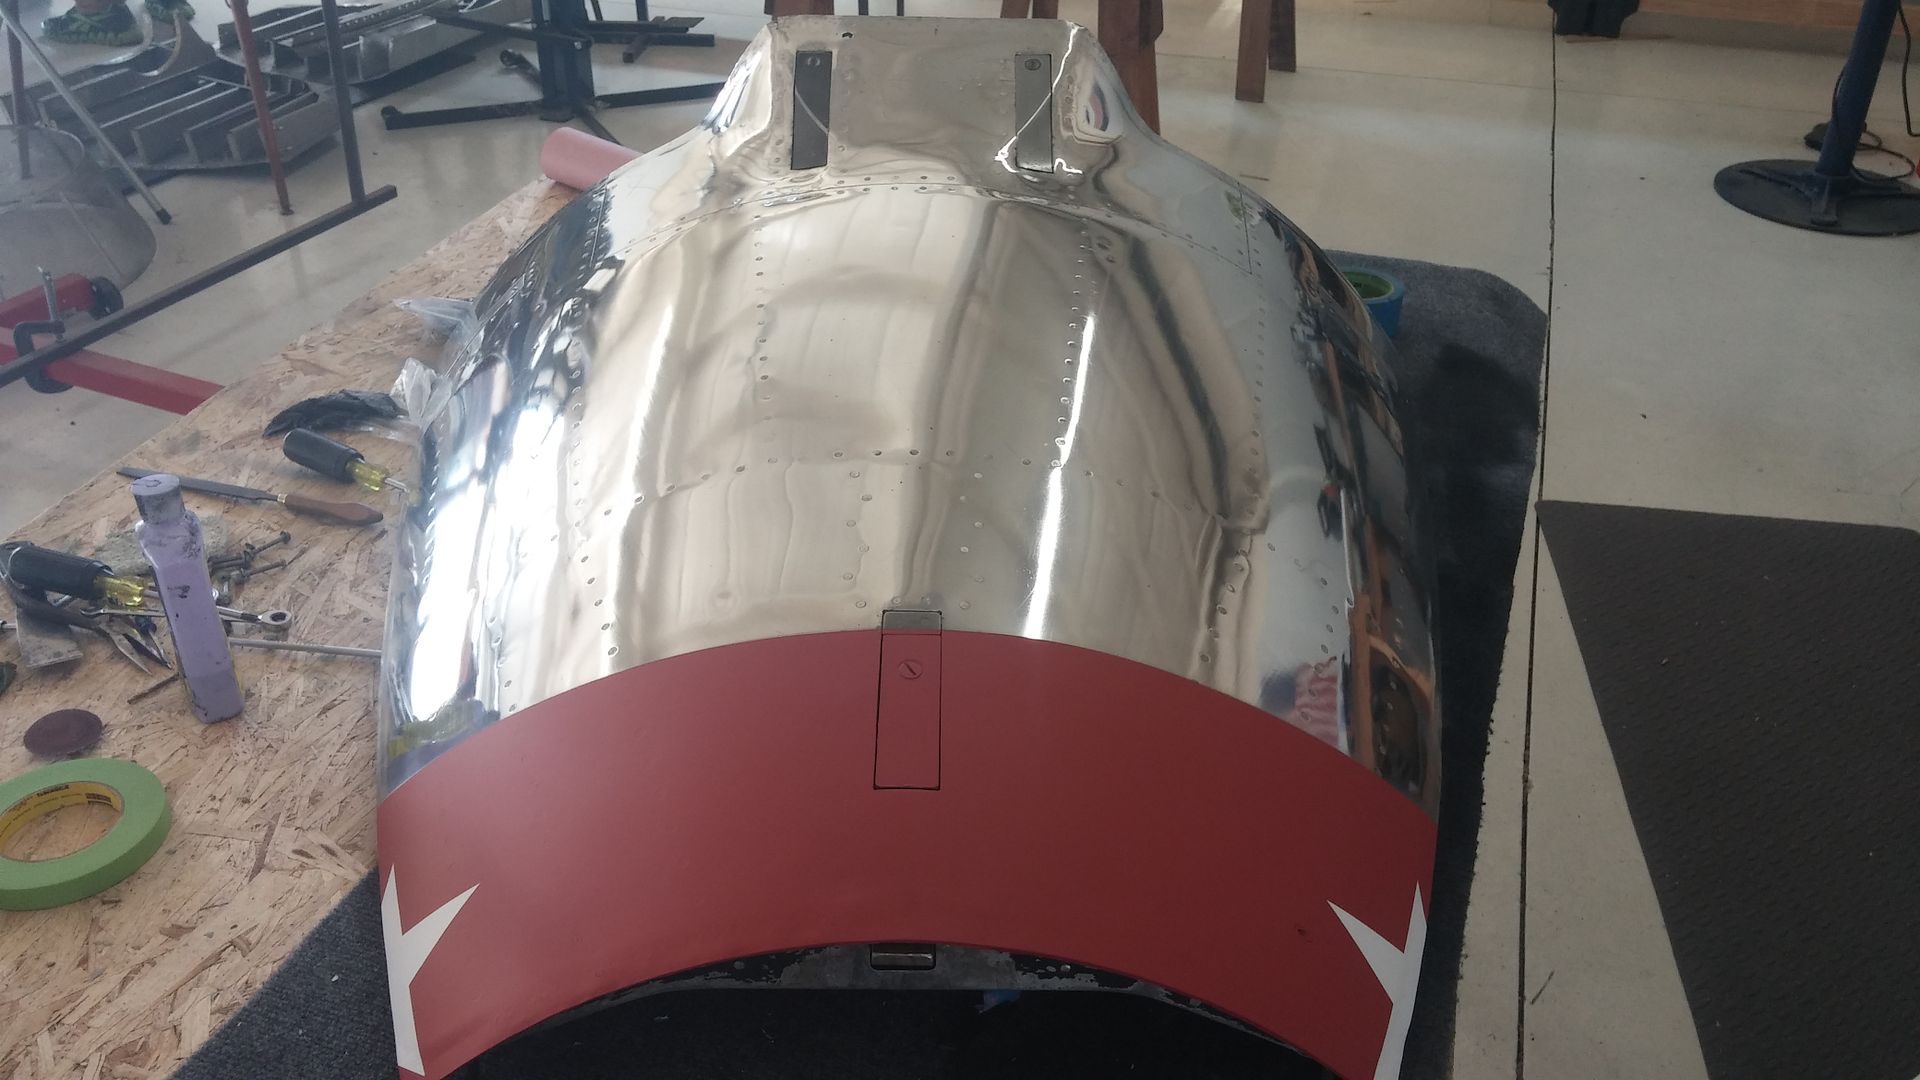

Jack, what is reflected hanging from my ceiling? Picture of a pony to the winner.


Re: Not sure, anybody interested?
Mon Aug 03, 2015 8:51 pm
Sabre Div: Please see the new post on Sabre Ejection Seat Help.
Here is the nose panel re-chromated per the owners request. I found that this panel was not from his airframe #381 but actually off of #358. So, it appears that there is a bondo type squash seal used to make the slight contour variations in #358 fit #381 perfectly. I also found that the little tubes on the inside seem to be a pressure release mechanism for the three clamps that are in line with the centerline of the aircraft. I am surmising that if the pressure was not bled off, there might be a chance that the panel could blow off in flight.
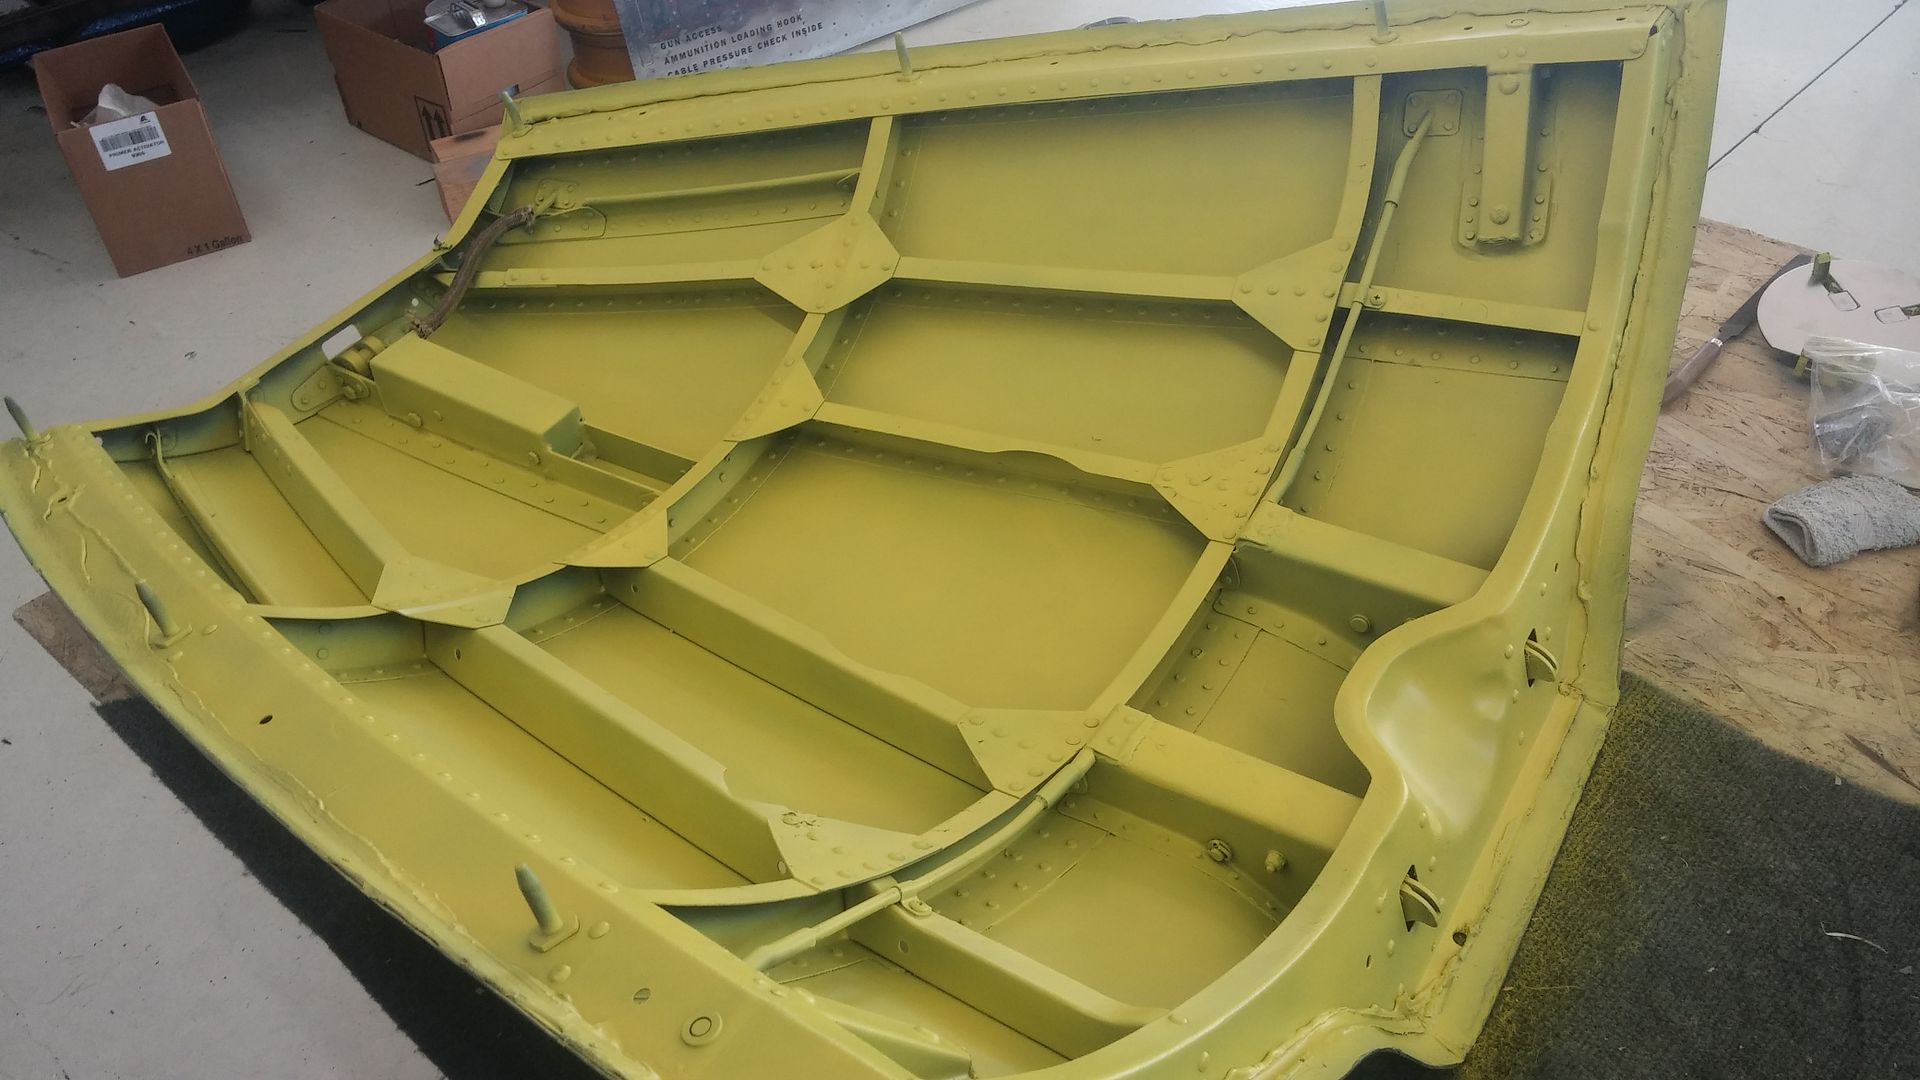
Purty...
Corsair Div.:
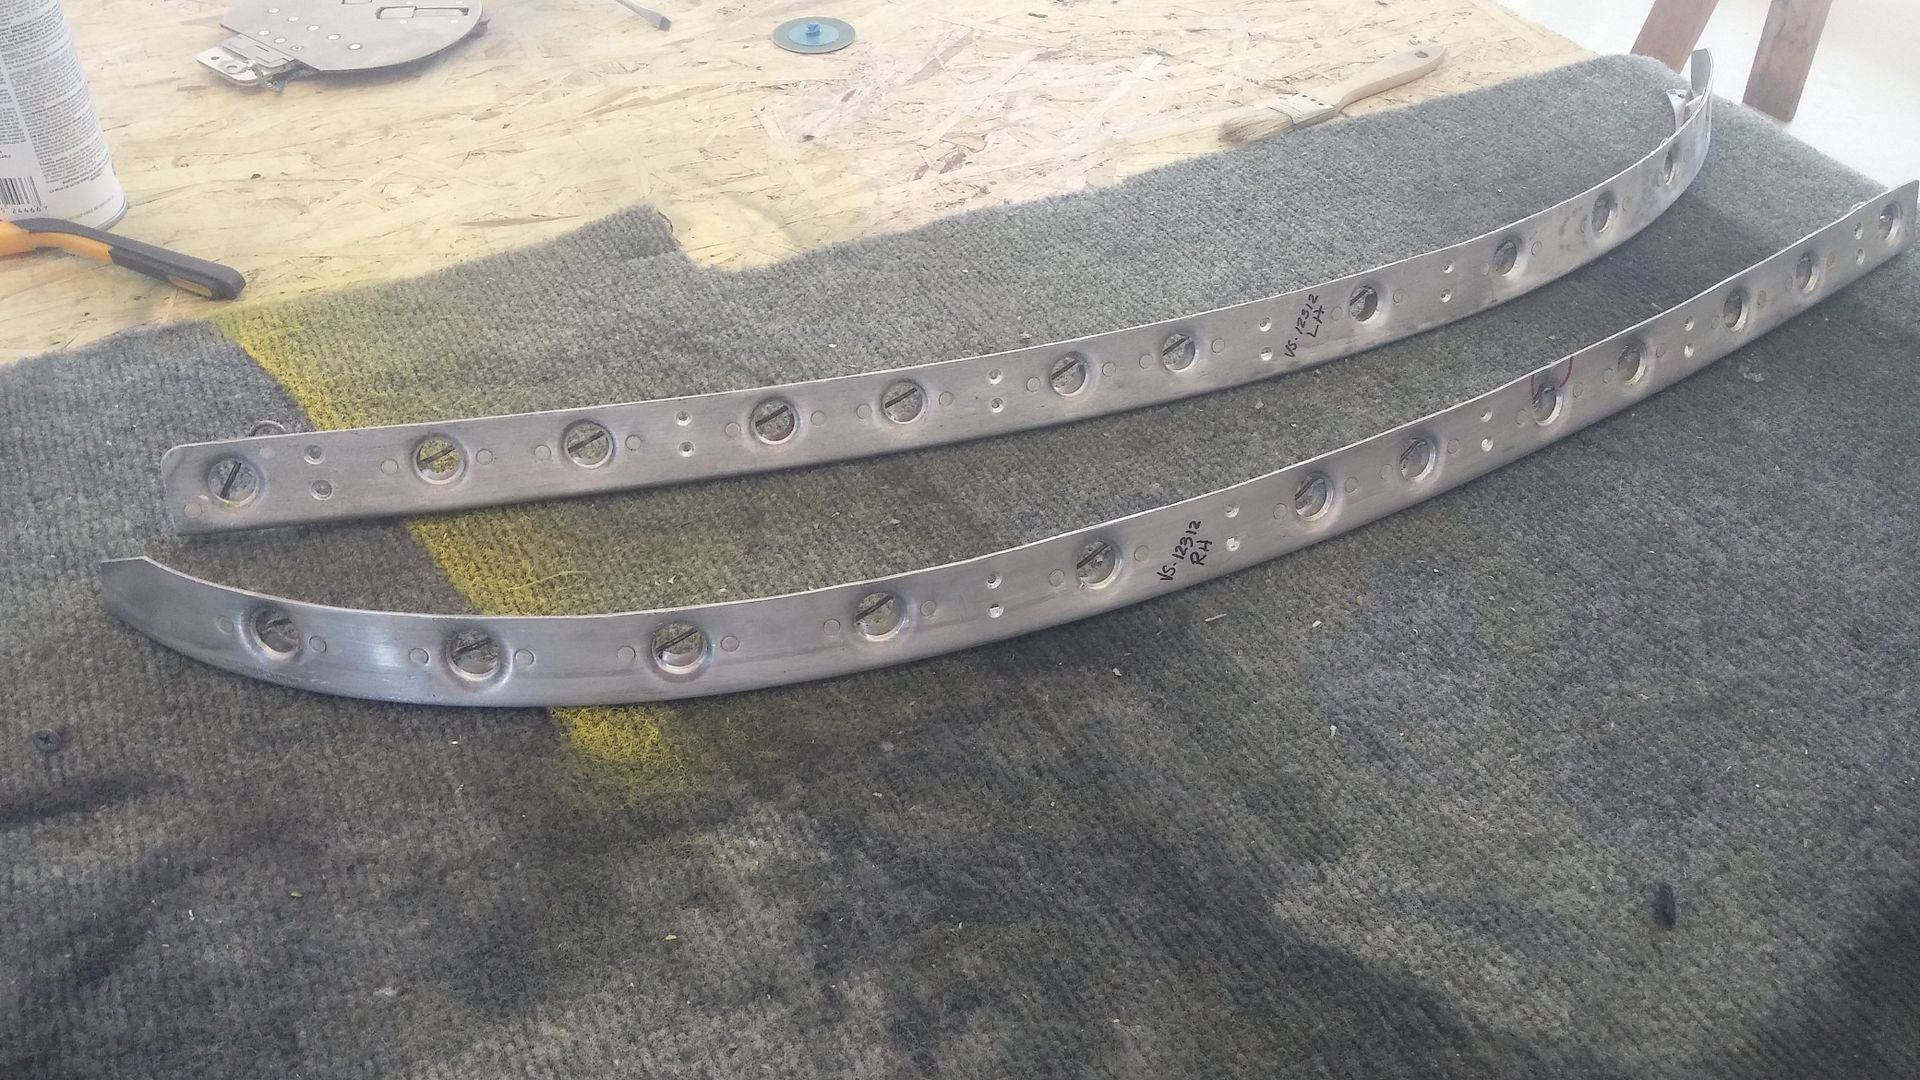
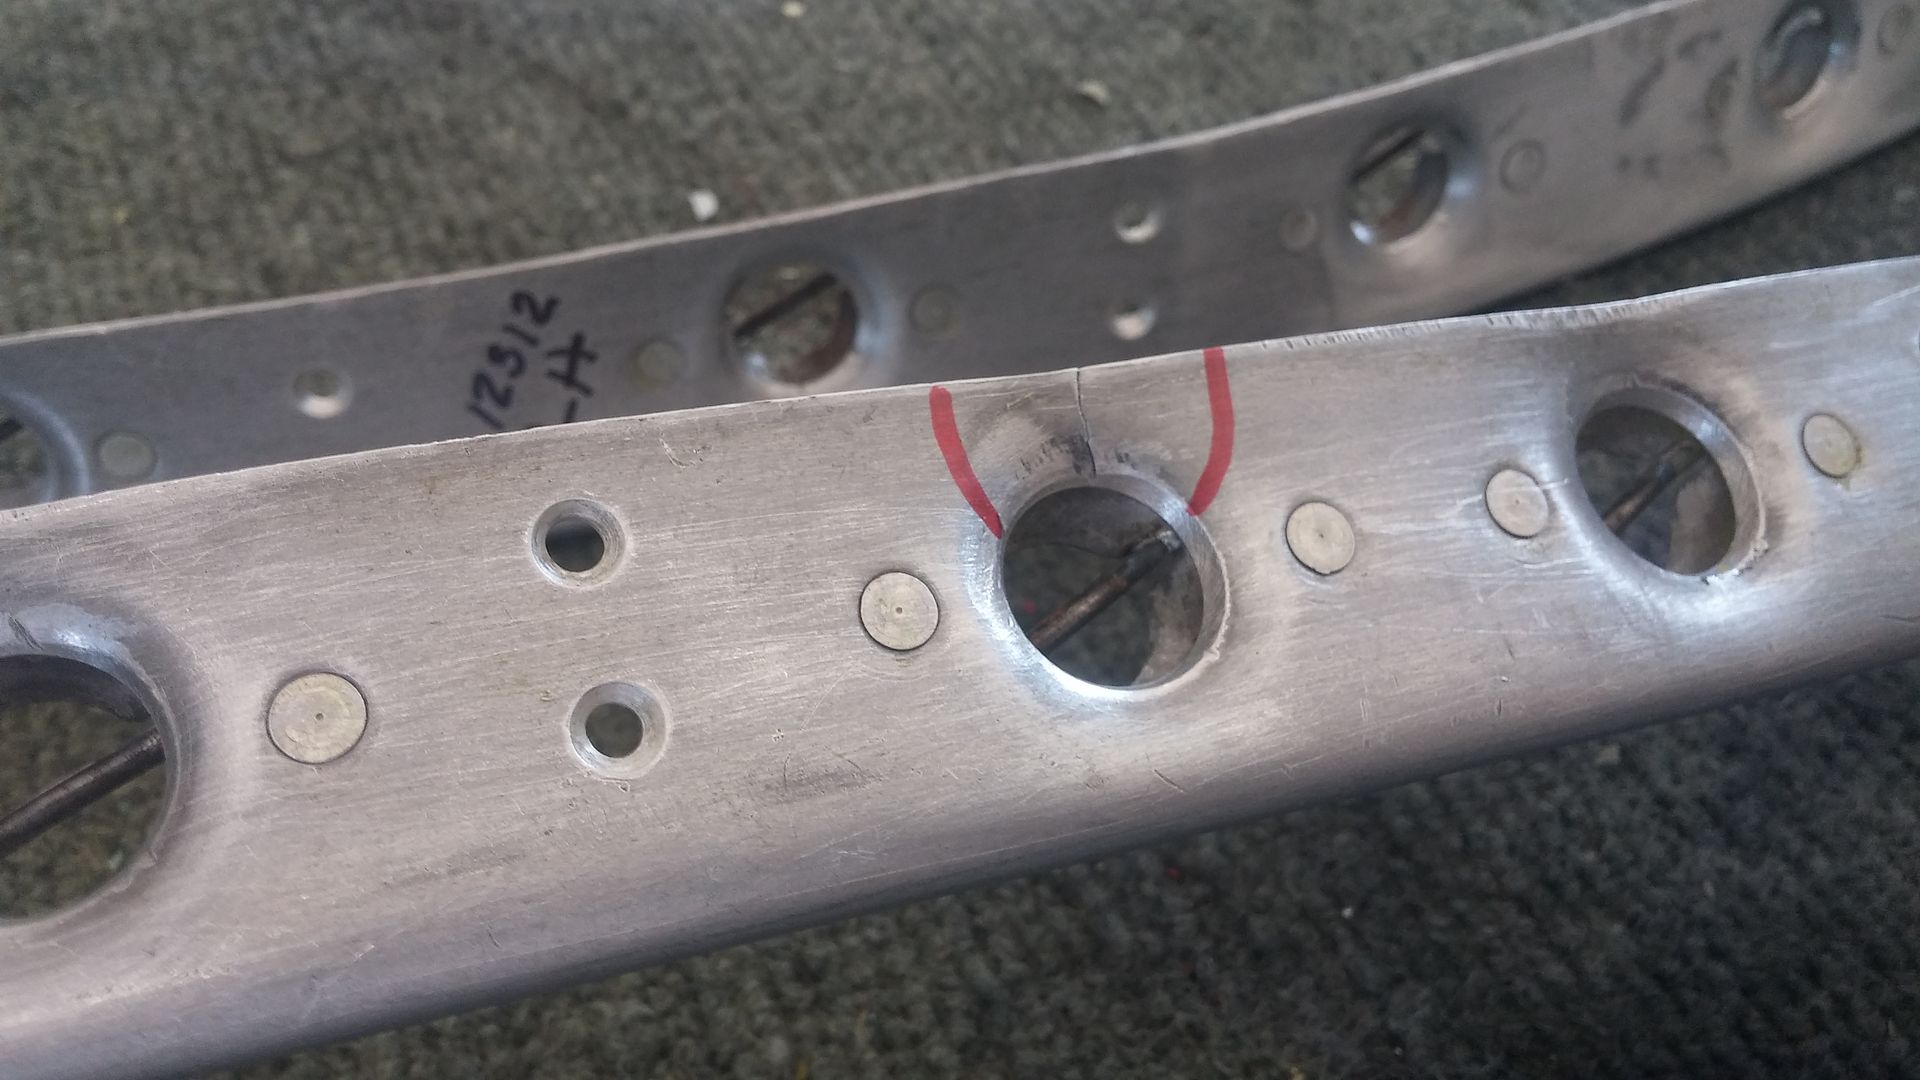
Why you strip and inspect. Our intercooler support frame upper angles.

Uh oh...
Will let the Boss decide a plan of action for this. Now, all we need is EVERYTHING else... The angle is the top piece in this picture.

Here is the nose panel re-chromated per the owners request. I found that this panel was not from his airframe #381 but actually off of #358. So, it appears that there is a bondo type squash seal used to make the slight contour variations in #358 fit #381 perfectly. I also found that the little tubes on the inside seem to be a pressure release mechanism for the three clamps that are in line with the centerline of the aircraft. I am surmising that if the pressure was not bled off, there might be a chance that the panel could blow off in flight.

Purty...

Corsair Div.:
Why you strip and inspect. Our intercooler support frame upper angles.


Uh oh...

Will let the Boss decide a plan of action for this. Now, all we need is EVERYTHING else...

Re: Not sure, anybody interested?
Tue Aug 04, 2015 9:45 am
How did you do the deoxidizer / polish ? I watched thier video and am wondering if you did it by hand or used a polishing hand tool. We have a F-86L that needs some serious help with being cleaned and polished and this look more promising than other methods.
Tom P.
Tom P.
Re: Not sure, anybody interested?
Tue Aug 04, 2015 10:10 am
wendovertom wrote:How did you do the deoxidizer / polish ? I watched thier video and am wondering if you did it by hand or used a polishing hand tool. We have a F-86L that needs some serious help with being cleaned and polished and this look more promising than other methods.
Tom P.
Tom, the deoxidizer is just wiped on with a small terry cloth rag. You can follow immediately or after the deoxidizer dries with the Purple Metal Polish. I used the Flitz purple polishing ball in a drill motor for the final shine. Amazing stuff this is.
Re: Not sure, anybody interested?
Tue Aug 04, 2015 7:42 pm
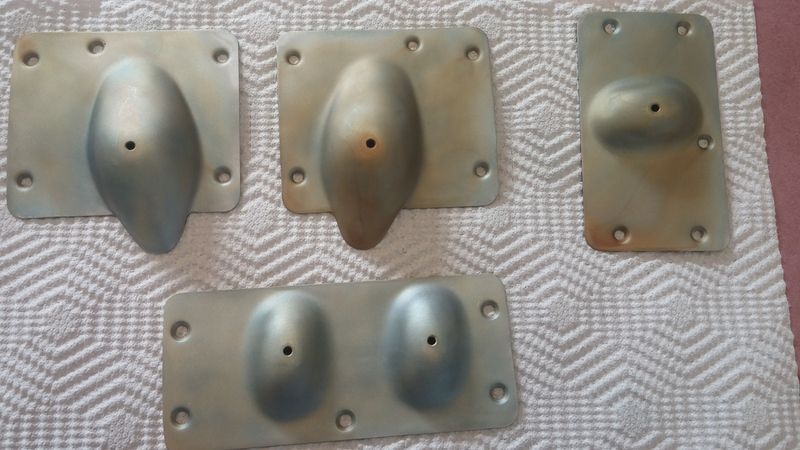
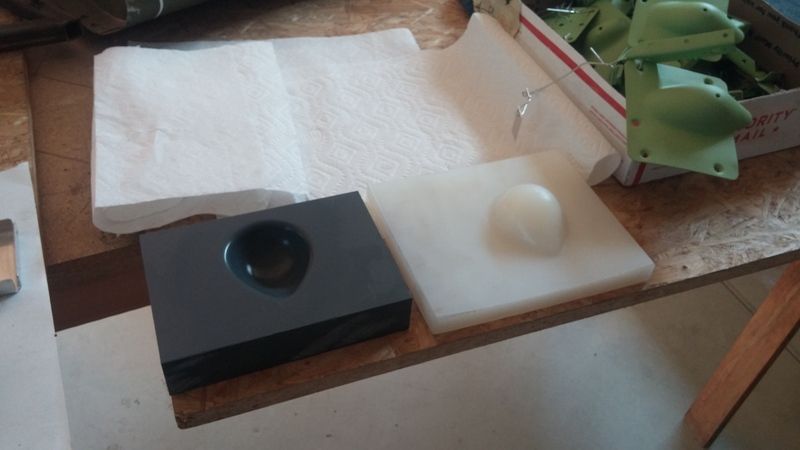
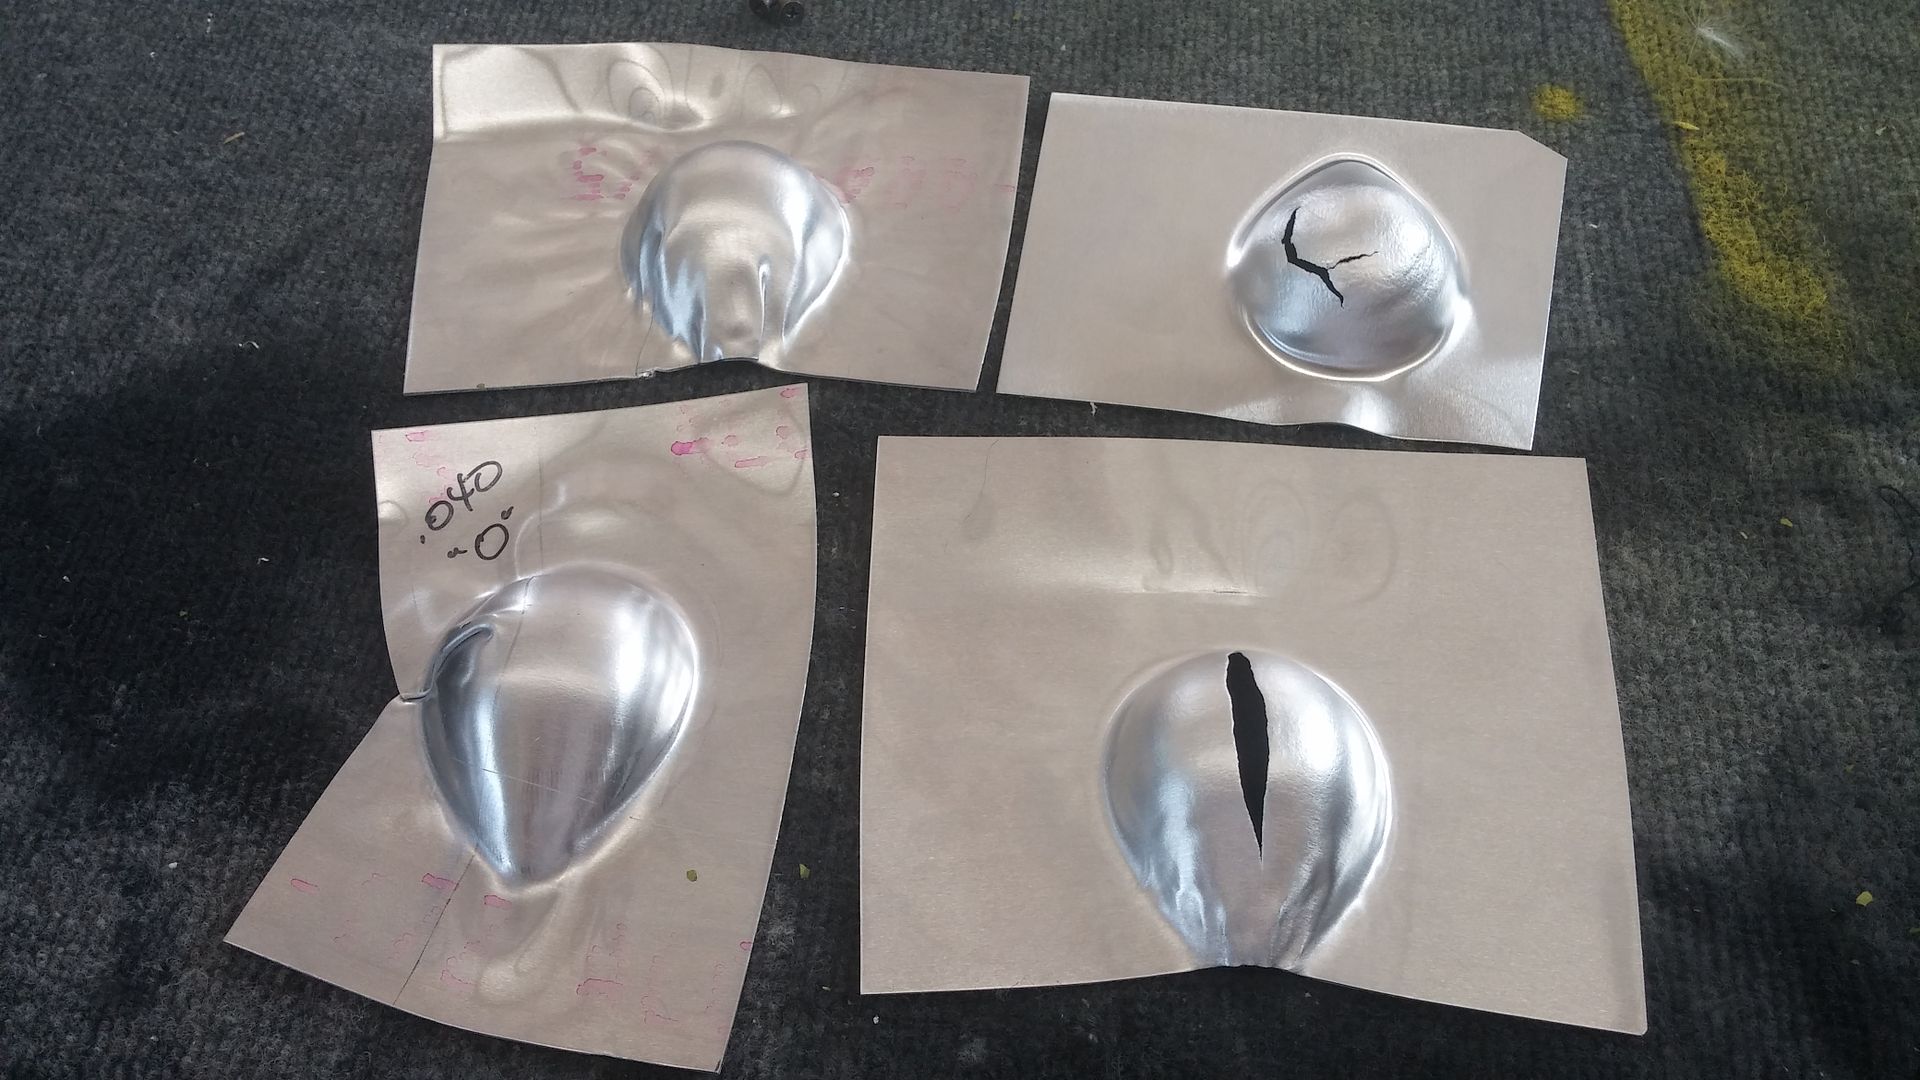
So, when your bright idea proves how dumb you really are, go back to the basics. These outboard aileron hinge covers need to be made since we have not. My first genius idea was to hydro form these. Piece of cake thought I, DOH! Frankie the Magician made me two forms, one male and one female. I'm thinking it needs to be formed over the male form with the press and rubber. Wa wa wa! Folded over on itself like a wad of tin foil. The rubber would probably not work in the female as this is a deep 1 1/4" draw so Brainiac here decides to use both male and female at once. Crumple zone 2.0! OK, says I, we will use the female die and flow form. Meanwhile, the creatures deep in my brain are firing up the furnace to get power back on. .040" 2024-0 is the material. Forming, forming, rip! Forming part way, anneal (cause it is obviously work hardening), forming part way, rip!?!?!
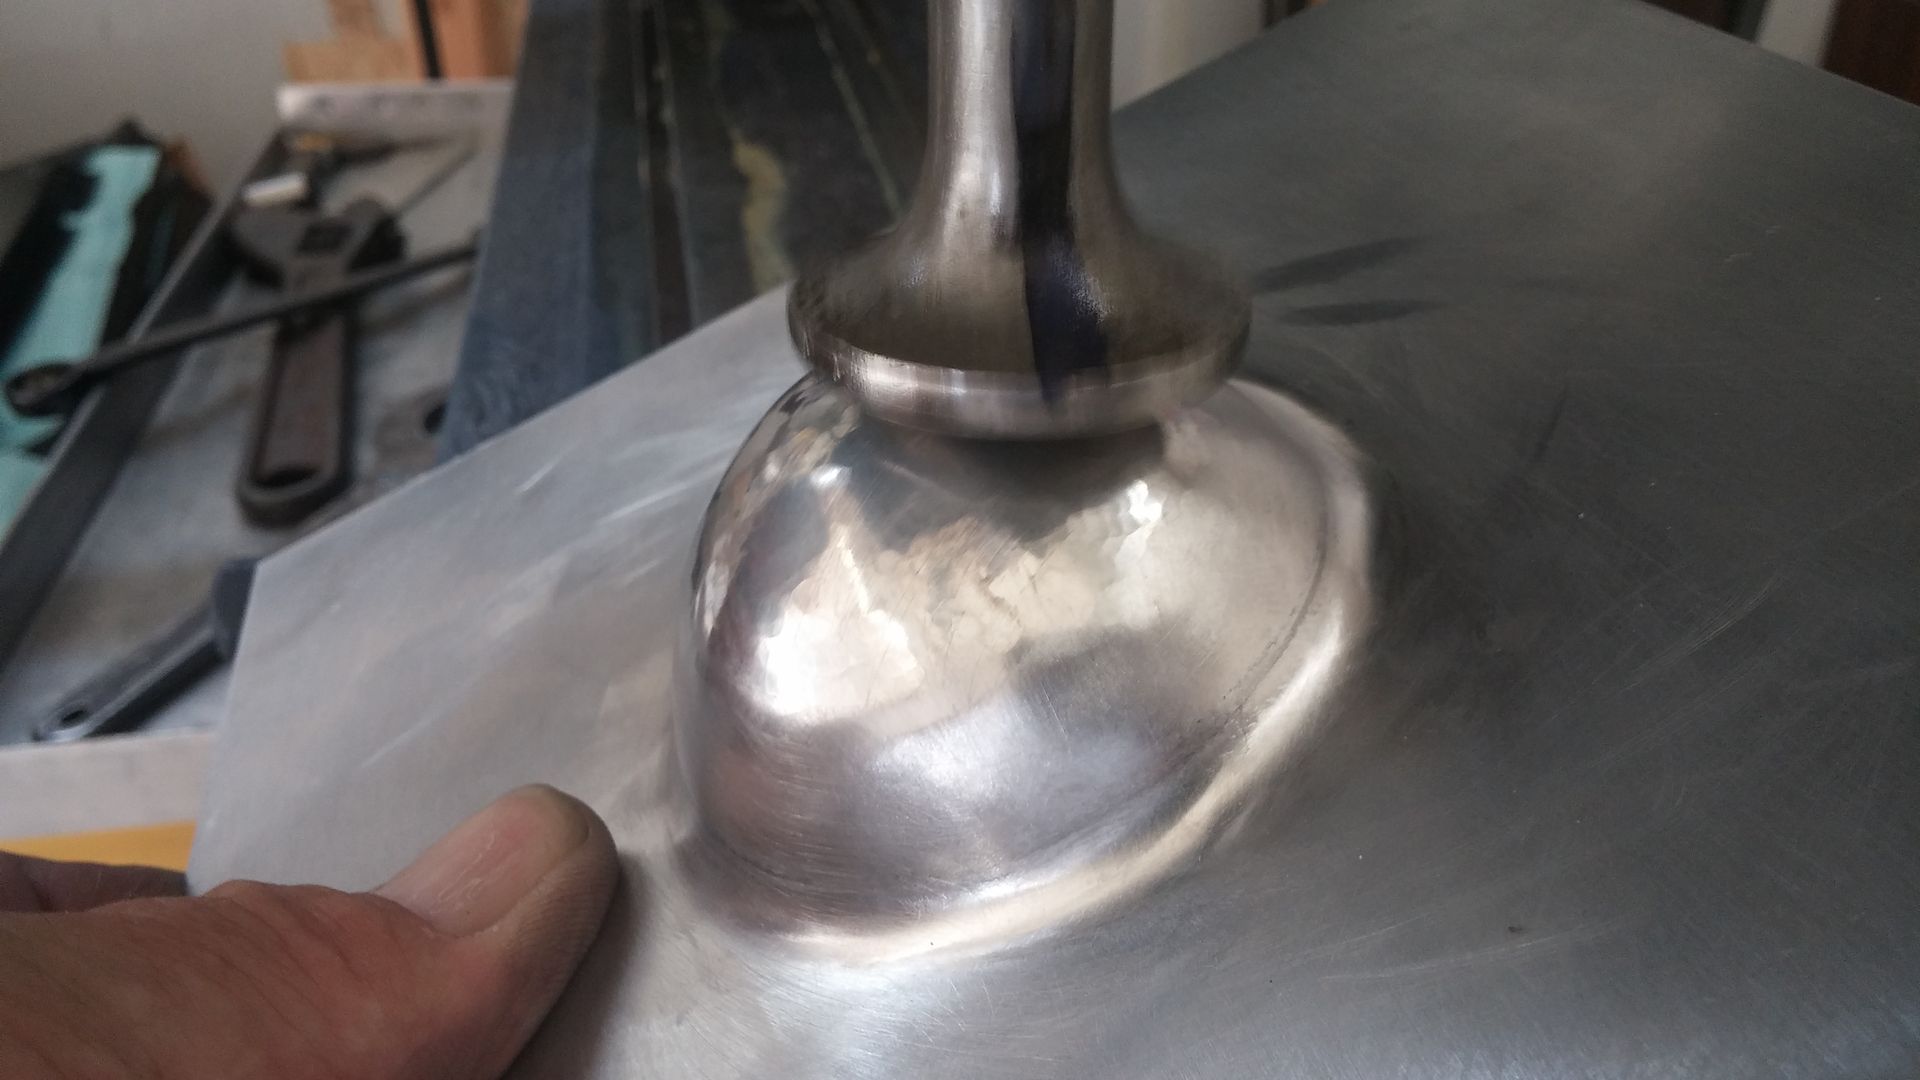
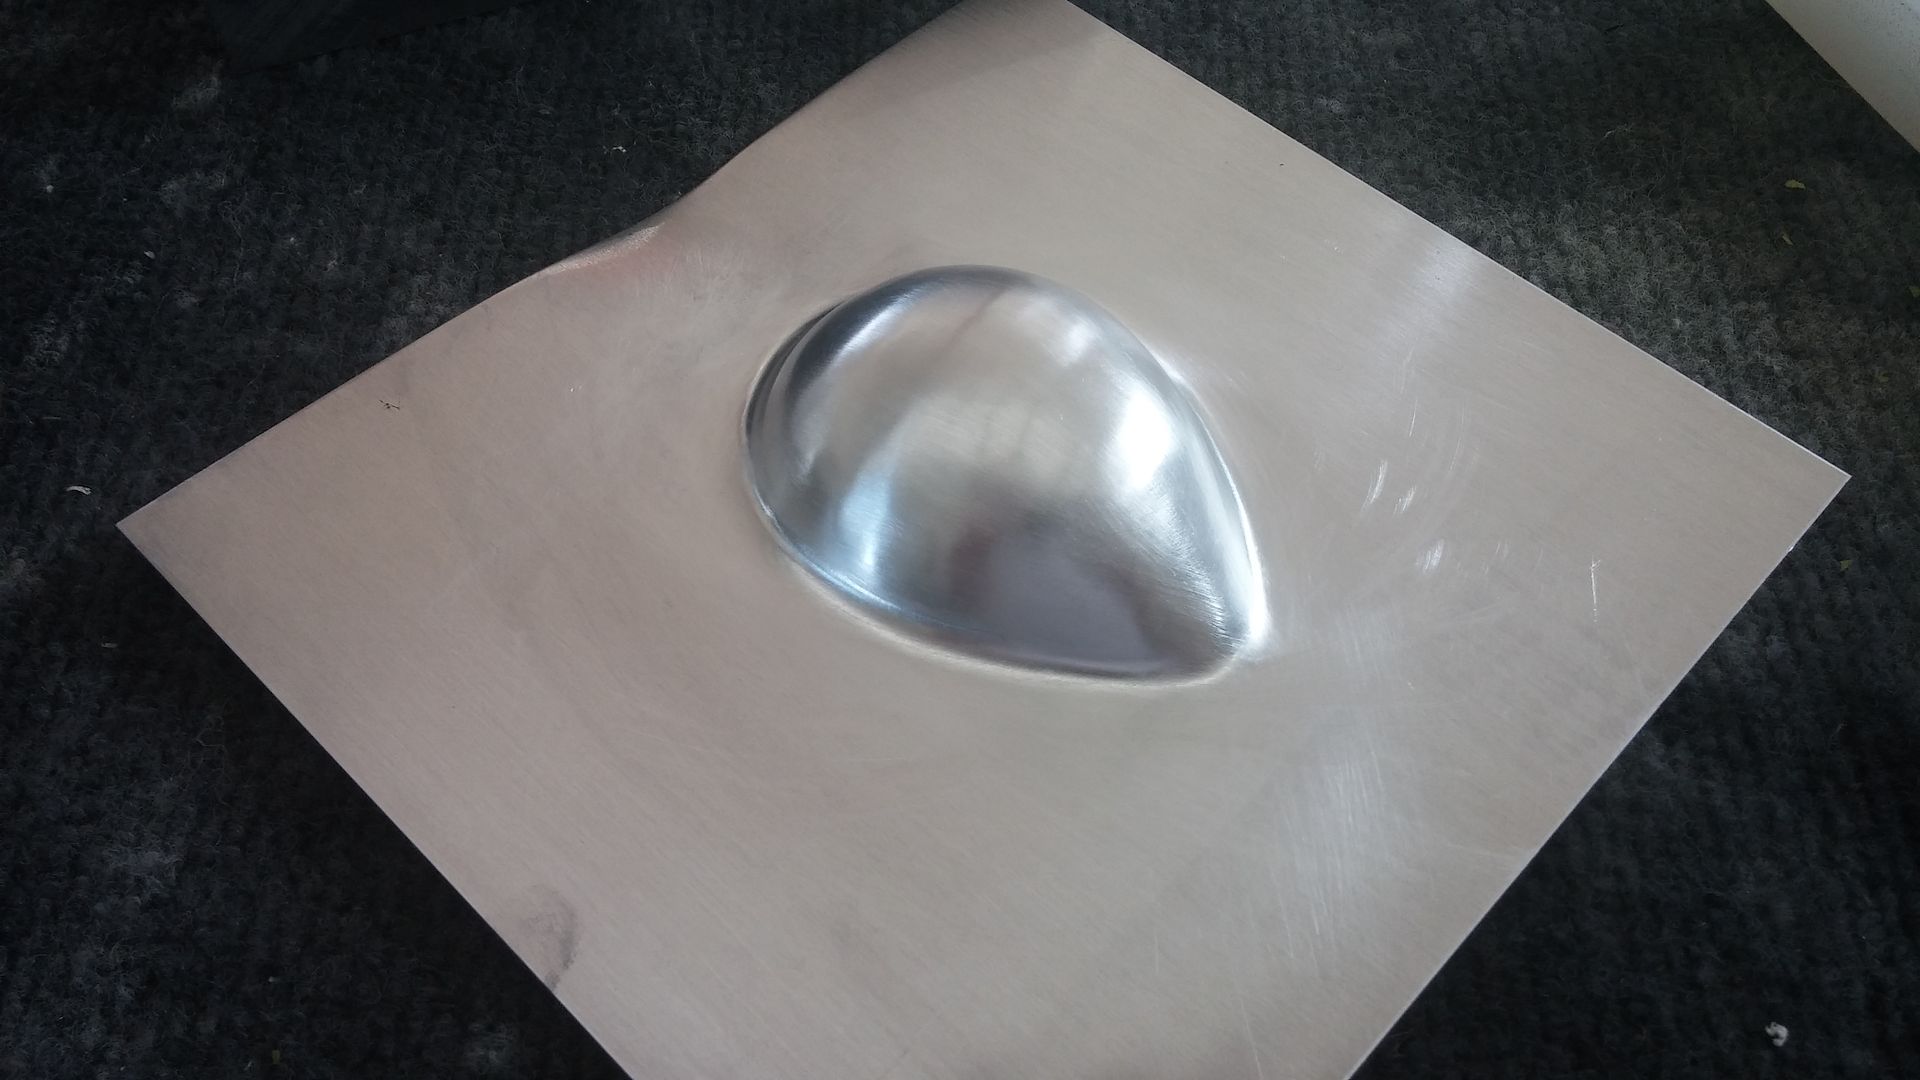
Get a call from the engine room, brain power is back on. See that beautiful Pullmax you Dork? Stretch, stretch, flow form part way. Stretch on the Pullmax some more, flow form. Holy jaboly! Look what you have. 1 1/4" deep, 2 1/2" wide and a little over 3" long. The blank is big enough to trim for the right and left hand plates. Now, there will be a little Crown Royale Black in my evening. Happy, happy.
Take away? Don't overthink. Do what you know is right.
Aileron hinge covers inboard and center both sides. We need the outboards.
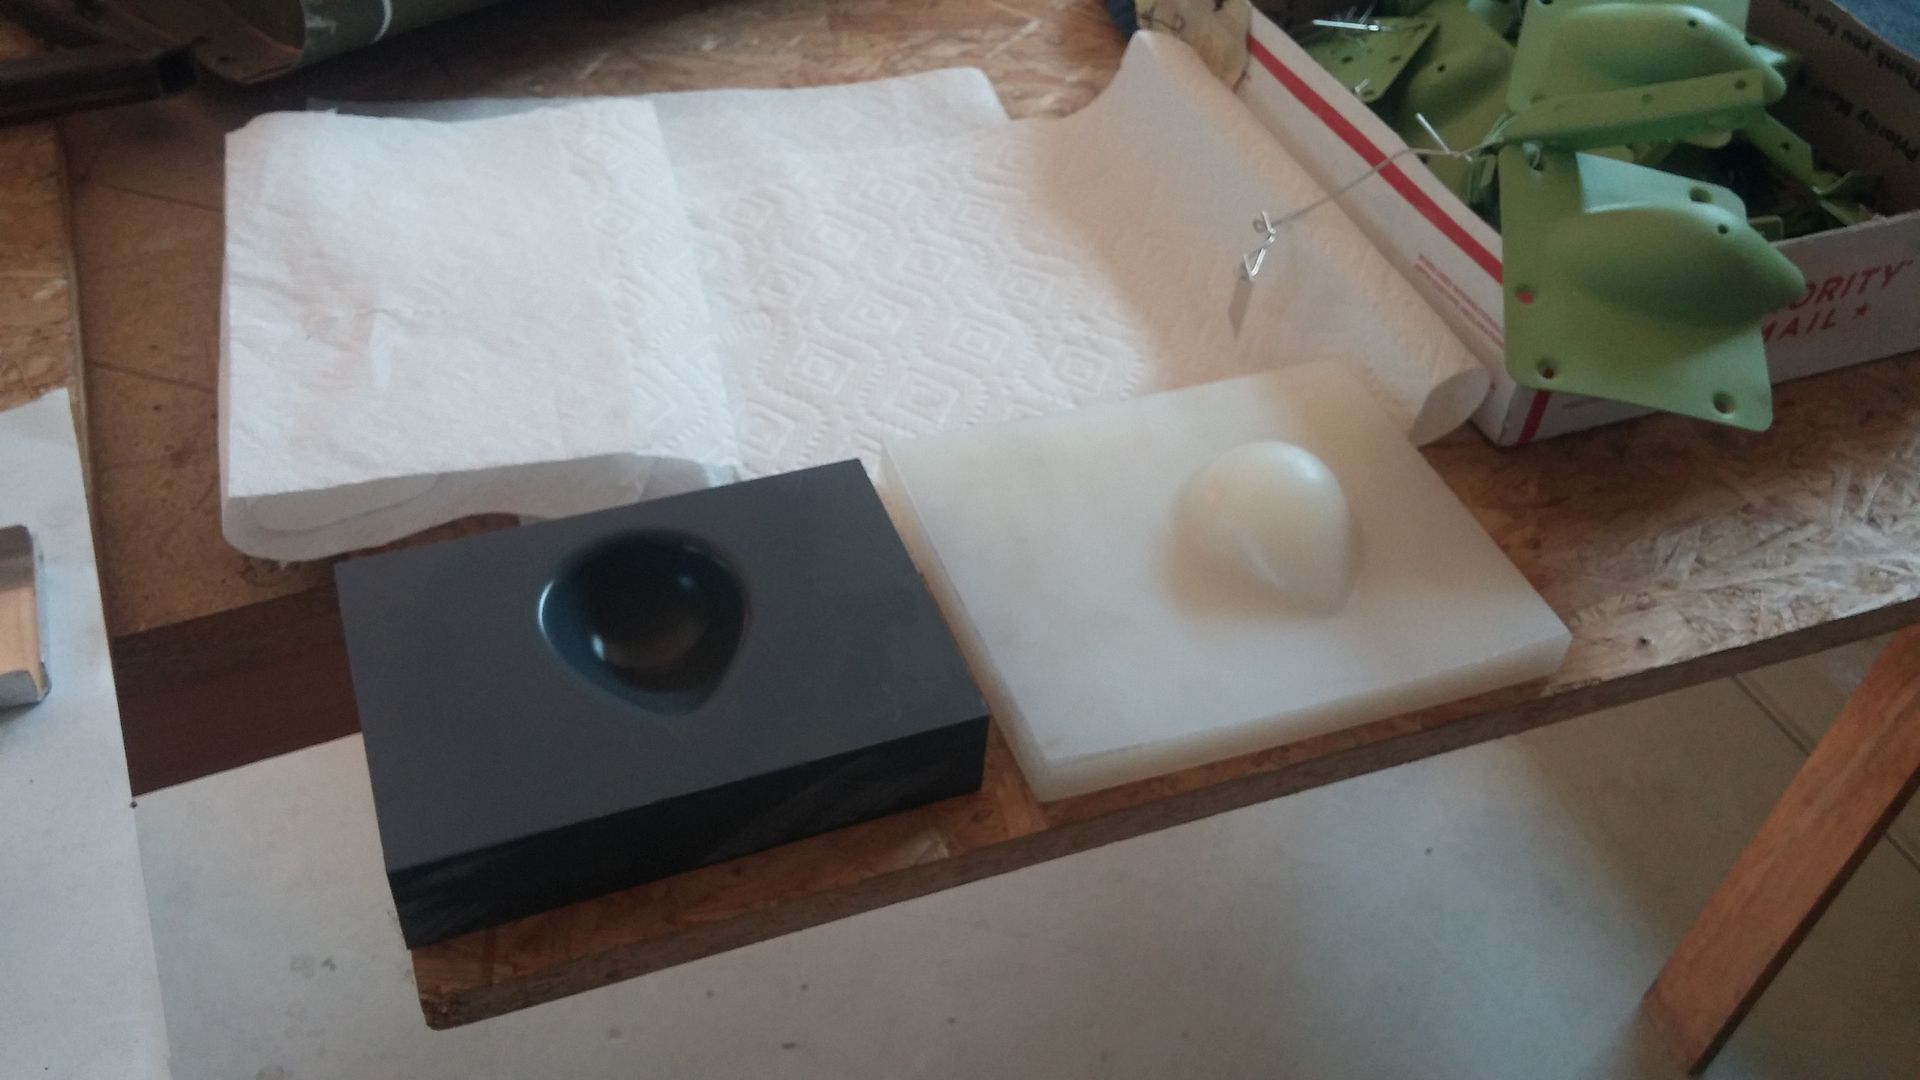
Frankie the Magician's PVC tooling
$0.50 per pound scrap
Stretch number four or so on the Pullmax then back to the female die and flow forming
Ta da!
Get a call from the engine room, brain power is back on. See that beautiful Pullmax you Dork? Stretch, stretch, flow form part way. Stretch on the Pullmax some more, flow form. Holy jaboly! Look what you have. 1 1/4" deep, 2 1/2" wide and a little over 3" long. The blank is big enough to trim for the right and left hand plates. Now, there will be a little Crown Royale Black in my evening. Happy, happy.
Take away? Don't overthink. Do what you know is right.
Aileron hinge covers inboard and center both sides. We need the outboards.

Frankie the Magician's PVC tooling

$0.50 per pound scrap

Stretch number four or so on the Pullmax then back to the female die and flow forming

Ta da!

Re: Not sure, anybody interested?
Tue Aug 04, 2015 9:14 pm
sdennison wrote:Sabre Div: Please see the new post on Sabre Ejection Seat Help.
Here is the nose panel re-chromated per the owners request. I found that this panel was not from his airframe #381 but actually off of #358. So, it appears that there is a bondo type squash seal used to make the slight contour variations in #358 fit #381 perfectly. I also found that the little tubes on the inside seem to be a pressure release mechanism for the three clamps that are in line with the centerline of the aircraft. I am surmising that if the pressure was not bled off, there might be a chance that the panel could blow off in flight.
To me, it looks like the little tubes are water drains to prevent water from pooling around the latches. Just a guess on my part...........
Re: Not sure, anybody interested?
Tue Aug 04, 2015 10:00 pm
Rod Schneider wrote:sdennison wrote:Sabre Div: Please see the new post on Sabre Ejection Seat Help.
Here is the nose panel re-chromated per the owners request. I found that this panel was not from his airframe #381 but actually off of #358. So, it appears that there is a bondo type squash seal used to make the slight contour variations in #358 fit #381 perfectly. I also found that the little tubes on the inside seem to be a pressure release mechanism for the three clamps that are in line with the centerline of the aircraft. I am surmising that if the pressure was not bled off, there might be a chance that the panel could blow off in flight.
To me, it looks like the little tubes are water drains to prevent water from pooling around the latches. Just a guess on my part...........
Never thought of that. Could be right.
Re: Not sure, anybody interested?
Wed Aug 05, 2015 12:26 pm
Scott,
I find that sometimes learning what does not work is as important, or even more so, than just learning what does work.
Thanks for showing us your boo boos.
Still watching, still enjoying.
Thanks
Andy
I find that sometimes learning what does not work is as important, or even more so, than just learning what does work.
Thanks for showing us your boo boos.
Still watching, still enjoying.
Thanks
Andy
Re: Not sure, anybody interested?
Wed Aug 05, 2015 12:56 pm
sdennison wrote:So, when your bright idea proves how dumb you really are, go back to the basics. These outboard aileron hinge covers need to be made since we have not. My first genius idea was to hydro form these. Piece of cake thought I, DOH! Frankie the Magician made me two forms, one male and one female. I'm thinking it needs to be formed over the male form with the press and rubber. Wa wa wa! Folded over on itself like a wad of tin foil. The rubber would probably not work in the female as this is a deep 1 1/4" draw so Brainiac here decides to use both male and female at once. Crumple zone 2.0! OK, says I, we will use the female die and flow form. Meanwhile, the creatures deep in my brain are firing up the furnace to get power back on. .040" 2024-0 is the material. Forming, forming, rip! Forming part way, anneal (cause it is obviously work hardening), forming part way, rip!?!?!
Get a call from the engine room, brain power is back on. See that beautiful Pullmax you Dork? Stretch, stretch, flow form part way. Stretch on the Pullmax some more, flow form. Holy jaboly! Look what you have. 1 1/4" deep, 2 1/2" wide and a little over 3" long. The blank is big enough to trim for the right and left hand plates. Now, there will be a little Crown Royale Black in my evening. Happy, happy.
Take away? Don't overthink. Do what you know is right.
Aileron hinge covers inboard and center both sides. We need the outboards.
Frankie the Magician's PVC tooling
$0.50 per pound scrap
Stretch number four or so on the Pullmax then back to the female die and flow forming
Ta da!
Hi Scott,
It was great hanging with you at Oshkosh…naturally not enough time though! I think next year (If I go) we’re talking about renting a camper and staying in Warbirds. You might even convince me to bring my banjo! Ya, ya…lock up the wives and daughters for safety, I know!
Hey, not to be an Anorak but rather than using a matched die or one sided die and rubber, a draw die may have done the trick for you. I’ve made some really deep draws in super thin brass and aluminum I never thought possible using draw dies. Fact is I made a bet with the engineer that there was no way I’d get the draw as deep as he wanted…I lost and am now a believer! A draw die uses a third “Tension Plate” to hold the blank in place and adds a slight drawing tension on it when the two halves of the form die are brought together. The tension plate keeps wrinkles from forming in the areas you want to stay flat and it places an even tension across the blank as the die halves come together. The majority of the reason your parts split was because of those wrinkles. They jammed on the edge of the form and wouldn’t let material draw into the form so all the forming had to come from stretching the material inside the cup shape which was way too much for it to handle. Anyway, if the tension is set correctly (Experimentation), as the die closes, the material from the blank pulls evenly down and into the cup shape from the outsides rather than asking all the stretching to happen in the cup area itself. Bee’s wax on the negative side of the die and edge radiuses also helps reduce the friction between the blank and the die reducing the risk of splits and tear’s. Draw dies help reduce stretching and the subsequent work hardening in the deepest areas of the draw while also retaining some of the material thickness in those areas. Try it sometime…you’ll like it!
Cheers,
John
Re: Not sure, anybody interested?
Tue Aug 11, 2015 8:33 pm
Multi-tasking today...Corsair Div.: (oh yeah, I also assembled and mounted two new front tires for a certain tug for a certain jet-type guy I know)
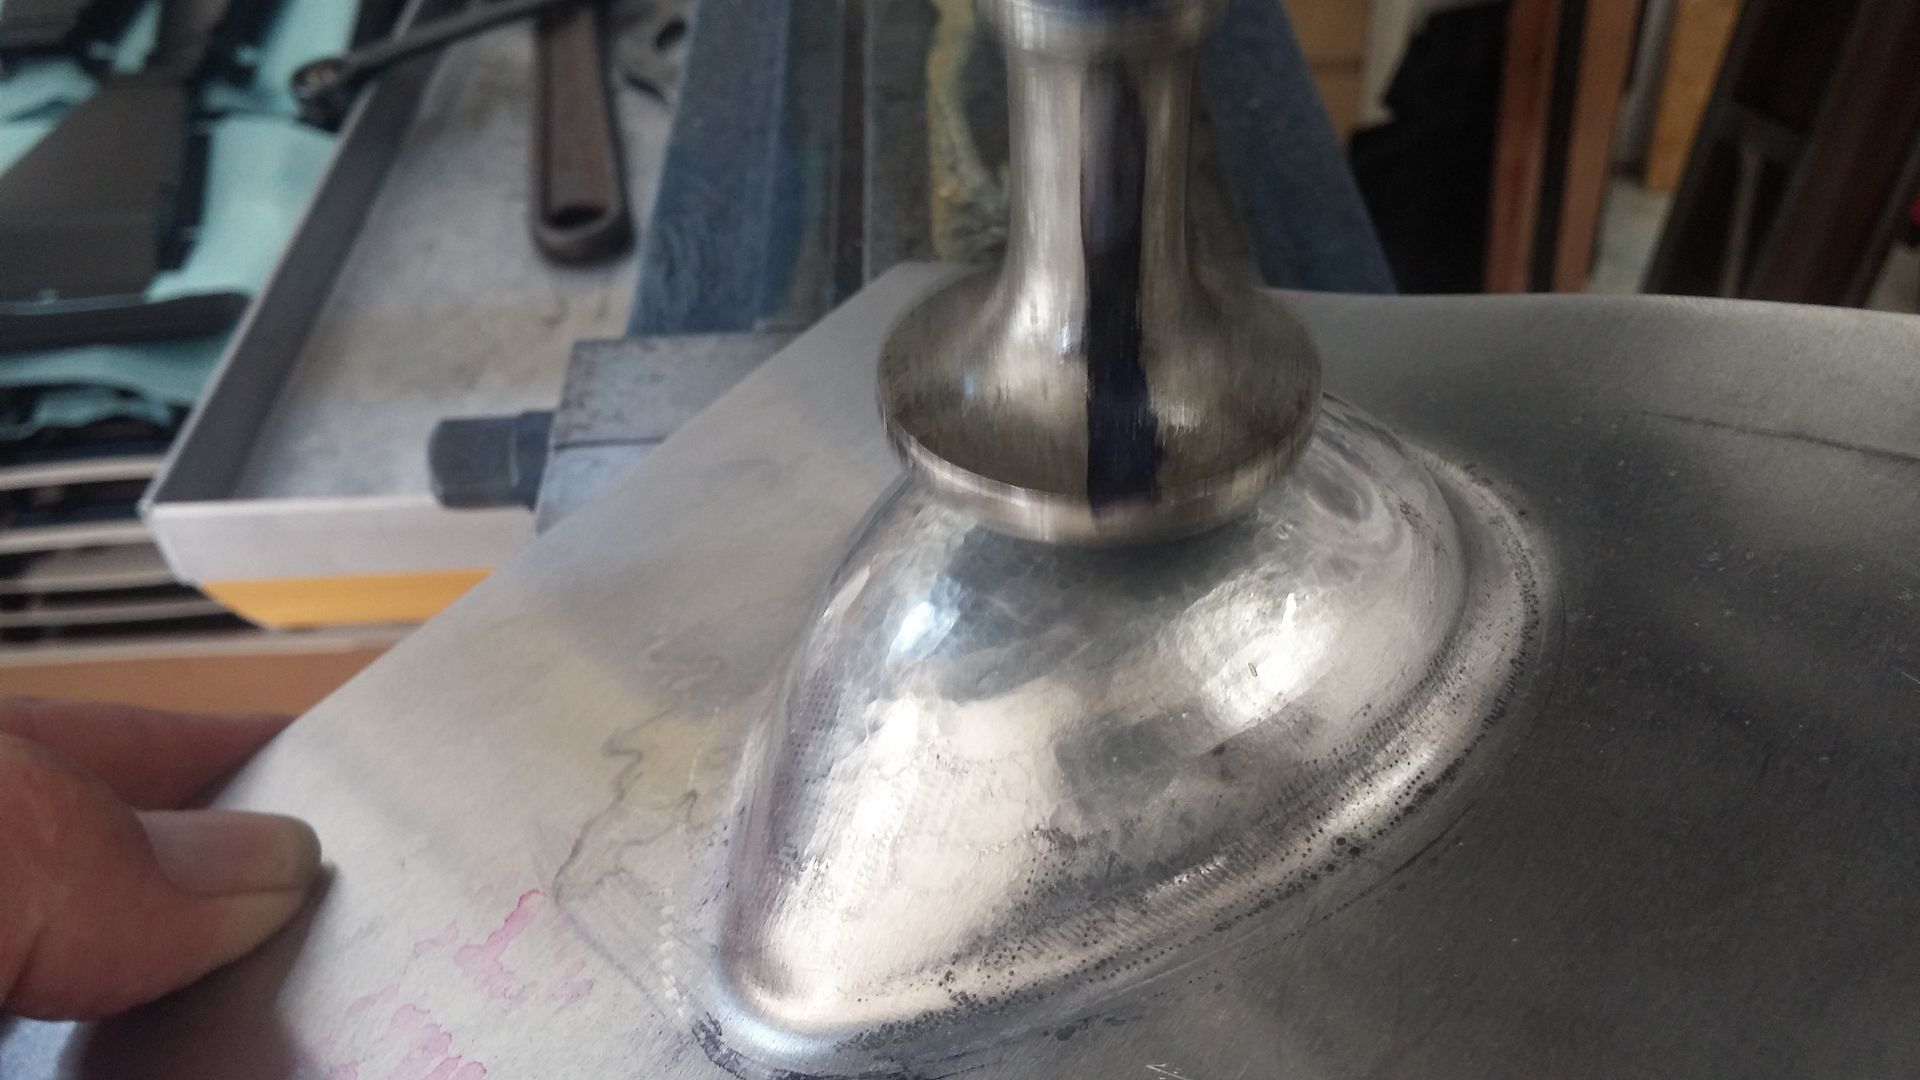
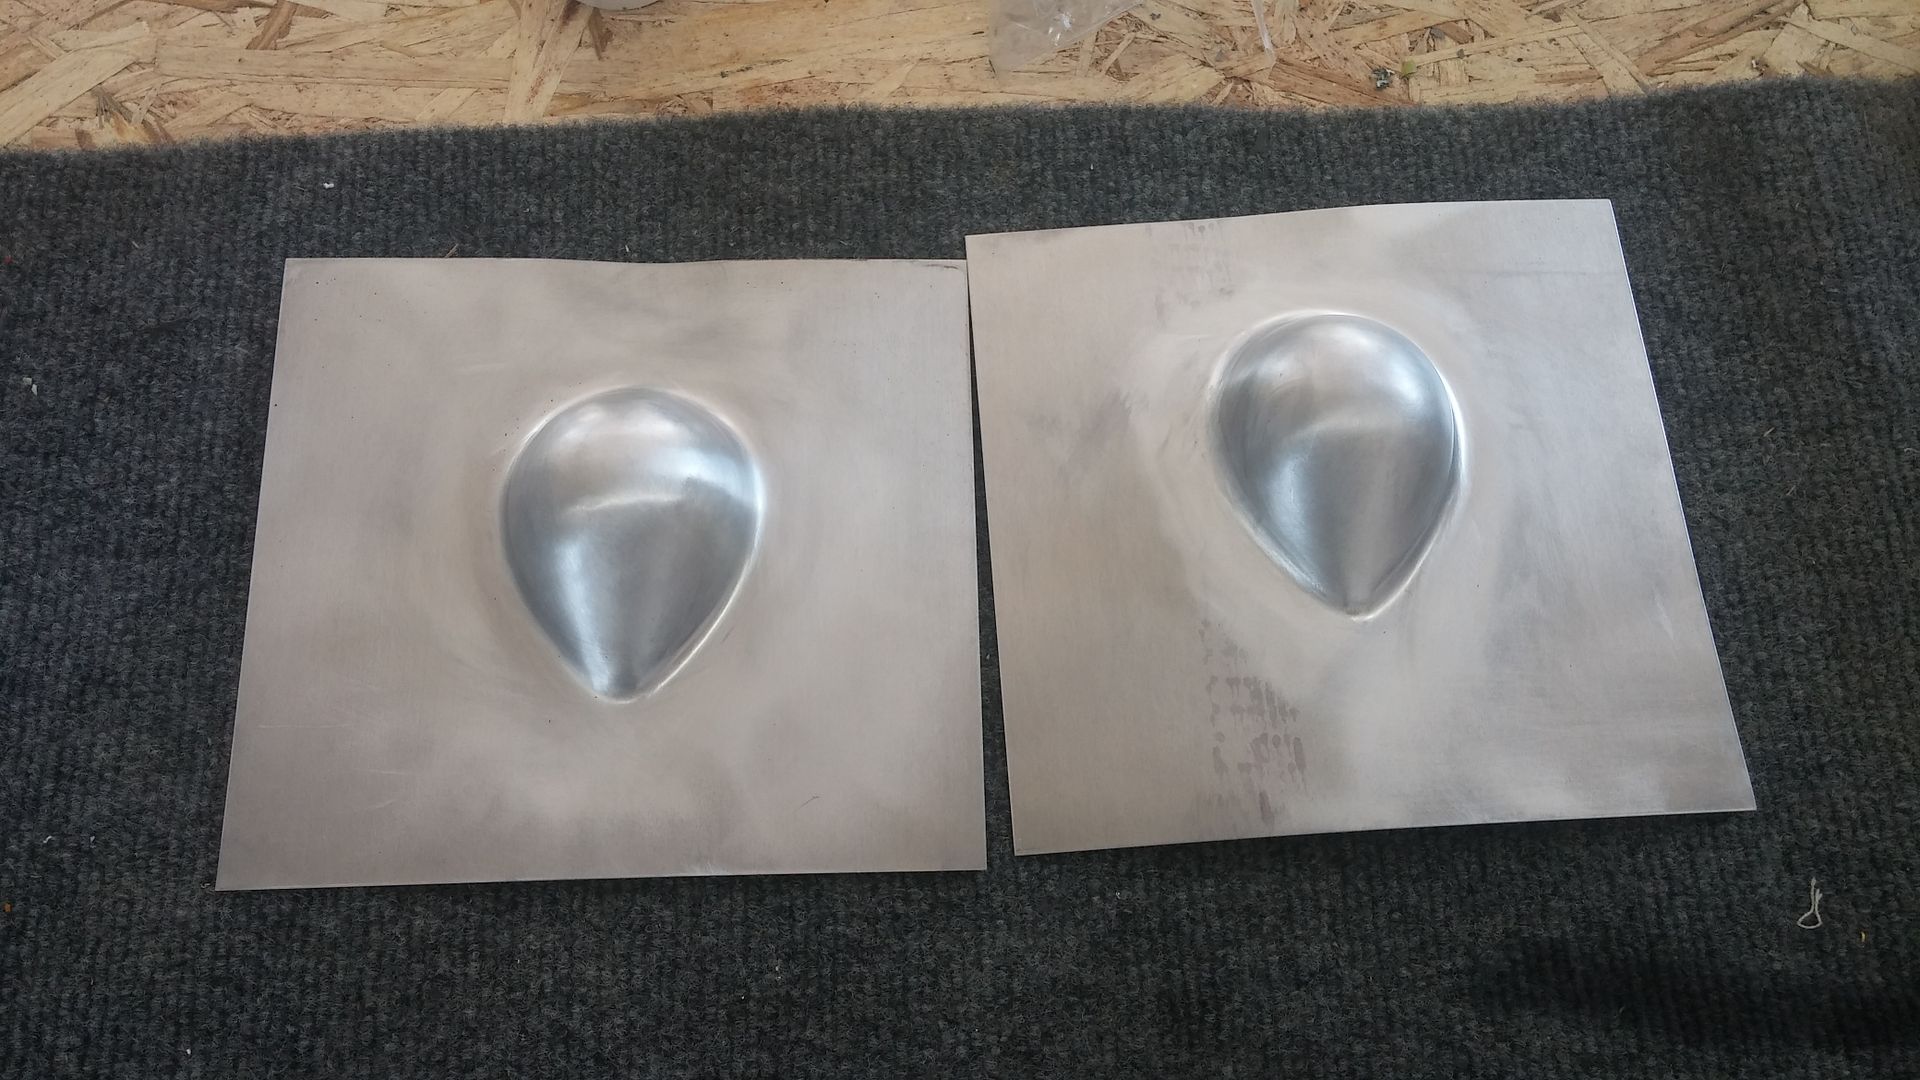
So, I remembered to take some process shots while making the second tear drop cover today. Missed the first shot but essentially, I outline the boundary and go to the Pullmax first to stretch and raise the dome some. Then to the flow form and start working from the edges down toward the center a little at a time. Then back to the Pullmax to work and stretch some more, then flow form some more.
When I am about 90% to final size in the female dish form, I work the balance carefully with a tear drop poly hammer. Then hand finish the piece. Next will come trimming the blank to print, finishing bolt holes and dimples, then heat treating.
First lap through the Pullmax to raise and stretch the dome then first pass through flow forming to work the edges
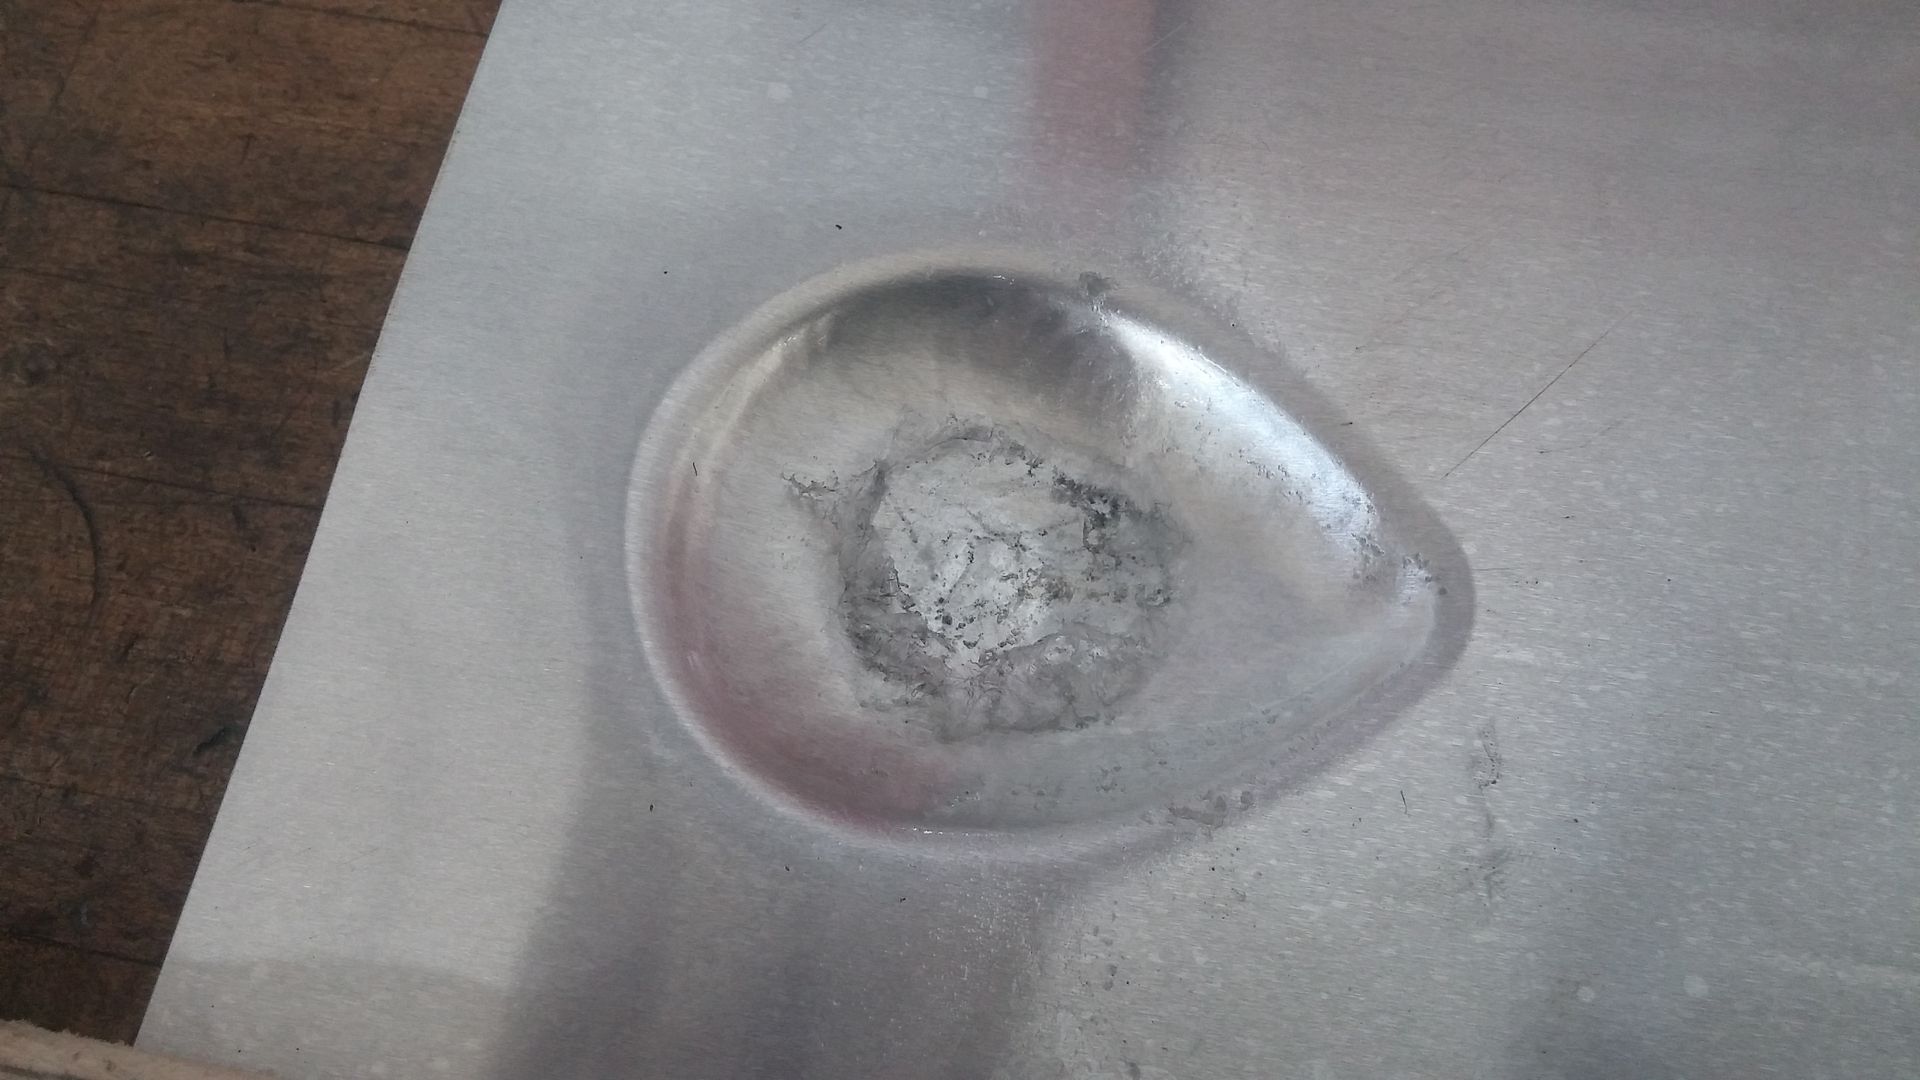
Flow forming the edges but not the bottom
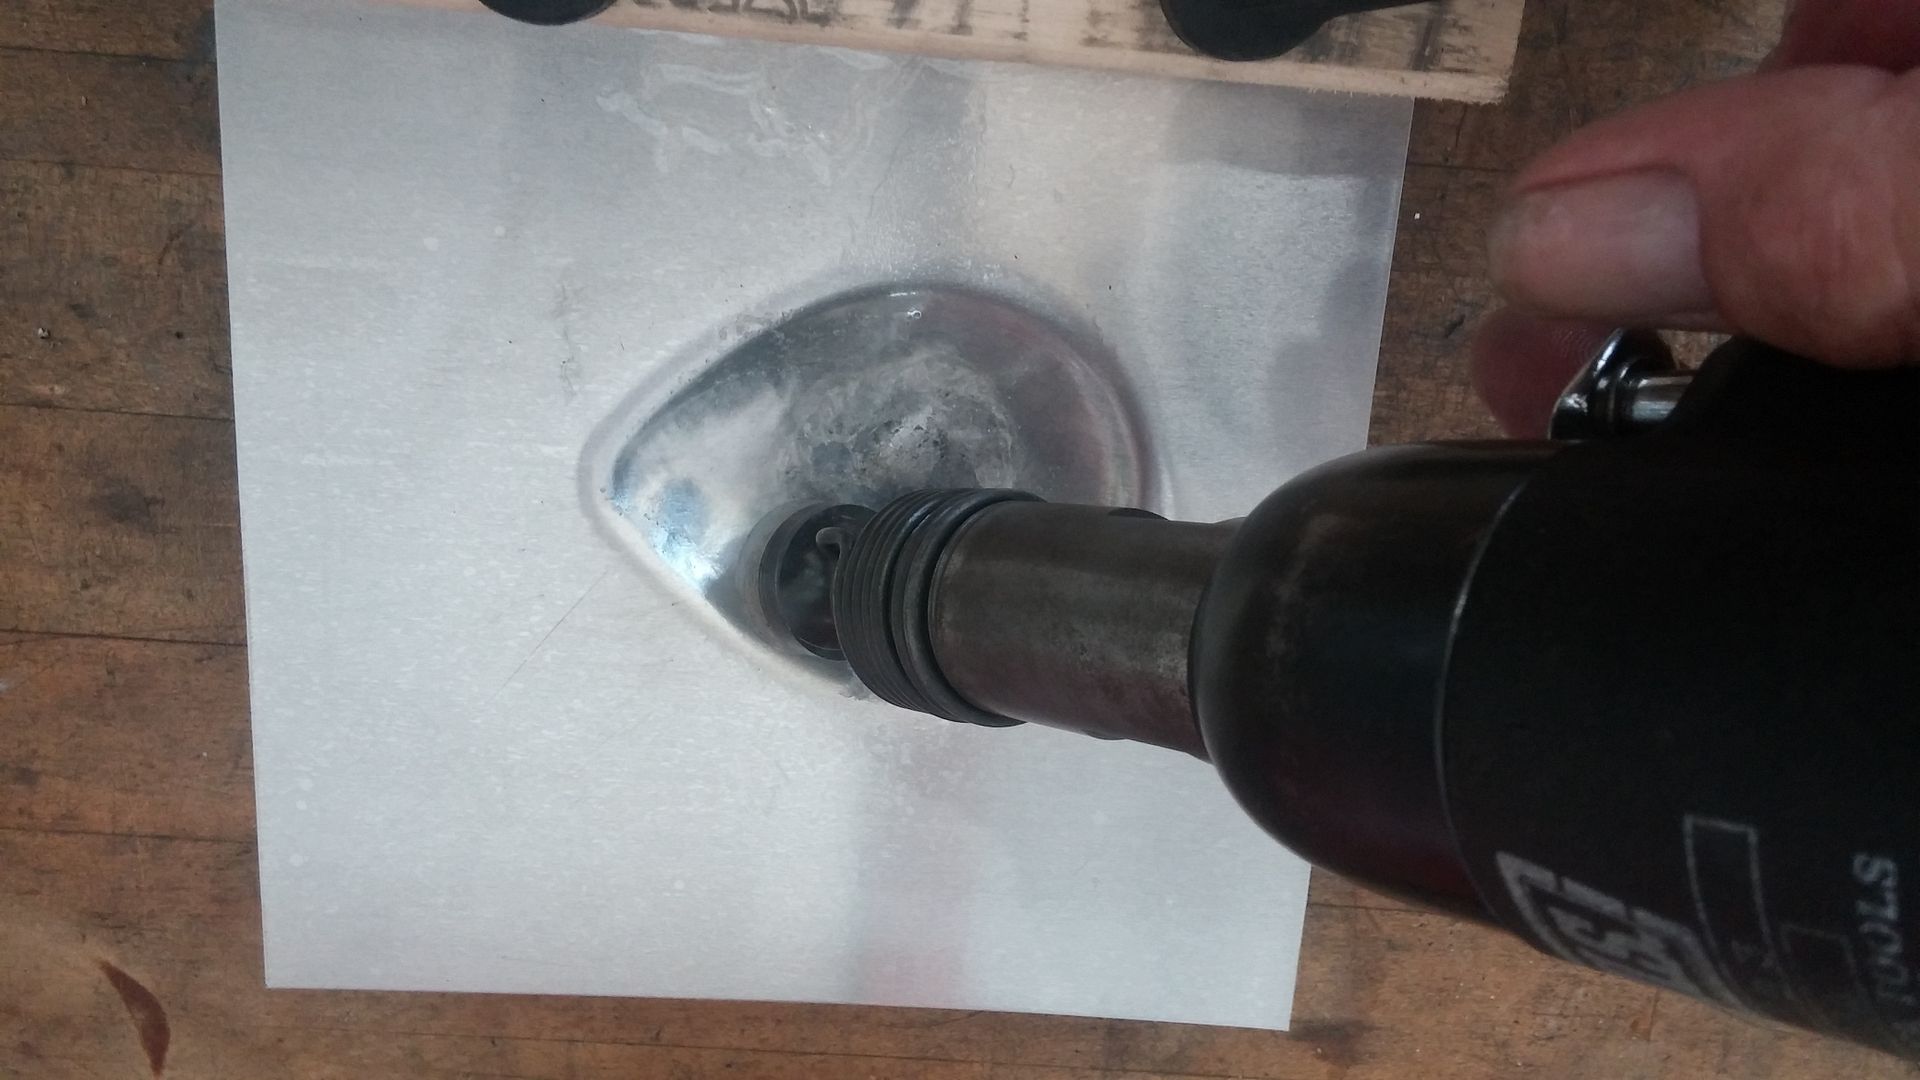
Clamped to the flow form block only on one side to allow metal to move as freely as possible as this is a deep draw. I may be wrong in process but it worked for me rather than a full perimeter clamp.
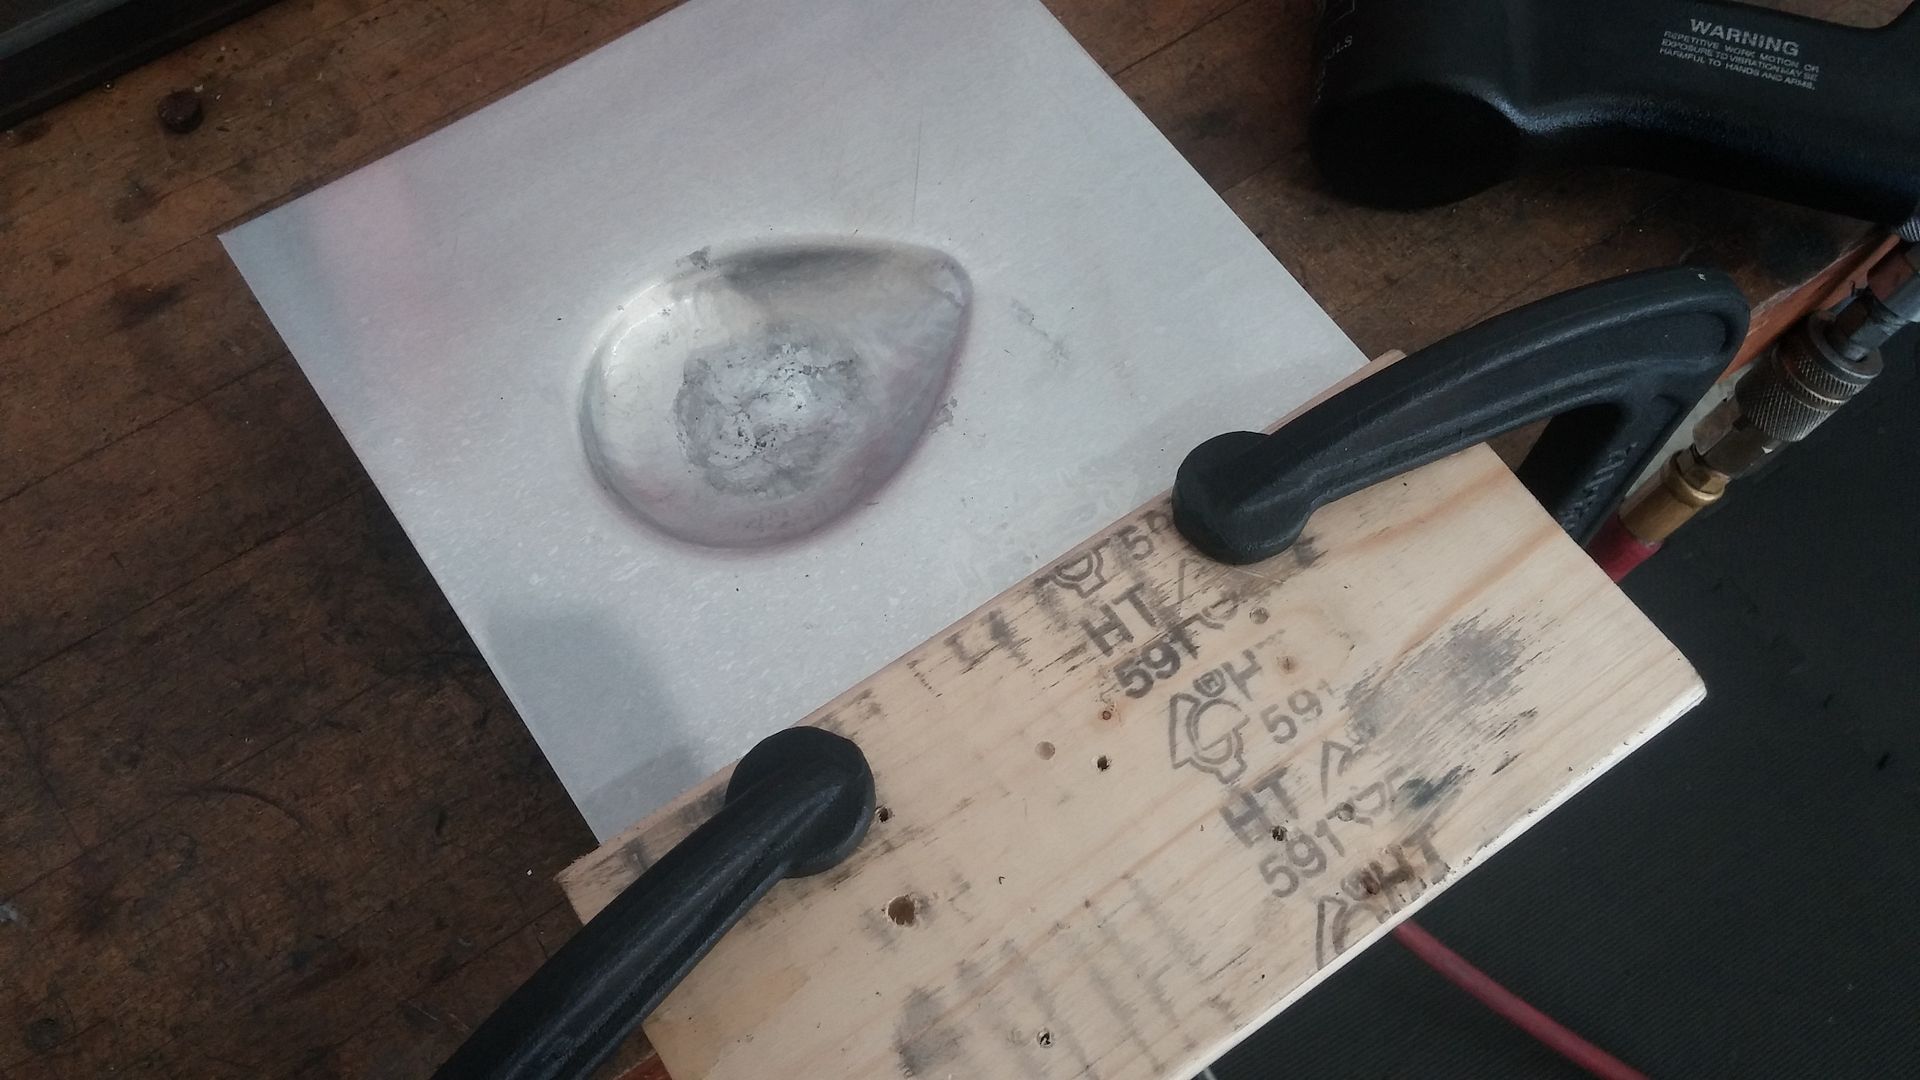
More Pullmax raising and stretching
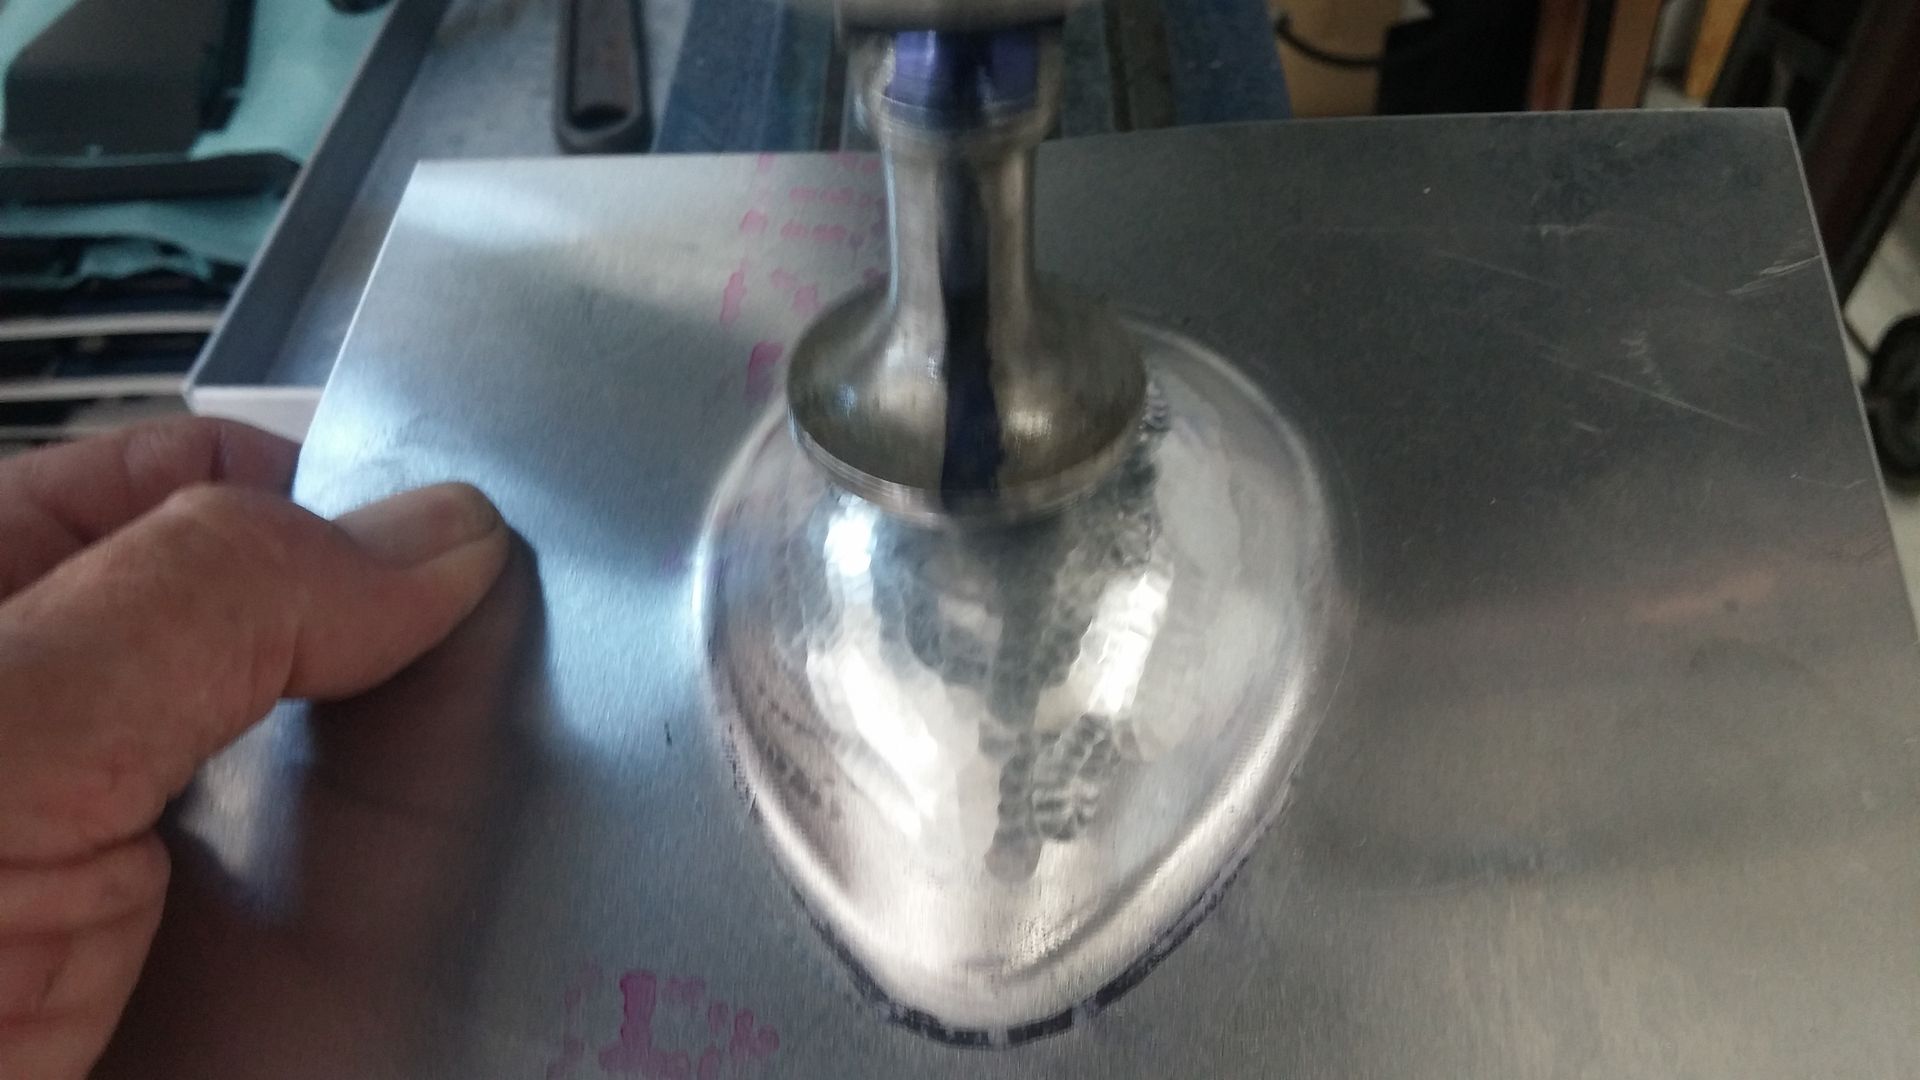
Then a couple more cycles like that and I finish in the female flow form with a tear drop poly hammer, some planishing by hand, hand surface finishing and now I have two.
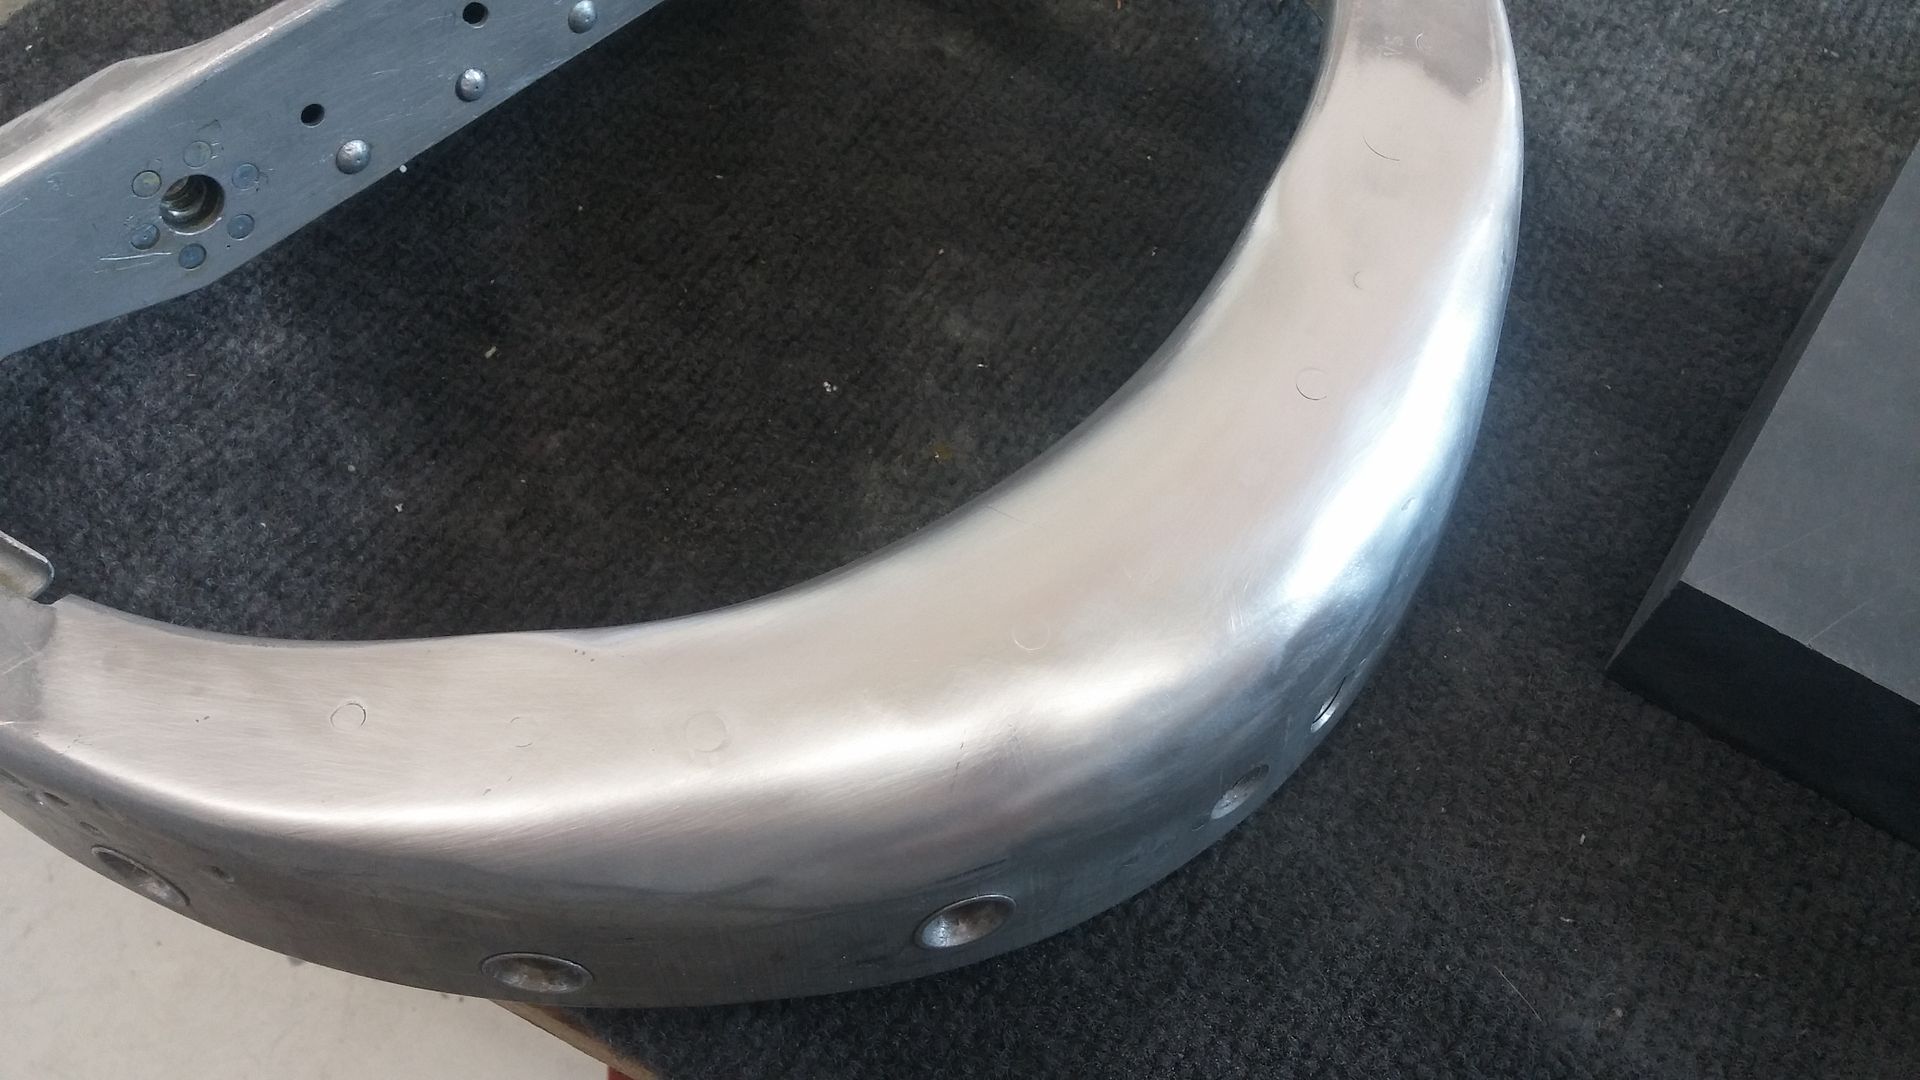
Then back to the "figure 8" rivets to fill in rivet holes in a highly visible rib at the intake opening. I previously filled the #30 rivet holes that were actually drilled properly. These remaining required oversize. Then, when finished and painted, will look great from 5000 feet.
Random because I don't seem to have enough to do...div:
Hail damage wing tip leading edges.
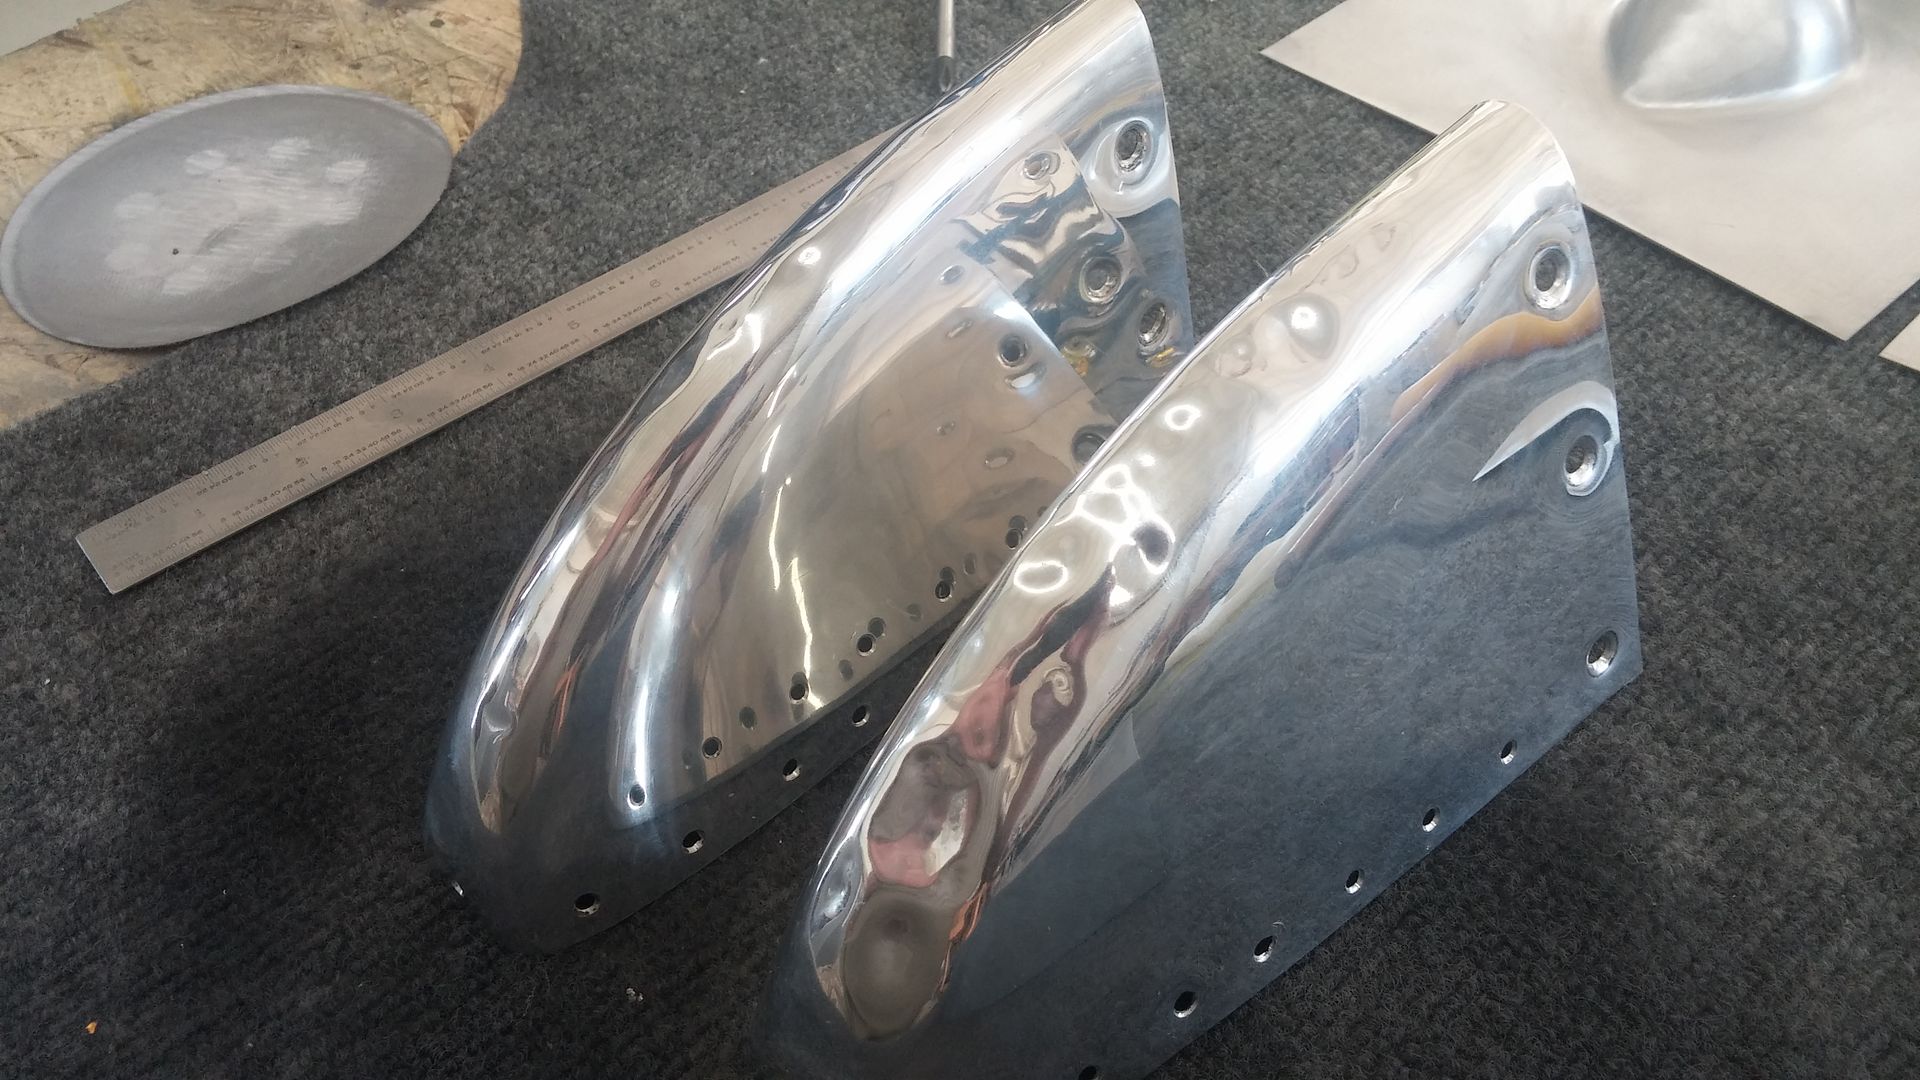
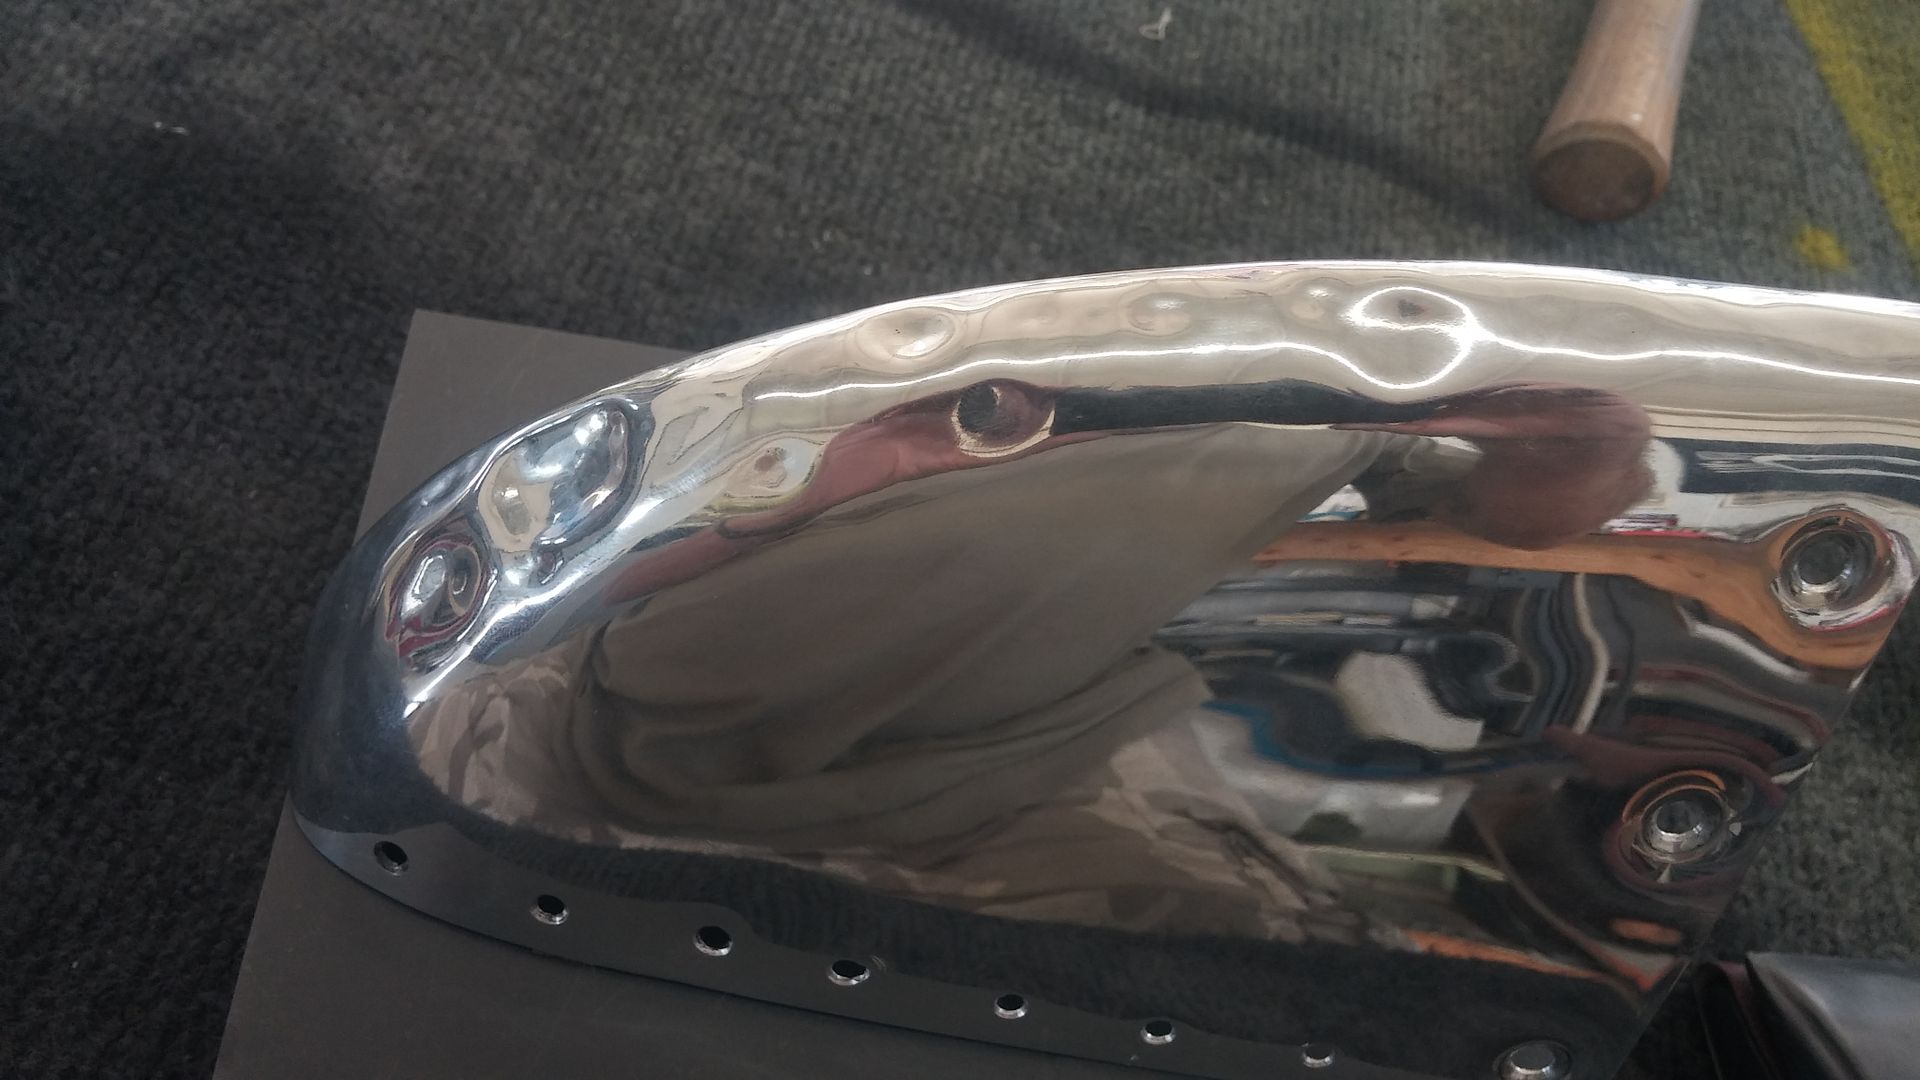
This is the easy one as it is not too damaged. The owner will only accept perfection so we'll try this one to see
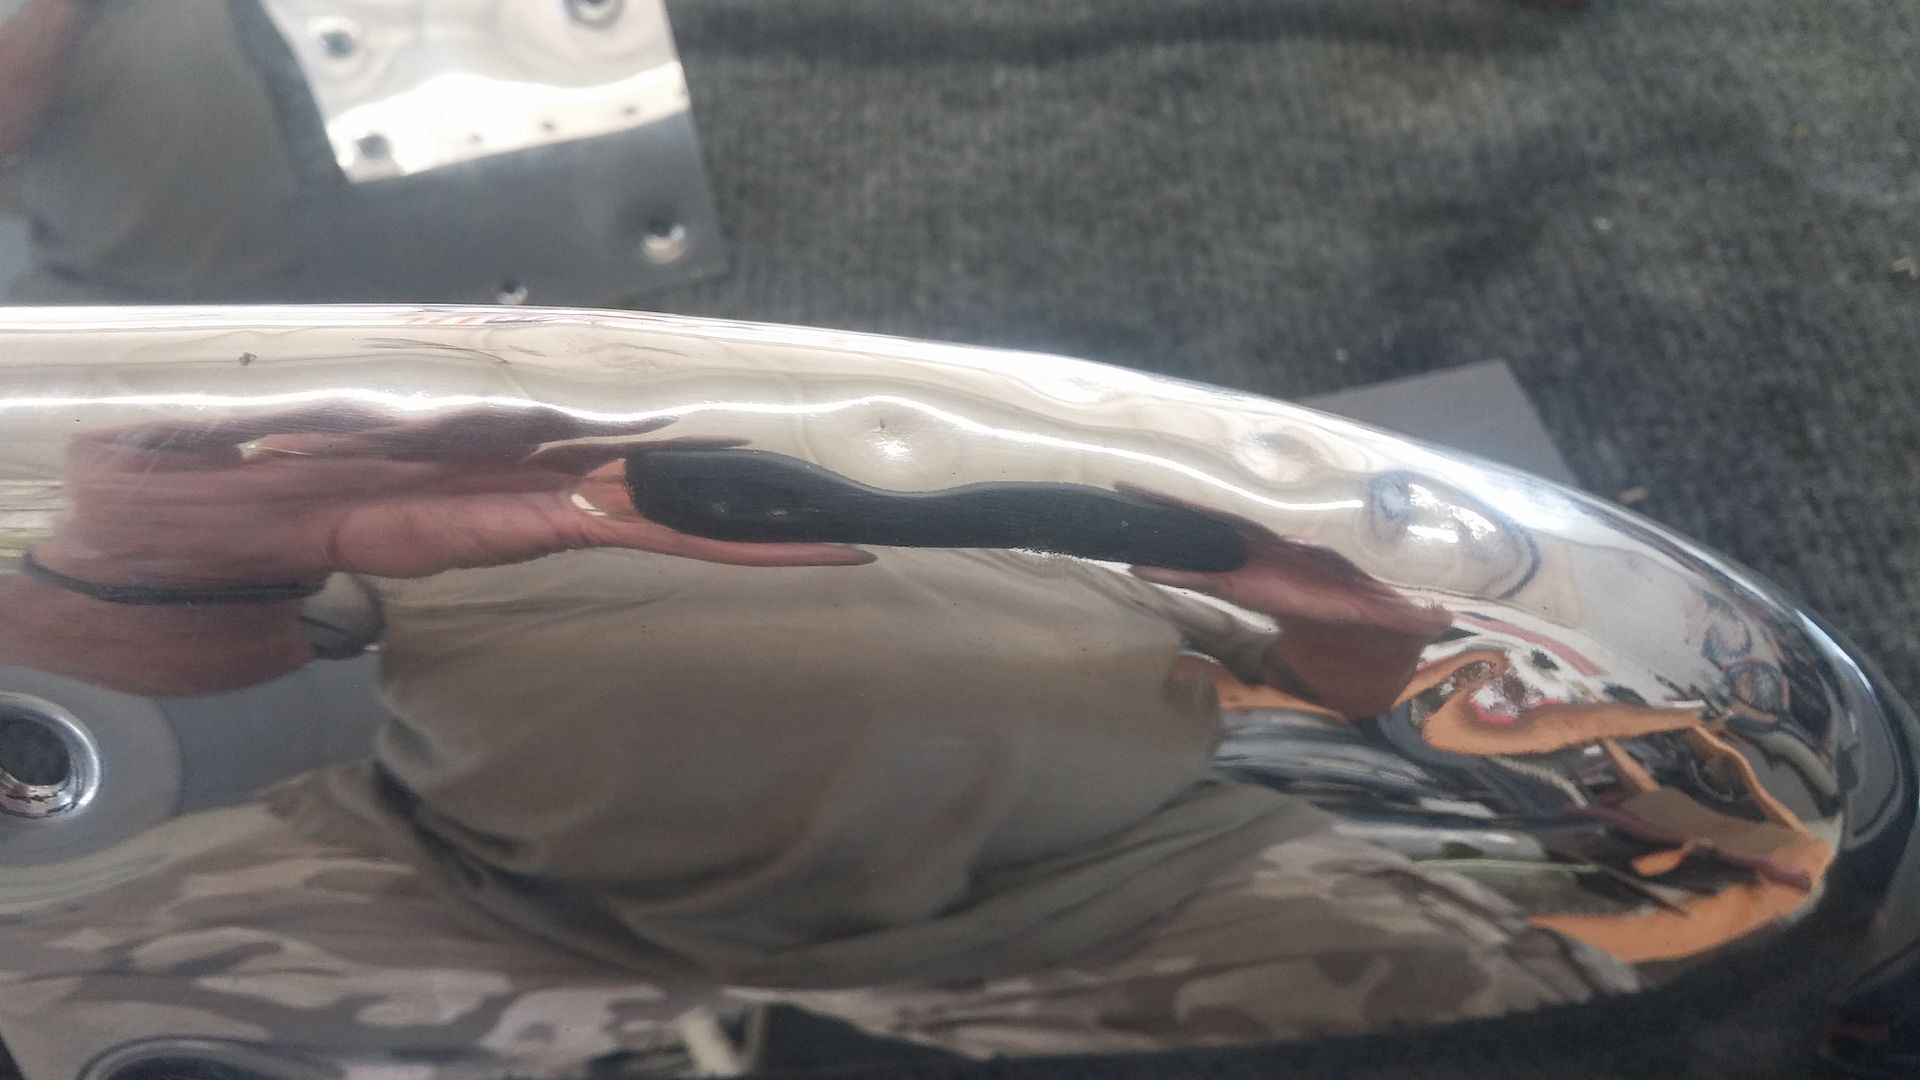
So far, so good
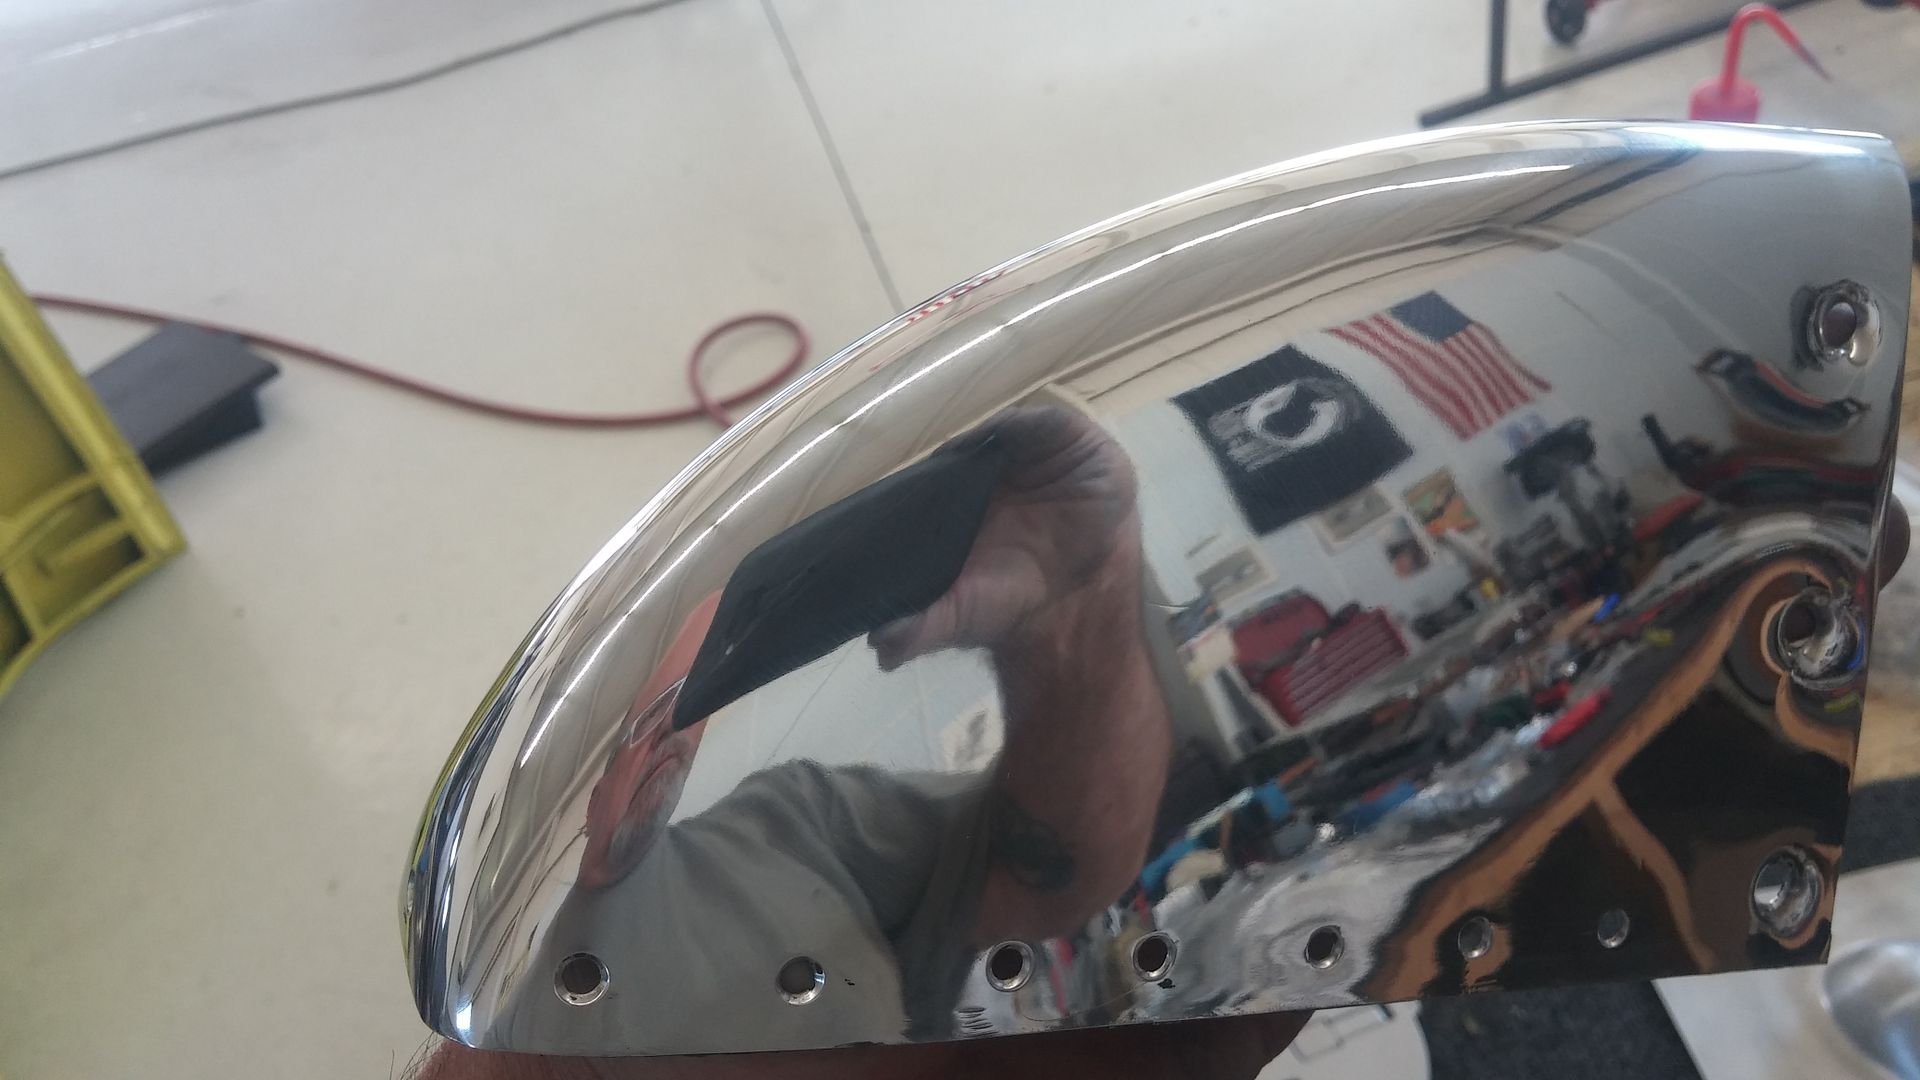
Gooder as new...
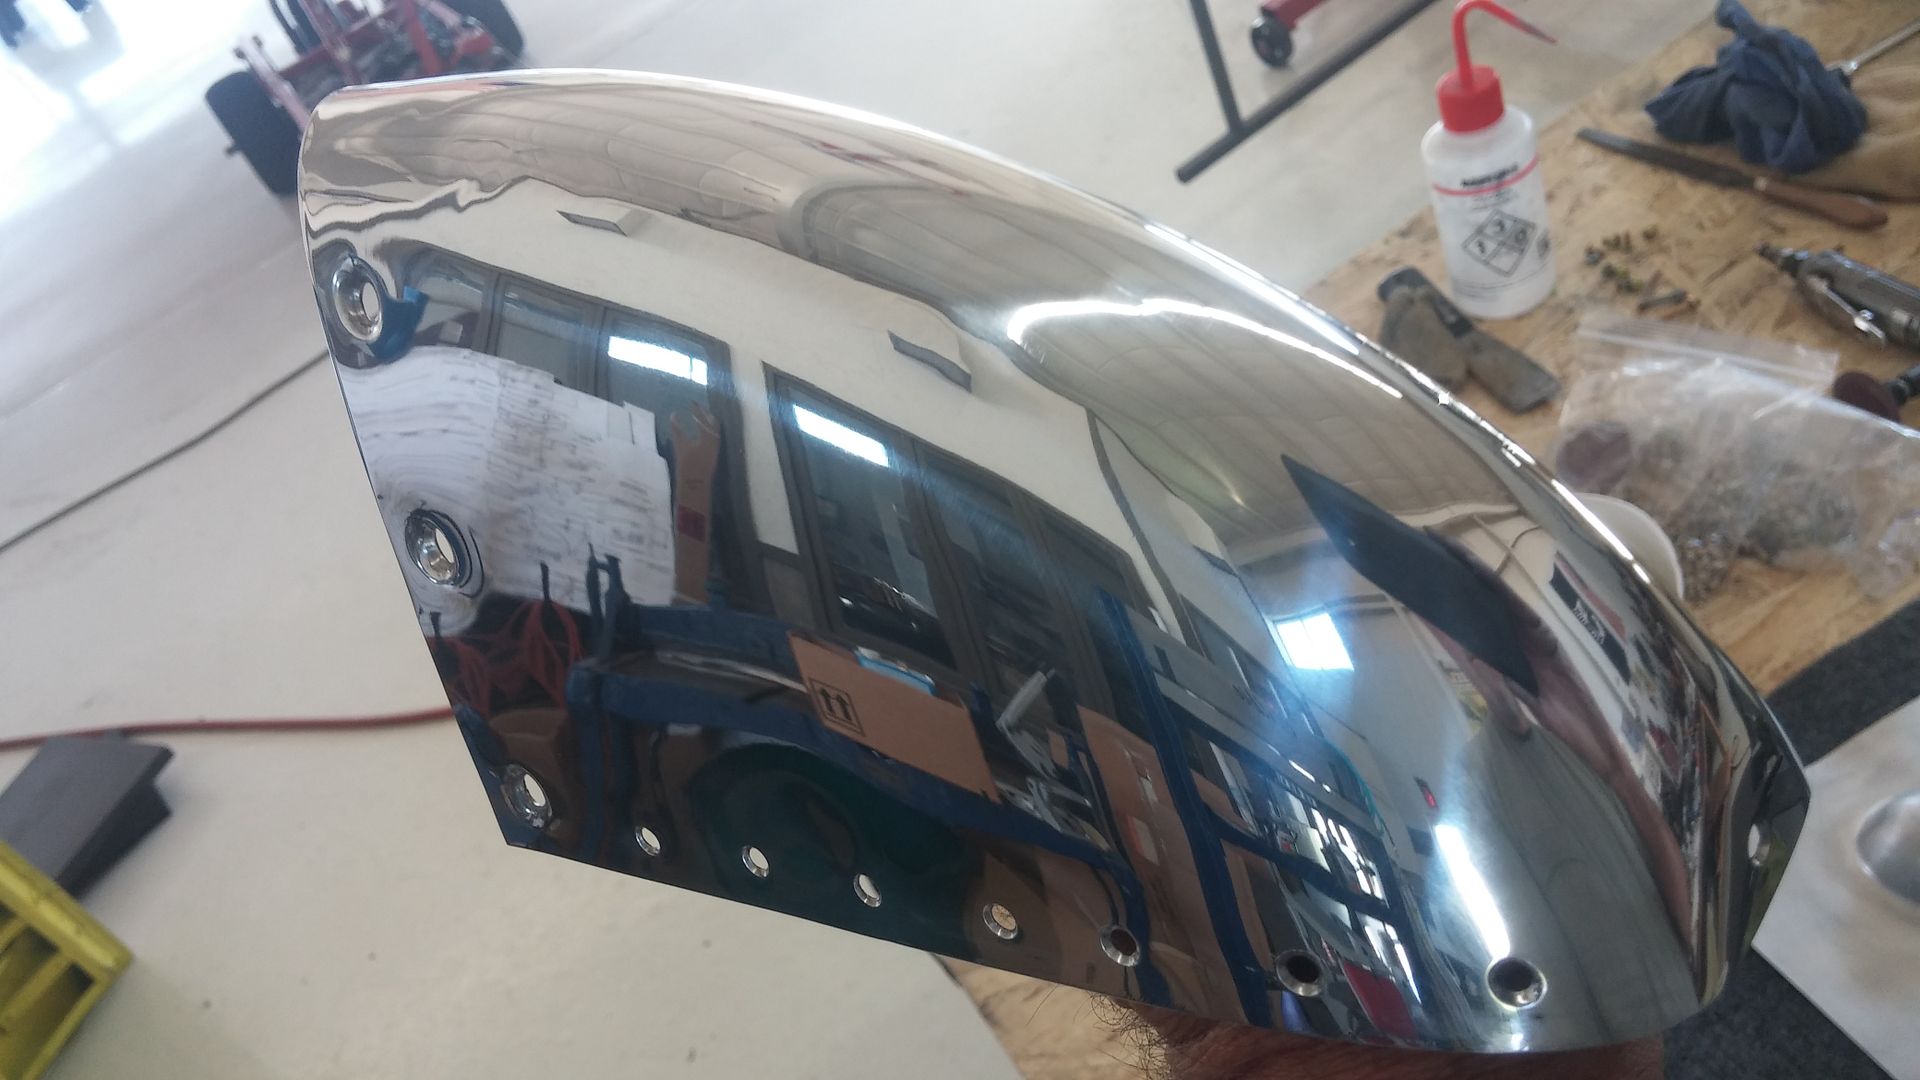
Next, the hard one, film at 11.
So, I remembered to take some process shots while making the second tear drop cover today. Missed the first shot but essentially, I outline the boundary and go to the Pullmax first to stretch and raise the dome some. Then to the flow form and start working from the edges down toward the center a little at a time. Then back to the Pullmax to work and stretch some more, then flow form some more.
When I am about 90% to final size in the female dish form, I work the balance carefully with a tear drop poly hammer. Then hand finish the piece. Next will come trimming the blank to print, finishing bolt holes and dimples, then heat treating.
First lap through the Pullmax to raise and stretch the dome then first pass through flow forming to work the edges

Flow forming the edges but not the bottom

Clamped to the flow form block only on one side to allow metal to move as freely as possible as this is a deep draw. I may be wrong in process but it worked for me rather than a full perimeter clamp.

More Pullmax raising and stretching


Then a couple more cycles like that and I finish in the female flow form with a tear drop poly hammer, some planishing by hand, hand surface finishing and now I have two.

Then back to the "figure 8" rivets to fill in rivet holes in a highly visible rib at the intake opening. I previously filled the #30 rivet holes that were actually drilled properly. These remaining required oversize. Then, when finished and painted, will look great from 5000 feet.

Random because I don't seem to have enough to do...div:
Hail damage wing tip leading edges.


This is the easy one as it is not too damaged. The owner will only accept perfection so we'll try this one to see

So far, so good

Gooder as new...

Next, the hard one, film at 11.
Re: Not sure, anybody interested?
Wed Aug 12, 2015 8:25 pm
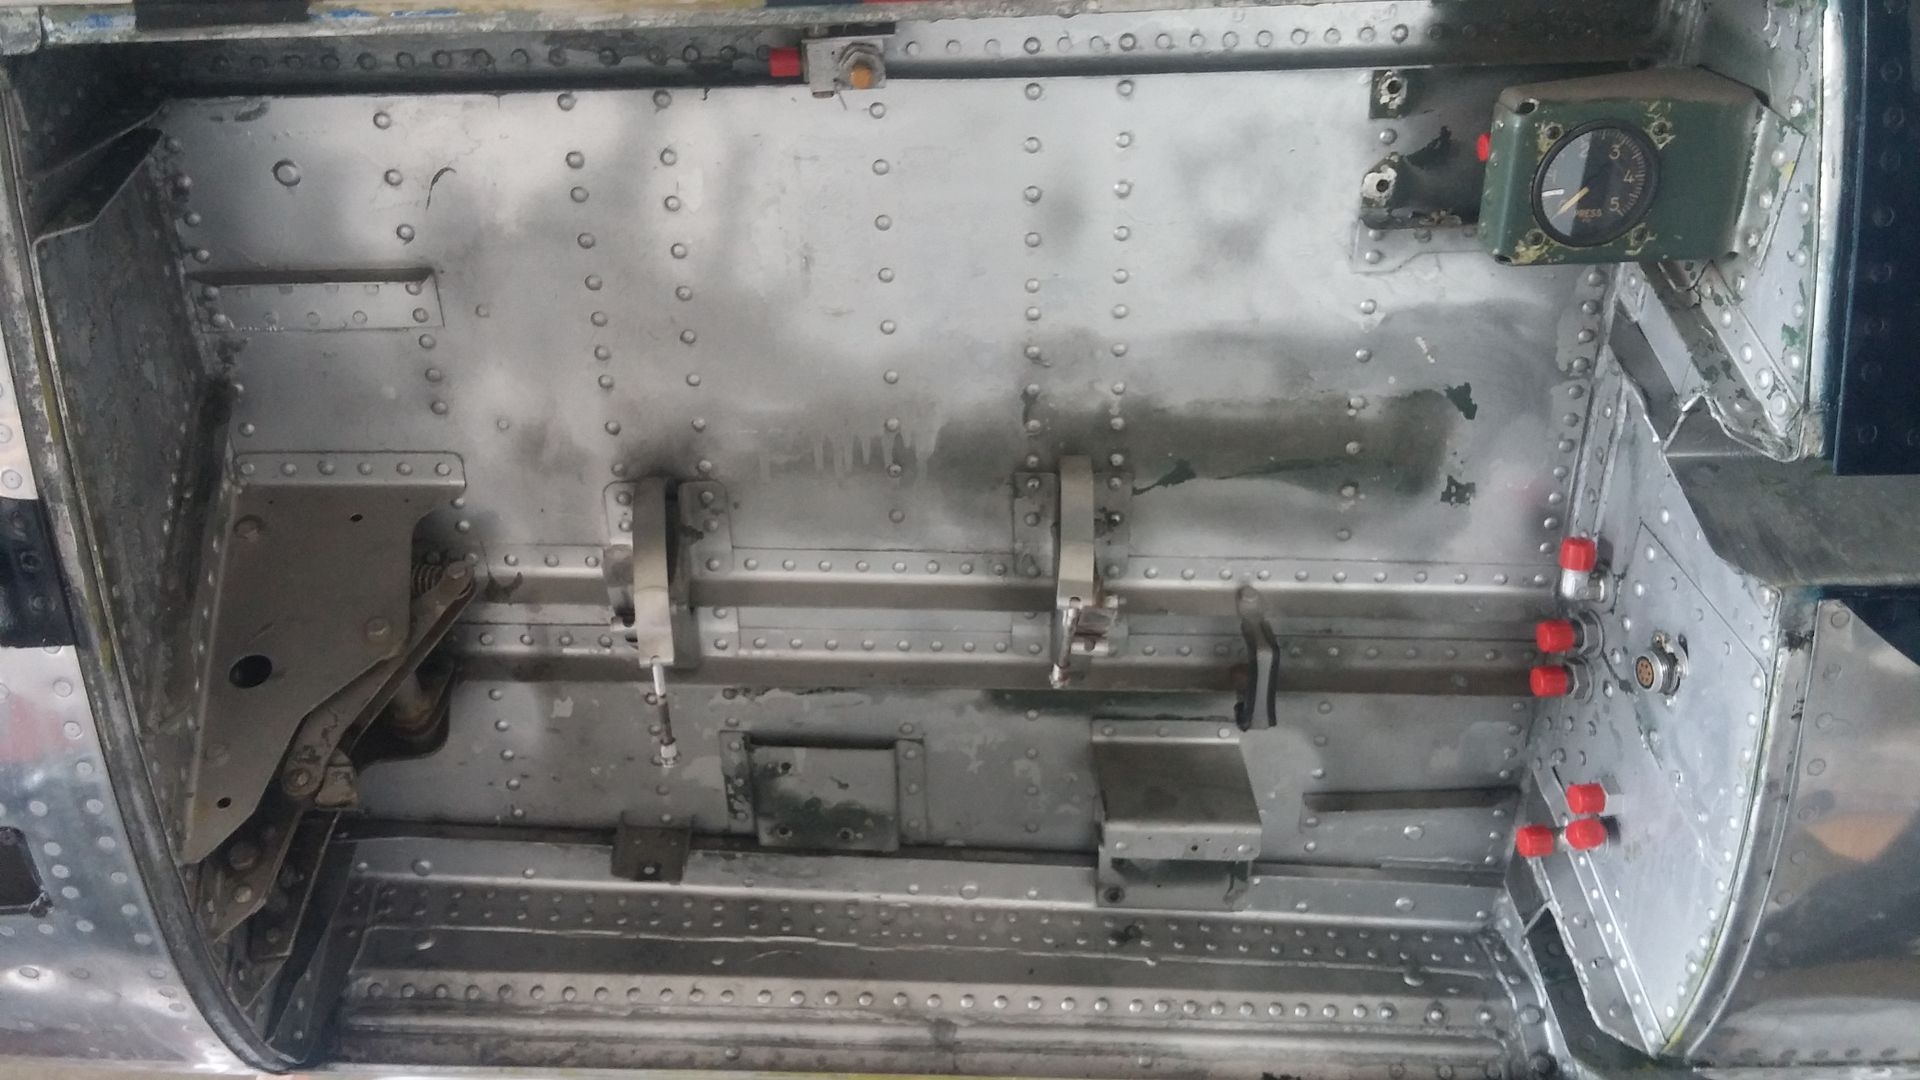
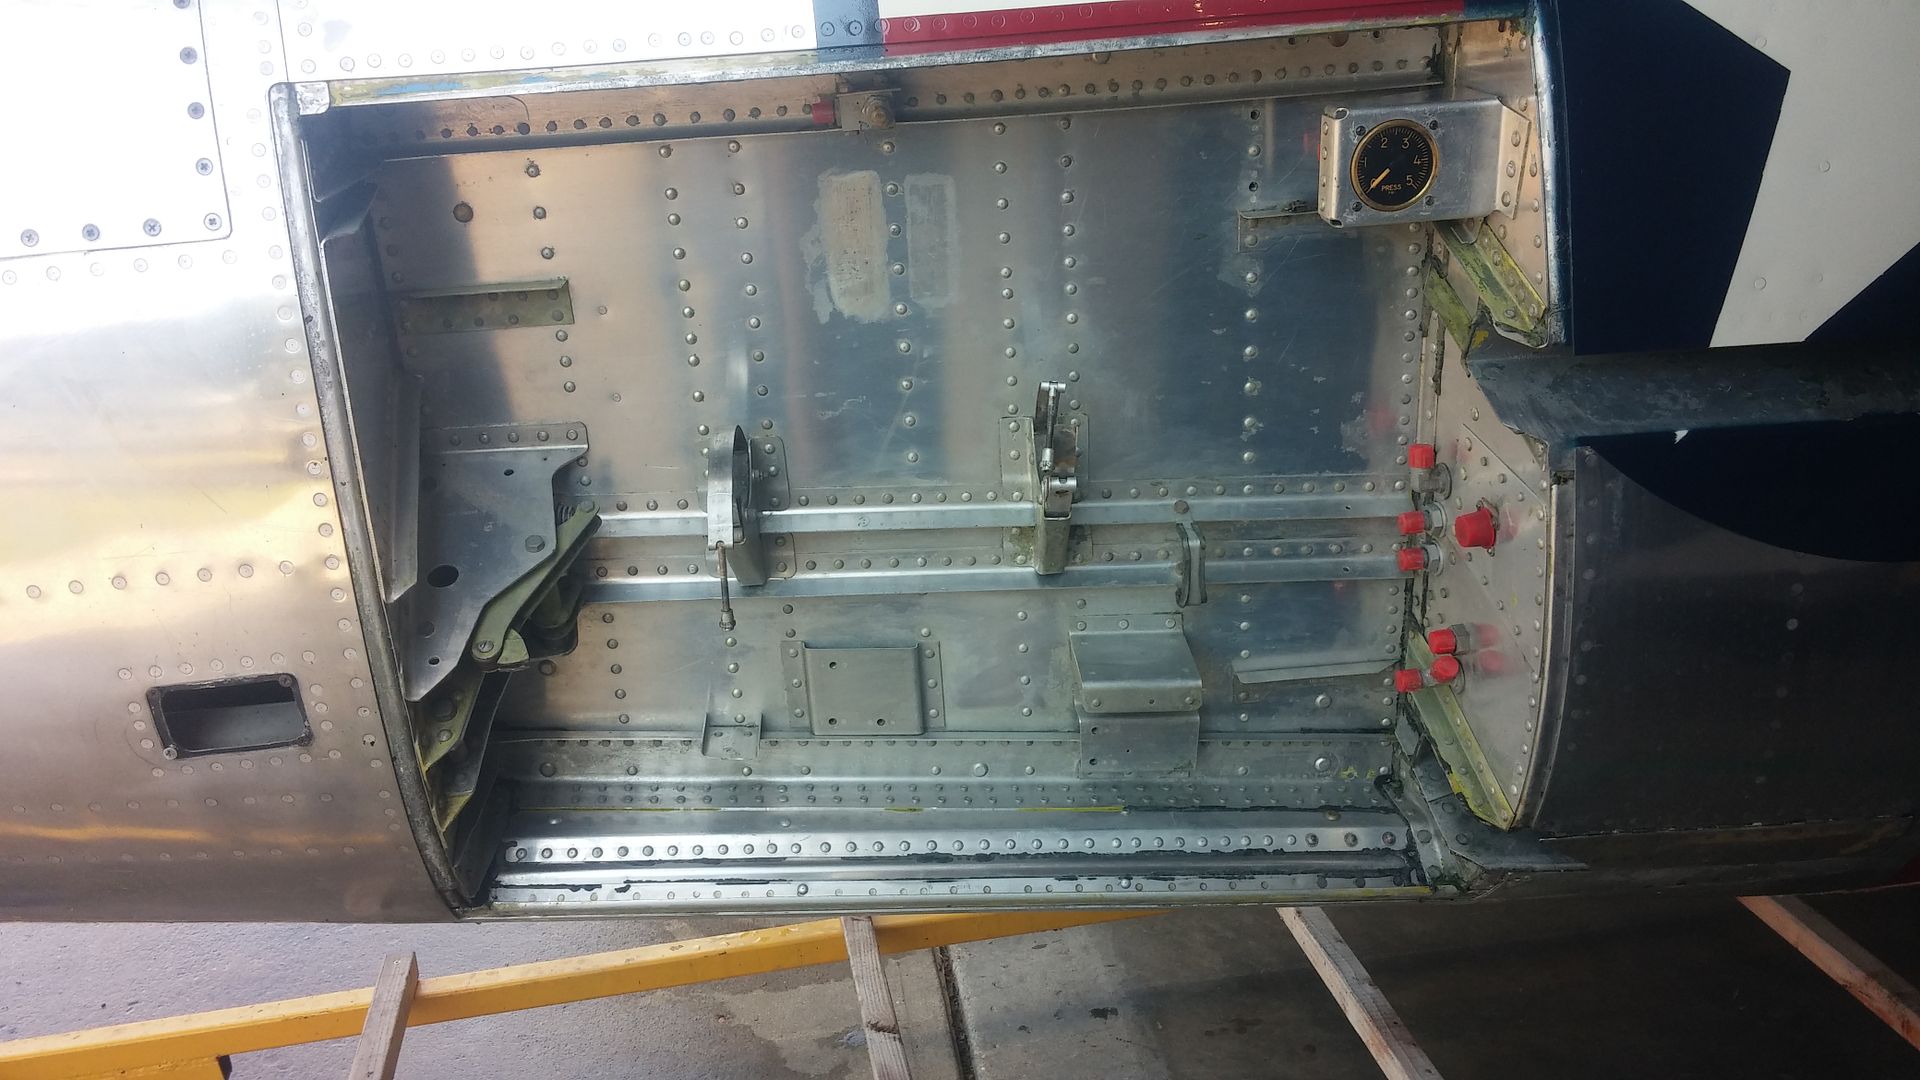
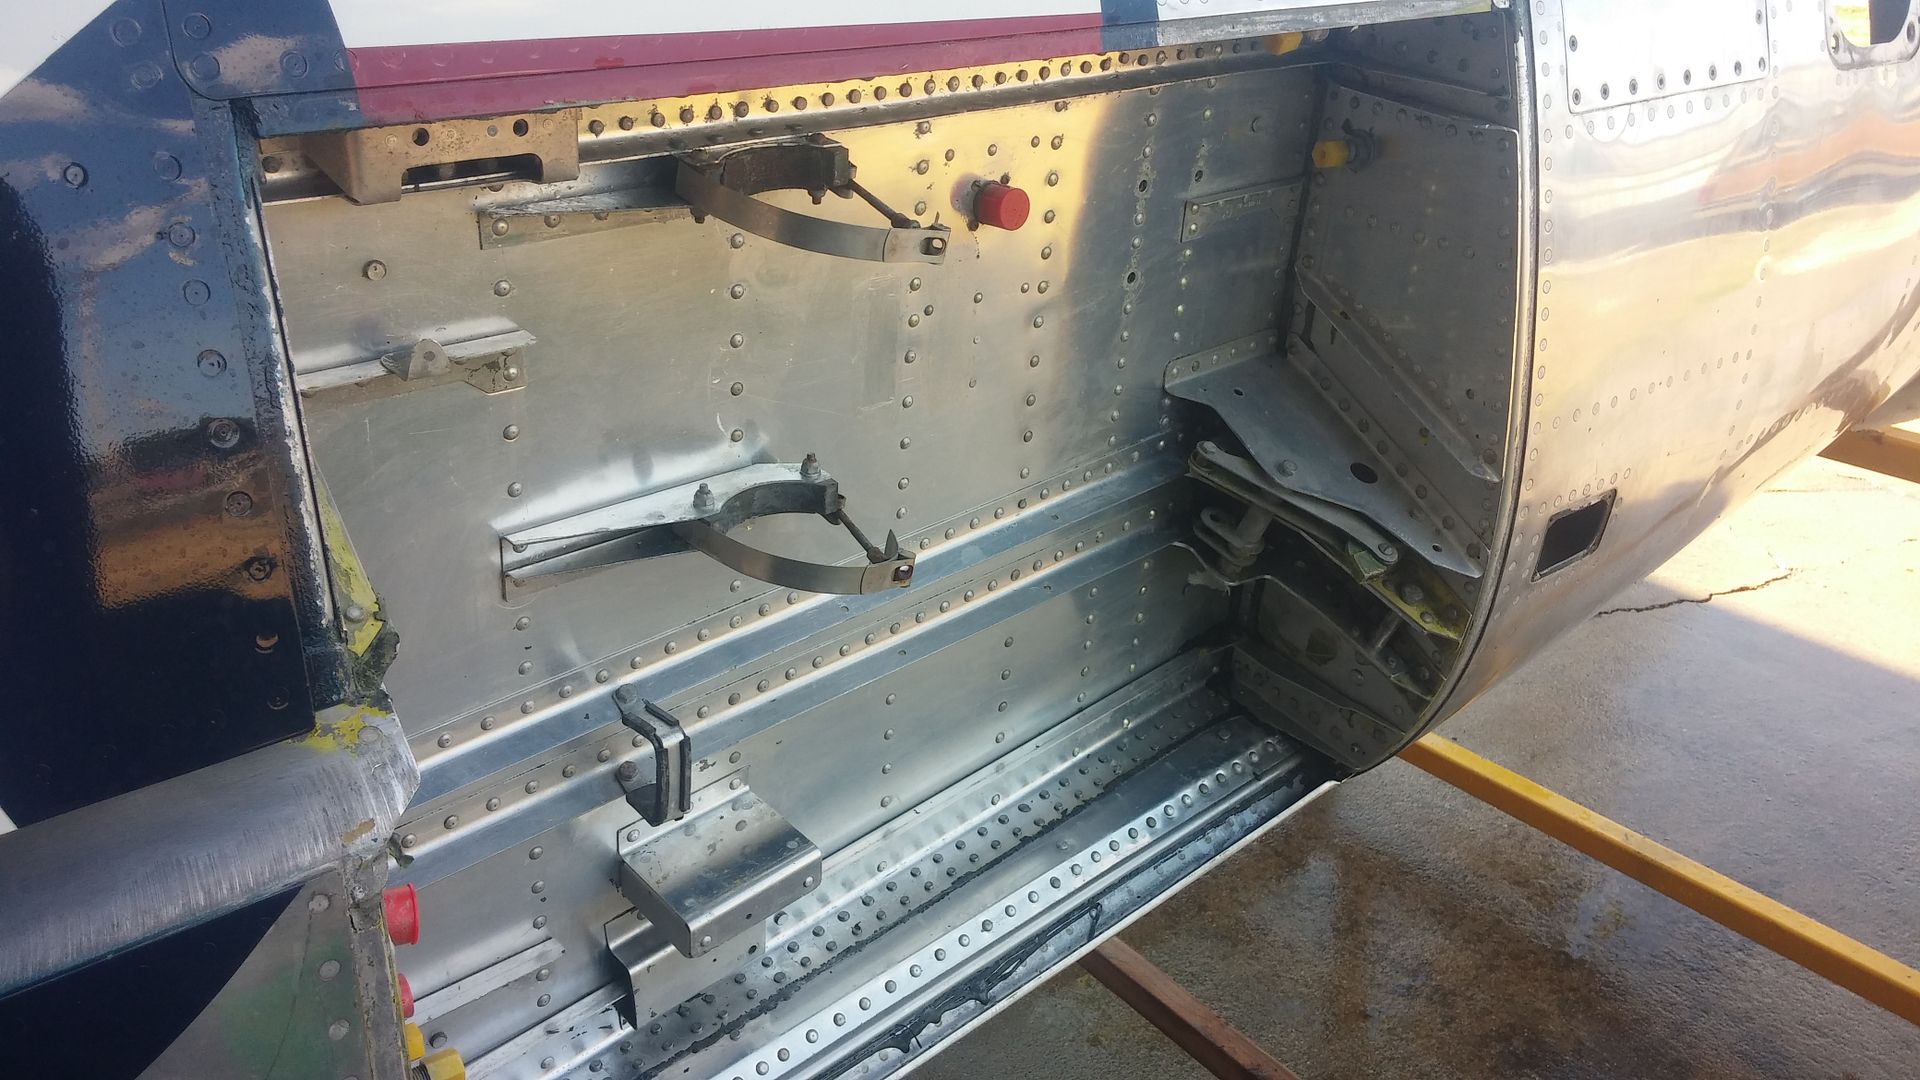
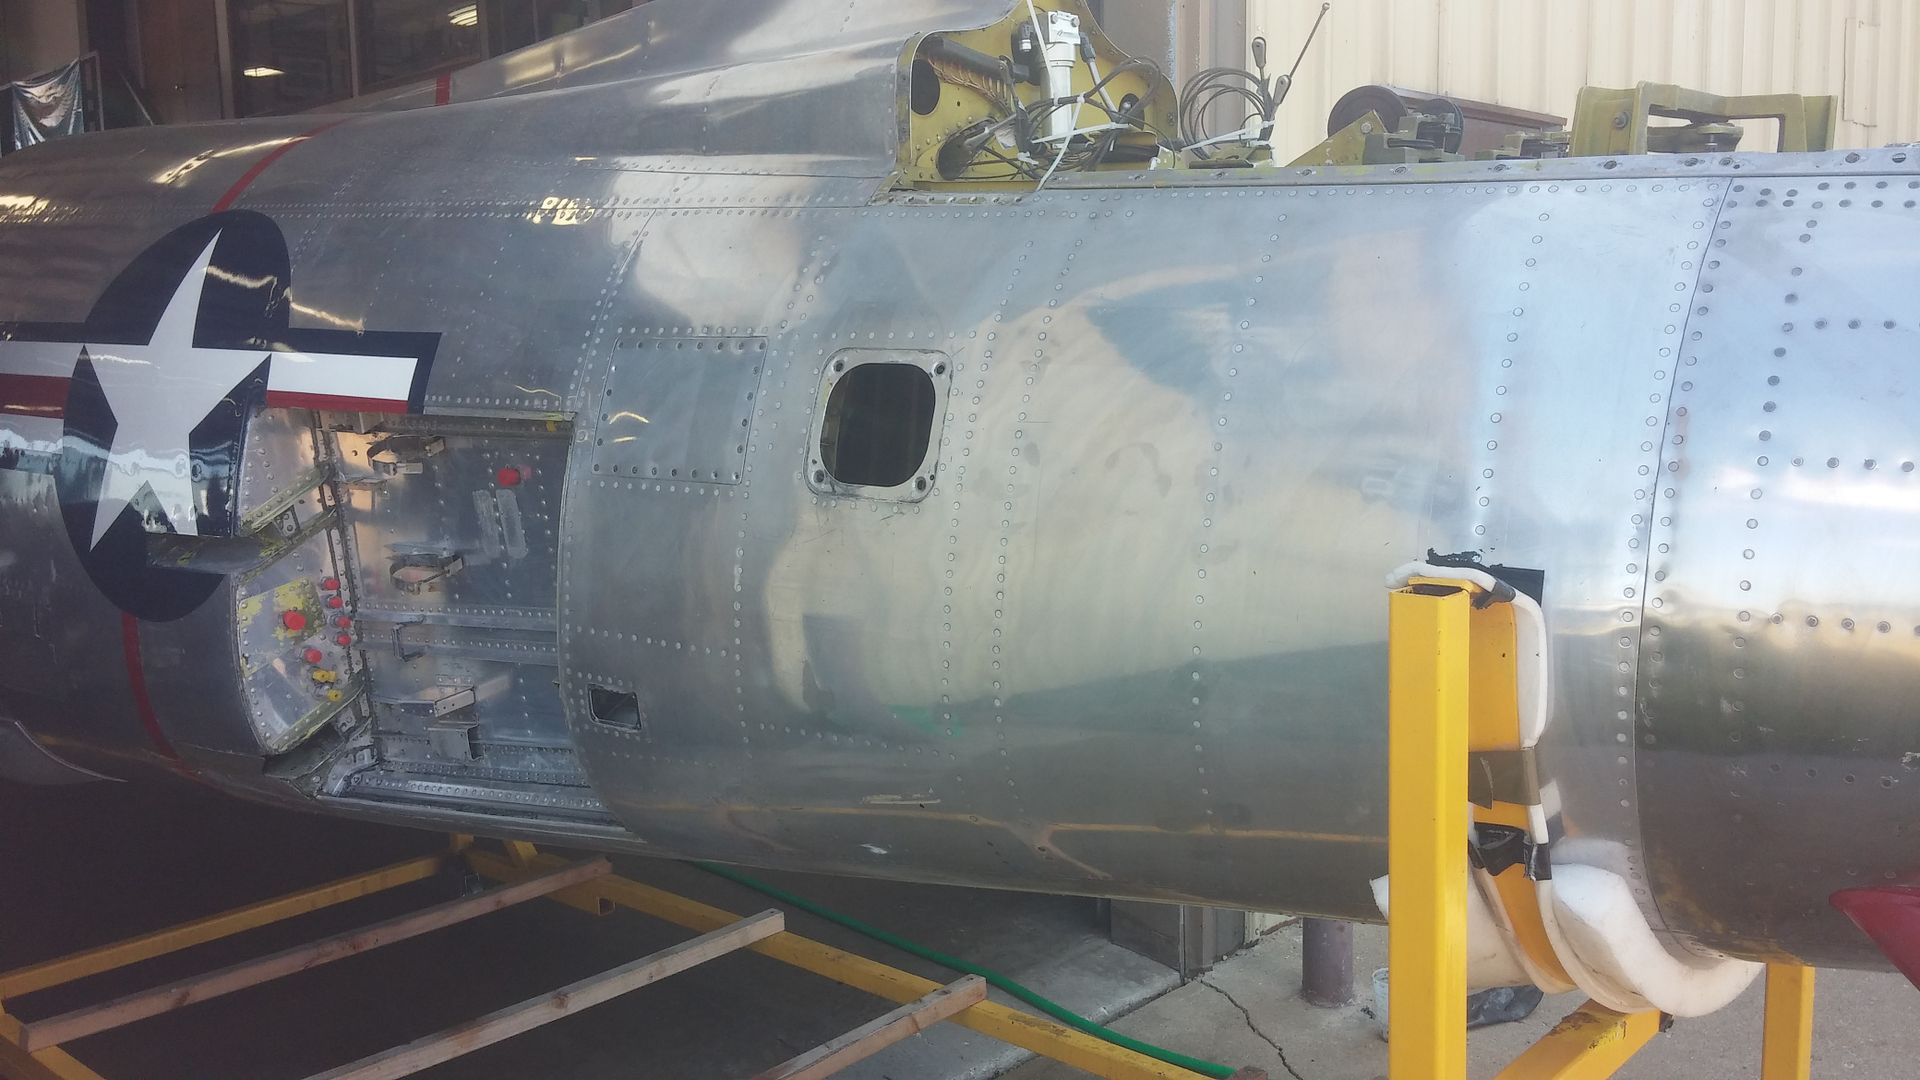
Strippin without a pole...Yeah, wouldn't be a good visual anyway. Spent the day with the Sabre speed brake wells. Thought, piece of cake, but lots of different surfaces to get at. Rattle can silver over chromate but that aircraft paint stripper not to be used on aircraft works well.
Starboard side, silver rattle can over chromate
After
Port side
Also had to strip the FU numbers
Starboard side, silver rattle can over chromate

After

Port side

Also had to strip the FU numbers

