Okay, after posting the update yesterday morning, I said I was going right out to work on the hinges for that tunnel gun door. Well, I was wrong. I don't think I even touched the airplane after about 9 or 10 a.m., due to the sucky part of this crew chief job. Phone calls, parts ordering, Internet traffic (okay, the WIX part is cool), and a newspaper interview were all things that got in the way of progress. They are all things that need to be done, and I don't necssarily mind doing them, but they are momentum killers for sure. I'm not good at any of that stuff. I'm just good at working.
So, after yet another sleepless night worrying about my deadline to finish this thing (been up since 12:30 a.m.), I got here bright and early to get back in the groove of things. I didn't take as many pictures of the step by step process that I should have, but here's what I have to offer.......
My first job of the morning was to get some bracketry made that will eventually bolt to the original tunnel gun structure that is still in the airplane. Unfortunately, much of the structure was removed many moons ago, so this hinge design is being Austinized, rather than being put back to original. Here are the first few brackets and hinge points I made.......

The next step was to either design and fabricate a set of hinges, OR to use some hinges that some other person has engineered and manufactured for another airplane. I chose the latter. I knew those ol' A-26 gear door hinges would come in handy at some point.......


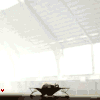
Here's the first hinge in it's imaginary position after I have tack welded the hinge points to the bracket that goes on the structure. Did you get all of that?..........

And here's both hinges in their eventual position.

The next step was kind of fun I reckon. I needed to make a piece of structure that would tie the two hinges together to prevent the door from twisting and to also make the transition from the angle of the x tubes to the slot in the center of the hinge itself. This was accomplished by taking a straight piece of steel and just running it through the bead roller. The resulting beads on the flat piece not only look cool (which is always important
), but also add the necessary strength I will need to hold all of this in place. Here's the first bead while it was being rolled....

And here's the piece that was once flat and flimsy that now has the strength to tie those hinges together. This piece will be welded to the framework soon. I will only tack everything together during the assembly of this entire project though........

The last piece I made today was the 90 degree angle that will be welded to the previously mentioned piece of structure (which, of course, is kind of tough to see in this picture). There will be two of these angles and each of them will bolt to it's own hinge. Here is what it looks like right now...........

I am confident that I will be back out here early in the morning tomorrow to keep pressing on with this. I am hoping to have this stinkin' door swinging by about 8 a.m. That's my goal anyway. After these hinges are done, I'll start on the latching mechanism. I'll start losing sleep over that design tonight.

Gary


