Warbird Information Exchange

DISCLAIMER: The views expressed on this site are the responsibility of the poster and do not reflect the views of the management.
It is currently Sun Jul 06, 2025 10:00 am

All times are UTC - 5 hours


Classic Wings Magazine WWII Naval Aviation Research Pacific Luftwaffe Resource Center
When Hollywood Ruled The Skies - Volumes 1 through 4 by Bruce Oriss


Post new topic Reply to topic  [ 39 posts ]  Go to page Previous  1, 2, 3  Next
Author Message
PostPosted: Thu Jun 12, 2014 4:54 pm 
Offline

Joined: Mon Jul 24, 2006 8:03 pm
Posts: 283
Location: Mesa, Arizona USA
Trevor, fine report on the rebirth of the Andover system. I always got a lot of strange looks when I told folks I had experience rebuilding the Ranger Model V-32 powerplant, as it evokes mental images of something a little larger than life.

If you need some parts for your restoration project, I still have a couple of parts donors here that will probably yield some decent spares. I'd saved about a half-dozen dead ones from a junkyard years ago and have a few left. You're welcome to whatever you need to get both of them back in the game.

If and when you get into that pull-start system, be mindfull of how you take it apart and put it back together. There's a rather powerful and very long recoil spring assembly inside the cover there that's like something from a large and powerful lawn mower. I had one of those springs bitch slap me from one end of the shop to the other a time or two before I figured a way to properly coil, tighten, cage and set the spring in the clutch and housing. You'll swear it's a job for a three-handed man before you get it right.

Your "farm fresh" system looks pretty complete, right down to that pretty exhaust pipe wrapping. The experts say that's friable asbestos, but frankly, with my cholesterol numbers being what they are these days I try to stay away from fried stuff. Much better if it's lightly sauteed in a little butter, or fine weight of engine oil... but hey, that's just me.

Keep at it.

- Robert in PHX


Top
 Profile  
 
PostPosted: Fri Jun 13, 2014 3:05 am 
Offline
User avatar

Joined: Tue May 04, 2004 11:52 pm
Posts: 393
Location: North Georgia
Iclo wrote:
That remember me that I have to buy a good fire extinguisher for the car I restore with my father. Just in case... I don't want to reproduce the Kee Bird expericen : sitting and wathing a restoration work burining :D


That is a very good idea, and you might be able to help someone else out with it too. I've seen a number of burnt out cars along the road over the years that might have been saved if someone had an extinguisher.

This is getting a little off topic, but while we're on the subject of fires, I thought I'd share a little story about why you always need to be prepared for an emergency when working on warbirds. Unfortunately, this is something that far too many people overlook or simply ignore. I have a personal rule that wherever my toolbox goes, so does a fire extinguisher and a first aid kit--and I mean a real kit that can handle traumas, not some $10 box of band-aids from Walmart.

On this particular day, we were in the middle of winter maintenance on "The Movie" Memphis Belle and I was replenishing the oil tanks (ever notice how the young guys always get nominated for the dirty/oily jobs?? :P ). A little ways down from us there was a guy working on an old fuel truck, and every so often we'd hear him trying to crank this thing up, but he wasn't having much luck. So I'm standing there holding the hose while the pump did all the work, and Rod S. (who posted earlier in this thread) was also there, as well as my father, and we're just chatting about this and that, when all of the sudden we hear the guy working on the fuel truck start yelling about something.

(A glamorous shot of me watching the oil flow just moments before we heard the guy yelling--I've been told this is my best side!)

Image

At first we weren't sure if he was just yelling at the truck he was working on, as all wrench turners tend to do on occasion, but then we heard him yell "Hey guys! Guys!" in our general direction. At that moment, the three of us turned around and saw what all the commotion was about: he had caught the dead grass on fire next to the fuel truck! Doh! Even worse, he did not have a fire extinguisher, so he was trying to beat the flames into submission with an old blanket, which also began to catch on fire. Double Doh!!

The three of us quickly sprang into action. I ran over and grabbed the extinguisher out of my truck and started to knock the flames down, while my dad grabbed a couple 2-liter bottles of water I also had in my truck, and Rod was going for the extinguisher in the trailer when he saw me with mine. I quickly got the flames knocked down and my dad came in behind me and hit the hot spots with the water. As you can imagine, the guy was very thankful we were there and reacted as fast as we did! Otherwise, it would have been a job for the Fire Dept. and who knows how far it would have spread before they got there.

This was the aftermath. We were lucky that the fire was burning downhill (fire moves slower going downhill) and there was also a log there that had stopped some of it from spreading farther into the heavy brush. But this is a perfect example of why you always need to be prepared when working on warbirds, or anything else for that matter. Just because you yourself are safety conscious doesn't mean that the people around you are as well.

Remember: you are the first responder to your own emergency, so be prepared! :wink:

Image

Image

I took this picture later that day when we were packing up to go home (I was going to make a joke about the towing power of the Dodge Ram, ha!), but if you look on the far right, you can see the back of the fuel truck sitting there. This was an older truck that didn't have any fuel onboard, or an extinguisher. Always be prepared!

Image

_________________
~Trevor McIntyre
http://www.TrevorMcIntyre.com


Last edited by B29Gunner on Tue Jul 08, 2014 3:30 am, edited 1 time in total.

Top
 Profile  
 
PostPosted: Fri Jun 13, 2014 3:27 am 
Offline
User avatar

Joined: Tue May 04, 2004 11:52 pm
Posts: 393
Location: North Georgia
Pooner wrote:
If and when you get into that pull-start system, be mindfull of how you take it apart and put it back together. There's a rather powerful and very long recoil spring assembly inside the cover there that's like something from a large and powerful lawn mower. I had one of those springs bitch slap me from one end of the shop to the other a time or two before I figured a way to properly coil, tighten, cage and set the spring in the clutch and housing. You'll swear it's a job for a three-handed man before you get it right.


Hey brother, long time no talk! Is your e-mail addy still the same? I dropped you a line a few months back about some B-17 parts.

Yeah I'm not sure what I'm going to do about the pull starter yet, or if I'll even attempt to repair it. It's not something that really needs to be functional anymore, as I managed to rig up, after countless minutes of design engineering and analysis, a way to drill start the engine instead. Eventually I'll reinstall the generator and start it that way, but I remember your stories about fighting with those springs and I'm not sure that I want to subject myself to that same anguish....although, the overhaul manual does make it sound like a piece of cake, ha! :P

For everyone else, this is the spring we're talking about:

Image

_________________
~Trevor McIntyre
http://www.TrevorMcIntyre.com


Last edited by B29Gunner on Tue Jul 08, 2014 3:45 am, edited 1 time in total.

Top
 Profile  
 
PostPosted: Sat Jun 14, 2014 10:35 pm 
Offline
1000+ Posts!
1000+ Posts!
User avatar

Joined: Sun Oct 07, 2007 5:31 pm
Posts: 1352
Location: Galveston County
Very cool stuff Trevor -- keep it coming man! pop2 8)

_________________
Cheers,
Kurt Maurer
League City, Texas

PIC, Ford 6600 pulling Rhino batwing up and down the runway


Top
 Profile  
 
PostPosted: Sun Jun 15, 2014 3:11 am 
Offline
User avatar

Joined: Tue May 04, 2004 11:52 pm
Posts: 393
Location: North Georgia
Since today marks the 70th anniversary of the first B-29 raid on Japan, and the invasion of Saipan, which would become the home of the first B-29 airbase in the Marianas, I thought I'd do something a little different with this post. Instead of an update on the APU, let's go back in time and take a look at the San Francisco News newspaper from June 15, 1944, and see what was happening on this day 70 years ago!

As you can imagine, the B-29s rocked the headlines with the first bombing raid on Japan since the Doolittle Raiders (which was over two years prior).

Image

Image

Image


This was at the bottom of the front page. The casualty figures of WWII were truly mind-boggling.

Image

Everywhere you look in this newspaper you see reminders of the war.

Image

Some of those reminders were much closer to home.

Image

But just because there is a world war going on, that's still no excuse not to brush your teeth! Pebeco Tooth Powder: no grit, and now with 60% more tooth powder than the other leading brands!

Image

Let's see what Walgreens has on sale. Wow, that's a great buy on toilet tissue!

Image

Be sure to pick up a little something for that special gal in your life.

Image

Image

And finally...don't forget the booze! :P

Image

_________________
~Trevor McIntyre
http://www.TrevorMcIntyre.com


Top
 Profile  
 
PostPosted: Tue Jun 24, 2014 12:57 am 
Offline
User avatar

Joined: Tue May 04, 2004 11:52 pm
Posts: 393
Location: North Georgia
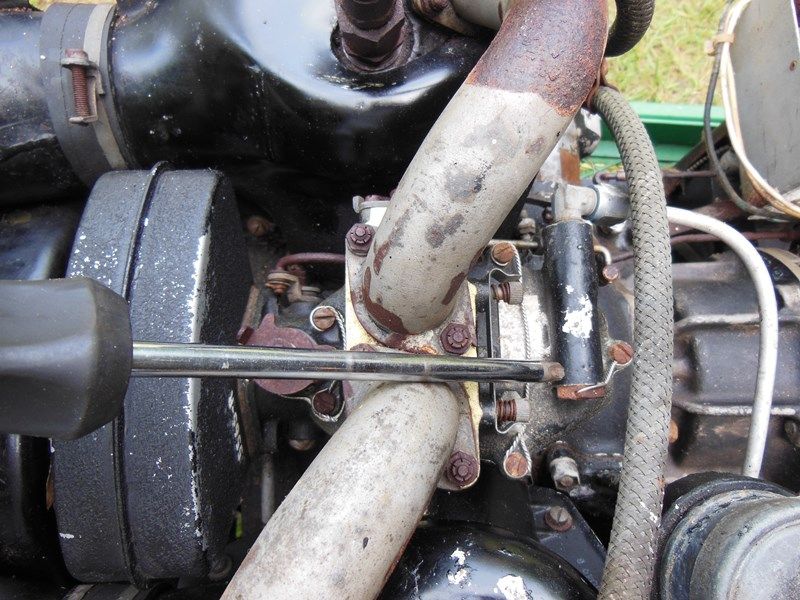
In this installment we're going to start doing some prep work on the engine's fuel system. Let us begin with the carburetor!

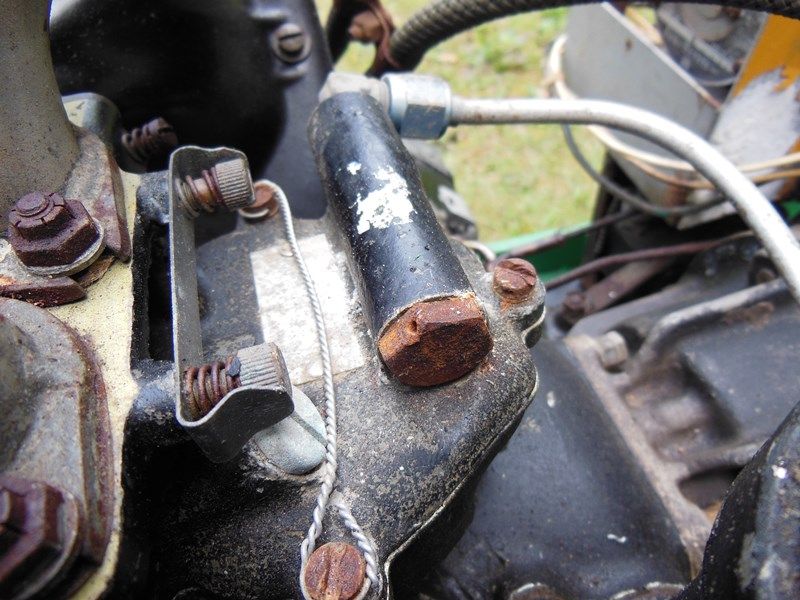
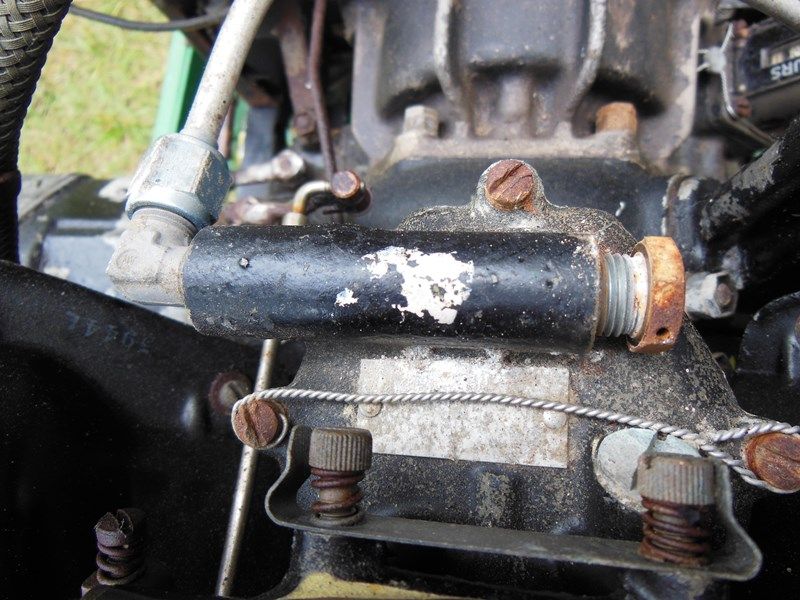
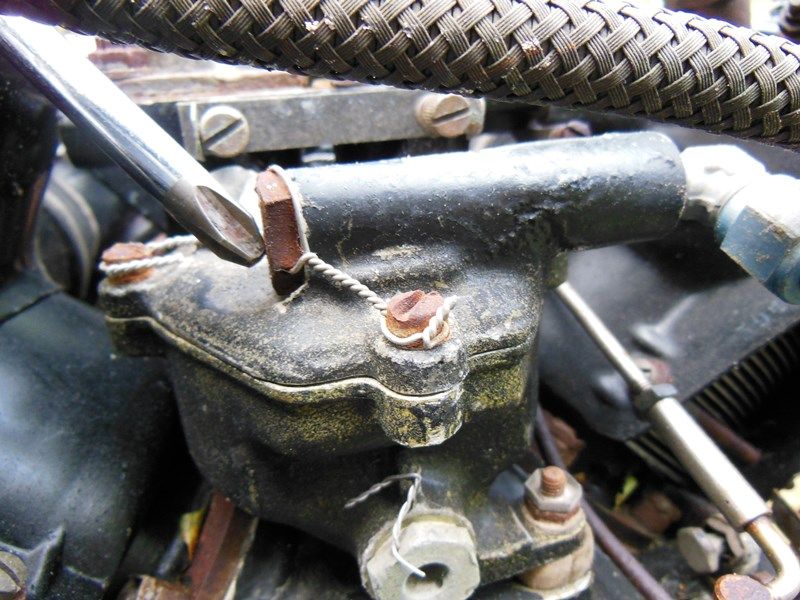
These engines use a simple two-barrel updraft carb, and the first thing we'll do is remove the fuel strainer and see what it looks like.
Image

Image

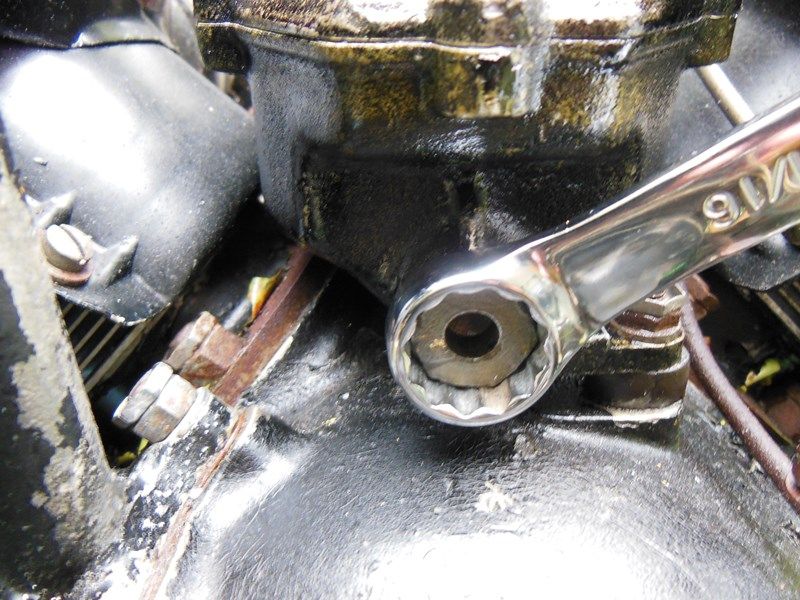
Safety wire removed, and it's time to start turning. Remember: lefty-loosey, righty-tighty...except in Australia, where everything is backwards! :P

Image

Almost there.

Image

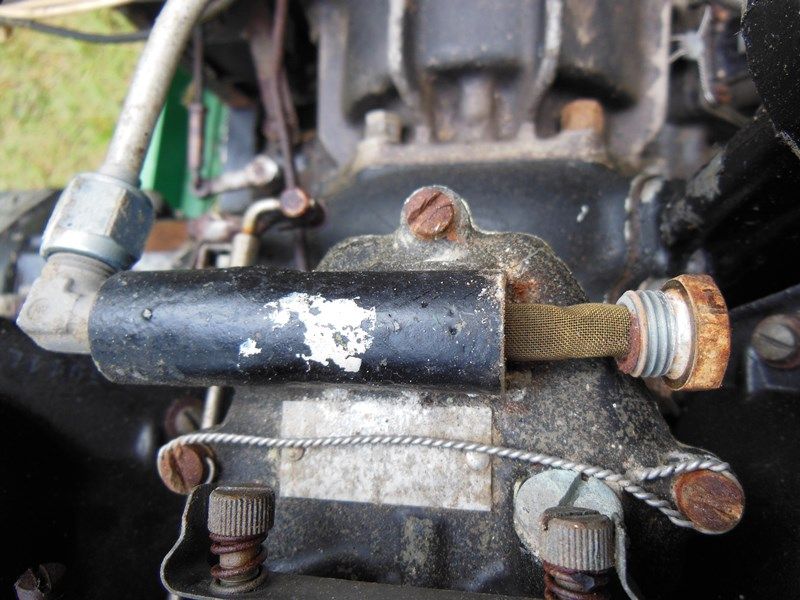
Here it comes..

Image

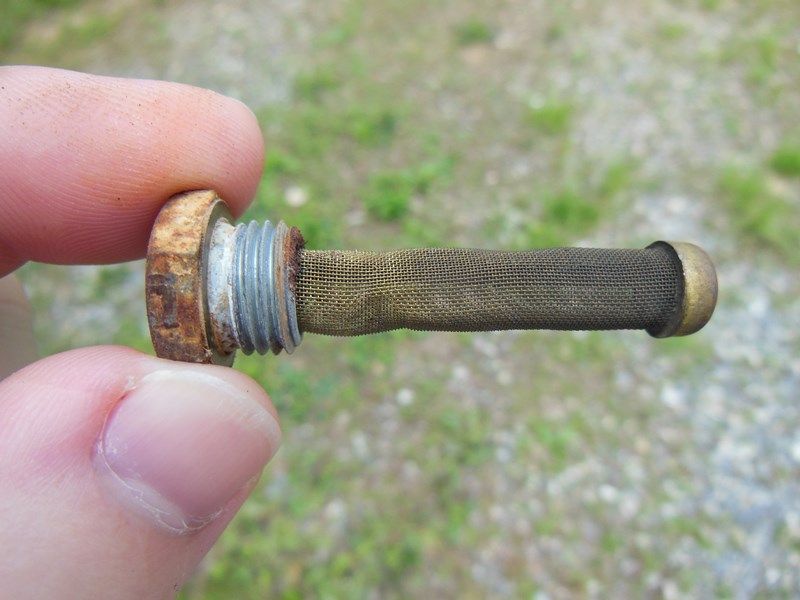
And the strainer is out! Aside from the rusty head, everything actually looks pretty good here.
Image

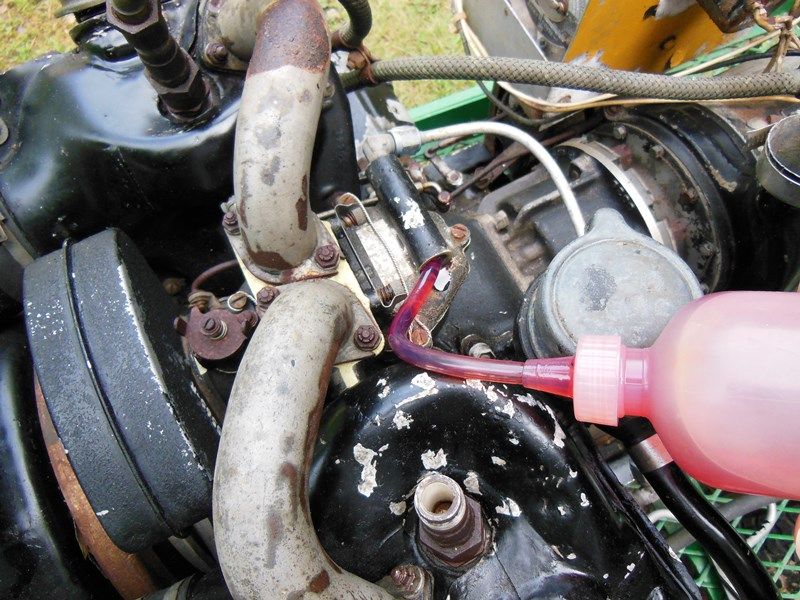
With the strainer removed, we'll squirt a little MMO in there.
Image

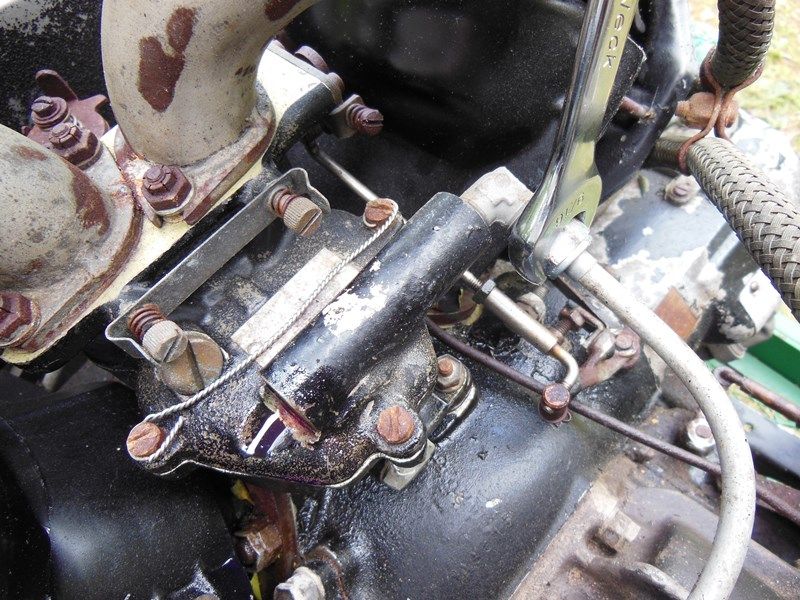
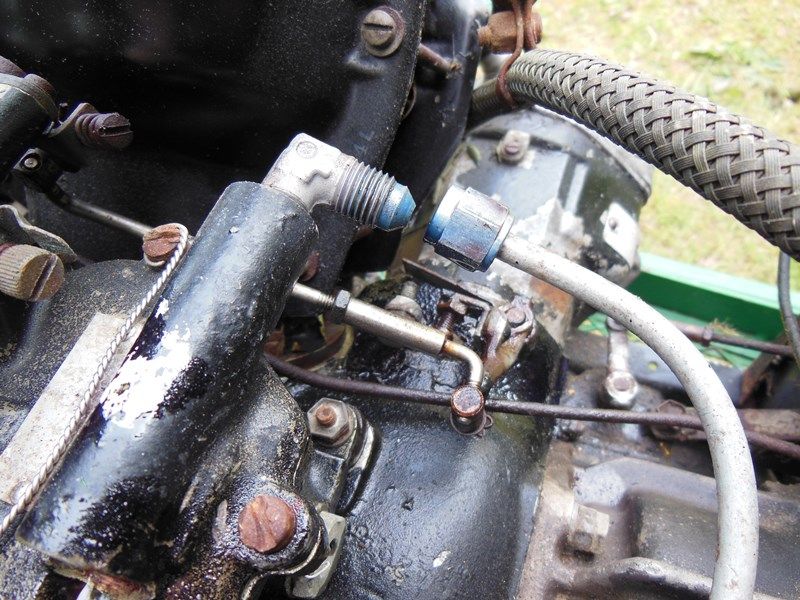
Next we'll disconnect the feed line.

Image

This thing was being stubborn, so I had to give it a few "love taps" to persuade it to surrender :wink:

Image

After 50 years--free at last!

Image

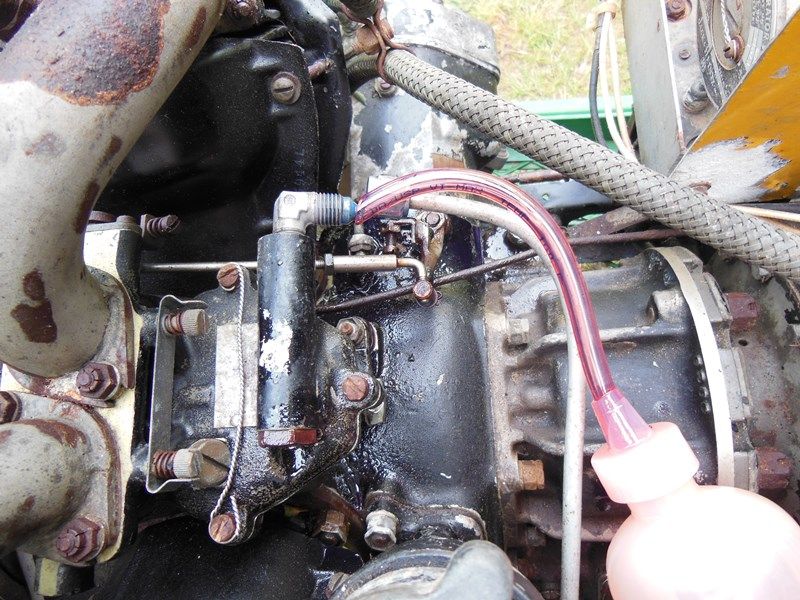
Next we'll reinstall the fuel strainer (after I cleaned it--forgot to take pics of that). Then I'll take the hose on my squeeze bottle and, holding it tight against the fitting, start pumping MMO into the carb. What we want to do here is completely fill up the float chamber (aka fuel bowl) with MMO and allow it to work into the jets, etc. Our concern here is any fuel varnish that might be inside the float chamber. (Fuel varnish is the gummy residue old fuel leaves behind when it deteriorates--nasty stuff!) If the float chamber was not drained after the last time this engine ran, then all of that fuel will have left behind a nasty varnish that can clog up the jets and cause all kinds of problems. (I don't want to stray into the details of how a carburetor works, but this is a good primer if you'd like to know more: http://www.enginehistory.org/Accessories/HxFuelSys/FuelSysHx04.shtml.)

Inside the float chamber is a float, of course, and a needle valve that is opened and closed by the movement of the float. When the chamber is full of fuel (to the set level), the float rises and closes the needle valve. When the fuel level drops, so does the float, and this opens the needle valve and permits more fuel to enter and refill the chamber. By using the squeeze bottle, I can "feel" when the float chamber is full, and this tells me that both the float and the needle valve are working just as they should. On the other hand, if I was able to keep pumping MMO into the chamber, then that would tell me that either the needle valve is stuck open, or the float is not...floating!
Image

Here you can see the drain plug for the float chamber. This is the lowest point of the chamber and removing the plug will tell you right away if you have any varnish to deal with. I elected to leave the plug in place for now and we'll come back in a few days and remove it after the MMO has soaked for a while.
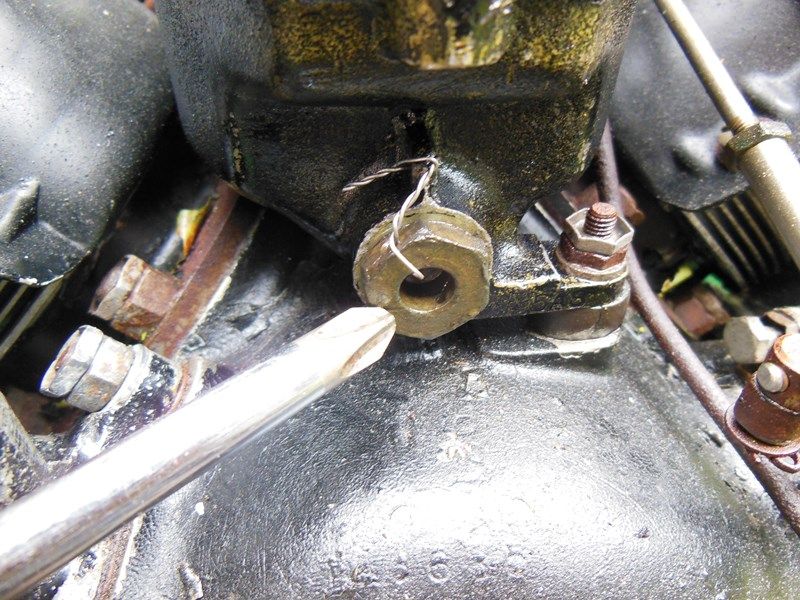
Image

BUT, since I've been under the weather lately and have fallen behind on the updates, we'll magically fast forward and pull the plug now! Safety wire removed...
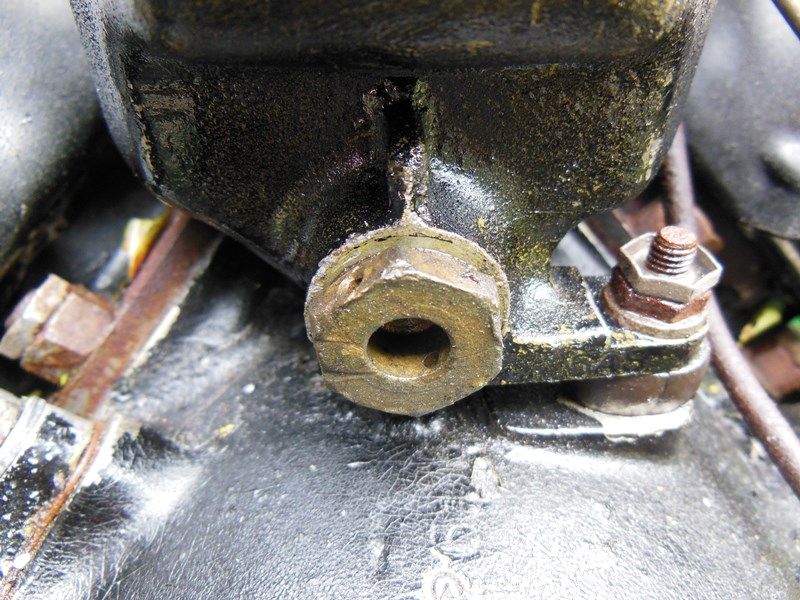
Image

Turn and burn.

Image

I struck "earl", as we pronounce it here in North GA. But half of it spilled over on the way out and now I have a mess to clean up!
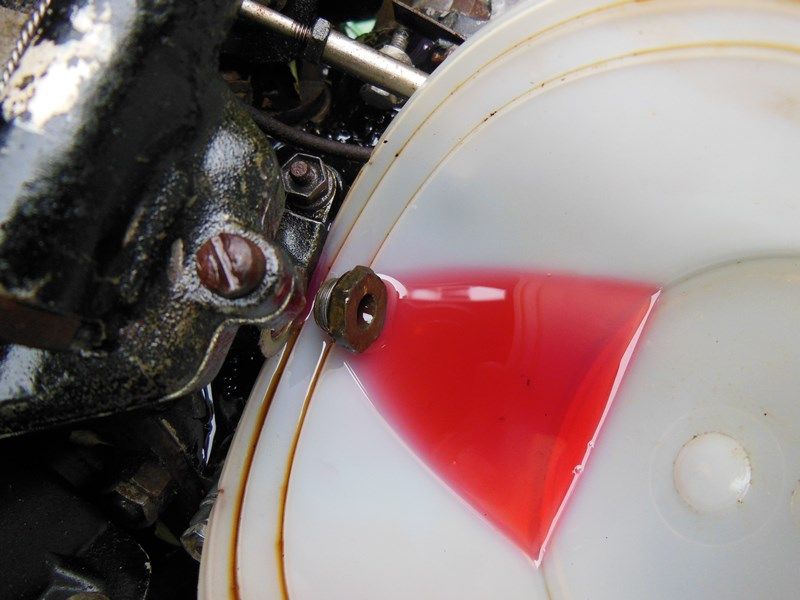
Image

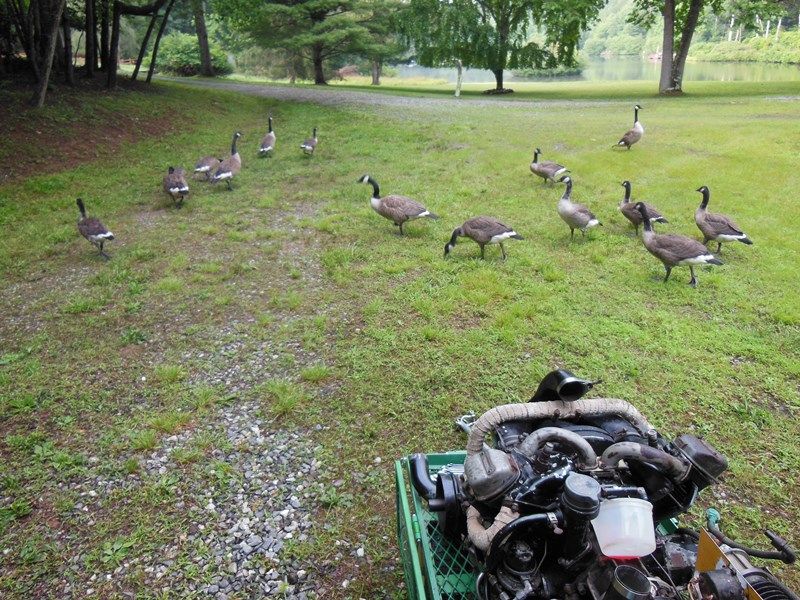
Thankfully some help shows up, and just in the nick of time!
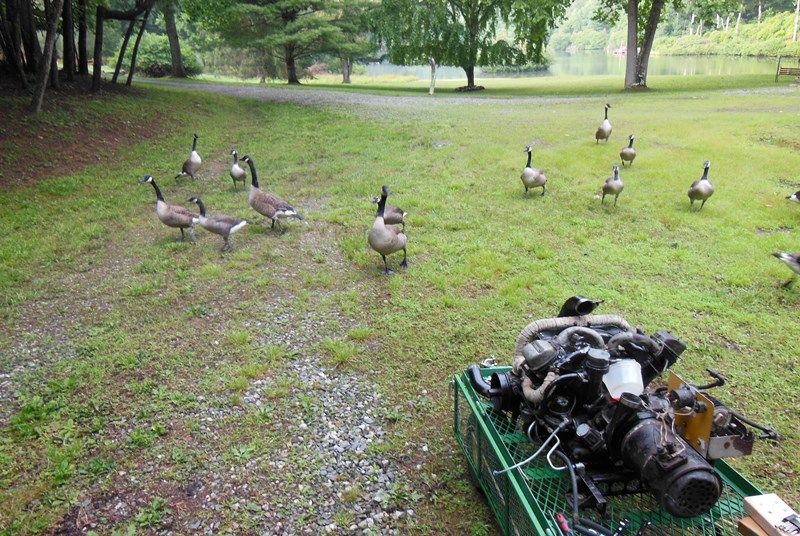
Image

Aaaand they're gone. Ever notice how the help always seems to disappear when it comes to those dirty/oily jobs?? Hmm...
Image

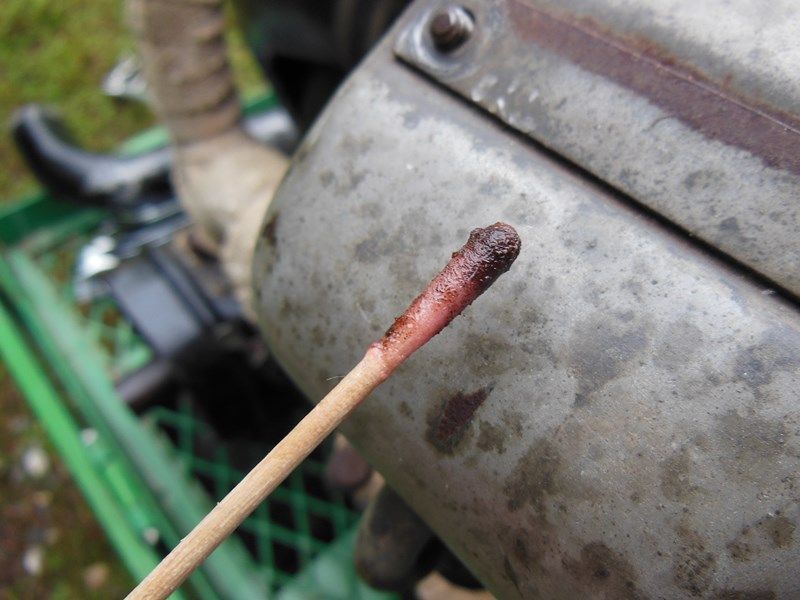
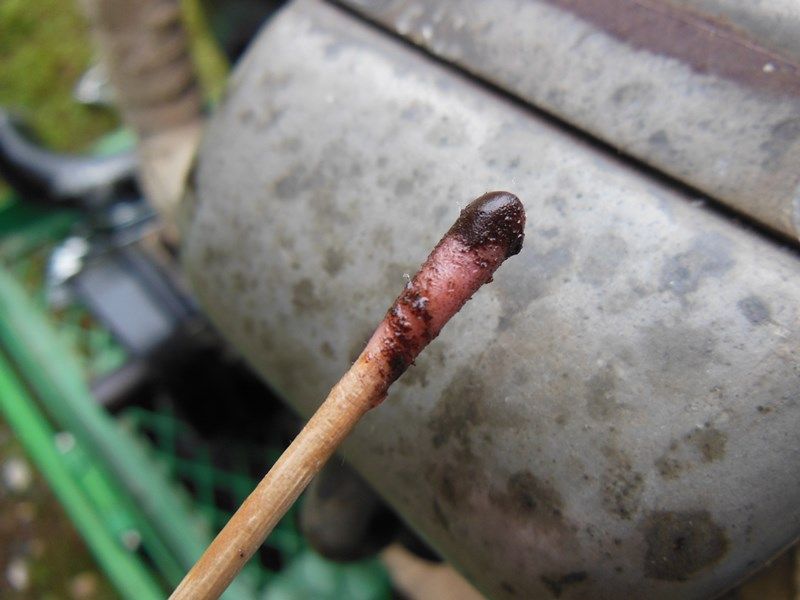
Here we can see the first signs of varnish in the float chamber.

Image

So I swabbed around inside the bottom of the chamber and found even more. This tells me that there's also going to be varnish in the jets, and that means ya'll will get to see what the inside of this carburetor looks like, because now I have to take it apart and clean it! :P But for now, I'll reinstall the plug and fill the chamber up with MMO again and let it soak some more.
Image

Image

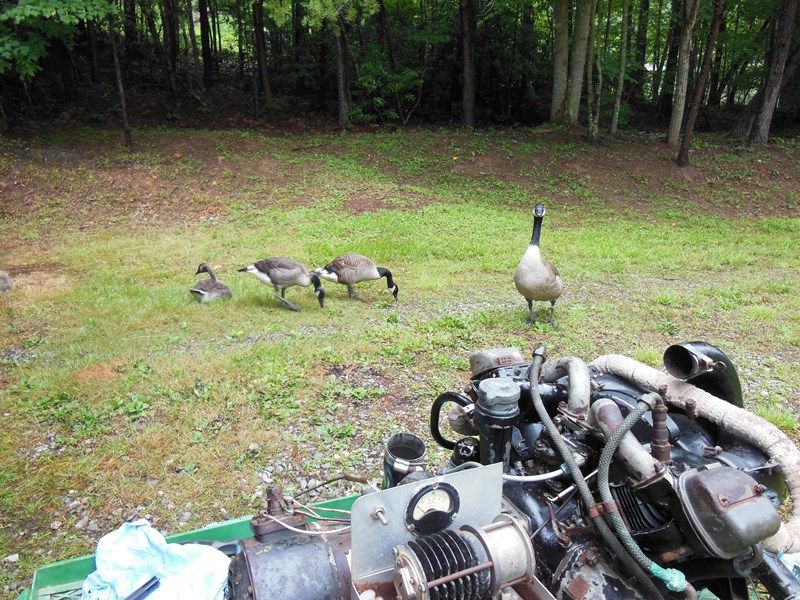
And of course, now that the dirty work is over, a few helpers magically appear again. Ever feel like you're being watched??
Image

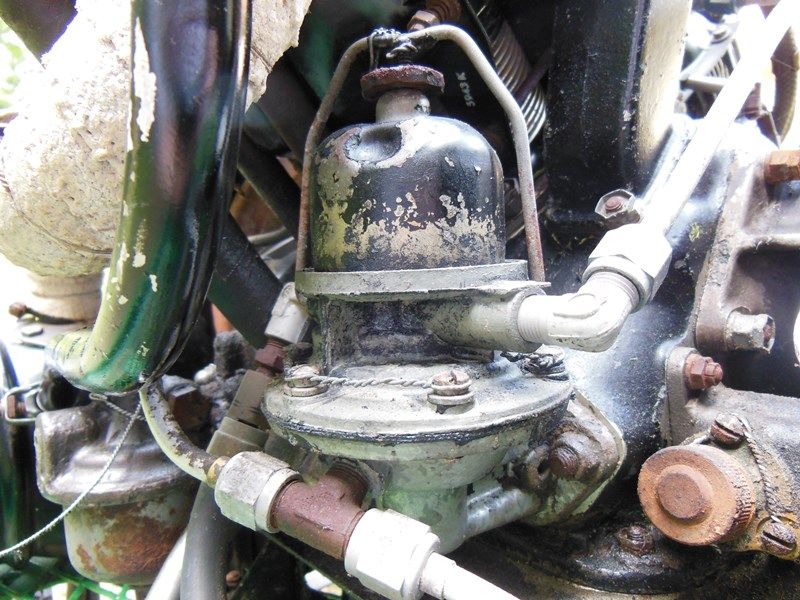
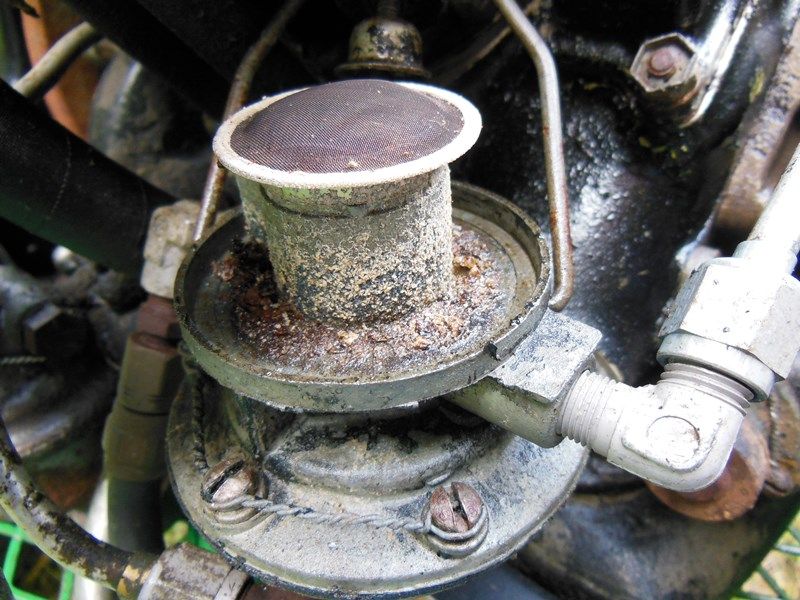
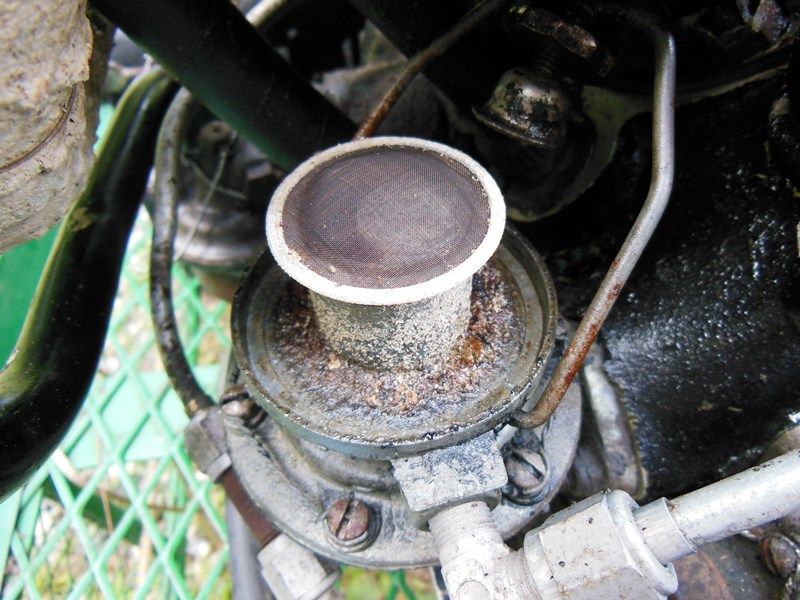
Now let's turn our attention to everyone's favorite component on these engines: the fuel pump! These are simple diaphragm pumps and as far as I can tell, they are practically identical to the fuel pumps used on WWII Jeeps. Now I'm no expert on Jeeps, but looking at the part numbers, I believe the only major differences are the rocker arm, diaphragm spring and the lack of a priming lever? Otherwise, as best as I can tell, the two pumps share the exact same parts.
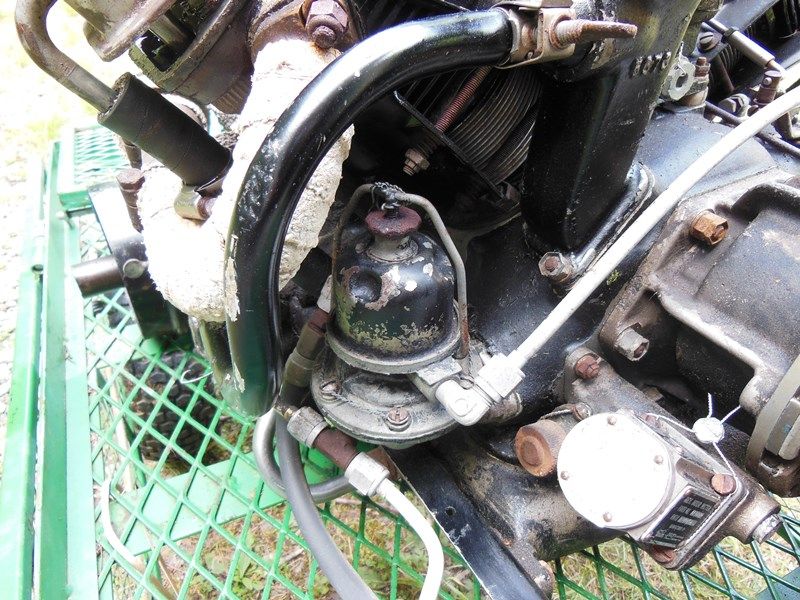
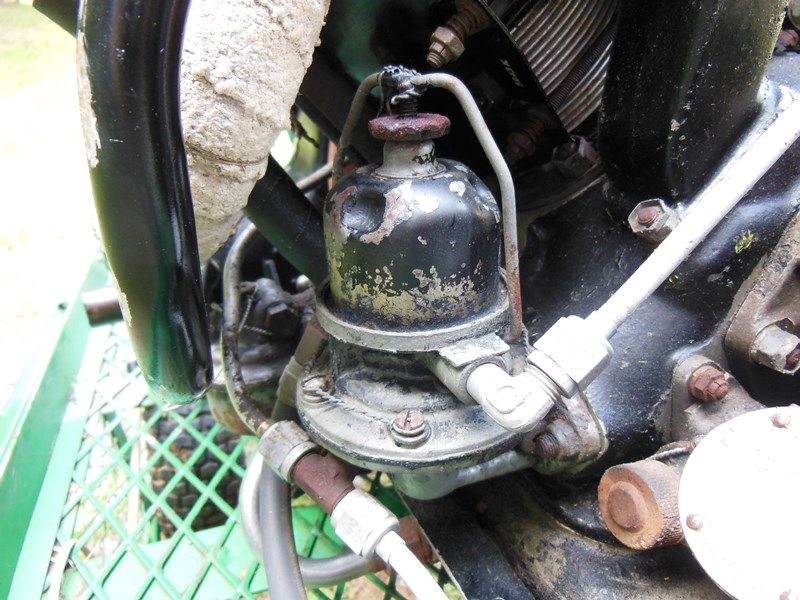
Image

Image

Image

The first thing we'll do is squirt a bunch of MMO into the carb feed line and let it work down into the pump (more on that later).
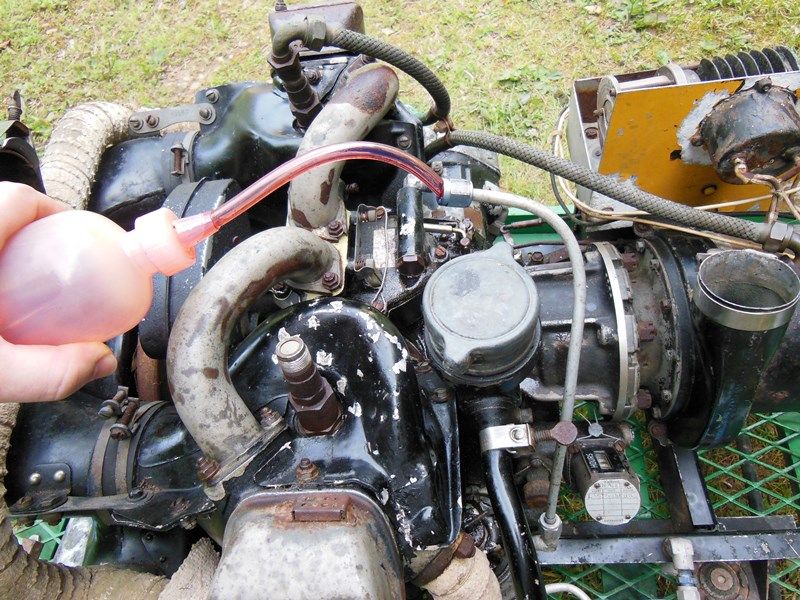
Image

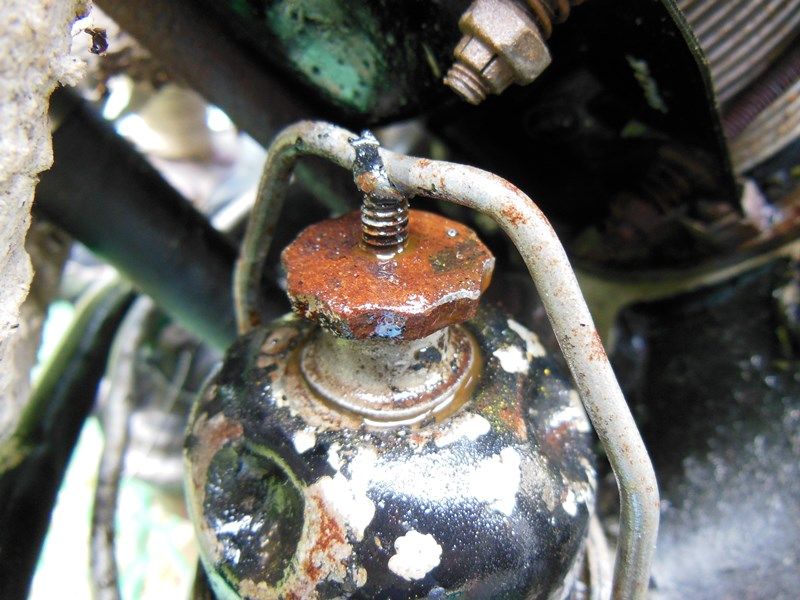
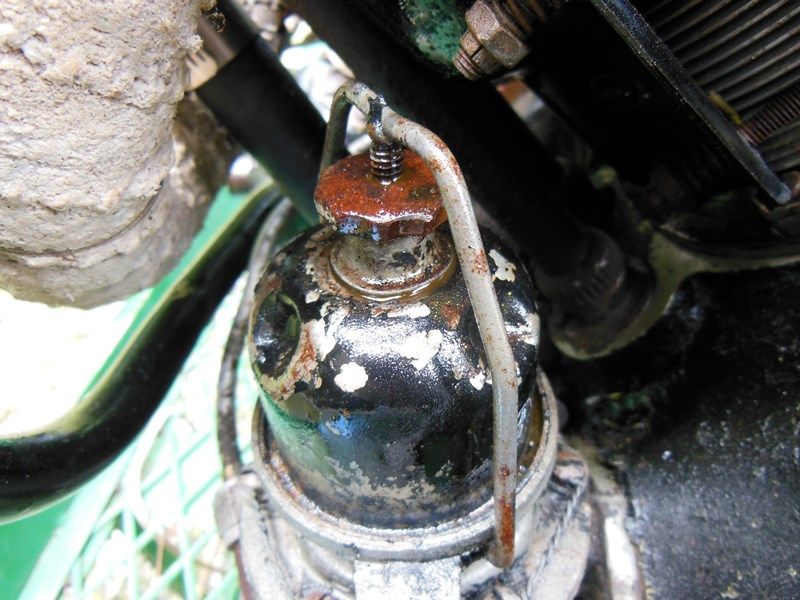
Next we'll remove the bowl and see if there's any fuel varnish we need to clean up. To remove the bowl, first we need to loosen the retaining knob on the bail. After removing the safety wire, I tried to loosen the knob, but it wasn't budging! We'll give it a few shots of PB Blaster and let it soak for a spell.
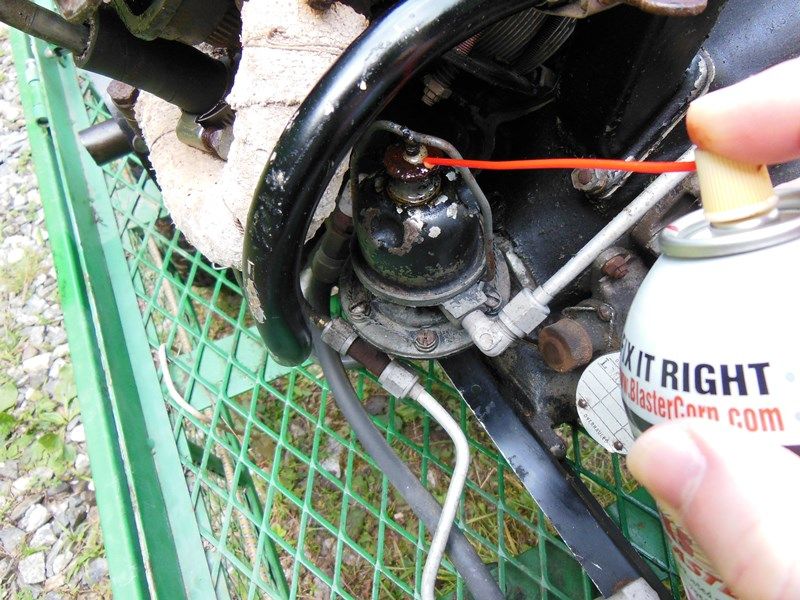
Image

Image

Image

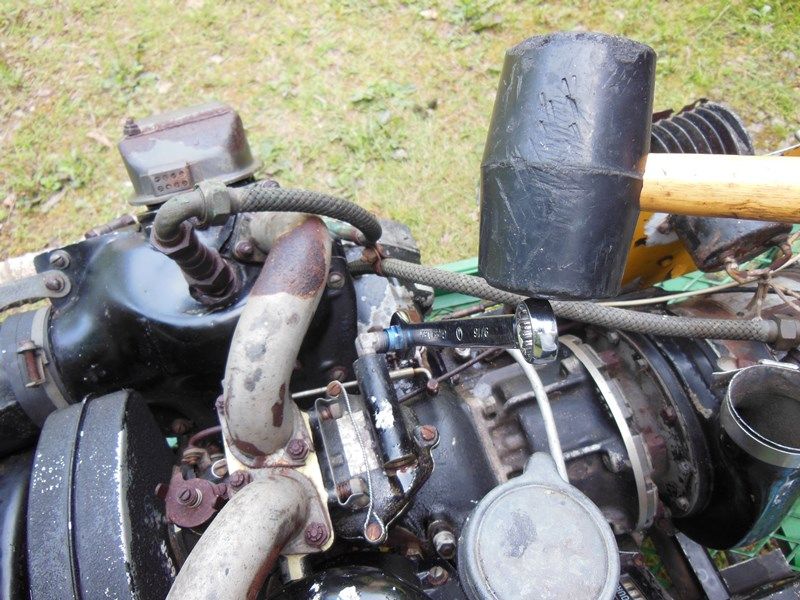
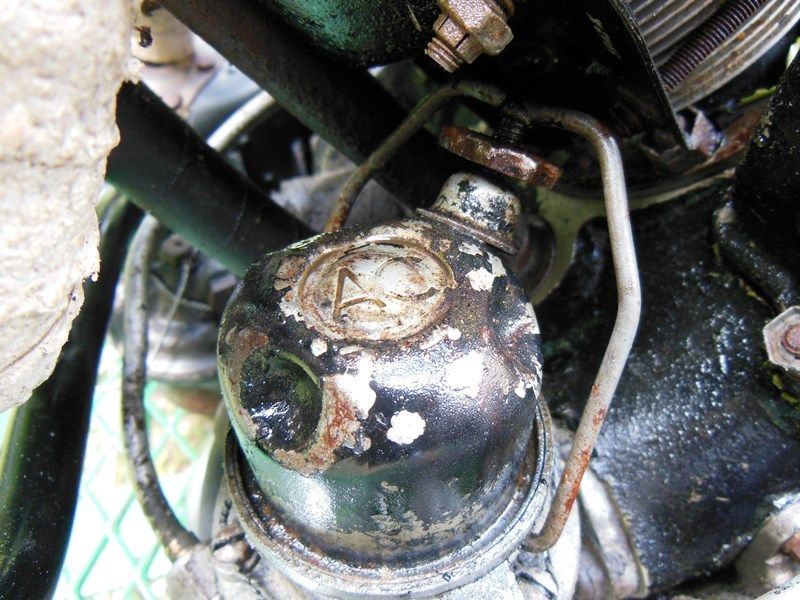
Coming back a few minutes later, the knob was still refusing to budge, so I hit it with some more PB Blaster and waited a few minutes. Well, that didn't work either! So I hit it again with the PB, and then I took a mallet and a flat tip screwdriver and slowly started tapping the knob loose. After a few minutes of slow going, the bail was finally free. These pumps were made by AC Spark Plug, hence the "AC" stamped into the bowl.
Image

Let's open it up and see what we got!

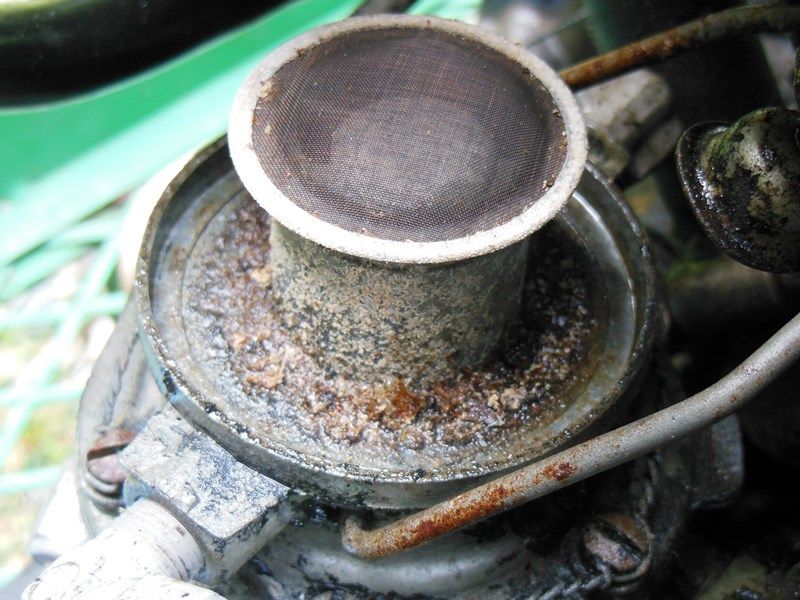
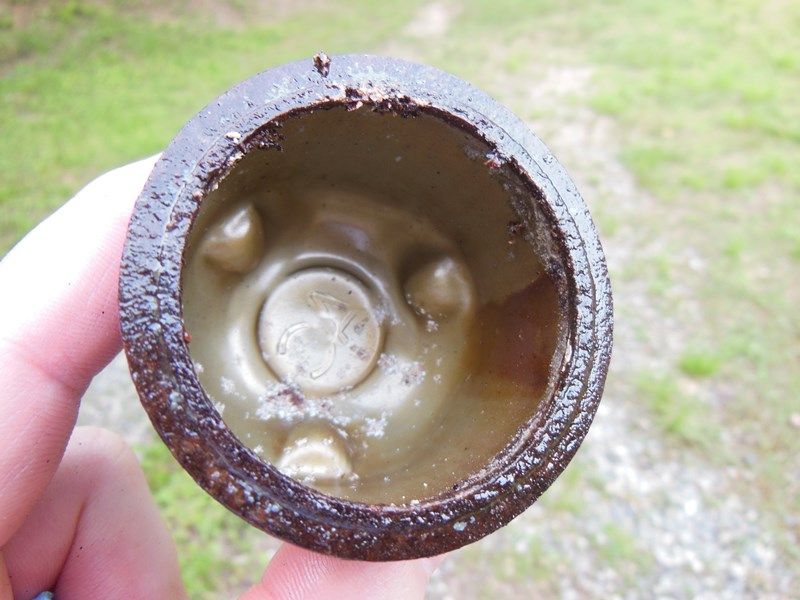
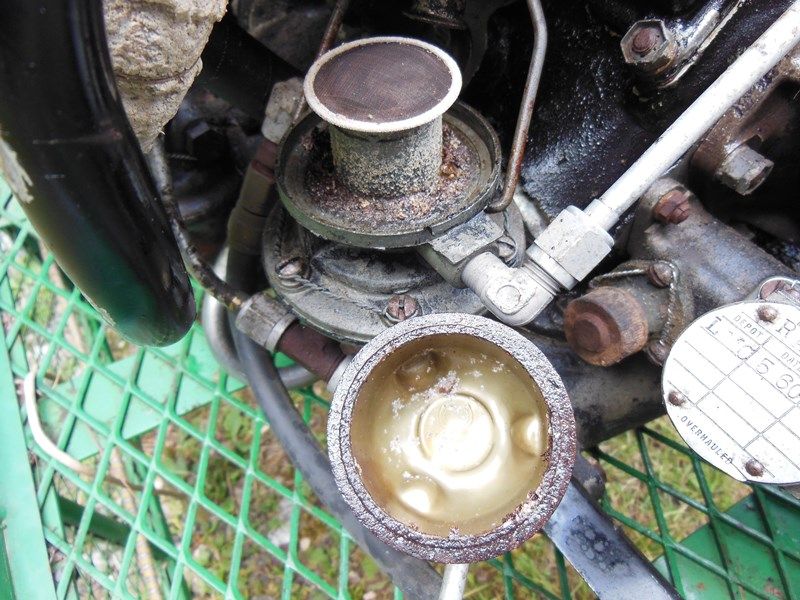
Here's looking inside the bowl. Aside from some gunk and a little corrosion, it doesn't look too bad. But what about the rest of the pump, you say?
Image

Oh dear. There's all kinds of nasty goin' on right there!
Image

Image

Image

Image

Image

Image

Image

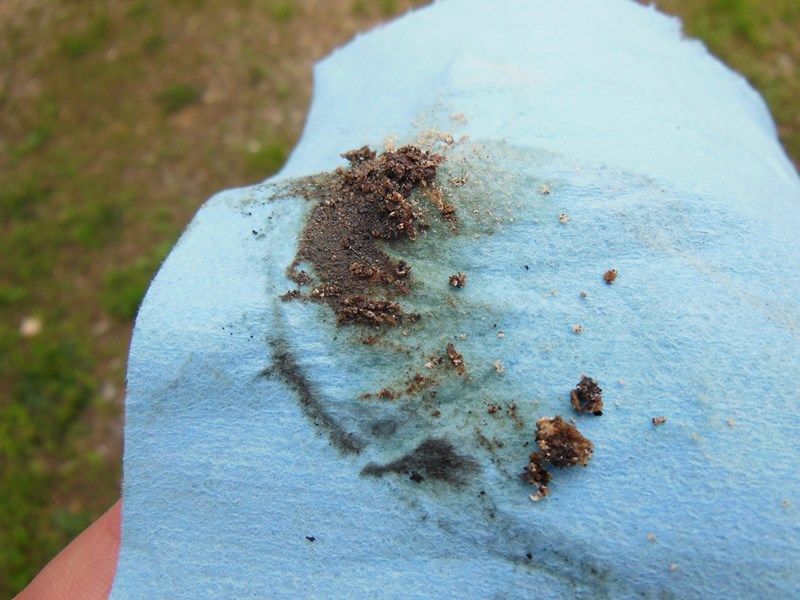
Here's some of "the nasty" that came out of it. This is a mixture of varnish, grime and who knows what else. There's also going to be more varnish down inside the pump that we cant see yet.
Image

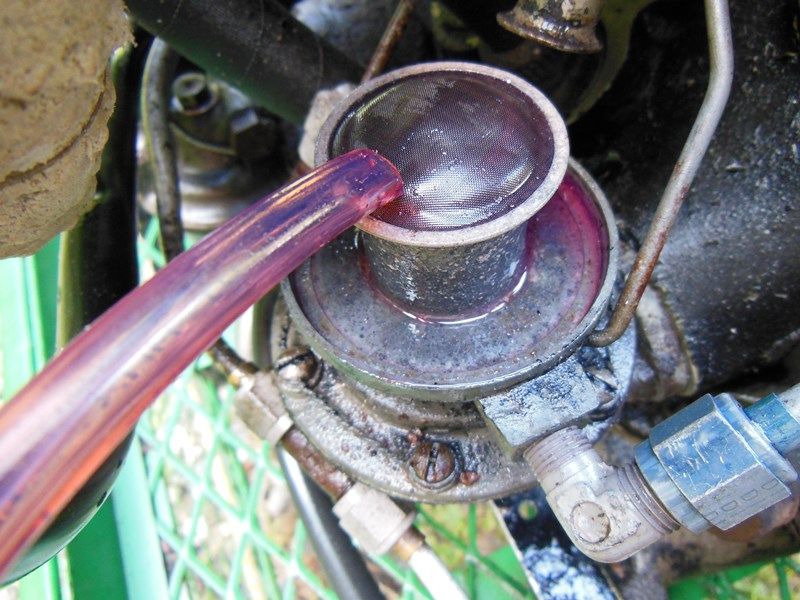
We'll come back and do some more cleaning on the fuel pump later, but for now, you guessed it: more MMO!
Image

Now this has never happened to me before, but I actually ran out of MMO after that last picture! The Engine Gods will not be pleased! Part II of the prep work on the fuel pump will be coming soon, just as soon as I can get some more of my "magic juice"...and MMO! :P

_________________
~Trevor McIntyre
http://www.TrevorMcIntyre.com


Top
 Profile  
 
PostPosted: Tue Jun 24, 2014 10:01 am 
Offline
3000+ Post Club
3000+ Post Club
User avatar

Joined: Sun Feb 12, 2006 9:58 pm
Posts: 3282
Location: Nelson City, Texas
Very good info,................only thing I would do different is try AeroKroil instead of PB Blaster.


Top
 Profile  
 
PostPosted: Wed Jun 25, 2014 9:55 pm 
Offline
2000+ Post Club
2000+ Post Club
User avatar

Joined: Sat Jan 14, 2006 7:18 pm
Posts: 2056
Location: Meriden,Ct.
I think I will invest in Marvel Mystery Oil.... :wink:

Good job,
Phil

_________________
A man's got to know his limitations.


Top
 Profile  
 
PostPosted: Thu Jun 26, 2014 1:58 am 
Offline
User avatar

Joined: Tue May 04, 2004 11:52 pm
Posts: 393
Location: North Georgia
Alrighty, now that I have a fresh supply of MMO and the Engine Gods are happy once again, let's pick up where we left off with the fuel pump!

What we're going to do now is start soaking the internals of the pump with MMO. Down inside the pump body are two one-way valves that serve as a fuel inlet and outlet above the diaphragm. The way this pump works, very simply put, is the diaphragm is pulled down by a pull rod (via a rocker arm that rides on a camshaft lobe), which draws fuel in from the inlet valve, and then the diaphragm is pushed back up by a spring, which forces the fuel out through the outlet valve. (That spring also determines the fuel pressure--heavier spring, higher fuel pressure.) This flexing motion of the diaphragm is what accomplishes the "pumping" of the fuel to the carb, but we'll get into all of that in greater detail in a later post!

By adding the MMO here we want to fill up the chamber above the inlet valve, and the MMO we added earlier to the carb feed line will run down and fill up the chamber above the outlet valve. The screen removed:

Image

Looking down into the pump.

Image

Here's an extreme close up. Note the inlet valve.

Image

I swabbed around the inlet valve and everything looks clean--no varnish!

Image

Next we'll fill up the chamber with MMO.

Image

And then I'm going to gently push open the valve and allow the MMO to flow down onto the diaphragm. (I found it flows faster by "tapping" on the valve instead of just holding it open.) I'll keep adding more MMO as needed until the diaphragm chamber is completely full. These diaphragms can dry out with age and will easily tear if you try to use the pump, which is what happened on the Kee Bird and led to the rigged up fuel can in place of the pump. Now I don't know what the condition of this diaphragm is, but before we even think about trying to rotate the crankshaft on this engine, which will also put the diaphragm into motion, we want to really soak that diaphragm good and get it pliable again. It might already be too far gone to save, but we wont know for sure until later. For now: fill 'er up!

Image

Here you can see all the MMO has flowed down into the diaphragm chamber. We'll keep adding more until we're sure the chamber is full.

Image

The next thing we're going to do is full up the chamber beneath the diaphragm with MMO as well. To gain access to it, we'll remove the drain lines and T-fitting on the bottom of the pump.

Image

Drain lines disconnected.

Image

T-fitting removed.

Image

Looks like we have some varnish to clean up in the bottom of the pump!

Image

I'm not able to get a picture of it, but if you were to look inside there, you would see the bottom side of the diaphragm, as well as the diaphragm spring, etc. A quick swab inside there also revealed varnish.

Image

What we'll do now is screw in a new fitting...

Image

Aaaand then we'll start pumping MMO into the chamber until it's completely full.

Image

So now we have filled all the internal chambers of the fuel pump with MMO and both sides of the diaphragm are soaking. One thing I should mention here is that there were a couple different types of diaphragms used in these pumps over the years, and I can tell from the outside that this pump has the later (post-war) diaphragm that is more durable than the WWII variety, so hopefully after a good soaking in MMO, it might still be usable. We'll take a closer look at this and our options if the diaphragm has to be replaced in a later post. You can actually still buy brand new replacement diaphragms and rebuild kits for these pumps, so worse case scenario, we have that option available if needed!

Image

Oh, and here's some shots of the inspection stamps and such on the bowl for the die hard modelers :wink:

Image

Image

So to sum up today's adventure: the carb will need to be removed and cleaned, and the fuel pump needs further soaking/cleaning and inspection to determine serviceability. Will we be able to bring the fuel pump back to life again after all these years, or will it end up burning my garage down? Stay tuned! :wink:

_________________
~Trevor McIntyre
http://www.TrevorMcIntyre.com


Top
 Profile  
 
PostPosted: Thu Jun 26, 2014 2:38 am 
Offline
User avatar

Joined: Tue May 04, 2004 11:52 pm
Posts: 393
Location: North Georgia
Obergrafeter wrote:
Very good info,................only thing I would do different is try AeroKroil instead of PB Blaster.


I've heard a lot of good things about AeroKroil, but I haven't had a chance to use it myself yet. I'll have to order some and see how it does--there's certainly enough rusty hardware on this engine to test it out on!

If anyone else has any product recommendations, feel free to post it! I want to make this thread a go-to resource for bringing these engines back to life again, so ya'll feel free to post about any products, such as AeroKroil, that would be useful to that end!

_________________
~Trevor McIntyre
http://www.TrevorMcIntyre.com


Top
 Profile  
 
PostPosted: Thu Jun 26, 2014 2:49 am 
Offline
User avatar

Joined: Tue May 04, 2004 11:52 pm
Posts: 393
Location: North Georgia
phil65 wrote:
I think I will invest in Marvel Mystery Oil.... :wink:

Good job,
Phil


Marvel Mystery Oil is great stuff! I even use it in my truck (and lawn mower). Maybe they'll sponsor this restro if I keep saying good things about their product, ha! :wink:

_________________
~Trevor McIntyre
http://www.TrevorMcIntyre.com


Top
 Profile  
 
PostPosted: Thu Jun 26, 2014 4:15 pm 
Offline
2000+ Post Club
2000+ Post Club

Joined: Tue Jun 14, 2005 10:16 am
Posts: 2308
Following on from the newspaper photos, here's a couple more...

Image

Image

Image

_________________
Those who possess real knowledge are rare.

Those who can set that knowledge into motion in the physical world are rarer still.

The few who possess real knowledge and can set it into motion of their own hands are the rarest of all.


Top
 Profile  
 
PostPosted: Thu Jun 26, 2014 4:21 pm 
Offline
2000+ Post Club
2000+ Post Club

Joined: Tue Jun 14, 2005 10:16 am
Posts: 2308
One more:

Image

Found this newspaper while unwrapping a box of NOS aircraft parts a few years back. Front page headline was the German collapse at Stalingrad.

_________________
Those who possess real knowledge are rare.

Those who can set that knowledge into motion in the physical world are rarer still.

The few who possess real knowledge and can set it into motion of their own hands are the rarest of all.


Top
 Profile  
 
PostPosted: Thu Jun 26, 2014 7:55 pm 
Offline
User avatar

Joined: Tue May 04, 2004 11:52 pm
Posts: 393
Location: North Georgia
ZRX61 wrote:
Found this newspaper while unwrapping a box of NOS aircraft parts a few years back. Front page headline was the German collapse at Stalingrad.


Very cool find, thanks for posting that! It's really something to go back and look at those old newspapers from the war.

Here's a help wanted ad from Martin-Omaha offering jobs on the B-29 production lines:

Image

And speaking of Martin-Omaha, let's take a look at a worker's badge from the plant! These badges were "worn" in a number of different ways, and this particular one is mounted on a leather keeper that would just slip into a shirt pocket. This badge was put away after the war ended and it remained untouched for nearly 70 years--quite a little time capsule!

Image

Here's the backside showing his "Aircraft Workers Club" membership card.

Image

And inside we have a doctor's note, a reminder to pick up some drill bits, a business card from a furniture store, the "Aircraft Workers Club" membership card, and last but not least, two toothpicks! One can never have enough of those :wink:

Image

_________________
~Trevor McIntyre
http://www.TrevorMcIntyre.com


Top
 Profile  
 
PostPosted: Wed Jul 02, 2014 3:28 am 
Offline
User avatar

Joined: Tue May 04, 2004 11:52 pm
Posts: 393
Location: North Georgia
So before we go any further here and start tearing parts off this APU, I thought this would be a good time to explain how the cooling system on these engines work.

If you watched my "farm fresh walkaround" video of this APU, https://www.youtube.com/watch?v=M-QV1vC-4kk, then you may recall that I pointed out the squirrel cage fan that's contained within the scroll. That fan is what cools the cylinders and generator, but while it would be logical to assume that it simply blows air on these components, that's actually not how it works. Instead of a blast system, these engines use a suction cooling system, whereby air is pulled through the generator and cooling fins of the cylinders.

To make this easier to visualize, I had the graphics department put together some highly detailed "flow charts" of the cooling system for me. OK, I don't really have a graphics department, but this will give you a good idea of the airflow!

Image

Image

Image

Now let's take a closer look at how this cooling system works. First we'll start with the most prominent part, which is the large scroll that contains the squirrel cage fan (which is attached to the flywheel).

Image

Here's an inside view of another scroll and fan.

Image

Image

This view shows how the fan is contained within the scroll...

Image

But to make it easier to see, I turned the fan around in this view. As the fan rotates, it draws in air from both the cowlings around the cylinders, and another scroll that's mounted around the generator. This air is then expelled, along with the engine exhaust, outside the aircraft.

Image

Now let's take a look at the cylinder cowling. Each cylinder has two little cowls that bolt together around the cylinder, and at one end there is an opening that permits air to enter, while the other end is connected to the scroll.

Image

Here you can see the cowl air intake.

Image

Image

And here you can see where the cowling is connected to the scroll.

Image

Image

In these pictures you can see what the cowling itself looks like.

Image

Image

Image

And the cowling mounted to the scroll (note the "A" for "Andover" stamped into the scroll).

Image

Image

Image

Now lets take a look at how the generator is cooled. Here you can see the scroll that wraps around the generator.

Image

Image

Image

Image

Image

The end cap of the generator is perforated, which allows air to be drawn into the generator and flow back to the scroll.

Image

Here's some shots of another Eclipse P-2 generator with the end cap removed.

Image

Image

Image

Image

While we're here, here's a shot of one of the brush assy's...

Image

Aaaaand the generator data plate, for those die hard modelers--and yes, these generators really do weigh 36 pounds! :wink:

Image

Image

In the next post we'll talk about crankcase ventilation and how those rocker box cover vents work. Stand by!

_________________
~Trevor McIntyre
http://www.TrevorMcIntyre.com


Top
 Profile  
 
Display posts from previous:  Sort by  
Post new topic Reply to topic  [ 39 posts ]  Go to page Previous  1, 2, 3  Next

All times are UTC - 5 hours


Who is online

Users browsing this forum: No registered users and 4 guests


You cannot post new topics in this forum
You cannot reply to topics in this forum
You cannot edit your posts in this forum
You cannot delete your posts in this forum
You cannot post attachments in this forum

Search for:
Jump to:  
Powered by phpBB® Forum Software © phpBB Group