I know alot of you build models, here's a place for you to discuss model related items and to post pictures of your projects.
Post a reply

Fri Dec 14, 2007 3:31 pm

it's the fine detailing mods that your doing that really make a masterpiece. can't wait to see it's completion!!

Sat Dec 15, 2007 8:54 pm

Hey Matt

I know it might be a little premature, but have you decided on a particular Dominator for your paint scheme?

Nice work by the way and a great subject to model.

Shay
____________
Semper Fortis

Sat Dec 15, 2007 9:40 pm

I am leaning to The Lady Is fresh
Image
Image

All B-32s were bare metal, I am getting close to paint and am getting nervous about it. I have never done a bare metal finish, let alone on a vac kit. I am going to use the Alcad II system. Once I get the seams finished, I will sand all the gray primer off, polish the plastic and put on the final finish.

Sun Dec 16, 2007 4:30 pm

That's my preference for nose as well. If I recall, the kit comes markings for with "The Lady" and "Hobo Queen II." I've actually found pics of two different nose arts for "The Lady." I wouldn't have thought she was in service long enough for a repaint, unless there were two different "Ladies"....

SN

Image

Image

Sun Dec 16, 2007 10:20 pm

According to William Wolf, the author of the Consolidated B-32 Dominator, it is the same plane. When the first nose art became scruffy, they painted a new one futher aft in the same location that Hobo Queen II carried it's nose art.

Mon Dec 17, 2007 12:41 am

Matt,

Give a little thought to Bare Metal foil for some of the surfaces. I've been using a combination of Alclad and the original Bare Metal--not the "Chrome" material, however, as it doesn't conform to compound curves. The original stuff works great. Simply finish the entire model to a flawless finish as you would for Alclad, then apply Alclad and foil to duplicate the varying panels on the real bird. I apply the foil in different orientations to get subtle panel variations on large areas as well. Here are a couple of examples:
Image
Image
Horace Carswell was flying this aircraft the day he earned the MOH. Godspeed to a brave man.


Image
I used to work on these little puddle-jumpers years ago.

The Lady Is Fresh is a great choice for your subject--somewhere I have a photo of her at Clark? after the nose gear collapse. She may have been the last intact B-32 depending on when they got around to scrapping her.

Scott

Mon Dec 17, 2007 1:22 pm

That -24 looks amazing Scott!

Mon Dec 17, 2007 8:12 pm

I would love to do a foil plane, but there is no way I could ever get pieces to line up. I can't draw a straight line with a ruler on both sides of the line as a guide.

Tue Dec 18, 2007 1:49 am

Thanks, Chad.

Matt,

Here's something you don't always see--the right side of a subject! I don't know if they ever got around to painting the babe on this side, but I'd guess they did.
Image

And another shot of the left side with the original artwork, complete with "Lorraine" on the nose ball:
Image

I'll do a little Bare Metal foil class in the morning so you all can see how I apply it. Once you get the hang of it you'll enjoy the results.
Last edited by Second Air Force on Thu Dec 20, 2007 1:52 am, edited 2 times in total.

Tue Dec 18, 2007 11:10 am

Ok,

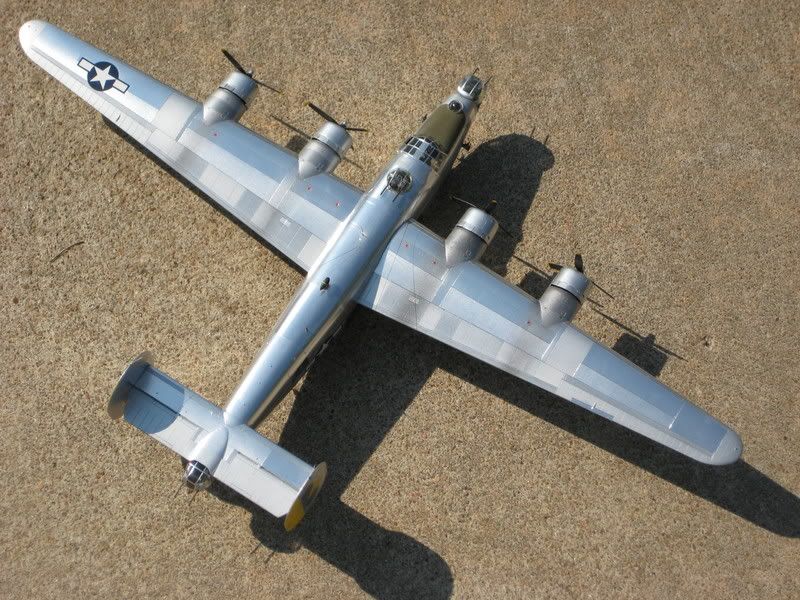
Here's how I apply Bare Metal foil. Sorry about the photo quality, and the foil I have is probably ten years old, so this is a poor representation of the process. As the foil ages on the backing paper it seems to become more fragile and tears easily when removing it. New sheets fresh from the hobby shop should give good results. I use "Chrome", not "Ultra Bright Chrome" because it is more representative of shiny alclad and conforms better. "Matte Aluminum" is good for alternating panel shades on relatively flat surfaces. I use Alclad or Testors Metalizer for various areas depending on shading, shape, etc.

First, and most important, is a perfect, glass smooth surface. Any seams, scratches, etc will really show up when the foil is smoothed out.
Image

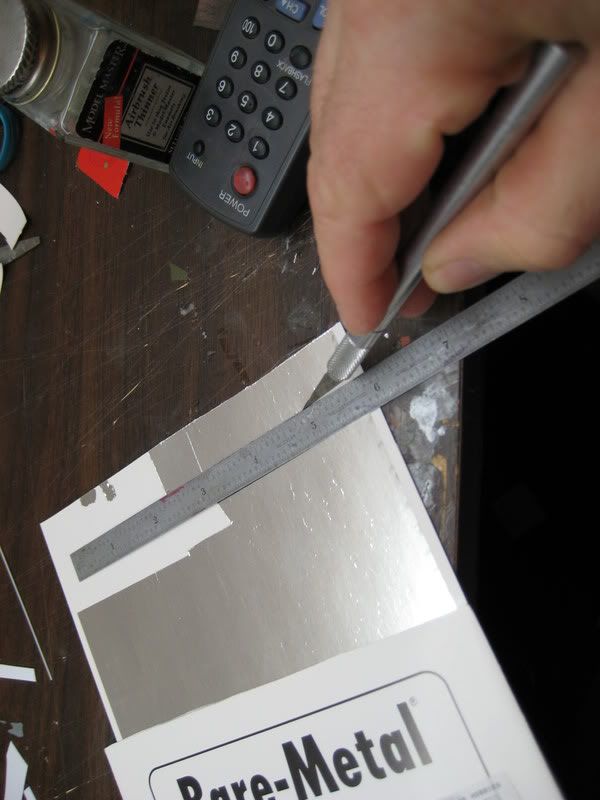
Next, use a metal straight edge and a BRAND NEW X-acto blade to cut a panel to roughly the size you require:
Image

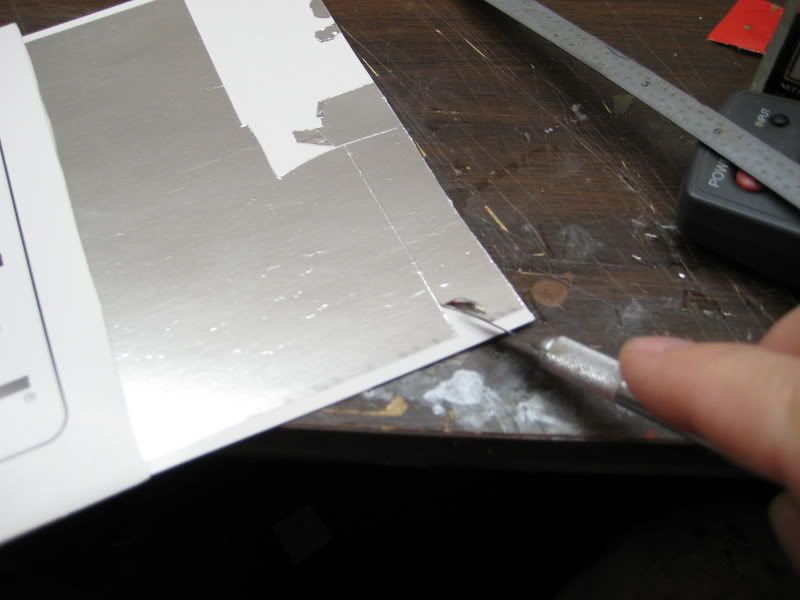
Now pick up a corner of the foil with the BRAND NEW blade and carefully peel it off the sheet:
[Image

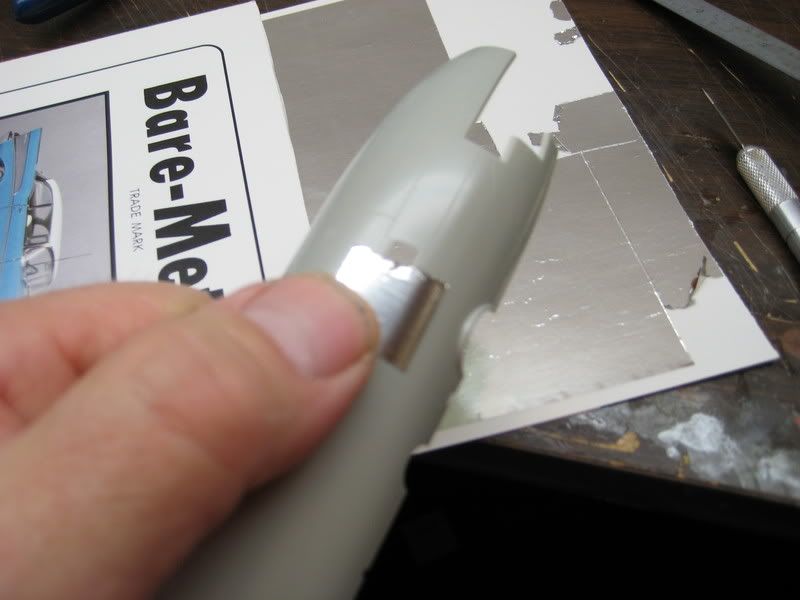
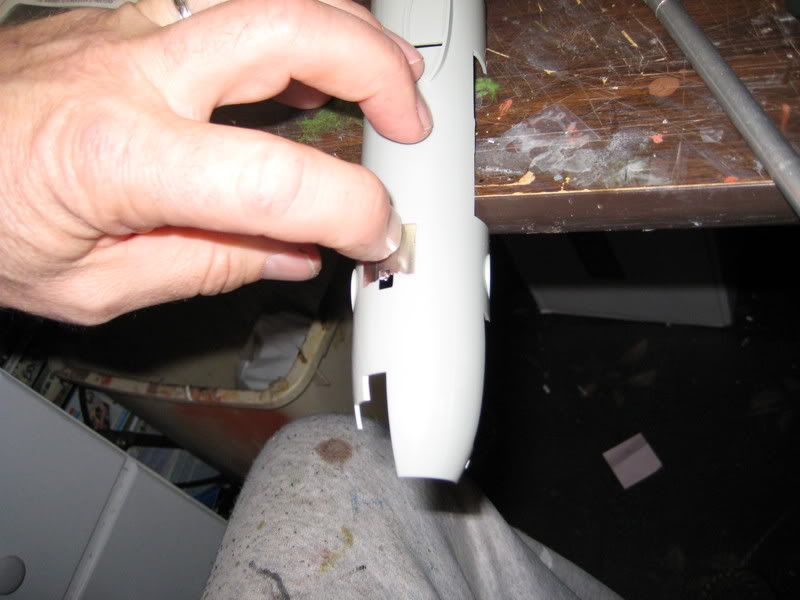
Apply the foil to the area you want to cover, being very careful not to fold or kink the foil in the process:
[Image

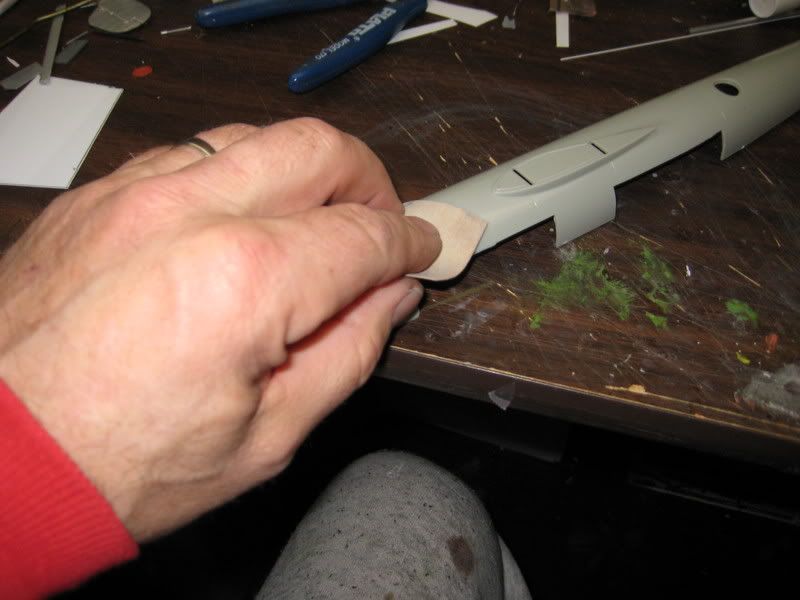
Now smooth the foil carefully across the entire surface, and I use a fingernail to slowly insert the material into all panel lines:
Image

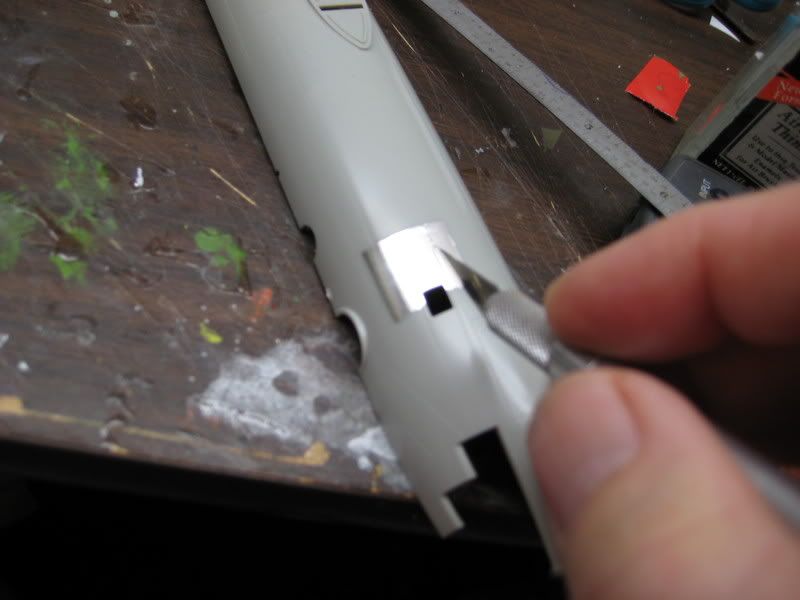
This step will be difficult for your project, Matt, due to the panel lines on vacuform being less distinct than on injected kits. If you're careful, you can use a flexible ruler to wrap around the fuselage in order to maintain straight panel lines. I use the fresh blade to trim down the panel lines on the kit and remove the material not needed:Image

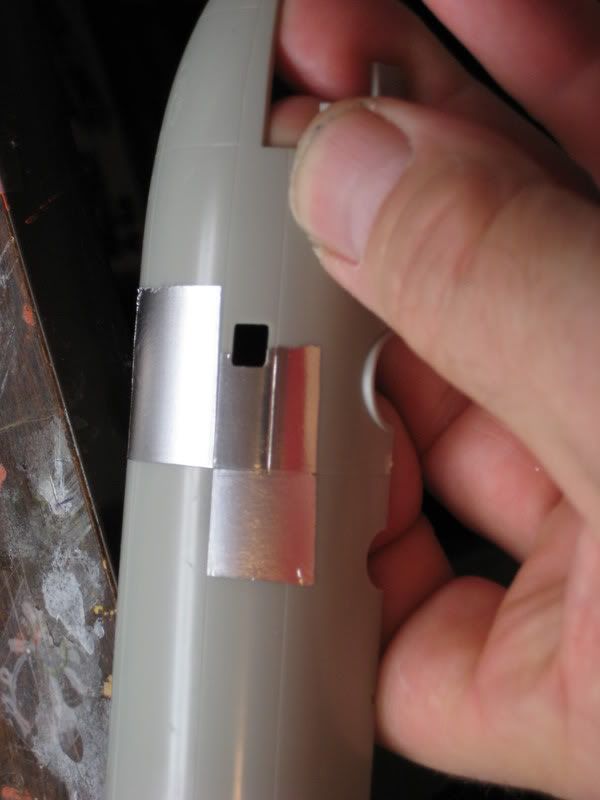
Simply repeat this process to add panels across the airplane, being careful to smooth the foil with a soft cloth from time to time. In this example I used Chrome and Matte Aluminum to get the varying panel coloration:
Image

If you aren't satisfied with a particular area, you can carefully remove the foil with a fingernail or soft tool. Clean off all adhesive that may remain before putting on the next sheet:
Image

There you have it, one guy's way to do NMF aircraft. Practice makes perfect as in any hobby, but I've had good luck with this system. Three things to remember: Absolutely smooth surface; BRAND NEW X-acto blades; and fresh Bare Metal foil.

Scott
Last edited by Second Air Force on Thu Dec 20, 2007 1:47 am, edited 1 time in total.

Wed Dec 19, 2007 10:55 am

Here is a Falcon Vacuform F-89 that I finished with Alclad and another product that I can't remember the name of. It was actually hard making the finish look "weathered", the photos I had of the real airplane depicted a tired looking bird. One of the joys of modeling was that I finished this thing and hauled it down to the hobby shop to show the guys--the manager said "Hey, that reminds me, there's a Monogram kit of that thing coming out this year!!!!" I didn't know whether to scream or laugh.
Image

Scott

Wed Dec 19, 2007 5:19 pm

Thx Scott for the descripition, I don;t know if it was just me, but I could not see the pics. I have not been able to touch the model for a couple of days, hoping to later tonight.

Wed Dec 19, 2007 5:23 pm

I just checked in and I can't see any of his pictures and when I click on the link to go directly it says his account doesn't exist.

Wed Dec 19, 2007 6:28 pm

Guys,

I'll re-do the photos to go with that little story. Django had the same problem, and the computer I'm on right now doesn't recognize them either.

Scott

Thu Jan 10, 2008 8:03 pm

Hi Matt. Been a while since your last post. Have been following it with great interest. Hope you find the time to finish this great project. All the best of luck (and skill of course) wih it. :D
Post a reply