Re: PV-2D Harpoon 84062 (Tanker 101) comes back to life
Fri Jun 28, 2013 6:14 pm
Hey Taigh, did you get my pm about the C47 parts?
Re: PV-2D Harpoon 84062 (Tanker 101) comes back to life
Sat Jun 29, 2013 9:32 am
Yes, I did. Sorry for the slow reply. I just sent a list of the items I have that are on your want list for the C-47.
Re: PV-2D Harpoon 84062 (Tanker 101) comes back to life
Sun Jul 07, 2013 12:43 pm
Lots more work going on lately but little reporting. I am sorry for that. Right now I am only capable of posting photos for the updates at work and not home and things are so busy at work I do not have the time to make the updates.
So much to do for our upcoming trip across the US to OSH and Topeka and it has been quite the roller coaster ride. Recently three of our donors from Switzerland bailed out of going on the trip after 9 months of saying they were going for sure and will not back out. Mad scramble ensues as the loss of those donations kills the trip. One of our museum patrons has doubled his donation to help cover the loss as we all feel we cannot and will not cancel the trip now. We have WWII PV-2 vets coming to meet us and we will not let them down or the vets who may just happen upon us at one of the shows.
Now I take a closer look at the fuel calculations and sharpen the pencil to see what we really need but frankly the problem is our lack of long range flight experience in 062. We certainly have the book values for consumption rates and fuel flows that have been our guide all along. I have talked to the Glenn at the Hot Stuff gang and Dave who owns Attu Warrior and they have been quite helpful with their numbers but there are big differences in how they operate their Harpoons. Hot Stuff lives in the low lands so they do not have to climb too high and Dave pretty much always does climbs to altitude since they are from Colorado.
We need to be conservative in our calculations but just how conservative is the question when trying to figure out the actual cost of the trip. Right now we have fuel and oil funds to get us to OSH and to Topeka but after that not so much. As I said we all agree that we cannot stop now too many are counting on us so we will continue our fundraising to come up with the remaining funds needed to get home.
Many things have to happen to get 062 ready and one important aspect for me is the capability of lots of extra fuel for that conservative safety factor/comfort level that is desired. Right now our outer wing tanks are not working so we only have the mains and aux tanks which hold just under 500 gallons. 500 gallons do not last long on trips like these so we need more fuel. One of the ways to do this is to explore the other options used in the Harpoon. The PV-2's had a fuselage tank and drop tank capability that would give us an extra three hours of range/safety factor so it is desired to put these in place. Not only will they increase our capability but it makes the old gal more complete and also looks pretty cool. Of course there is a trade off to have the additional drag of the drops but so what. I think a PV-2 looks great with the drops and once they go on the wings I would like to see them stay there. Incidentally I looked in the flight manual to see what the drag penalty is for the drops and the charts say that external stores data will be provided in the future. I sent a text to Lockheed but I haven't heard back yet.
Pretty simple, just find a pair of tanks and pylons and away you go. Yeah right, welcome to warbirds. As with any project on old aircraft, especially Warbirds, one idea created a hundred other headaches that you have to go through to make it happen. Finding the tanks is a big pain in the backsides for several reasons. First they haven't been manufactured in 60 plus years. They are made of steel that likes to rust away. Then there are the hot rod guys who all have dreams of recreating the Lakester racers, you know the ones that were made from drop tanks. This little dream of so many has single handedly consumed a large number of our Warbird drop tanks most of which were cut up and then never finished.
Finding the tanks is easy when compared to finding the pylons to hold them up with. It is amazing to me that they are so difficult to find because many aircraft used the same basic pylon. Lockheed designed this pylon as a universal unit that could be used for drops, bombs and gun pods. They were installed on the P-38, PV-1, PV-2 and the P-61 even that carried 4 of them. With so many of these aircraft having been produced why are they so hard to come by? My best guess is they were needed to supply some foreign country post WWII and off they went. I bet they are sitting in a warehouse in Brazil right now. Oh well.
Dave Hansen was kind enough to trade us one of his pylons as he had two rights. It is great Dave and will be the basis for our right side. The left we will be making from the blueprints and borrowed parts that were kindly loaned to us by some wonderful big name warbird folks. Thank you guys so much for your help with this.
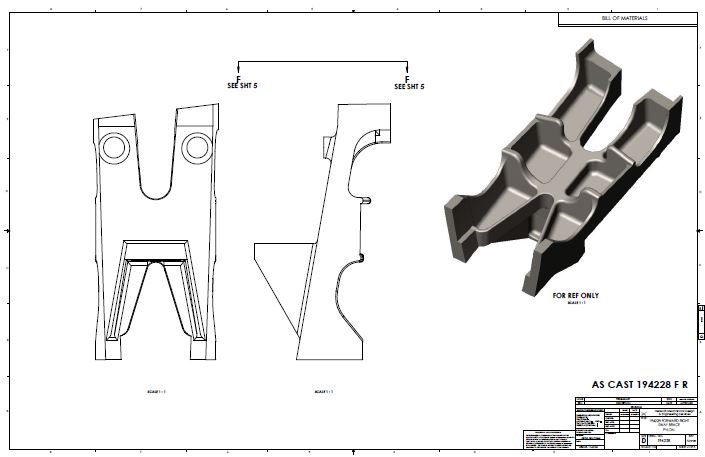
Casting parts for a torpedo sight bracket or other trinkets is a long ways off from making a casting that holds a drop tank on the wing so it is important to get it right. It has to be just as accurate and strong as a wing spar or other structural component so when you have to make something like this you need to use the proper resources.
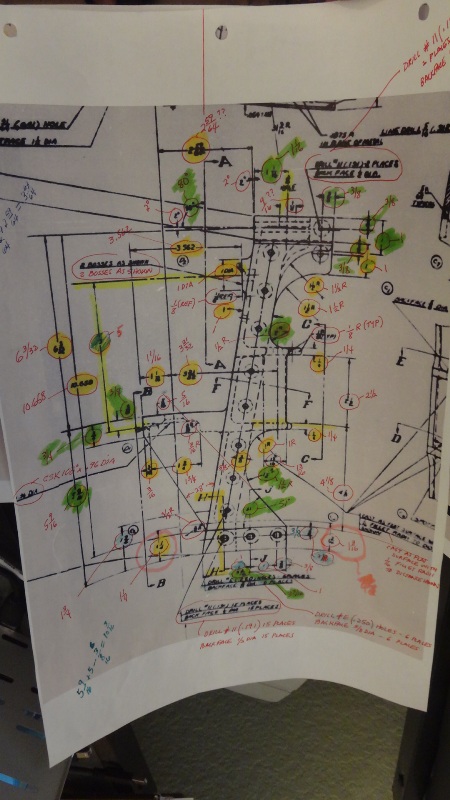
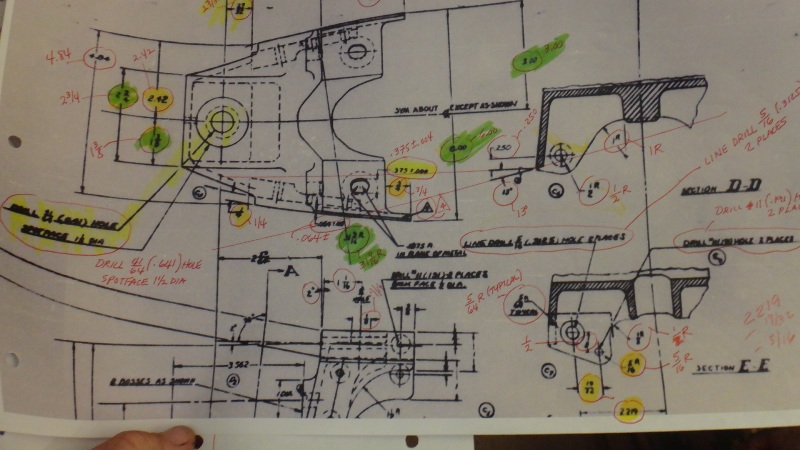
On this project we start with the factory drawings which leave a lot to be desired. Thanks to Bill and Bill at the kind restoration shop who sent me the drawings. As with all of these drawings they are a blessing that we have simply even them but sometimes we feel the need to curse the folks that were taking the microfilm photos at the time. You can have one drawing as crystal clear as it was when the draftsman created it right next to a drawing that is completely illegible for many reasons.
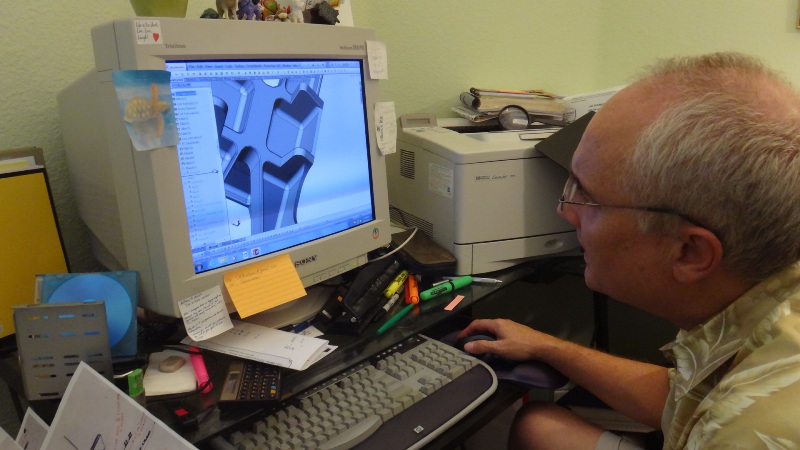
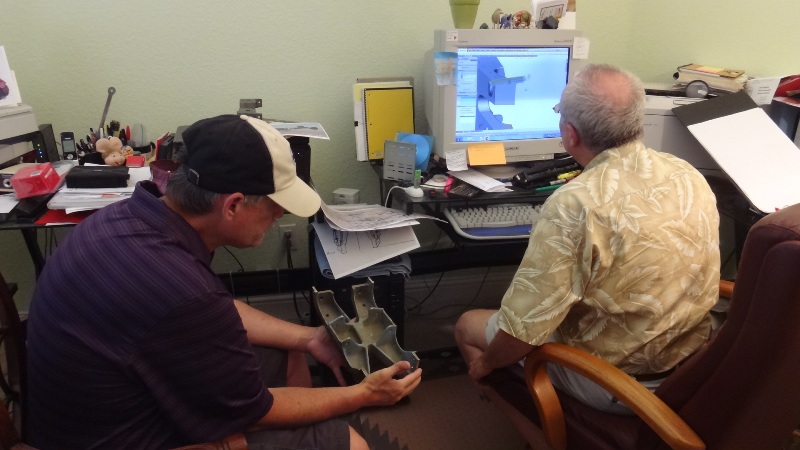
After taking original loaned parts as examples to Manuel, our wonderful engineering volunteer, he began the process to make a 3D model of the parts in solidworks. With the model we have options available to us to have castings made or to have the part machined out of billet. It was difficult for Manuel as the drawings were not production drawings and did not have enough information to model. Thanks to Mike and John at two different restoration shops for loaning us the real parts because these answered the many questions of the missing dimensions. This is so much of a team effort on many different levels.
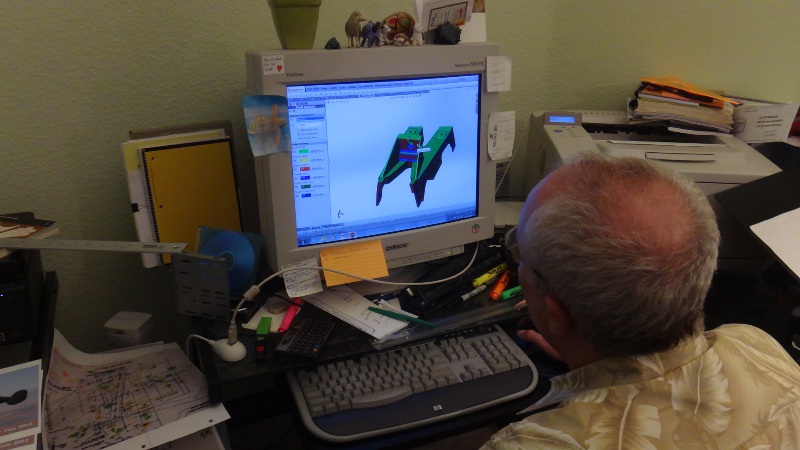
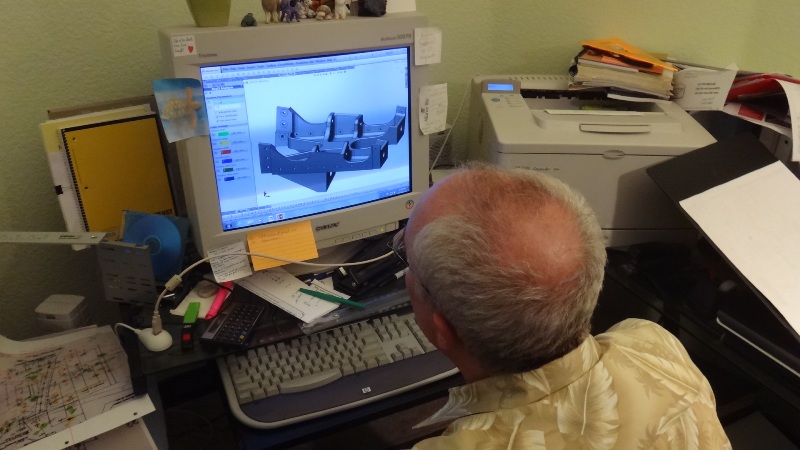
Here is Manuel with the 3D model he worked on for countless hours.
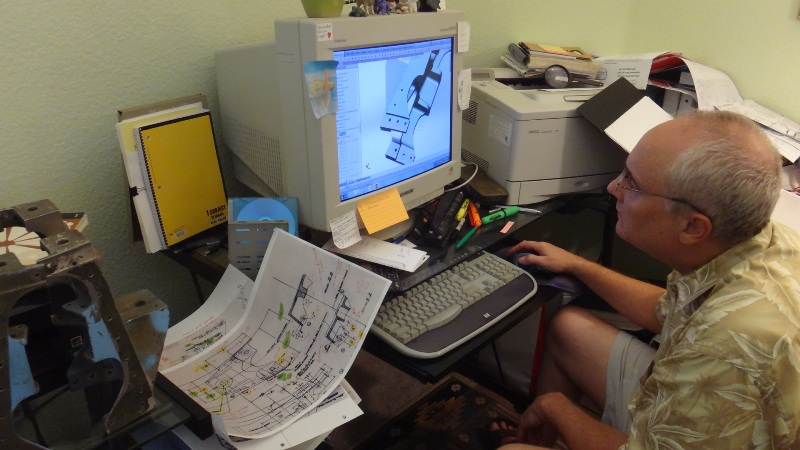
And here is Tim the machinist figuring out how to make the part. These guys have been invaluable in helping to solve the mystery of the pylons. Projects like these are massive undertakings that involve huge resources in time and money. It ain't cheap to reverse engineer and reproduce parts accurately which is why restorations are so costly. We are fortunate that we have some real nice people helping us and volunteering their time, materials and energy. Thank you all!
Manuel can even do an analysis of the relief angles to be sure the pattern will come out of the sand properly at the foundry. He can also do stress and strain analysis for alternate methods of manufacture.
Back to work on the simple minded things that my pea brain can handle like banging on the airplane.
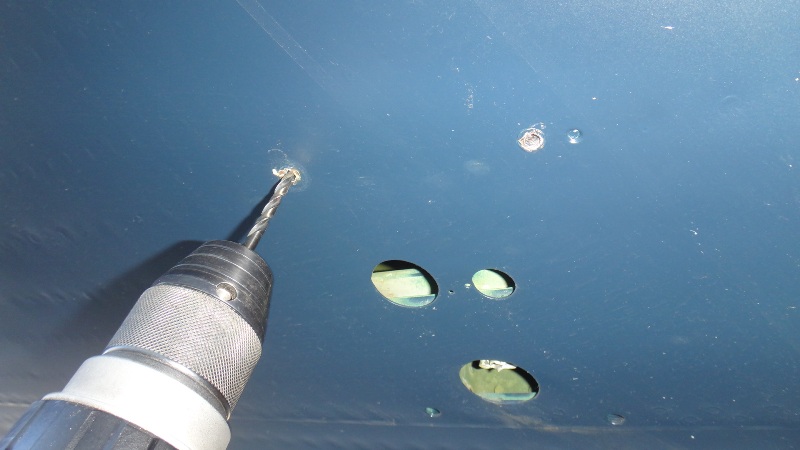
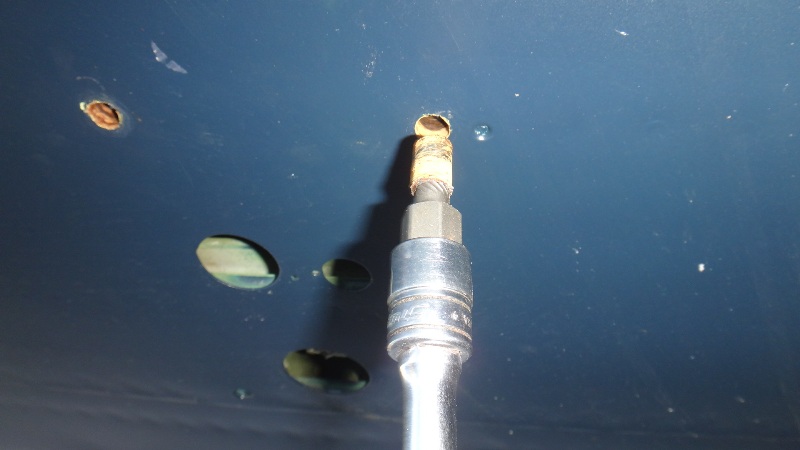
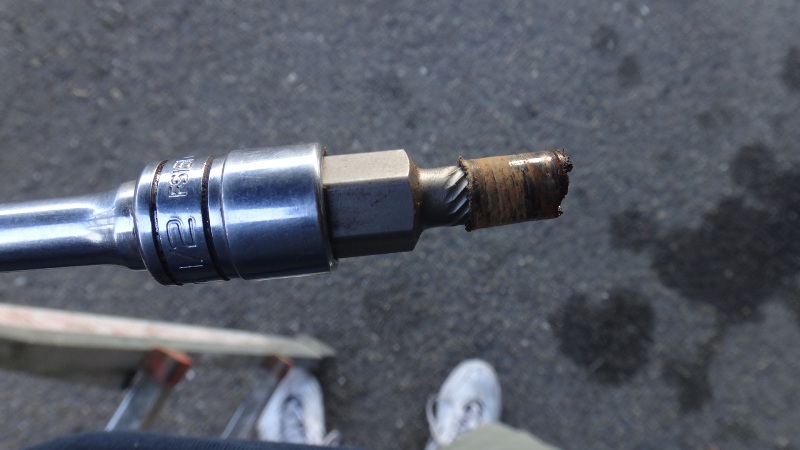
The leading edges need to come off again for access for pylon mounting and plumbing, wiring and rockets. Where the pylons attach to the wing two of the original studs were simply cut off and the remnants were flush with the skin. I needed to drill these out as they would not budge by normal extraction methods. By drilling them out to almost their full OD it weakens the stud and makes it easier to remove. It is tricky to not broach the wall and possibly damage the structure but I got lucky and it came out nicely.

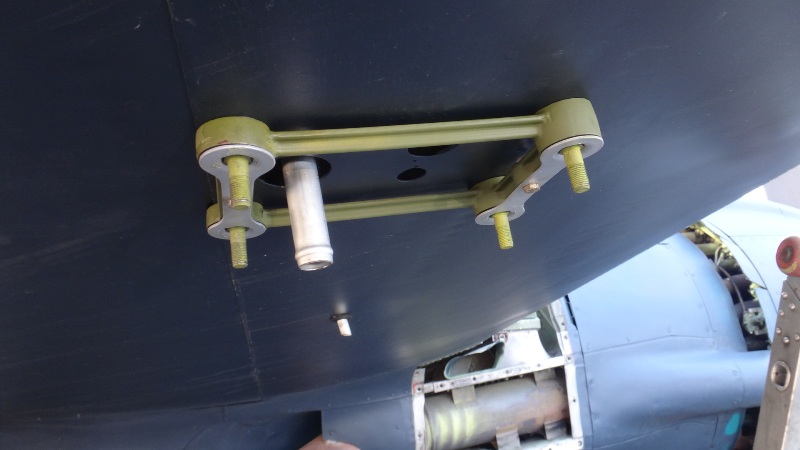
This allowed me to install the pylon adapter bracket on the right side. This is what the pylon bolts to on the wing and these brackets are specific to the different type of aircraft. We were thankful to have located an original set and we have some extras of one side.
The tubing that connects to the tank was also cut off flush with the wing so Ricky fabricated a new one that you can see coming out of the wing like it is supposed to.
One of the chain of events for making the drop tanks functional is the plumbing. Earlier we replaced the 1943 rubber self sealing hose inside the wing spar with new hose. Now we need to reconnect the drop tank plumbing to the fuel transfer valve. It was disconnected back in its tanker days and now need to be reinstalled with new rubber couplings. Bringing old systems unused since the aircraft was made is a lot of fun and is rewarding.
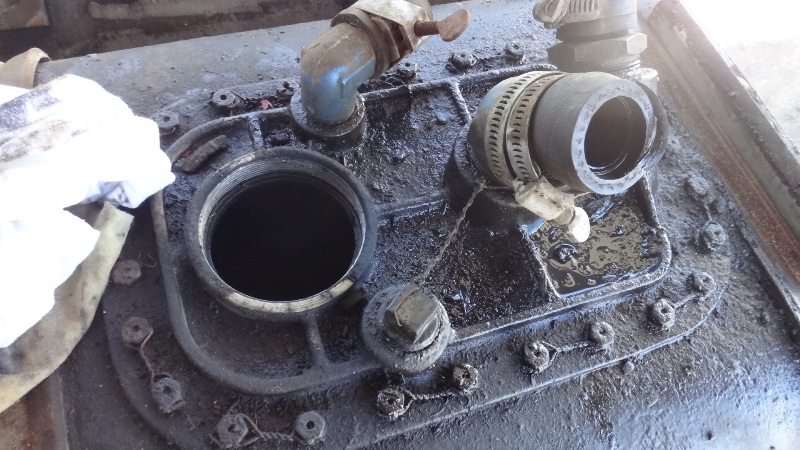
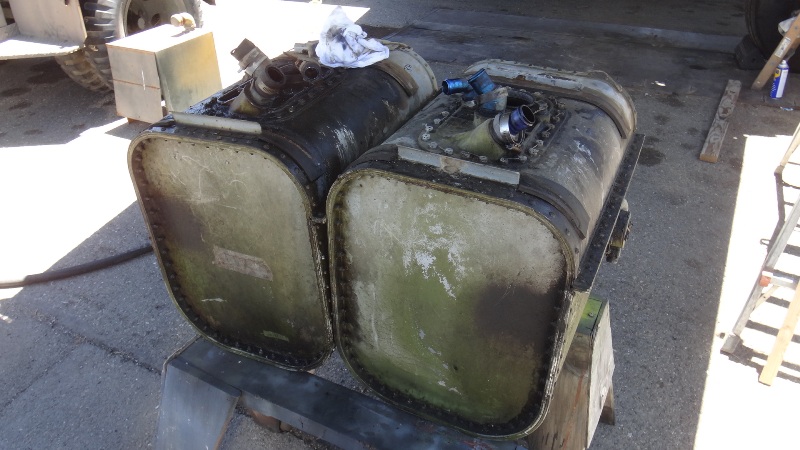
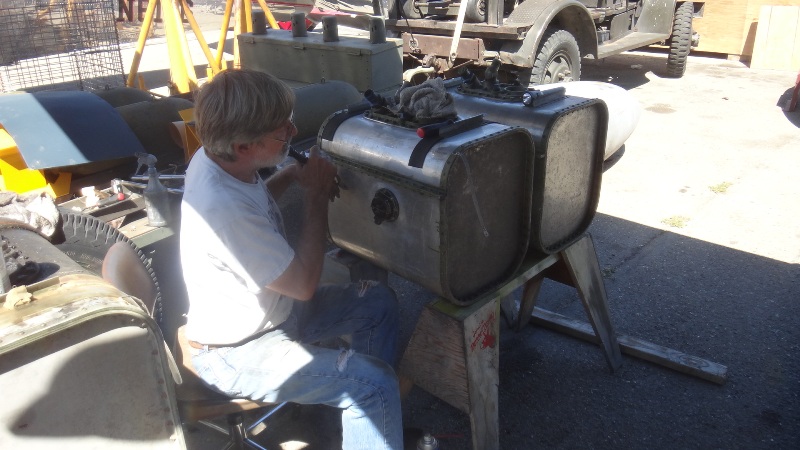
Earlier we removed the oil tanks to gain access to replace the hoses inside the spar. When you remove the oil tanks it is standard practice to clean them out and remove any sludge that could have built up in the bottom. Sludge is the thick and heavy crud that builds up over time. Tanks are usually set up to allow for room for sludge to accumulate below the outlet fitting. These tanks had some sludge in them but not a lot. A few gallons of avgas and slosh them until the sludge is suspended in the fuel and then drain. You need to repeat this until the tank is clean. The right side cleaned up nicely but the left was another story.
When the left side tank was rinsed the crud on the bottom of the tank started to look like one of the those gold panning shows on TV. Lots of shiny metal in the bottom of the tank. Holy crap our engine has been making metal?!
This didn't jive with everything else we have been seeing though and our oil analysis etc. We had recently changed the oil filters and nothing was present in the filter elements at all. Nothing showed up in the oil analysis except to say that the more time we put on the engines the cleaner they are running so where did the metal come from?
I remembered that at the end of her tanker career she had an engine failure on the left side. They knew the engine was going and were still running it until it really gave up the ghost. It finally did and then the engine was pulled and replaced with another one out of the can. the problem was that the mechanic didn't clean out the whole oil system properly. When you have a failure and the engine makes metal that metal contaminates everything that uses engine oil like the prop, oil cooler, prop governor, oil tank etc. If you don't remove all of this metal then it will flow into your new engine and screw it up too which is just what happened. After they put the new engine on the metal from the old engine killed the new one.
The story goes that it was these two successive engine failures that kept Tanker 101 from making good on her contract with the forestry service and the contract was lost. This loss forced the operator into bankruptcy and he had to fold.
The guy who told me this story was one of his pilots who was laid off as a result. He said that Mr. Kinney owed him a lot of back pay that was now gone from the bankrupt status. He went on to say that several years after this he got a call from Bruce Kinney who said that he now had recovered enough and that he wanted to pay the pilot back for the money he owed him and he did. The pilot was understandably astounded and conveyed how much that meant to him and what a testament it was to the character of Bruce Kenney. Bruce passed away a several years ago.
The metal in our tank was left over from that failure so long ago and had been glued in place by the sludge. Once the avgas went in it washed away the grime and exposed the metal. This is a good example of why non detergent oil is used on old engines like this. If we had used detergent oil then the sludge would have been cleaned somewhat and the metal might have made its way into the engine.
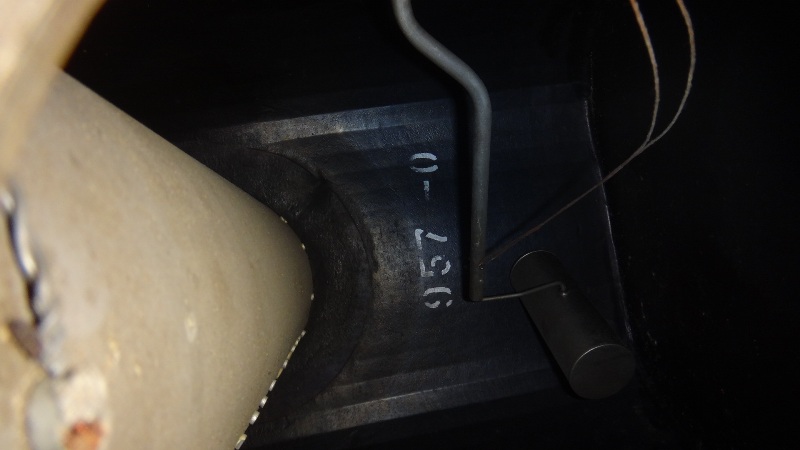
Here is a poor shot of the metal in the bottom of the tank. Needless to say this metal needs to all come out

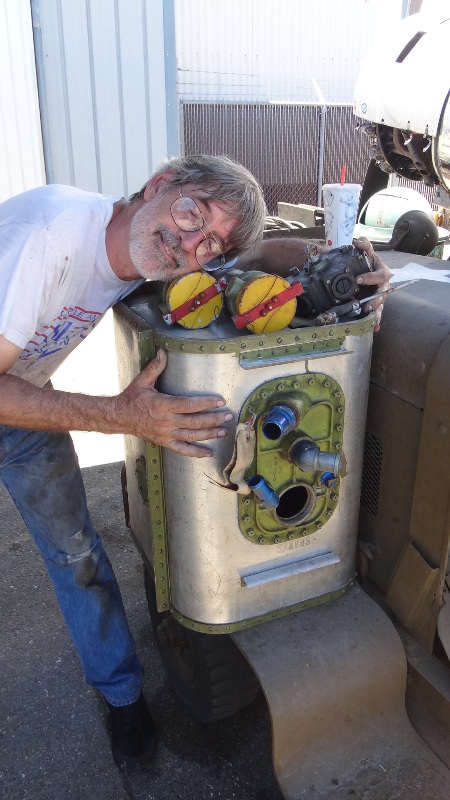
The other tank cleaned up nicely but this one will have to have the sump removed and the tank more thoroughly cleaned. At this point I remembered that we had bought some oil tanks with a large PV-2 parts inventory we had picked up a while ago. I went and found the tanks in storage and sure enough we had a new old stock pair of beautiful tanks complete with all of the fittings and new oil quantity sending units.
Happiness is a new pair of oil tanks right Ricky?

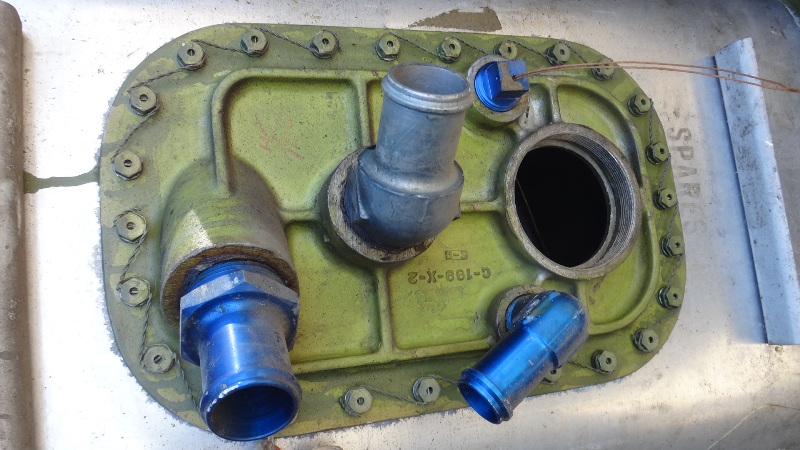
We even have replacement sets of oil filler necks/vent assys with caps

This saves us a large amount of time in just cleaning up the old tanks and prepping them for reinstallation. The old ones are perfectly good but the new ones are decidedly better.
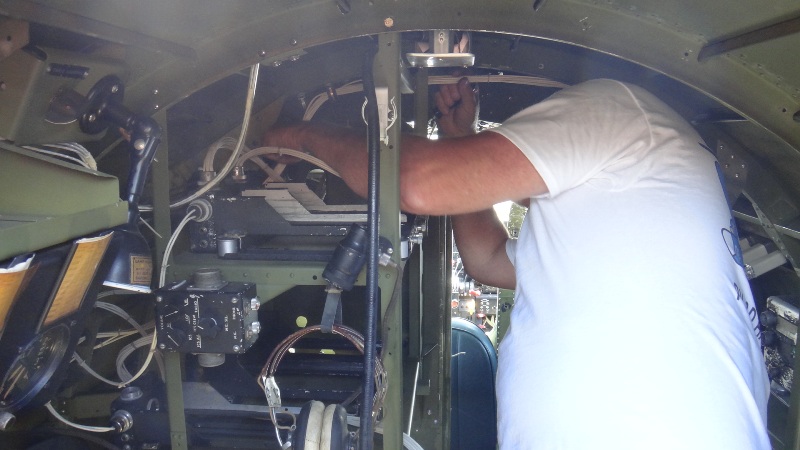
Here is Cousin mike working on the drop tank and cabin tank fuel lines and couplings in the gear well.

Yesterday we had a great work day with lots of folks showing up to help. Dick was working on wiring in the wing getting the landing lights working. Ricky fixed a problematic up lock cylinder that has persisted in leaking lately.
Mark finished up the wiring for the ARC-5 Command set and he fired it up for the first time. Dynamotors were spinning and I heard audio through the headphones! Another radio set comes to life. How cool is that. Just in time too because we have a PV-2 radio operator meeting us at topeka. Hopefully we can get the ARB running with the ART-13 so he can broadcast once again from his old office.
Ricky's kids were helping with cleaning duties. Ken and his kids were making PX things to sell at Oshkosh to help us raise money for the gas to get home.

It was a good day yesterday and now I need to get away from the computer and get back to work. We have a big trip coming up. Well half of it anyway!
So much to do for our upcoming trip across the US to OSH and Topeka and it has been quite the roller coaster ride. Recently three of our donors from Switzerland bailed out of going on the trip after 9 months of saying they were going for sure and will not back out. Mad scramble ensues as the loss of those donations kills the trip. One of our museum patrons has doubled his donation to help cover the loss as we all feel we cannot and will not cancel the trip now. We have WWII PV-2 vets coming to meet us and we will not let them down or the vets who may just happen upon us at one of the shows.
Now I take a closer look at the fuel calculations and sharpen the pencil to see what we really need but frankly the problem is our lack of long range flight experience in 062. We certainly have the book values for consumption rates and fuel flows that have been our guide all along. I have talked to the Glenn at the Hot Stuff gang and Dave who owns Attu Warrior and they have been quite helpful with their numbers but there are big differences in how they operate their Harpoons. Hot Stuff lives in the low lands so they do not have to climb too high and Dave pretty much always does climbs to altitude since they are from Colorado.
We need to be conservative in our calculations but just how conservative is the question when trying to figure out the actual cost of the trip. Right now we have fuel and oil funds to get us to OSH and to Topeka but after that not so much. As I said we all agree that we cannot stop now too many are counting on us so we will continue our fundraising to come up with the remaining funds needed to get home.
Many things have to happen to get 062 ready and one important aspect for me is the capability of lots of extra fuel for that conservative safety factor/comfort level that is desired. Right now our outer wing tanks are not working so we only have the mains and aux tanks which hold just under 500 gallons. 500 gallons do not last long on trips like these so we need more fuel. One of the ways to do this is to explore the other options used in the Harpoon. The PV-2's had a fuselage tank and drop tank capability that would give us an extra three hours of range/safety factor so it is desired to put these in place. Not only will they increase our capability but it makes the old gal more complete and also looks pretty cool. Of course there is a trade off to have the additional drag of the drops but so what. I think a PV-2 looks great with the drops and once they go on the wings I would like to see them stay there. Incidentally I looked in the flight manual to see what the drag penalty is for the drops and the charts say that external stores data will be provided in the future. I sent a text to Lockheed but I haven't heard back yet.
Pretty simple, just find a pair of tanks and pylons and away you go. Yeah right, welcome to warbirds. As with any project on old aircraft, especially Warbirds, one idea created a hundred other headaches that you have to go through to make it happen. Finding the tanks is a big pain in the backsides for several reasons. First they haven't been manufactured in 60 plus years. They are made of steel that likes to rust away. Then there are the hot rod guys who all have dreams of recreating the Lakester racers, you know the ones that were made from drop tanks. This little dream of so many has single handedly consumed a large number of our Warbird drop tanks most of which were cut up and then never finished.
Finding the tanks is easy when compared to finding the pylons to hold them up with. It is amazing to me that they are so difficult to find because many aircraft used the same basic pylon. Lockheed designed this pylon as a universal unit that could be used for drops, bombs and gun pods. They were installed on the P-38, PV-1, PV-2 and the P-61 even that carried 4 of them. With so many of these aircraft having been produced why are they so hard to come by? My best guess is they were needed to supply some foreign country post WWII and off they went. I bet they are sitting in a warehouse in Brazil right now. Oh well.
Dave Hansen was kind enough to trade us one of his pylons as he had two rights. It is great Dave and will be the basis for our right side. The left we will be making from the blueprints and borrowed parts that were kindly loaned to us by some wonderful big name warbird folks. Thank you guys so much for your help with this.
Casting parts for a torpedo sight bracket or other trinkets is a long ways off from making a casting that holds a drop tank on the wing so it is important to get it right. It has to be just as accurate and strong as a wing spar or other structural component so when you have to make something like this you need to use the proper resources.
On this project we start with the factory drawings which leave a lot to be desired. Thanks to Bill and Bill at the kind restoration shop who sent me the drawings. As with all of these drawings they are a blessing that we have simply even them but sometimes we feel the need to curse the folks that were taking the microfilm photos at the time. You can have one drawing as crystal clear as it was when the draftsman created it right next to a drawing that is completely illegible for many reasons.
After taking original loaned parts as examples to Manuel, our wonderful engineering volunteer, he began the process to make a 3D model of the parts in solidworks. With the model we have options available to us to have castings made or to have the part machined out of billet. It was difficult for Manuel as the drawings were not production drawings and did not have enough information to model. Thanks to Mike and John at two different restoration shops for loaning us the real parts because these answered the many questions of the missing dimensions. This is so much of a team effort on many different levels.
Here is Manuel with the 3D model he worked on for countless hours.
And here is Tim the machinist figuring out how to make the part. These guys have been invaluable in helping to solve the mystery of the pylons. Projects like these are massive undertakings that involve huge resources in time and money. It ain't cheap to reverse engineer and reproduce parts accurately which is why restorations are so costly. We are fortunate that we have some real nice people helping us and volunteering their time, materials and energy. Thank you all!
Manuel can even do an analysis of the relief angles to be sure the pattern will come out of the sand properly at the foundry. He can also do stress and strain analysis for alternate methods of manufacture.
Back to work on the simple minded things that my pea brain can handle like banging on the airplane.
The leading edges need to come off again for access for pylon mounting and plumbing, wiring and rockets. Where the pylons attach to the wing two of the original studs were simply cut off and the remnants were flush with the skin. I needed to drill these out as they would not budge by normal extraction methods. By drilling them out to almost their full OD it weakens the stud and makes it easier to remove. It is tricky to not broach the wall and possibly damage the structure but I got lucky and it came out nicely.
This allowed me to install the pylon adapter bracket on the right side. This is what the pylon bolts to on the wing and these brackets are specific to the different type of aircraft. We were thankful to have located an original set and we have some extras of one side.
The tubing that connects to the tank was also cut off flush with the wing so Ricky fabricated a new one that you can see coming out of the wing like it is supposed to.
One of the chain of events for making the drop tanks functional is the plumbing. Earlier we replaced the 1943 rubber self sealing hose inside the wing spar with new hose. Now we need to reconnect the drop tank plumbing to the fuel transfer valve. It was disconnected back in its tanker days and now need to be reinstalled with new rubber couplings. Bringing old systems unused since the aircraft was made is a lot of fun and is rewarding.
Earlier we removed the oil tanks to gain access to replace the hoses inside the spar. When you remove the oil tanks it is standard practice to clean them out and remove any sludge that could have built up in the bottom. Sludge is the thick and heavy crud that builds up over time. Tanks are usually set up to allow for room for sludge to accumulate below the outlet fitting. These tanks had some sludge in them but not a lot. A few gallons of avgas and slosh them until the sludge is suspended in the fuel and then drain. You need to repeat this until the tank is clean. The right side cleaned up nicely but the left was another story.
When the left side tank was rinsed the crud on the bottom of the tank started to look like one of the those gold panning shows on TV. Lots of shiny metal in the bottom of the tank. Holy crap our engine has been making metal?!
This didn't jive with everything else we have been seeing though and our oil analysis etc. We had recently changed the oil filters and nothing was present in the filter elements at all. Nothing showed up in the oil analysis except to say that the more time we put on the engines the cleaner they are running so where did the metal come from?
I remembered that at the end of her tanker career she had an engine failure on the left side. They knew the engine was going and were still running it until it really gave up the ghost. It finally did and then the engine was pulled and replaced with another one out of the can. the problem was that the mechanic didn't clean out the whole oil system properly. When you have a failure and the engine makes metal that metal contaminates everything that uses engine oil like the prop, oil cooler, prop governor, oil tank etc. If you don't remove all of this metal then it will flow into your new engine and screw it up too which is just what happened. After they put the new engine on the metal from the old engine killed the new one.
The story goes that it was these two successive engine failures that kept Tanker 101 from making good on her contract with the forestry service and the contract was lost. This loss forced the operator into bankruptcy and he had to fold.
The guy who told me this story was one of his pilots who was laid off as a result. He said that Mr. Kinney owed him a lot of back pay that was now gone from the bankrupt status. He went on to say that several years after this he got a call from Bruce Kinney who said that he now had recovered enough and that he wanted to pay the pilot back for the money he owed him and he did. The pilot was understandably astounded and conveyed how much that meant to him and what a testament it was to the character of Bruce Kenney. Bruce passed away a several years ago.
The metal in our tank was left over from that failure so long ago and had been glued in place by the sludge. Once the avgas went in it washed away the grime and exposed the metal. This is a good example of why non detergent oil is used on old engines like this. If we had used detergent oil then the sludge would have been cleaned somewhat and the metal might have made its way into the engine.
Here is a poor shot of the metal in the bottom of the tank. Needless to say this metal needs to all come out
The other tank cleaned up nicely but this one will have to have the sump removed and the tank more thoroughly cleaned. At this point I remembered that we had bought some oil tanks with a large PV-2 parts inventory we had picked up a while ago. I went and found the tanks in storage and sure enough we had a new old stock pair of beautiful tanks complete with all of the fittings and new oil quantity sending units.
Happiness is a new pair of oil tanks right Ricky?
We even have replacement sets of oil filler necks/vent assys with caps
This saves us a large amount of time in just cleaning up the old tanks and prepping them for reinstallation. The old ones are perfectly good but the new ones are decidedly better.
Here is Cousin mike working on the drop tank and cabin tank fuel lines and couplings in the gear well.
Yesterday we had a great work day with lots of folks showing up to help. Dick was working on wiring in the wing getting the landing lights working. Ricky fixed a problematic up lock cylinder that has persisted in leaking lately.
Mark finished up the wiring for the ARC-5 Command set and he fired it up for the first time. Dynamotors were spinning and I heard audio through the headphones! Another radio set comes to life. How cool is that. Just in time too because we have a PV-2 radio operator meeting us at topeka. Hopefully we can get the ARB running with the ART-13 so he can broadcast once again from his old office.
Ricky's kids were helping with cleaning duties. Ken and his kids were making PX things to sell at Oshkosh to help us raise money for the gas to get home.
It was a good day yesterday and now I need to get away from the computer and get back to work. We have a big trip coming up. Well half of it anyway!
Re: PV-2D Harpoon 84062 (Tanker 101) comes back to life
Mon Jul 08, 2013 4:46 pm
What a great update!!
Re: PV-2D Harpoon 84062 (Tanker 101) comes back to life
Wed Jul 10, 2013 3:48 pm
Taigh Ramey wrote:
Ken and his kids were making PX things to sell at Oshkosh to help us raise money for the gas to get home.
I'll see you in Oshkosh cash in hand
Re: PV-2D Harpoon 84062 (Tanker 101) comes back to life
Thu Jul 11, 2013 3:05 pm
Well, if you ever wanted to own a piece of a rare PV-2D Harpoon then you're in luck!
Re: PV-2D Harpoon 84062 (Tanker 101) comes back to life
Thu Jul 11, 2013 10:24 pm
Check this out, airshow photo from 1954. The rest of the pics in the collection are just as nice.
http://www.flickr.com/photos/23032926@N ... 027548881/
http://www.flickr.com/photos/23032926@N ... 027548881/
Re: PV-2D Harpoon 84062 (Tanker 101) comes back to life
Fri Jul 12, 2013 8:15 am
Here's the direct pic Chad posted... as soon as I saw this yesterday, I immediately thought of you guys, Taigh.  Look how shiny she is!!! (I still prefer how 062 looks, to be honest)
See, there's a pair of perfectly functional pylons and some rocket stubs for your Har.... oh, right. This was in 1954. Guess that ain't gonna work.

See, there's a pair of perfectly functional pylons and some rocket stubs for your Har.... oh, right. This was in 1954. Guess that ain't gonna work.
Re: PV-2D Harpoon 84062 (Tanker 101) comes back to life
Sun Jul 14, 2013 5:42 pm
Re: PV-2D Harpoon 84062 (Tanker 101) comes back to life
Sun Jul 14, 2013 6:13 pm
Those might fit but they are not correct for the PV-2. The PV-2 tanks were the 165 gallon ones used on the P-38, P-61, PV-1 and a few other aircraft.
Re: PV-2D Harpoon 84062 (Tanker 101) comes back to life
Sun Jul 14, 2013 6:16 pm
lmritger wrote:Here's the direct pic Chad posted... as soon as I saw this yesterday, I immediately thought of you guys, Taigh.
See, there's a pair of perfectly functional pylons and some rocket stubs for your Har.... oh, right. This was in 1954. Guess that ain't gonna work.
That's a great shot. So clear it looks like a modern air show. Great gloss post war paint job. Sporty wheels and domes too.
Re: PV-2D Harpoon 84062 (Tanker 101) comes back to life
Sun Jul 21, 2013 11:13 am
One week from today we should be in the air, on our way to Oshkosh and our first fuel stop at Wendover. Thanks Wendover Tom for the great Warbird fuel discounts!
One week to go...oh my God, one week to go! So much to do.
Lots has been going on fixing up the old gal. Pretty much every aspect is being covered from the airworthy to the bells and whistles. Not sure where to start.
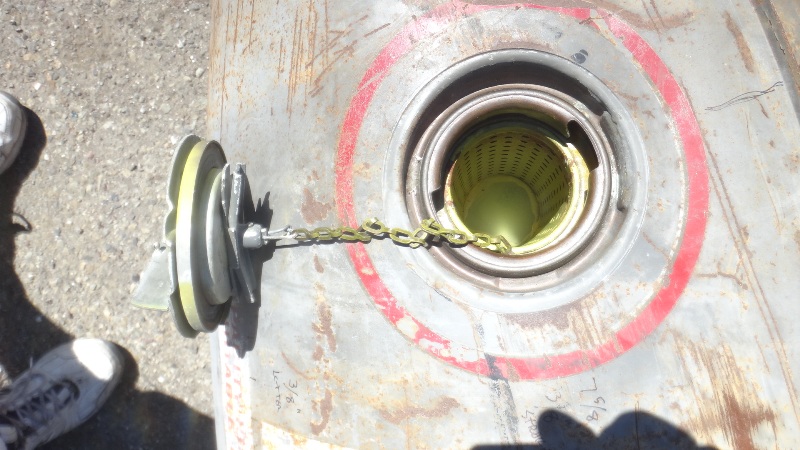
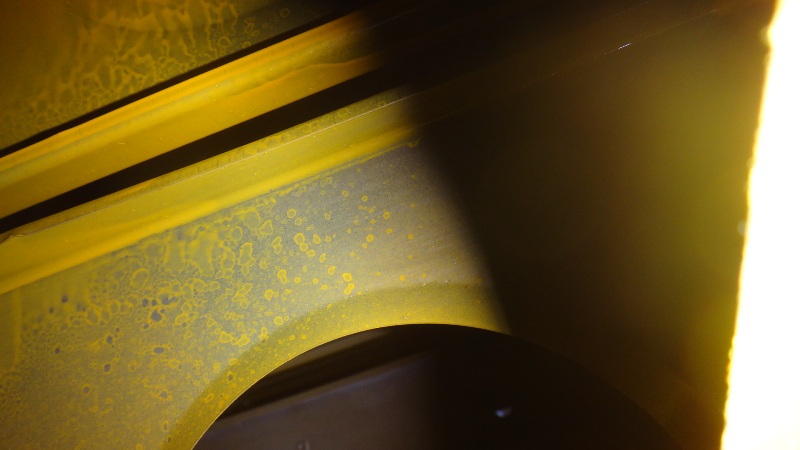
Pat was kind enough to trade a nice 165 gallon drop tank for our aluminum 75 gallon. The tank was in great shape with a few expected dents. It had a great selection of placards in varying degrees of completeness. Is completeness a word? It was painted grey so it is an earlier war tank applicable to the OD green and grey paint jobs. Pretty darn amazing that it survived in such good shape for sure especially the insides as they usually rust out. We are lucky to have found two tanks in comparable condition that are just as nice on the inside as the day they were made.
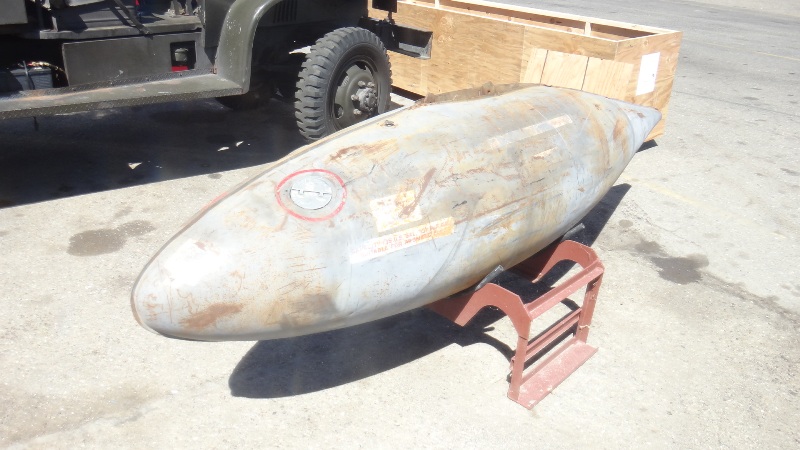
The tanks went off to a great local body shop, James Paulk Auto Body and Paint here in Stockton, to take the dents out and paint. These guys are awesome and if you or anyone you might know ever needs any body repair work done please send it to them. The owner, James Paulk, is a Vietnam vet who was a tunnel rat and he has the scars to prove it too. A great guy and thank you James for helping the Harpoon out and saving us so much time and energy that we were able to spend elsewhere. Thank you also for your service!
If you can't send him any business then could you send him a thank you note on our behalf? We would appreciate it.
James Paulk
James Paulk Auto Body and Paint
3000 West Lane
Stockton, California 95204
james@jamespaulk.com
James is the guy on the left


Our machinist Steven has been hard at work for us for sure. Man has he saved our bacon in more ways than one by helping us out. Dude you are the man!
Here are a few of the works of art that he produced for us. The fork bolts that hold the bomb shackles onto the wing pylon castings. They had real unusual oval shaped studs with a grove in it for the shackle to rest in.
Steven also made some of the studs for us to mount the pylon adapter brackets and the special clevis bolts that hold the fuselage fuel tank down to the floor/bomb bay structure.

Here is Ricky working on the new oil tanks and a myriad of other projects as well as the regular shop work.
Here he is setting them up to be a right and left tank and he is making sure the fittings are clocked correctly so everything will line up when they are installed.
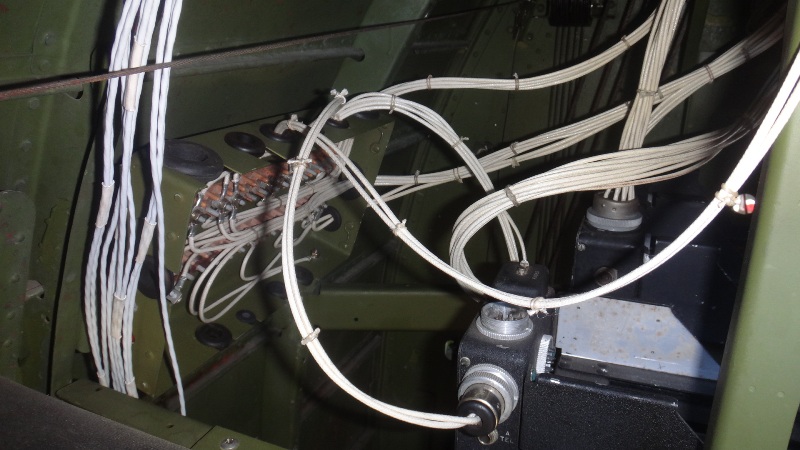
Then Mark came back to work on the WWII radio wiring. He finished up the ARC-5 set and built the harnesses for the ARB receiver. The ARC-5 fired up and I could hear the static through the headphones when the tubes warmed up. I need to finish up the antenna setup and wee if we can pick up a station.
The ARB receivers fired right up and worked perfectly bringing in AM broadcast and shortwave stations loud and clear. We now have both the command and Liaison sets up and running. All of the communication gear functions! How cool. Thanks Mark.


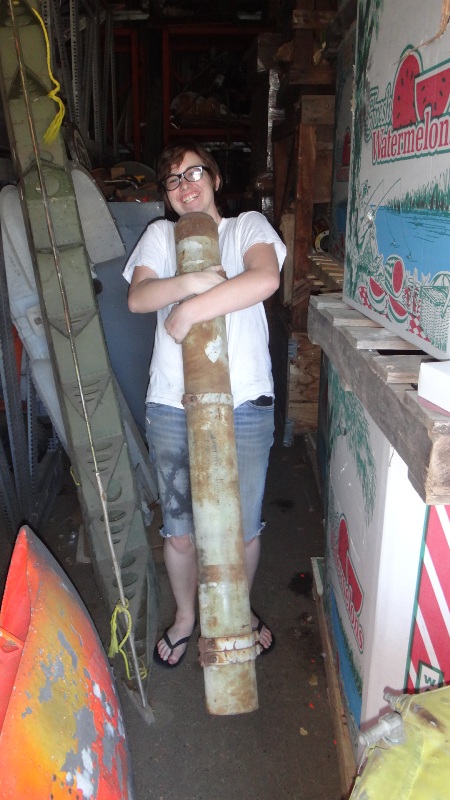
One of the trinket project that has been slowly working its way through the production process is the 5 inch HVAR rockets. The PV-2 carried 8 HVAR's (High Velocity Aircraft Rocket) four on each wing. Off to the hangar we go to retrieve a set of 8 HVARS also from the collection. We have some that have been fired and some that have had the propellent removed.
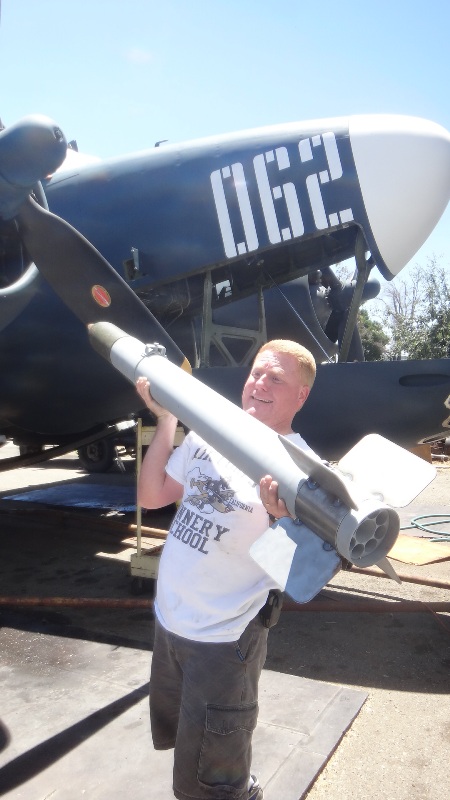
Here is my daughter Sydney pulling on from the storage hangar. These things are not light even without the propellant!
Give your HVAR a big hug. Rockets need love too ya know!
Yes, real rockets. I can just imagine the cringing about the extra weight! SO WHAT! I am not going to gut out the radios either! Oh don't get me started...too late...
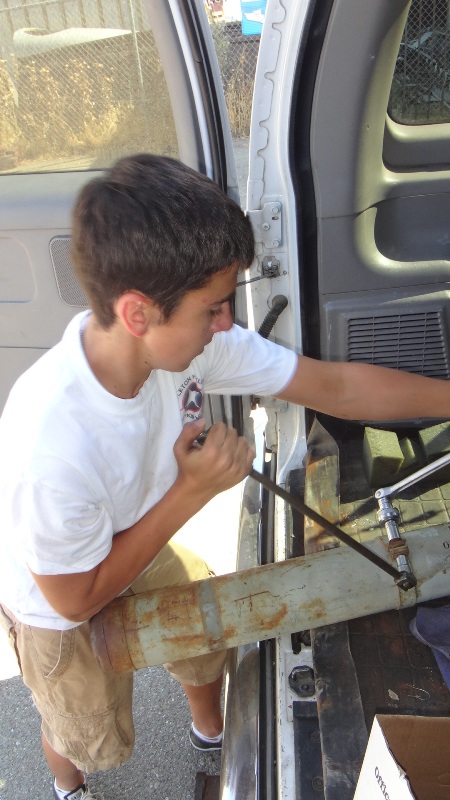
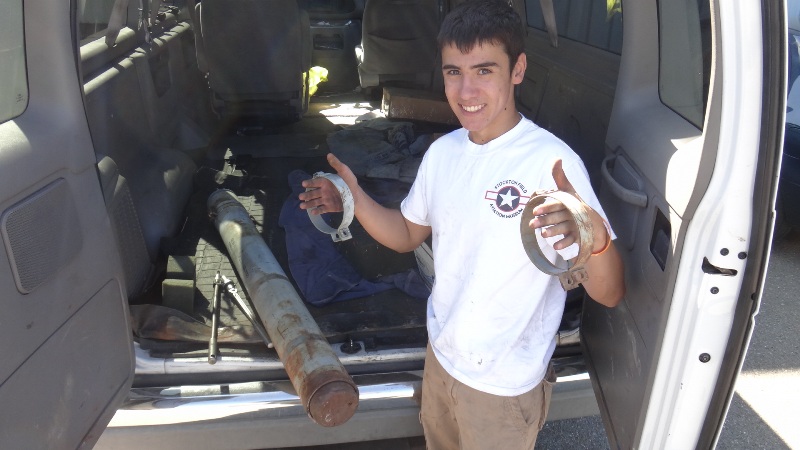
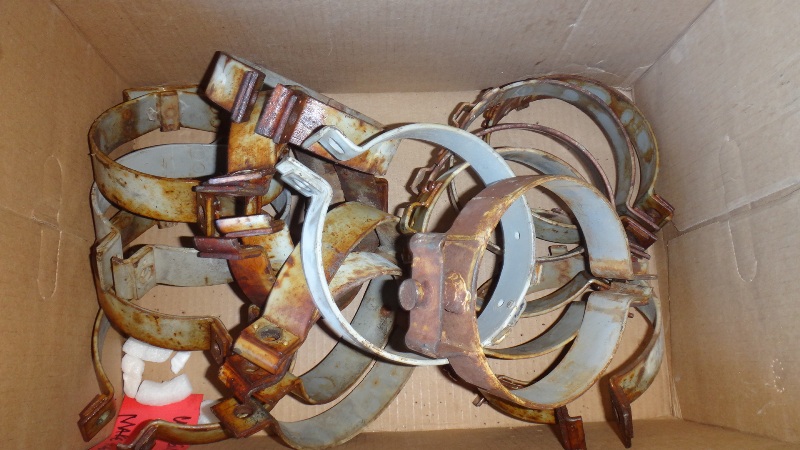
Here is Andrew removing the mounting clamps from the rockets in preparation for blasting and paint.

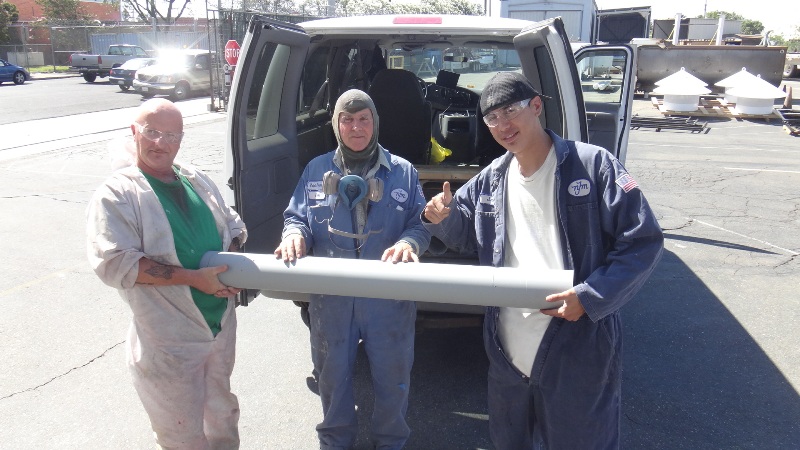
The awesome folks at N.J. McCutchen were kind enough to give us a screaming deal on blasting and painting the rocket bodies. Thanks!
Then they offered to fix up our reproduction warheads by machining them to accept fuses. We found some fuses that will do the job until we can make the correct ones.
Here is Willie working on the machining of the warheads and he is explaining what he went through to make it happen. Thanks again N.J. McCutchen for all of your great help with the rocket project!
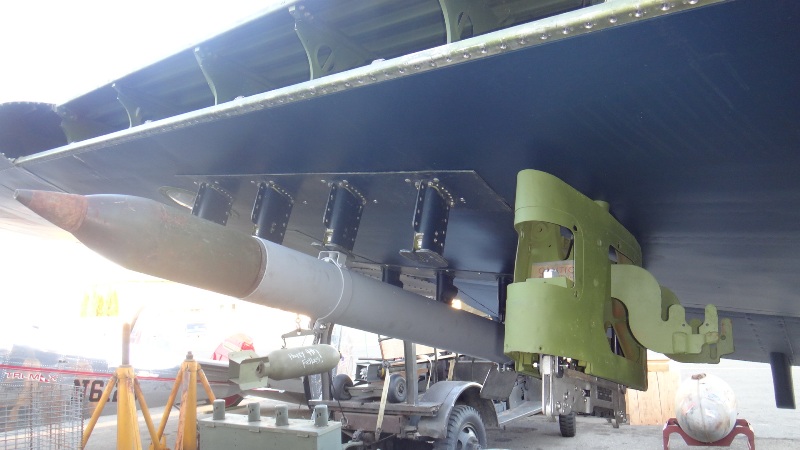
We were fortunate to have a set of rocket rails in the collection so out of storage they came.
One is stamped by its manufacturer: Firestone complete with their inspector stamps.

Marking the wing and plates for drilling to fit the Harpoon. Clear Mylar sheets help with the locating process to be sure the rails are aligned correctly on the wing
Tooling up to make the fins and we couldn't wait to hang one to see how it looked and check the fit. Heavy huh Kenny? More weight and balance required. This is a rocket with one of our real warheads and a dummy fuze. The final heads will be ready on Tuesday.
One pylon on for fit and plumbing and one to go.
One week to go and let see: what is left to finish?
Oil tanks-install and plumb
Drop tanks-finish the pylons, plumb and test
Fuselage fuel tank-install plumb and test
Reseal cross feed valve
Install leading edges
Fix oil leak on the left engine
Fix hyd leak on nose bay retract cylinder
Gun ports
Service fuel oil
Test flight
Wash and prep for OSH/Topeka
+173 other things to do
Load and go
Hopefully make it to OSH and collapse in the grass under the shade of the wing

One week to go...oh my God, one week to go! So much to do.
Lots has been going on fixing up the old gal. Pretty much every aspect is being covered from the airworthy to the bells and whistles. Not sure where to start.
Pat was kind enough to trade a nice 165 gallon drop tank for our aluminum 75 gallon. The tank was in great shape with a few expected dents. It had a great selection of placards in varying degrees of completeness. Is completeness a word? It was painted grey so it is an earlier war tank applicable to the OD green and grey paint jobs. Pretty darn amazing that it survived in such good shape for sure especially the insides as they usually rust out. We are lucky to have found two tanks in comparable condition that are just as nice on the inside as the day they were made.
The tanks went off to a great local body shop, James Paulk Auto Body and Paint here in Stockton, to take the dents out and paint. These guys are awesome and if you or anyone you might know ever needs any body repair work done please send it to them. The owner, James Paulk, is a Vietnam vet who was a tunnel rat and he has the scars to prove it too. A great guy and thank you James for helping the Harpoon out and saving us so much time and energy that we were able to spend elsewhere. Thank you also for your service!
If you can't send him any business then could you send him a thank you note on our behalf? We would appreciate it.
James Paulk
James Paulk Auto Body and Paint
3000 West Lane
Stockton, California 95204
james@jamespaulk.com
James is the guy on the left
Our machinist Steven has been hard at work for us for sure. Man has he saved our bacon in more ways than one by helping us out. Dude you are the man!
Here are a few of the works of art that he produced for us. The fork bolts that hold the bomb shackles onto the wing pylon castings. They had real unusual oval shaped studs with a grove in it for the shackle to rest in.
Steven also made some of the studs for us to mount the pylon adapter brackets and the special clevis bolts that hold the fuselage fuel tank down to the floor/bomb bay structure.
Here is Ricky working on the new oil tanks and a myriad of other projects as well as the regular shop work.
Here he is setting them up to be a right and left tank and he is making sure the fittings are clocked correctly so everything will line up when they are installed.
Then Mark came back to work on the WWII radio wiring. He finished up the ARC-5 set and built the harnesses for the ARB receiver. The ARC-5 fired up and I could hear the static through the headphones when the tubes warmed up. I need to finish up the antenna setup and wee if we can pick up a station.
The ARB receivers fired right up and worked perfectly bringing in AM broadcast and shortwave stations loud and clear. We now have both the command and Liaison sets up and running. All of the communication gear functions! How cool. Thanks Mark.
One of the trinket project that has been slowly working its way through the production process is the 5 inch HVAR rockets. The PV-2 carried 8 HVAR's (High Velocity Aircraft Rocket) four on each wing. Off to the hangar we go to retrieve a set of 8 HVARS also from the collection. We have some that have been fired and some that have had the propellent removed.
Here is my daughter Sydney pulling on from the storage hangar. These things are not light even without the propellant!
Give your HVAR a big hug. Rockets need love too ya know!
Yes, real rockets. I can just imagine the cringing about the extra weight! SO WHAT! I am not going to gut out the radios either! Oh don't get me started...too late...
Here is Andrew removing the mounting clamps from the rockets in preparation for blasting and paint.
The awesome folks at N.J. McCutchen were kind enough to give us a screaming deal on blasting and painting the rocket bodies. Thanks!
Then they offered to fix up our reproduction warheads by machining them to accept fuses. We found some fuses that will do the job until we can make the correct ones.
Here is Willie working on the machining of the warheads and he is explaining what he went through to make it happen. Thanks again N.J. McCutchen for all of your great help with the rocket project!
We were fortunate to have a set of rocket rails in the collection so out of storage they came.
One is stamped by its manufacturer: Firestone complete with their inspector stamps.
Marking the wing and plates for drilling to fit the Harpoon. Clear Mylar sheets help with the locating process to be sure the rails are aligned correctly on the wing
Tooling up to make the fins and we couldn't wait to hang one to see how it looked and check the fit. Heavy huh Kenny? More weight and balance required. This is a rocket with one of our real warheads and a dummy fuze. The final heads will be ready on Tuesday.
One pylon on for fit and plumbing and one to go.
One week to go and let see: what is left to finish?
Oil tanks-install and plumb
Drop tanks-finish the pylons, plumb and test
Fuselage fuel tank-install plumb and test
Reseal cross feed valve
Install leading edges
Fix oil leak on the left engine
Fix hyd leak on nose bay retract cylinder
Gun ports
Service fuel oil
Test flight
Wash and prep for OSH/Topeka
+173 other things to do
Load and go
Hopefully make it to OSH and collapse in the grass under the shade of the wing
Last edited by Taigh Ramey on Sun Jul 21, 2013 1:10 pm, edited 3 times in total.
Re: PV-2D Harpoon 84062 (Tanker 101) comes back to life
Sun Jul 21, 2013 12:36 pm
Excuse the old English turn of prase Taigh, but they look bloody brilliant ! 
Many thanks ,as always for taking the yime to post pictures of your teams progress.
I hiope you guys have a ball at Osh!


Many thanks ,as always for taking the yime to post pictures of your teams progress.
I hiope you guys have a ball at Osh!
Re: PV-2D Harpoon 84062 (Tanker 101) comes back to life
Sun Jul 21, 2013 9:43 pm
Taigh,
Whats written in chalk on the bomb in the last pic?
Whats written in chalk on the bomb in the last pic?
Re: PV-2D Harpoon 84062 (Tanker 101) comes back to life
Mon Jul 22, 2013 12:23 am
Yesterday was a good work day at the museum with lots of people showing up to lend a hand.
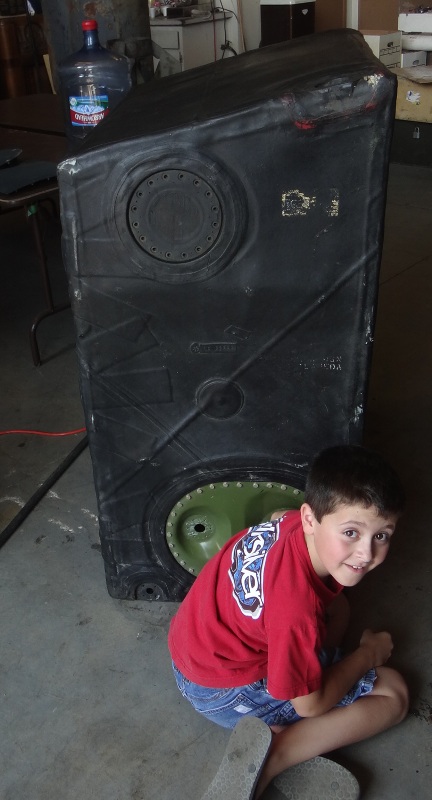
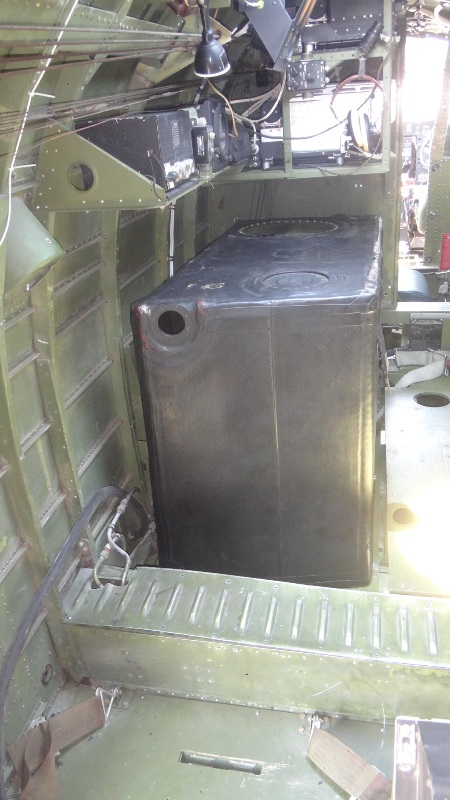
One big project that has been waiting for the special clevis bolts is the fuselage fuel tank. the fuselage fuel tank is a big 160 gallon self sealing rubber tank that sits under the navigators table and right up against the catwalk. there isn't even any room for the navigator to put his legs under his table because the tank also makes a great wall there.
Here is the tank getting cleaned up and receiving some special attention from Carson so it can go back where it belongs

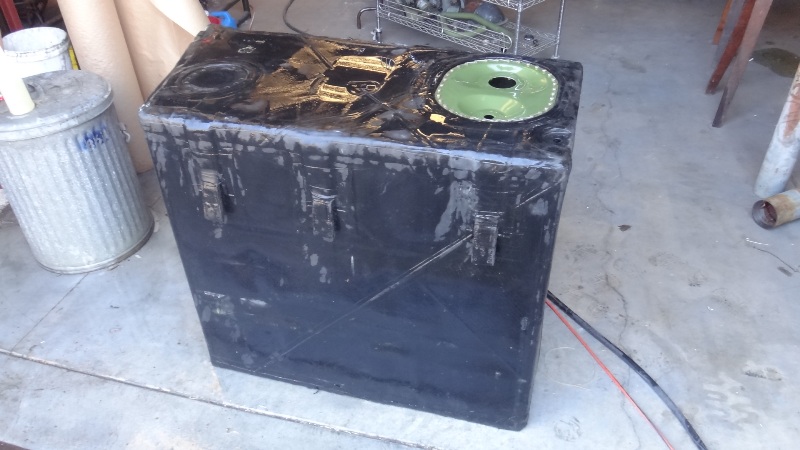
The tank is held in place with six straps that extend down and terminate with special clevis bolts. Steven, our wondrous machinist, turned these out of 4130 chrome-moly stock right to the specs from the drawing. Thanks Steven.
Because the tank sits against the left side of the fuselage the outboard straps and clevis bolts are nearly impossible to get to once the tank is in place so they are attached before the tank goes in. The bolts are taped in place to protect them and to keep them from snagging on the structure.

Needless to say it is a tight fit so several things need to come out of the fuselage before the tank can go in namely the navigators table, radar operators seat and a circuit breaker panel under the navigators flux gate compass shelf.
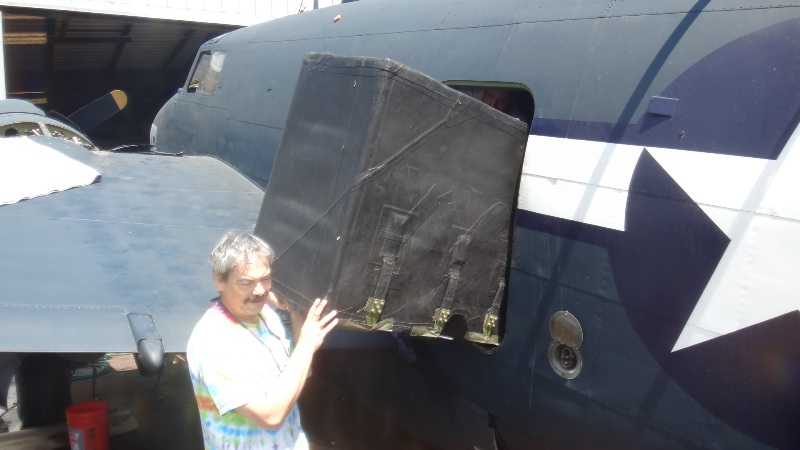
The main cabin door also needs to be removed to make way for the big rubber beast.
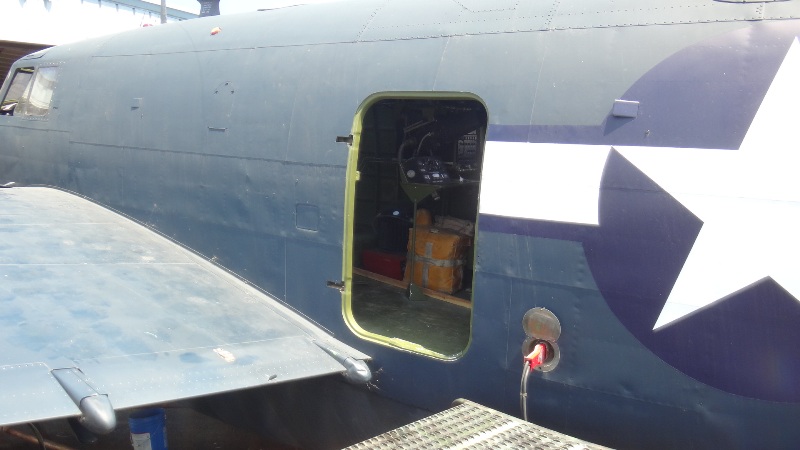
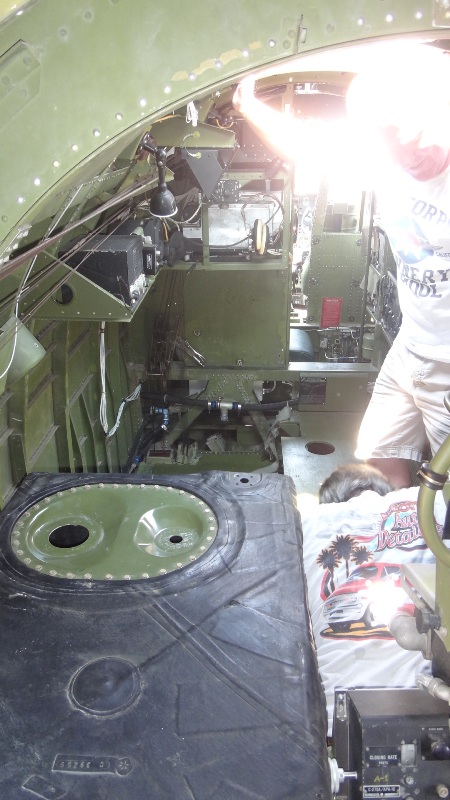
Now the fun begins. The tank weighs every bit of its 141 pounds and it ain't easy to maneuver. The tank needs to go in aft end first straight through the doorway. Then it needs to rotate and head forward between the radar table and the left side of the fuselage.
here are Ricky and Kenny mentally preparing for the fun that is in store for us. Why does Ken always have a goofy look on his face for photos? Did something get in your eye or are you trying to do a Popeye impression?

And the fun begins... Hey Jon, hold this while I take a picture
So how do you convey through a few photos just how much fun that little job was? Even though they are smiling this job was kicking our backsides and it was only half over at this point
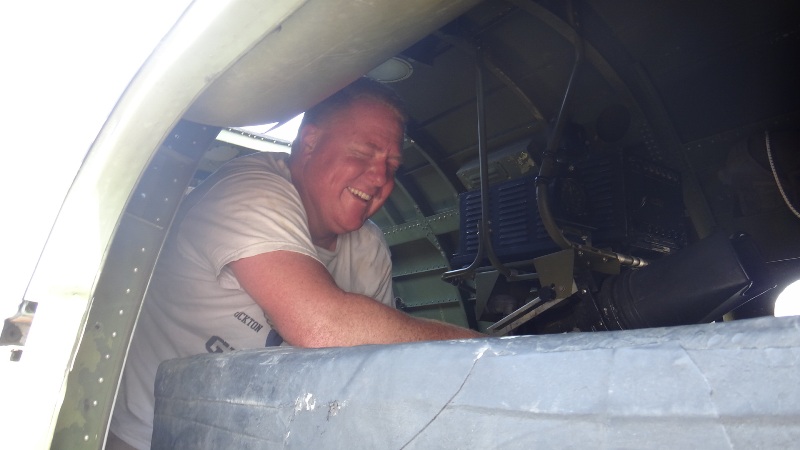
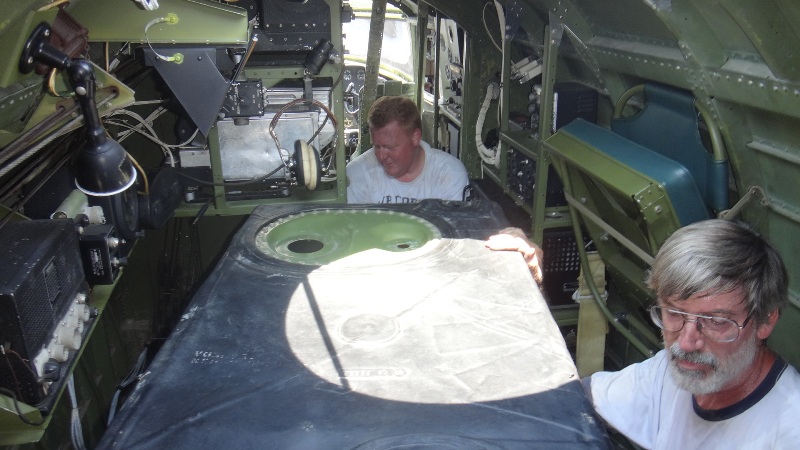
Conveniently I found myself on the outside so it was up to Kenny and Ricky to man handle the tank forward past the door until I could make an entrance. Did I mention it was a real hot day and the inside of an aircraft that is painted non specular sea blue doesn't lend itself to cool interior spaces

Now the tank needs to fit between the radar table and left fuselage wall and they didn't engineer any extra space on this one.
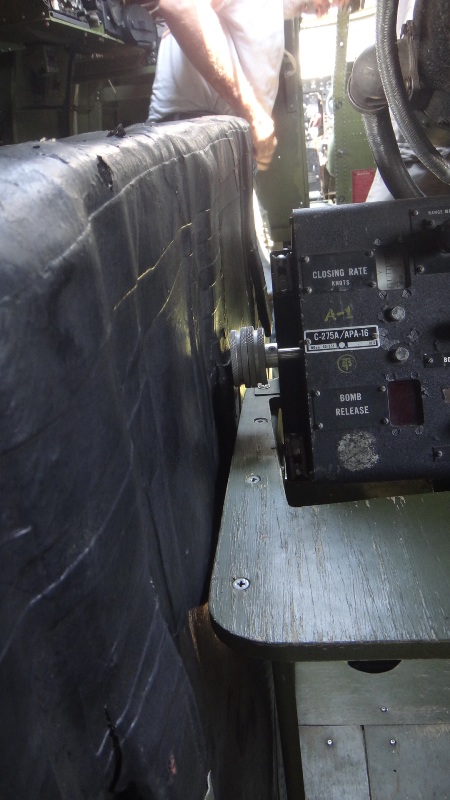

It has to go up and over the aft spar and down into its well. More awkward lifting, grunting, pushing, shoving, heavy breathing and lots of expletives

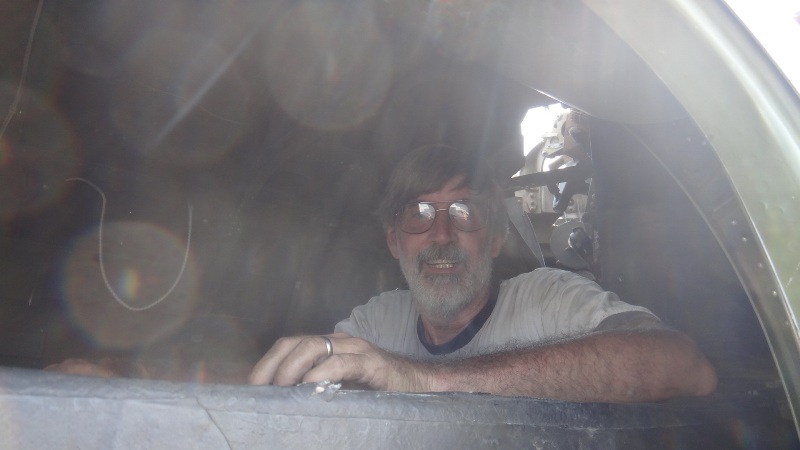
Almost...

Over the hump and into the well. A big sigh of relief

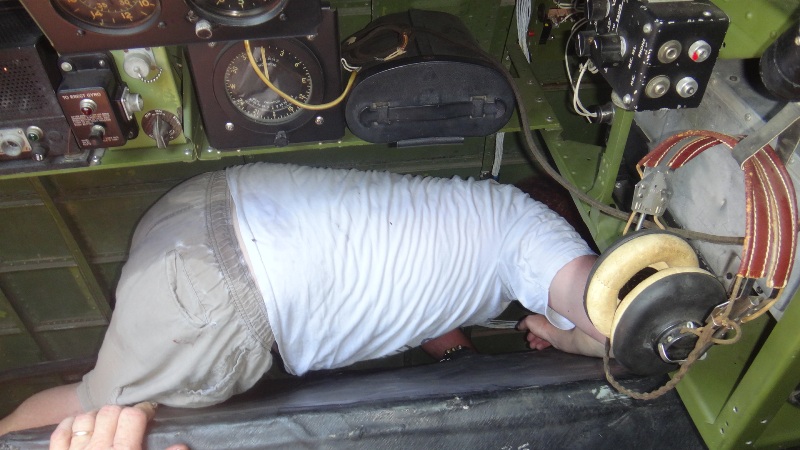
Now to get those clevis bolts through the slots in the floor/bomb bay structure. Rick and Ken used a few feet of .020 safety wire wrapped around the bolts and fed them through the slots. Lots of jockeying and it worked. The bolts are through and the tank is in place.
Kenny isn't a member of the soggy bottom gang. Someone, who shall remain nameless, took advantage of the poor helpless Ken as he was wedged in behind the fuel tank and poured some cold water on his back. Man did he squeal like a little girl!
The fuselage fuel tank is in place and will be secured and plumbed back into the fuel system shortly
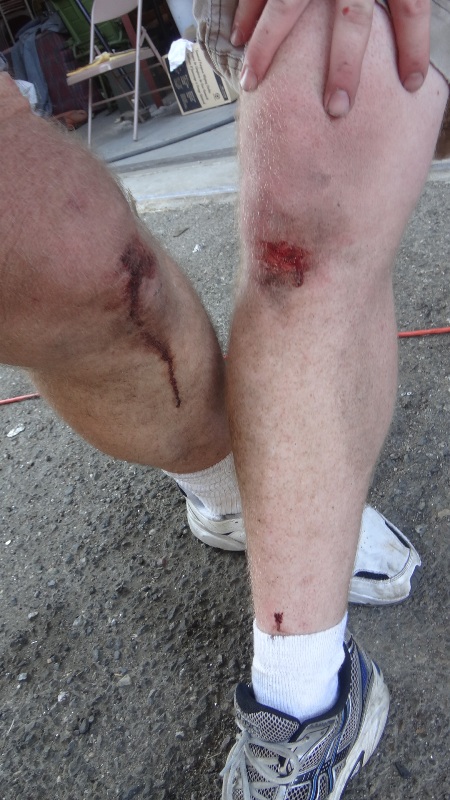
And with every job a little blood shall be shed...Some jobs require a little more blood than others. Man this one beat us up pretty good
One big project that has been waiting for the special clevis bolts is the fuselage fuel tank. the fuselage fuel tank is a big 160 gallon self sealing rubber tank that sits under the navigators table and right up against the catwalk. there isn't even any room for the navigator to put his legs under his table because the tank also makes a great wall there.
Here is the tank getting cleaned up and receiving some special attention from Carson so it can go back where it belongs
The tank is held in place with six straps that extend down and terminate with special clevis bolts. Steven, our wondrous machinist, turned these out of 4130 chrome-moly stock right to the specs from the drawing. Thanks Steven.
Because the tank sits against the left side of the fuselage the outboard straps and clevis bolts are nearly impossible to get to once the tank is in place so they are attached before the tank goes in. The bolts are taped in place to protect them and to keep them from snagging on the structure.
Needless to say it is a tight fit so several things need to come out of the fuselage before the tank can go in namely the navigators table, radar operators seat and a circuit breaker panel under the navigators flux gate compass shelf.
The main cabin door also needs to be removed to make way for the big rubber beast.
Now the fun begins. The tank weighs every bit of its 141 pounds and it ain't easy to maneuver. The tank needs to go in aft end first straight through the doorway. Then it needs to rotate and head forward between the radar table and the left side of the fuselage.
here are Ricky and Kenny mentally preparing for the fun that is in store for us. Why does Ken always have a goofy look on his face for photos? Did something get in your eye or are you trying to do a Popeye impression?
And the fun begins... Hey Jon, hold this while I take a picture
So how do you convey through a few photos just how much fun that little job was? Even though they are smiling this job was kicking our backsides and it was only half over at this point
Conveniently I found myself on the outside so it was up to Kenny and Ricky to man handle the tank forward past the door until I could make an entrance. Did I mention it was a real hot day and the inside of an aircraft that is painted non specular sea blue doesn't lend itself to cool interior spaces
Now the tank needs to fit between the radar table and left fuselage wall and they didn't engineer any extra space on this one.
It has to go up and over the aft spar and down into its well. More awkward lifting, grunting, pushing, shoving, heavy breathing and lots of expletives
Almost...
Over the hump and into the well. A big sigh of relief
Now to get those clevis bolts through the slots in the floor/bomb bay structure. Rick and Ken used a few feet of .020 safety wire wrapped around the bolts and fed them through the slots. Lots of jockeying and it worked. The bolts are through and the tank is in place.
Kenny isn't a member of the soggy bottom gang. Someone, who shall remain nameless, took advantage of the poor helpless Ken as he was wedged in behind the fuel tank and poured some cold water on his back. Man did he squeal like a little girl!
The fuselage fuel tank is in place and will be secured and plumbed back into the fuel system shortly
And with every job a little blood shall be shed...Some jobs require a little more blood than others. Man this one beat us up pretty good