Sat Mar 08, 2008 10:22 pm
Fouga23 wrote:Thanks for the info! So you basically build a new fuselage? What will happen with the old one?
I completely disassembled the fuselage. The wing attach and firewall fittings were stripped, NDT inspected and primered. The remaining parts were inspected and just a few found there way into the Fus.
If I had a chance to do it over it would have been better to just donate the fuselage or put it in Jim's basement and start with a complete new build. My Chino past has me trying to save as much as possible of the original parts. With the Mustang it is pretty easy to get almost any new part today.
Rich
Sun Mar 09, 2008 3:13 am
I'd like to thank you for your posts as well. I'm a recent convert to the Mustang Lovers club, & find all of your expertise & photos extremely helpful in learning about her.
Thanks again,
Mac
Thanks again,
Mac
Sun Mar 09, 2008 4:52 am
Jim MacDonald wrote:I'd like to thank you for your posts as well. I'm a recent convert to the Mustang Lovers club, & find all of your expertise & photos extremely helpful in learning about her.
Yeah, what he said, except for the Mustang bit.
Seriously though, a great insight, keep it coming, please!
Mon Mar 10, 2008 1:15 pm
A couple of recent photos;

Hope to have the L/H leading edge off today.
Rich
Hope to have the L/H leading edge off today.
Rich
Mon Mar 10, 2008 2:28 pm
51fixer wrote:Fouga23 wrote:Thanks for the info! So you basically build a new fuselage? What will happen with the old one?
I completely disassembled the fuselage. The wing attach and firewall fittings were stripped, NDT inspected and primered. The remaining parts were inspected and just a few found there way into the Fus.
If I had a chance to do it over it would have been better to just donate the fuselage or put it in Jim's basement and start with a complete new build. My Chino past has me trying to save as much as possible of the original parts. With the Mustang it is pretty easy to get almost any new part today.
Rich
A few pics to go with what I wrote above;
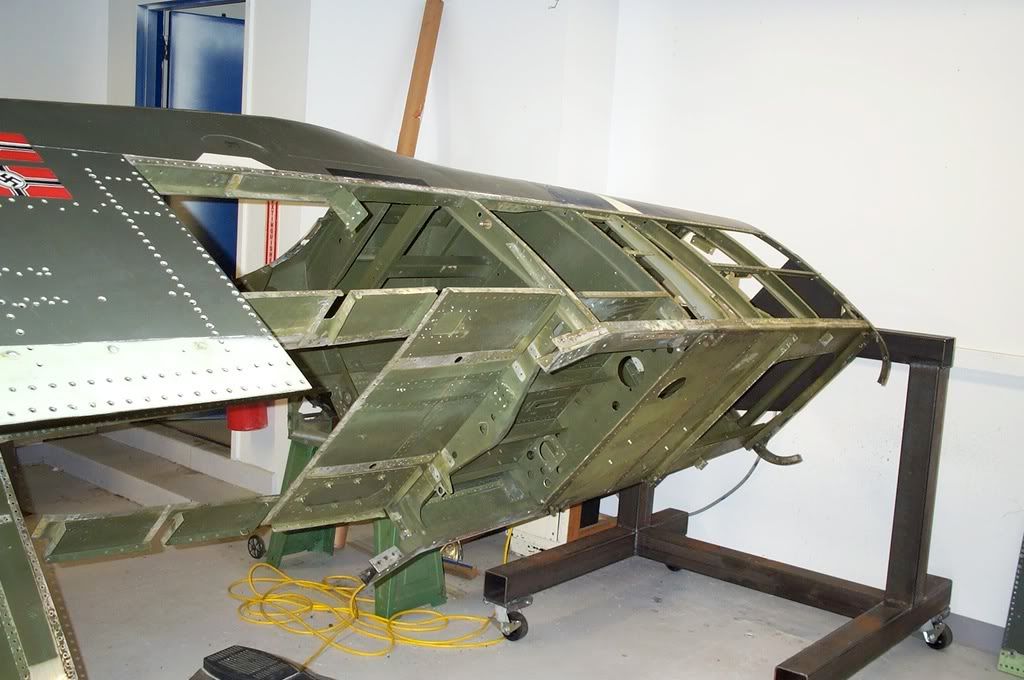
You can see the aft portion of the lower longeron splice made to connect the 2 fuselages.


This shows the aft factory longeron along the bottom of the frame. The factory splice is at the L/H side of the lower longeron.
Rich
Mon Mar 10, 2008 10:37 pm
Will you need a jig to put the fuselage back together? Seems that the reassembly will need accurate alignment for these parts.
Thx,
VL
Thx,
VL
Tue Mar 11, 2008 7:31 am

Vlado,
Do you mean this one that Gerry Beck built for us?
Rich
Tue Mar 11, 2008 9:10 am
If I understand correctly, you build a complete new fuse. this one:
and took all re-useable parts from this one and installed on the new fuse:
The old one (just frames now) is scrap?
and took all re-useable parts from this one and installed on the new fuse:
The old one (just frames now) is scrap?
Tue Mar 11, 2008 10:40 am
Fouga23 wrote:If I understand correctly, you build a complete new fuse. this one:
and took all re-useable parts from this one and installed on the new fuse:
The old one (just frames now) is scrap?
Scrap sounds so brutal!
I prefer to say we have a collection of parts that may find a purpose in the future.
Wall decorations, parts for a static rebuild, ect seems to be a good use. For the moment until it is done everything is being retained in case a measurement or some other reference is needed.
Rich
Tue Mar 11, 2008 1:59 pm
Rich:
That explains it!
Thx,
Vlado
That explains it!
Thx,
Vlado
Tue Mar 11, 2008 6:37 pm
vlado wrote:Rich:
That explains it!
Thx,
Vlado
I honestly had hoped to build a fixture off of the fuselage.
When I found it to be pieced together I figured it might not be exactly true.
Thats why we farmed it out to Tri State.
Rich
Tue Mar 11, 2008 9:54 pm
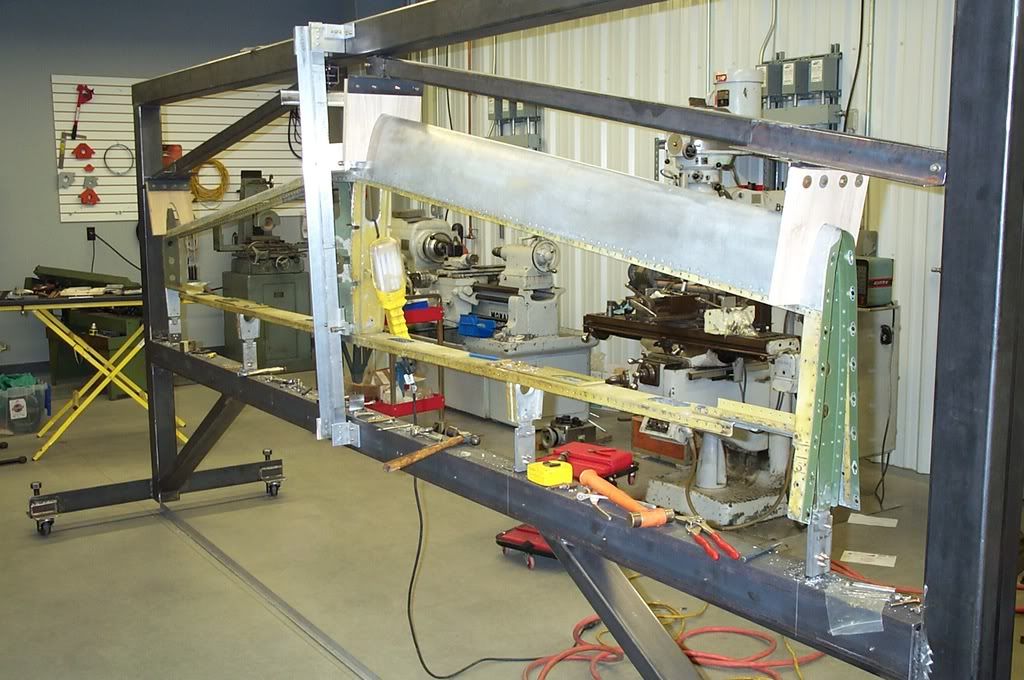
Shots from today;

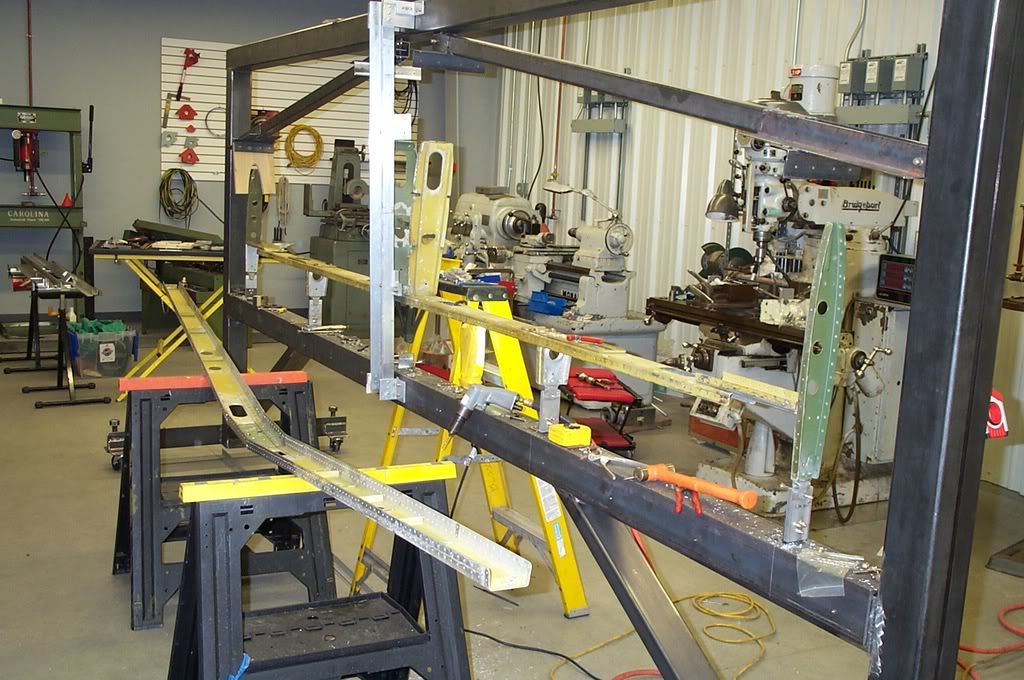
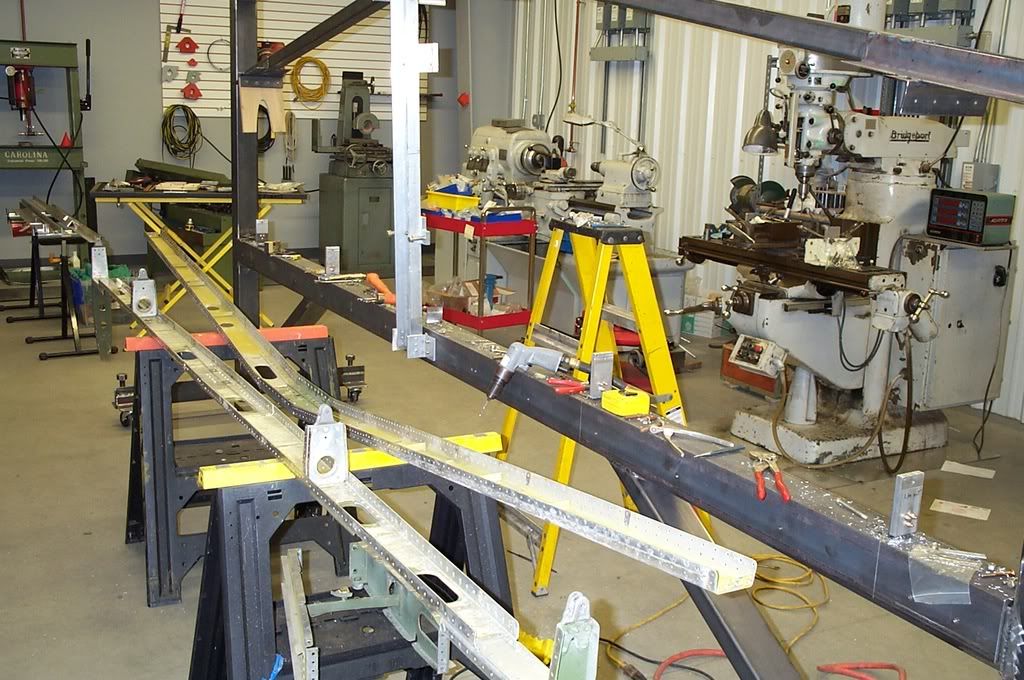
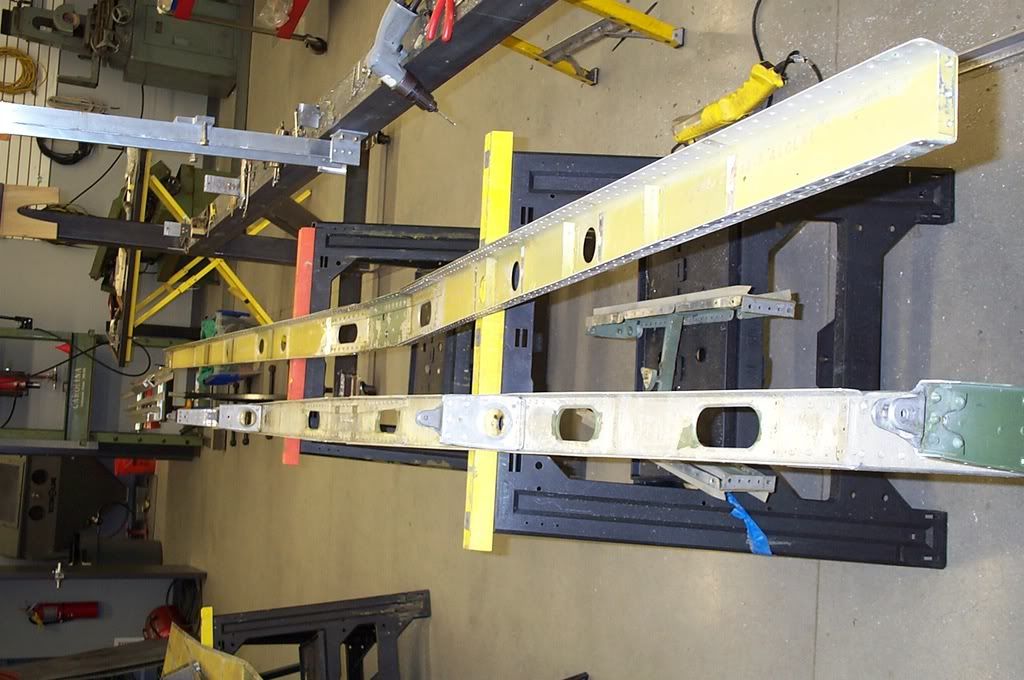
Front and rear spars.
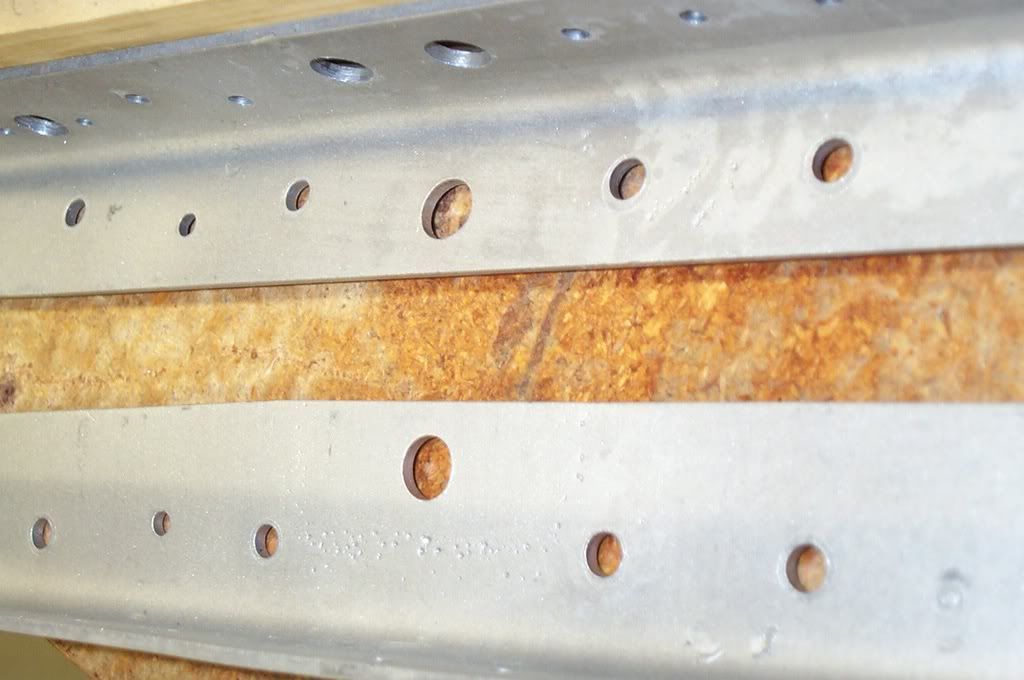
These are the factory splice plates for the rear spar. They show pitting around where the center elevator attach bolts on. Something in the crud that was built up around it in the past acted as a battery and caused pitting that appears like weld splatter but with no residue. It just left rounded pits.
Rich
Front and rear spars.
These are the factory splice plates for the rear spar. They show pitting around where the center elevator attach bolts on. Something in the crud that was built up around it in the past acted as a battery and caused pitting that appears like weld splatter but with no residue. It just left rounded pits.
Rich
Wed Mar 12, 2008 6:59 pm
Rich is really doing an awesome job. Carl Scholl has the wings which are almost done and will be shipped from Chino next month or so. This was really a lesson in what the humid Dominican environment can do to these planes and also what paint can hide. The wings were as bad as everything else, but until the .030 thick paint (put on before we got her in 1987) was stripped you wouldn't have realized how bad they were. Maybe she'll be flying in a year? Please Rich??? Jim
Wed Mar 12, 2008 7:56 pm
Jimmy my wings came back from Odegaard last week.
Do you want to start a kitty on who will be done first or do you want to send me the $5 now? HA!!
(Yes, the work looks great. Its amazing to find all the little pits that are discovered in the process. Great to get them all looked at now.)
VL
Do you want to start a kitty on who will be done first or do you want to send me the $5 now? HA!!
(Yes, the work looks great. Its amazing to find all the little pits that are discovered in the process. Great to get them all looked at now.)
VL
Wed Mar 12, 2008 8:01 pm
Rich
Why are you pulling the old horizontal down the new one looks great? Do you need the old hinge fittings?
Steve
Why are you pulling the old horizontal down the new one looks great? Do you need the old hinge fittings?
Steve