Wed Feb 27, 2008 11:40 pm
I forget, which bird is this?
Thx,
VL
Thx,
VL
Thu Feb 28, 2008 7:16 am
vlado wrote:I forget, which bird is this?
Thx,
VL
Frenesi.
Rich
Fri Feb 29, 2008 10:19 am
Horizontal is coming apart. There is some spots of corrosion but so far nothing major on the R/H side. They had a problem with edge distance on rivet holes in a couple spots at the factory. Many areas of metal shavings trapped between layers. More inspection will follow after paint removal.


Rich
Rich
Fri Feb 29, 2008 11:01 am
Any pics of the fuse splice?
Fri Feb 29, 2008 11:19 am
Fouga23 wrote:Any pics of the fuse splice?
I'll see I can find time to dig into the archives.
Rich
Fri Feb 29, 2008 1:11 pm
C'mon Rich! You don't want to "over-restore" that baby and ruin it's originality, do you? Go to the Eastwood auto restoration site. They sell aluminum welding rod that you can use with a gas torch. Polish it with 40 grit an a DA, and there you have it!51fixer wrote:bdk wrote:Was there anything in particular wrong with this part or did you guys just want to do an inspection?
Come on Brandon- You know my inspections, they normally go further in depth than this.
The Horizontal leading edge has several impacts from exhaust stack chunks of which a couple left cracks which were filled in with bondo. There were a couple scratches on the top and bottom wing skin which exceeded 1/3 the thickness of the .040 skin at points, creased the skin and were over a foot long.
Yup, a little inspection goes a long way. The music was all great in the '80s (http://www.youtube.com/watch?v=b20UzLecnHo), but I guess all the restorations weren't!
Wed Mar 05, 2008 1:21 pm
51fixer wrote:vlado wrote:I forget, which bird is this?
Thx,
VL
Frenesi.
Rich
"Frensi" used to be with the Dominican AF as FAD 1900...and there were a lot of former Swedish AF J 26s in the Domicanian AF inventory...and some Swedes among the tech staff during the 50s.
Fri Mar 07, 2008 3:23 pm
Fouga23 wrote:Any pics of the fuse splice?

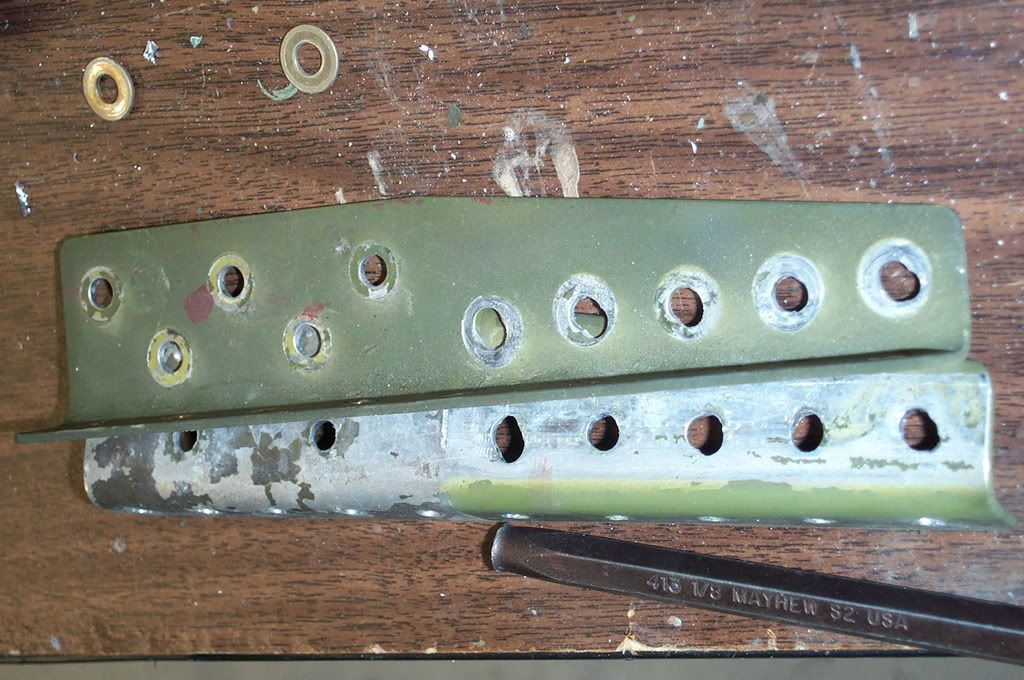
This is the R/H lower longeron splice. It is also where the flap attach bracket was installed. It was a homemade unit and you could only fit 3 of the 4 bolts so 1 hole was empty.
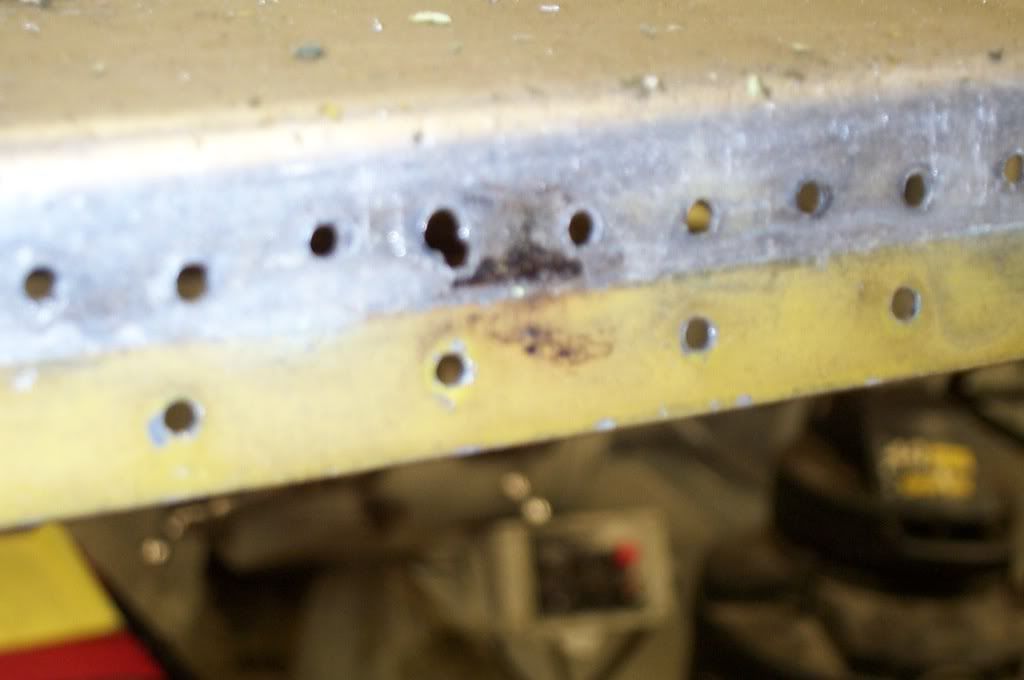
Splice plates for one of the upper longerons. This was the factory splice plate and position. I noticed that the fwd holes had rivets and the rear holes had AN-3 bolts. The factory installed rivets only. I removed the bolts and found the holes elongated, figure 8 and otherwise candidates for a "what not to do A & P poster".

Just an indication of what was found. This is the top rib for the rudder after the top cap was removed. This had been painted and recovered 2 times since it was brought back from Dominican service. You can notice that the forward flange was dissolving to dust.
Rich
Fri Mar 07, 2008 3:31 pm
Fascinating thread!
A question, if you don't mind, regarding the fuselage splice; you have mentioned a "factory splice plate and position", so was this a factory approved procedure to splice two fuselage sections into one? Or is this a factory production break?
At any rate, if this was originally built as one unit are you going to replace the longerons as factory built? These are a common corrosion area on Mustangs, right?
Sorry for all the questions, but this is very interesting stuff.
cheers
greg v.
Fri Mar 07, 2008 4:33 pm
gregv wrote:Fascinating thread!
A question, if you don't mind, regarding the fuselage splice; you have mentioned a "factory splice plate and position", so was this a factory approved procedure to splice two fuselage sections into one? Or is this a factory production break?
At any rate, if this was originally built as one unit are you going to replace the longerons as factory built? These are a common corrosion area on Mustangs, right?
Sorry for all the questions, but this is very interesting stuff.
cheers
greg v.
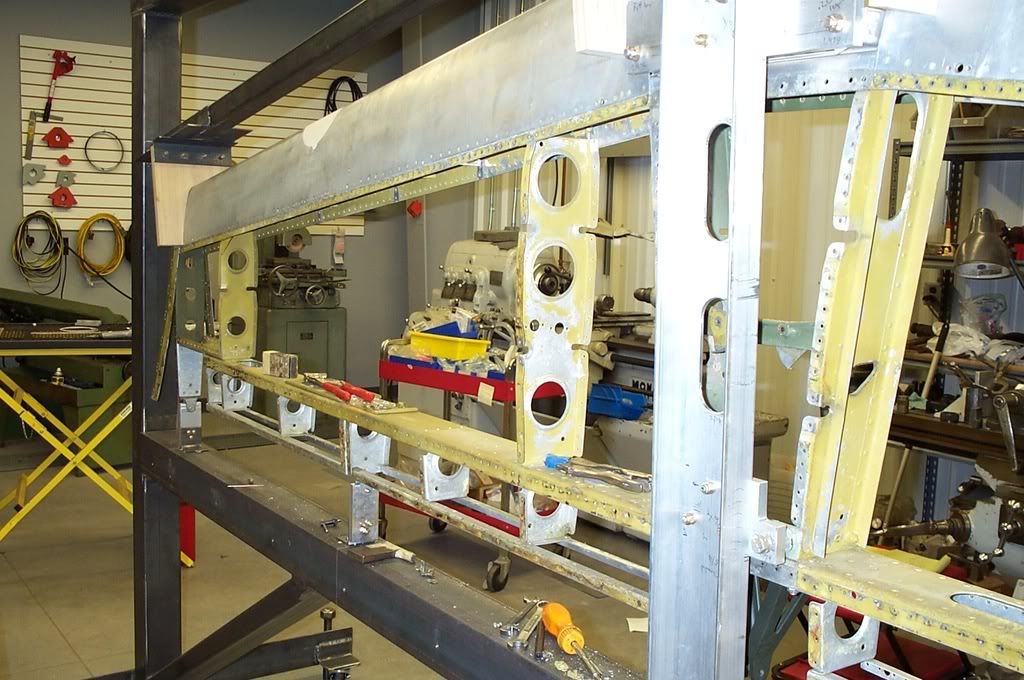
Both the upper and lower fuselage longerons have a factory splice. The splice plates shown in the 2nd picture are original and they are located about even with the rear edge of the canopy front to rear and where the curved upper skin meets the flat side skins up and down. What makes this bad is that the holes are no longer round so you don't have a close fitting hole to the surface of the bolt. This allows movement in a structural joint and transfers the load that should be carried by this splice to other parts of the structure.
The size of the longeron changes as you progress fwd to aft as the loads they carry change. The lower fwd is an H shaped extrusion which has to connect the engine and wing. The lower aft longeron is pressed from .100 or .125 Alum sheet into a U shape. That piece connects to the fwd longeron just aft of the radiator and continues to the mounting flange where the tailcone bolts onto the main fuselage.
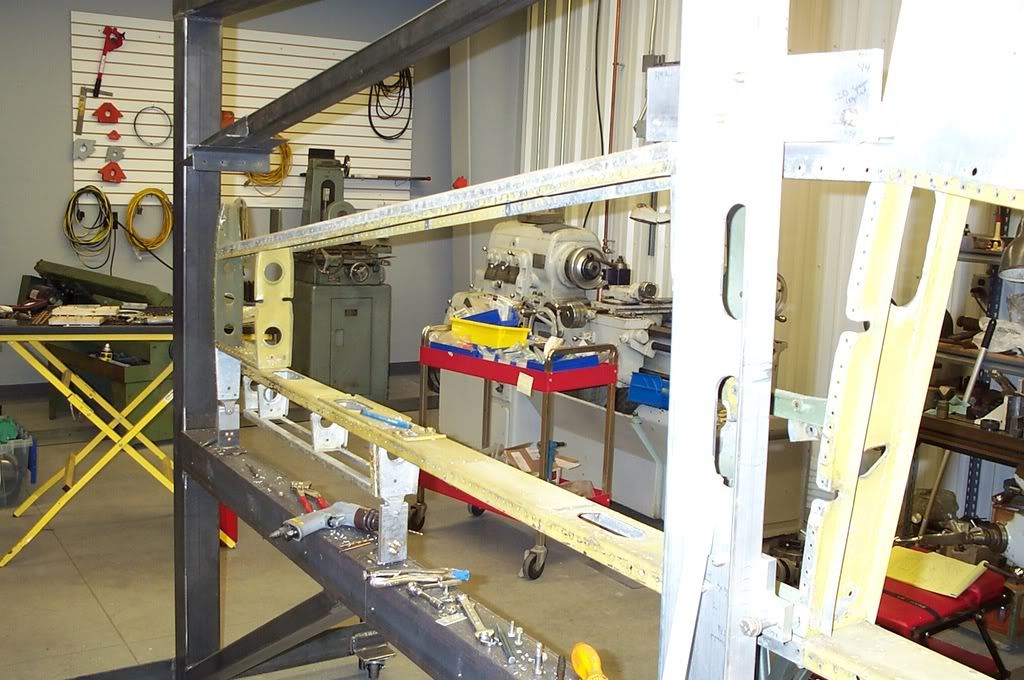
A pretty much new build fuselage has been constructed already. It is at the bottom of this picture.

The upper longeron splice is a couple of inches above the square opening on the side about in the middle of it. The tailcone bolts on a couple of inches aft of the rear support of the stand.
Rich
Fri Mar 07, 2008 4:42 pm
Fascinating postings Rich... thanks so much. It is a wonder that this aircraft did not have an inflight structural failure given all of the serious problems that have been noted. Looks like it was caught just in time!
Richard
Richard
Fri Mar 07, 2008 5:06 pm
Rich
thanks for your detailed response!
Looks like top notch work you guys are doing, very nice.
cheers
greg v.
thanks for your detailed response!
Looks like top notch work you guys are doing, very nice.
cheers
greg v.
Sat Mar 08, 2008 7:22 am
Thanks for the info! So you basically build a new fuselage? What will happen with the old one?
Sat Mar 08, 2008 11:36 am
Rich says he will throw it in my dumpster, but he has reneged on promises like that before...Fouga23 wrote:Thanks for the info! So you basically build a new fuselage? What will happen with the old one?
Sat Mar 08, 2008 1:13 pm
Rich, Great thread. Scary pics. Maybe Scott can do the sticky thing like Gary did with OL927. It looks like you'll have your work cut out for quite a while. As a "new" Mustang guy, I would sure appreciate all the photos you can post. What a great learning tool. Since this is the first time I looked at SUSU, I really overdid it but found it to be extremely clean and well kept up. The guys before me really did their jobs well.