Warbird Information Exchange

DISCLAIMER: The views expressed on this site are the responsibility of the poster and do not reflect the views of the management.
It is currently Mon May 05, 2025 5:04 pm

All times are UTC - 5 hours


Classic Wings Magazine WWII Naval Aviation Research Pacific Luftwaffe Resource Center
When Hollywood Ruled The Skies - Volumes 1 through 4 by Bruce Oriss


Post new topic Reply to topic  [ 3305 posts ]  Go to page Previous  1 ... 31, 32, 33, 34, 35, 36, 37 ... 221  Next
Author Message
 Post subject:
PostPosted: Thu Dec 21, 2006 10:22 am 
Offline

Joined: Tue Dec 12, 2006 2:30 pm
Posts: 691
Location: Ohio
Okay, let's take inventory here.

Warbird mechanic? No, I'm not.
Pilot? Not that either.
Ground volunteer? Docent at a museum? Nope. Restorer? Nay.
Find & post funny images from this here interweb thingy? Check.

I've found my niche!

_________________
"Anyway, the throat feels a bit rough...the legs have gone...but I'm still able to chant, so let's get going."

Joe Strummer, 1999


Top
 Profile  
 
 Post subject:
PostPosted: Thu Dec 21, 2006 11:06 am 
Offline
1000+ Posts!
1000+ Posts!
User avatar

Joined: Tue Jun 27, 2006 12:35 pm
Posts: 1318
Location: Waukesha Wisconsin
retroaviation wrote:
jpeters wrote:
When I read your update posts it reminds me of Bob Vila's old show "This Old House". I guess you can title yours, "This Old Warbird"! The only difference is that you can't blame everything on the plumber. :lol:
John


Hmmm, good point John. I reckon I could just blame everything on the pilots though. :lol:

Gary


That's fine, we'll be in the bar or at the post-show kegger if you have any questions how the FNG copilot busted your airplane.


Top
 Profile  
 
 Post subject: Re: Update
PostPosted: Thu Dec 21, 2006 11:50 am 
Offline
User avatar

Joined: Fri Jan 27, 2006 2:26 am
Posts: 199
fotobass wrote:
bluethunder28 wrote:
Alan Brooks wrote:
Image
Wow! Bucket seats!!!! :lol: :lol: :lol: :lol:


Image

How did you know my name is Glenn? :D :D


Top
 Profile  
 
 Post subject: Re: Update
PostPosted: Thu Dec 21, 2006 12:10 pm 
Offline

Joined: Tue Dec 12, 2006 2:30 pm
Posts: 691
Location: Ohio
bluethunder28 wrote:
How did you know my name is Glenn? :D :D


My mastery of the interweb is unparalleled.

Or I was fantastically lucky. One of those two...

_________________
"Anyway, the throat feels a bit rough...the legs have gone...but I'm still able to chant, so let's get going."

Joe Strummer, 1999


Top
 Profile  
 
 Post subject:
PostPosted: Thu Dec 21, 2006 12:29 pm 
Offline
Co-MVP - 2006
User avatar

Joined: Fri Nov 18, 2005 10:39 am
Posts: 4468
Location: Midland, TX Yee-haw.
After my update yesterday, jpeters made a funny comment about how this thread reminded him of Bob Villa and "This Old House." I've also heard that it reminds folks of American Chopper, Monster Garage, and others. That got me to thinking about one thing on those shows that really irks me. I hate how one minute they show a guy working on a gas tank or fender or something and the next minute it's finished and installed on the motorcycle. I want to see the details as to how that piece was built.

Sooooo, I had mentioned that the next little piece I needed to make for the tunnel gun door latch was a simple piece of structure to attach the latch to the door. I thought that I'd give everyone a step by step, detailed version of what it takes to build one little "simple" piece........mistakes and all. Now keep in mind, this is a look into the mind of Gary Austin, so it's not necessarily the "right" way to do it. :wink: There are going to be a lot of pictures for this update (I promise not to get this detailed every time Scott). Sorry if it bores those of you who already know how to do all of this.

Okay, here we go...

To start with, I had formed an idea in my head as to what I needed. Tough to take a picture of that though. ;-) What I started with was a reasonably sized piece of aluminum to work with, and then cut it to the length and width needed for the latch.....
Image

Image


Then I put the piece in it's position and marked where I needed to make the shape of the structure.
Image


The next step was to find something that was the same radius as what needed. The ball socket for the tunnel gun worked perfectly for this......
Image

Image


Then it was off to the belt sander for the shaping......
Image


And then the flap wheel on the die grinder to polish the edges up.....
Image

And here it is, all nice and pretty...........wait a minute......that'll never work! Awww Crap!!! What a stupid mistake. This piece has no upper end. How did I think I was actually going to attach it to the structure? Basically, I just made a duplicate of the latch itself...........
Image


After a few more choice words to myself that weren't exactly rated PG-13, I regrouped and started over. This time with a better game plan.

I started with the trusty ol' posterboard and traced out the piece I just made since I know it's dimensions were correct. I then drew a centerline on it as a reference for further measurements. I have to use different colors for different lines so I don't further confuse myself......
Image


Next, I needed to draw the radius for the upper portion of the structure.....
Image

Image


Then I used a circle template to make a nice transition from the large radius to the straight edges........
Image


Once that was done, then I needed to make another large radius that will be the very top edge of the piece.....
Image


And here it is all cut out. Wait a minute....something doesn't look right.....
Image

There, that looks better. I had forgotten to cut out the center piece. DUH! :roll:
Image

Now to transfer that shape onto the metal sheet and then trim the sheet down a bit to make it easier to work with......
Image

Image


The first step was to cut out the lower section. Notice I had drilled two small holes on the corners to make for a small radius when the piece is finished.......
Image

Image


Then over to the bandsaw to cut out the rest of the excess.......
Image

To make it easier for me to make those corners, I put in some relief cuts to help the bandsaw blade stay straight and not try to bend or twist......
Image

Image

Image

You can see that for the inside radius, I needed more relief cuts........
Image

Image

Once that was done, it was back to the belt sander for some rough finishing.......
Image

Oooh, that radius on the sander fits just right. Do you reckon that was planned? :wink:
Image

Then the flapper wheel polished the edges up nice and smooth......
Image

Now that the piece was built, it was time to start with the installation. The first step to this process was to clamp it in place and start transferring holes........
Image

Image


Once the holes were drilled, then I had to deburr them all.......
Image

I noticed a slight bend was needed in order for the shape to be right. So, I just clamped on to it with some seaming pliers and leaned on it a little. Nothin' fancy here........
Image

There, that fits about right now..........
Image

I needed to drill two small (#40) holes at the very top of this piece so that I can put a couple of #3 SO (soft) rivets in it later to hold it onto the door structure. These rivets will only be used as holder-downers for when the primary structure is disassmbled. They will have no other purpose in life....
Image

I then needed to taper the ends of the piece so that the Plexiglas transitioned nicely off of it when it's all put together. I used the sanding disc on the die grinder for this. It helps to use some solid lubricant on the sanding disc before starting on the alumunum (bar soap also works well).......
Image

Image

Image

Hang in there, we're almost done. :roll: :)

Next, I used my deburring tool to make some quick countersinks for those #3 SO rivets.......
Image

For the other rivet holes, I used the automatic countersink tool. The thing to do with one of these though, is to set it up by drilling holes in a scrap piece of aluminum that is the same thickness as what you are using and setting and testing the depth of the countersinks by placing a rivet in the holes........
Image

Too deep........
Image

Too shallow.......
Image

There, that looks about right.......
Image

Now that the proper depth is set, it's time to countersink the rest of the holes.......
Image

Image

After that is done, it's ready for primer. Once primed, I clecoed the piece in place while it was still wet. This makes for a good moisture barrier and helps seal between the two pieces of aluminum and the steel structure.......
Image

The first rivets to go in are the #3 SO rivets. I'll be using my hand held rivet squeezer for all of the riveting with this project........
Image

Now that those SO rivets are in place, you can see how they hold the upper end of this piece in place even when the clecos are taken away....
Image

Naturally, we didn't have the correct length of rivet for the remaining holes. So I had to cut every rivet needed to the correct length. Typically, you want the length to be 1 1/2 times the diameter of the hole. The rivet on the here on the left is the shortest one we have on hand. The rivet on the right is the correct length after I cut it (sorry for the poor photo).........
Image

The rivet cutter in action.......
Image

Once you get a couple of rivets you think are right, it's not a bad idea to go ahead and squeeze them in place just to make sure..........
Image

Then you just cut the rest of your rivets and squeeze them into place. The finished result looks good.......
Image

Image

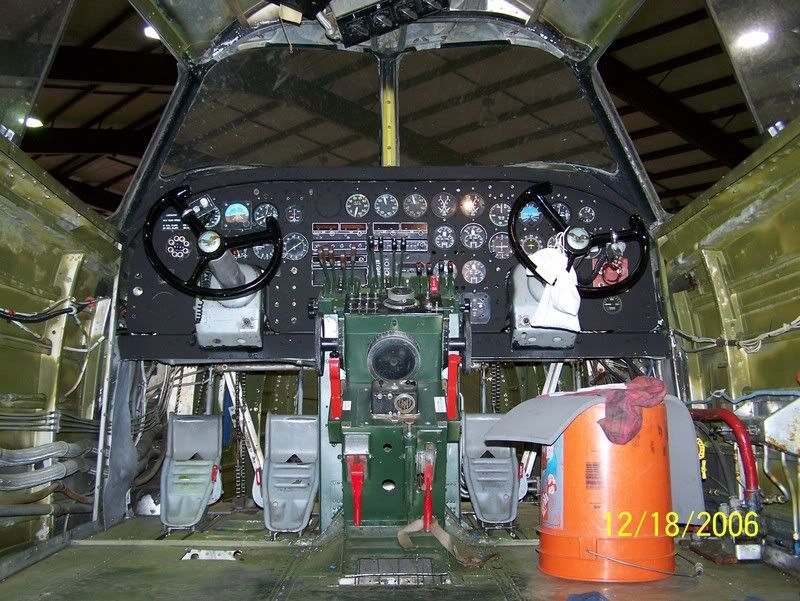
And finally, let's see what it looks like on the airplane........
Image

Image


So there you have it. One "simple" piece of structure built and installed. Total time of completion for this single project.........approximately 2 hours.

Now it's back out there to start working on the striker plate for the latch.

Gary


Top
 Profile  
 
 Post subject:
PostPosted: Thu Dec 21, 2006 1:16 pm 
Offline
2000+ Post Club
2000+ Post Club
User avatar

Joined: Tue May 04, 2004 2:14 pm
Posts: 2370
Location: Atlanta, GA
Gary, sheetmetal work, & welding are two things I had to promise not do on aircraft in order to graduate A&P school. :ouch: I am truely amazed at your talent. I have followed this thread with keen interest. Keep up the good work & thanks for step by step updates. I have learned a lot just keeping up with this. :lol:
Robbie

_________________
Fly Fast Make Noise!


Top
 Profile  
 
 Post subject:
PostPosted: Thu Dec 21, 2006 1:23 pm 
Offline
1000+ Posts!
1000+ Posts!
User avatar

Joined: Tue Feb 22, 2005 11:52 am
Posts: 1525
Location: Williamsburg, VA
Scott, I beg you, PLEASE sticky this or archive Gary's posts... I have learned SO much by watching Gary's progress, this is the equivalent of an online tutorial in airframe structure fabrication, and I appreciate it so much!

I've always wanted to be involved in a restoration, and thanks to Gary's posts, I actually feel like I'm learning something. Perhaps it's time I get hold of the Old Dominion CAF folks and find out how to get involved with rebuilding the Lodestar...

Thank you, Gary. :)

Lynn Ritger

_________________
Wisdom, courtesy of shrike: "In aviation, as well as marriage, it's often just as important to be seen to be doing something as is to do it properly in the first place."


Top
 Profile  
 
 Post subject:
PostPosted: Thu Dec 21, 2006 1:24 pm 
Offline
User avatar

Joined: Thu Feb 17, 2005 8:59 am
Posts: 28
Location: Cork, IE
Best thread, EVER.

Would love to help out, just the ocean standing in my way, actually the cost of crossing it and seeing this in person.
Amazing undertaking.

_________________
Groningen Eelde Aviation Society


Top
 Profile  
 
 Post subject:
PostPosted: Thu Dec 21, 2006 1:27 pm 
Offline
3000+ Post Club
3000+ Post Club
User avatar

Joined: Sun Nov 27, 2005 10:51 pm
Posts: 4666
Location: Cheshire, CT
Very cool Gary!
Thank you for the play by play on that one!
Jerry

_________________
"Always remember that, when you enter the ocean or the forest, you are no longer at the top of the food chain."


Top
 Profile  
 
 Post subject:
PostPosted: Thu Dec 21, 2006 2:21 pm 
Offline
2000+ Post Club
2000+ Post Club

Joined: Mon Jul 26, 2004 2:38 pm
Posts: 2662
Location: Nashville, Tennessee
I don't have any of the talent you have but one thing I can do is send a small donation to the CAF, earmarked B-24A in today's mail. Thanks for the pics and explanations. The postings help me better understand how tedious and exacting working with metal can be and why it's so darn expensive!


Top
 Profile  
 
 Post subject:
PostPosted: Thu Dec 21, 2006 2:38 pm 
Offline
Co-MVP - 2006
User avatar

Joined: Fri Nov 18, 2005 10:39 am
Posts: 4468
Location: Midland, TX Yee-haw.
Thanks marineair! :D We can use every penny we can get.

Gary


Top
 Profile  
 
 Post subject:
PostPosted: Thu Dec 21, 2006 5:43 pm 
Offline
3000+ Post Club
3000+ Post Club

Joined: Thu Dec 21, 2006 8:32 am
Posts: 4324
Location: Battle Creek, MI
Hi Gary,

I'm a newbie here (linked over from a modeling forum) and was prompted to join just so I could add my voice to those praising you for your incredible work on AM927. I just wish I had the time and money to travel down and help (not that I have any experience working on aircraft that aren't injection-molded plastic!)

I've always had a perverse love for the Liberator, and I've been wishing that someone would lavish this kind of attention on the airplane for literally decades. I'm escpecially happy that your not trying to turn her into a "faux B-24D" with gun turrets etc. (I've heard CAF guys bandy that idea about in the past.)

Keep up the good work! I hope you get up to Michigan this coming season..can't wait to see Lil's new look!


Cheers!

Steve


Top
 Profile  
 
 Post subject: Diamond Lil
PostPosted: Thu Dec 21, 2006 9:37 pm 
Offline

Joined: Tue Nov 14, 2006 8:22 pm
Posts: 79
Location: Sydney Australia
Gary,

Fantastic work on the B-24. The thread on the forum is the best I have seen and (forgetting all the politics) really shows people just what is involved with even simple restoration tasks. It should certainly cut out many of the "how come it isn't finished yet" dumb assed questions that pervade the warbird movement. Now people can see just how much work is involved. I am imprerssed with the "just get it done" attitude and practical approach you have on the work. I have been involved with restorations now for about forty years and thoroughly enjoyed watching the parts of the project coming together - especially interspersed with the factory detail shots and the schematics. Know exactly what its like to gut an aircraft, see it like a thousand bits and pieces then gradually see it coming together again. Wish I was there to help....... currently trying to fill a lot of holes in a PBY so watching your progress helps.

Pete


Top
 Profile  
 
 Post subject:
PostPosted: Fri Dec 22, 2006 6:03 am 
Offline
Co-MVP - 2006
User avatar

Joined: Fri Nov 18, 2005 10:39 am
Posts: 4468
Location: Midland, TX Yee-haw.
Steve Nelson, welcome to WIX and thank you for the kind words. You are right that there has been discussion in the past to make AM927 something it wasn't ever going to be.......a B-24D. I can't say I blame them, as the "D" model is one of the best looking of this ugly series of airplanes. :lol: Sorry, after being part of the fighter world for years, I'm just now getting to where I appreciate the...uh..."pretty face" of the B-24. :wink: After it's all said and done, I think we're making the right decision with putting this one back to an "A" model, like it was supposed to be. We'll just have to see what the general public thinks.

Mustang51, no need to apologize for not being here. I appreciate the kind words from you as well. When you get done plugging holes in your PBY, I've got one in my back yard that could use a little help. Just have Mark Pilkington to bring you with him and y'all can get to work. :) :P

Gary


Top
 Profile  
 
 Post subject:
PostPosted: Fri Dec 22, 2006 6:58 am 
Offline
WRG Editor
WRG Editor
User avatar

Joined: Thu Apr 29, 2004 4:43 pm
Posts: 5613
Location: Somerset, MA & Johnston, RI
Thanks Gary, that was very cool. I am fascinated with metal work of all types so this one is great. Keep em coming!

_________________
Scott Rose
Editor-In-Chief/Webmaster
Warbirds Resource Group - Warbird Information Exchange - Warbird Registry

Be civil, be polite, be nice.... or be elsewhere.
-------------------------------------------------------
This site is brought to you with the support of members like you. If you find this site to be of value to you,
consider supporting this forum and the Warbirds Resource Group with a VOLUNTARY subscription
For as little as $2/month you can help ($2 x 12 = $24/year, less than most magazine subscriptions)
So If you like it here, and want to see it grow, consider helping out.


Image

Thanks to everyone who has so generously supported the site. We really do appreciate it.

Follow us on Twitter! @WIXHQ


Top
 Profile  
 
Display posts from previous:  Sort by  
Post new topic Reply to topic  [ 3305 posts ]  Go to page Previous  1 ... 31, 32, 33, 34, 35, 36, 37 ... 221  Next

All times are UTC - 5 hours


Who is online

Users browsing this forum: No registered users and 7 guests


You cannot post new topics in this forum
You cannot reply to topics in this forum
You cannot edit your posts in this forum
You cannot delete your posts in this forum
You cannot post attachments in this forum

Search for:
Jump to:  
Powered by phpBB® Forum Software © phpBB Group