Rollers..
Mon Mar 17, 2008 8:55 pm
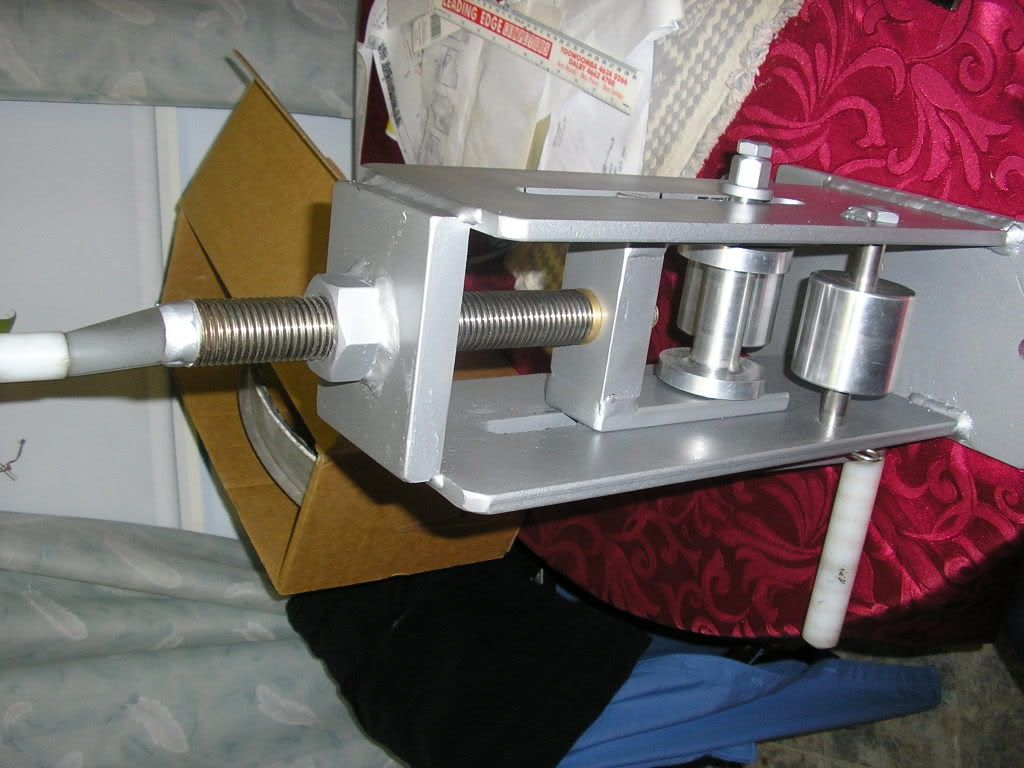
This is a tinbasher question to all the knowledgeable guys here.We are in the process of finishing off the cockpit frames for the forward part of our Spit.I designed up a set of rollers to curve up the various hatsections,angles and channels that proliferate the Spit.It works Ok but scuffs up the 2024-0 pretty badly.We tried brass,aluminium,wood and steel for the male,female dies but haven,t found the ideal material for the friction needed to push the material through cleanly.Have any of you guys got a good setup or any tricks to make life easier? 
Mon Mar 17, 2008 9:05 pm
The wheels on our English Wheel at work are highly polished and still mark the metal, so I don't know what would work for you.
Tue Mar 18, 2008 1:55 am
You might try making one wheel of a forming pair out of UHMW and try that... The other thing that I can think of is making the roller set all driven together....ie. some sort of drive link system so that they can't turn independently.
Tue Mar 18, 2008 7:41 pm
How bad are the scuff marks? Is it possible to sand it and up the grit with each pass? Then hit it with a bunch of different grit polishes? I have done this before with parts that were to be left unpainted and had good results.
Tue Mar 18, 2008 7:44 pm
Try running this past my friend, Ron Fournier
http://www.fournierenterprises.com/ master craftsman of the ultimate level.
Sorry, what does history tell us? How were they formed in the time? Do the originals show the same "scuffs"? We are supposed to be a lot more advanced now but I find that the simpler times usually had simpler solutions.
http://www.fournierenterprises.com/ master craftsman of the ultimate level.
Sorry, what does history tell us? How were they formed in the time? Do the originals show the same "scuffs"? We are supposed to be a lot more advanced now but I find that the simpler times usually had simpler solutions.
Tue Mar 18, 2008 8:04 pm
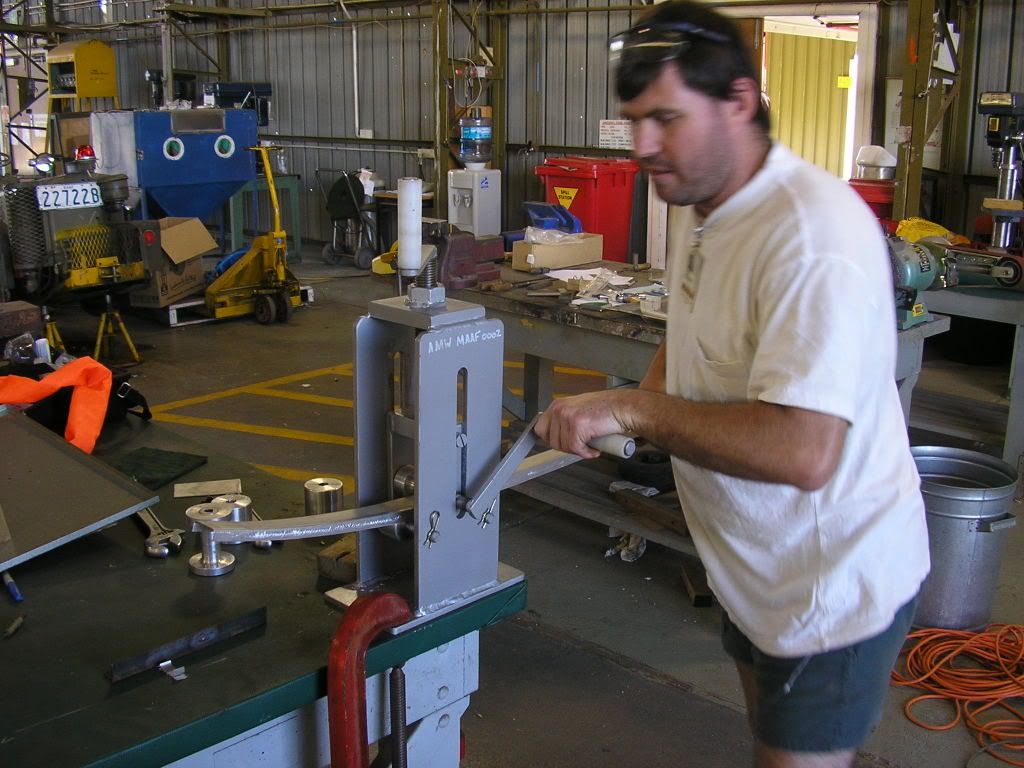
Another question. Is the forming done by one pass of the part through the set of rollers or is it done by passing the part several times through a progressive set of different rollers?
Tue Mar 18, 2008 9:45 pm
Even a human hair on a wheel will leave a mark. One trick someone told me about was to wipe them down with automotive transmission fluid to prevent corrosion.
Tue Mar 18, 2008 10:45 pm
You can try covering the surfaces with a plastic garbage bag so the bag is between the roller and the material. Works on draw dies.
Kenn
Kenn
Wow..
Wed Mar 19, 2008 3:40 pm
Thanks for the responses guys.The ally is folded up first into the various sections then fed into the rollers.Sanding the scuffs out is an option but I don,t like removing material from the thickness.Originally they would either be pressed or rolled I think.Havent found much on the way Supermarine built it,s components but do know there were a lot of sub contractors and many were car body builders.So olde English hand skills would have been relevant.
Wed Mar 19, 2008 4:17 pm
How about a close up image of the fit in the rollers and the scuffs?
Thu Mar 20, 2008 11:15 am
Please bear with me as I get a little info;
2024-0 is the material and is it already shaped as a channel?
Is the marring from the propulsion (center) roller used to move the piece? If so you might need a tension roller so there is some complete grip between the center crank roller and a idler/tension roller so the material is trapped under some tension. That way the material can't slip nor will the change in the curve of the piece change the tension of the movement roller. This would require adding a roller maybe of polyurethane that would meet up against only the center roller. If it could be made to mesh and turn at the same time but opposite direction it would even be better.
I personally like using the Marchant shrinker/stretcher machines for this type of work. They are pneumatic and highly controllable. With 0 material it requires little force.
Rich
Thu Mar 20, 2008 7:01 pm
Upon looking further, the marks we see on the side of the channel are being made as you run it through? Shootin' from the hip, I'd question the fit between the drum rollers and the ID of the channel as well as the ID of the "female" roller versus the OD of the channel. It looks like simple spalling or galling perhaps due to too tight a fit. 
Re: Wow..
Mon Apr 21, 2008 7:21 am
Rossco wrote:Thanks for the responses guys.The ally is folded up first into the various sections then fed into the rollers.Sanding the scuffs out is an option but I don,t like removing material from the thickness.Originally they would either be pressed or rolled I think.Havent found much on the way Supermarine built it,s components but do know there were a lot of sub contractors and many were car body builders.So olde English hand skills would have been relevant.
Try making one of the rollers out of nylon or teflon like the material you used on the handle for the crank. I am refering to the roller that is gaulling the flange. I would also back up the outside portions of the nylon/teflon roller with steel.
Re: Wow..
Mon Apr 21, 2008 7:22 am
Rossco wrote:Thanks for the responses guys.The ally is folded up first into the various sections then fed into the rollers.Sanding the scuffs out is an option but I don,t like removing material from the thickness.Originally they would either be pressed or rolled I think.Havent found much on the way Supermarine built it,s components but do know there were a lot of sub contractors and many were car body builders.So olde English hand skills would have been relevant.
Try making one of the rollers out of nylon or teflon like the material you used on the handle for the crank. I am refering to the roller that is gaulling the flange. I would also back up the outside portions of the nylon/teflon roller with steel.
Mon Apr 21, 2008 7:23 am
Sorry about the double post 