CafeReo B-24 redo to 400th BS "Ho Hum"
Posted: Mon Oct 05, 2020 1:26 pm
New one from the old man who is adding some aircraft to the Jolly Roger Diorama....
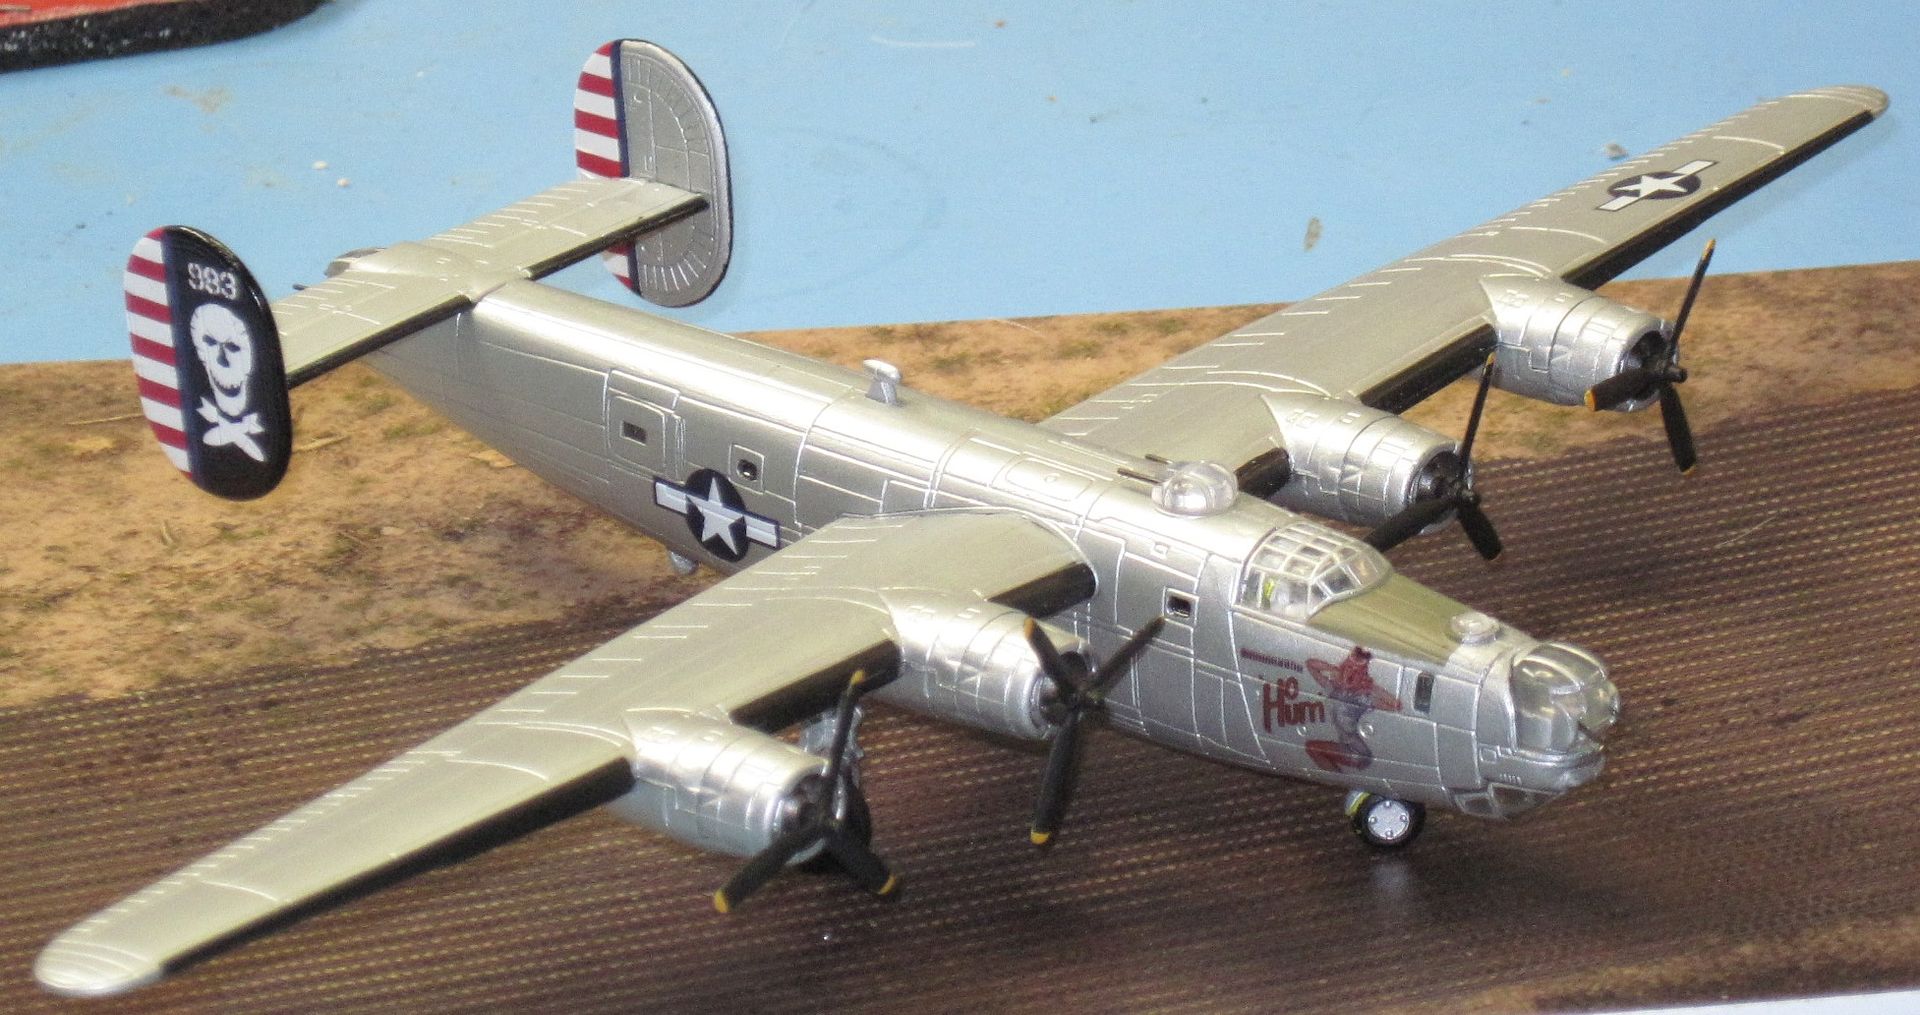
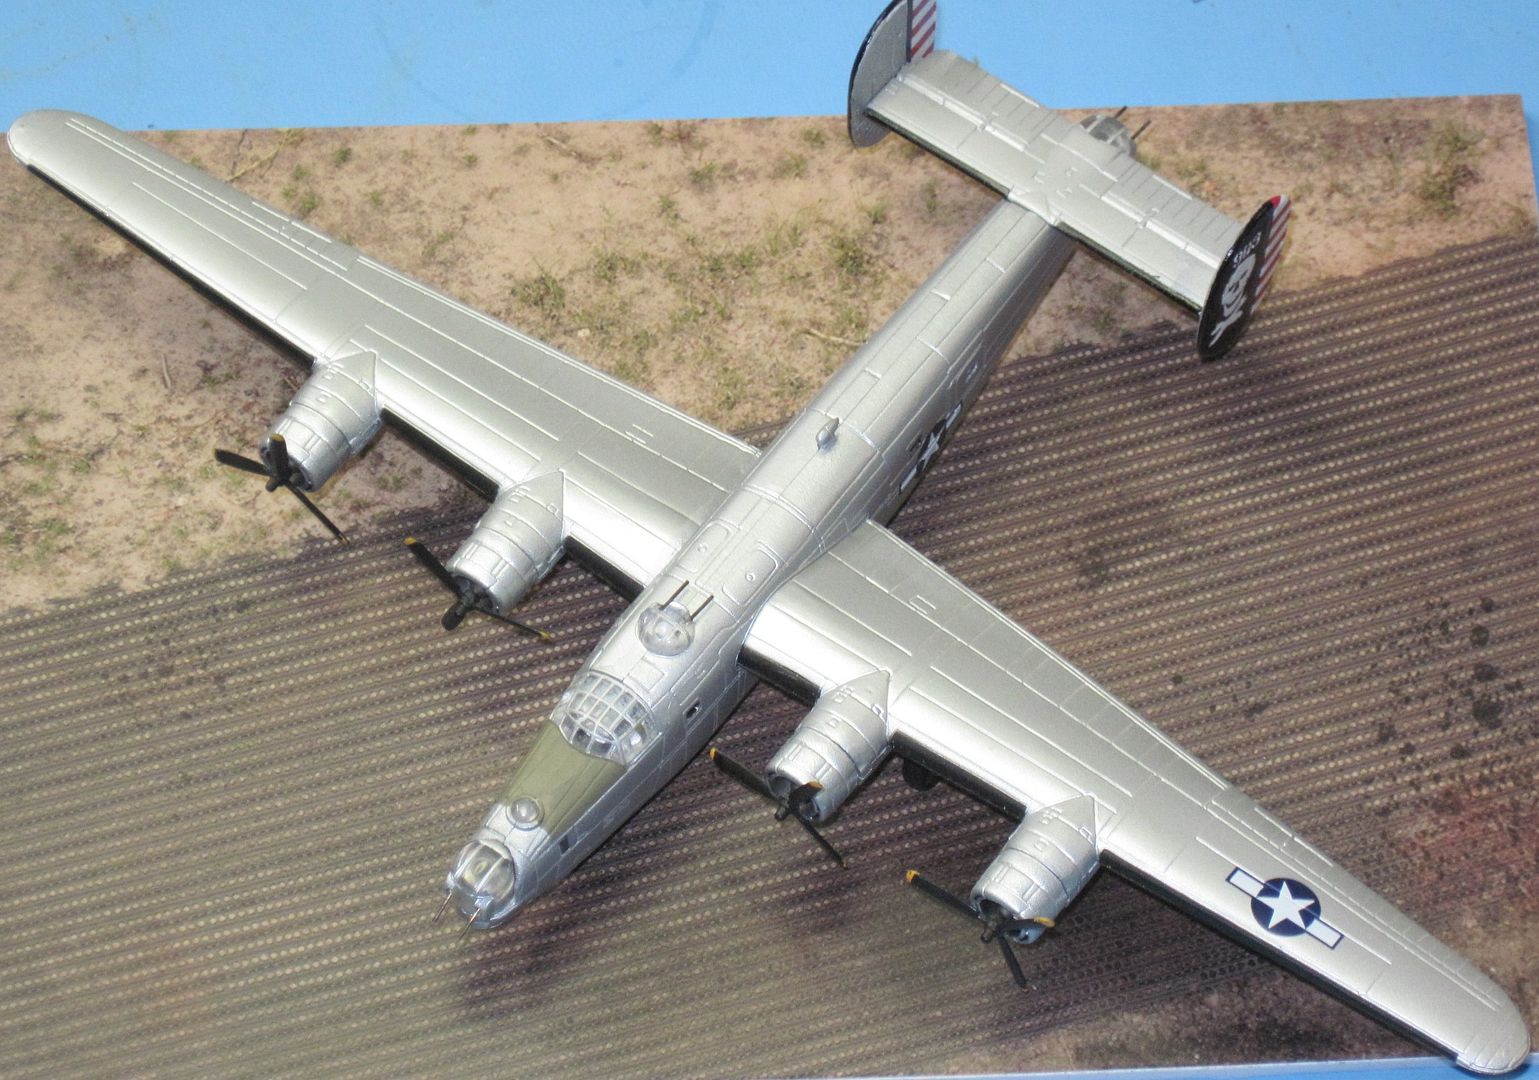
What should be a somewhat quick transformation of a CafeReo "BIG BIRD' B-24J (Cocktail Hour) into a 90th Bomb Group 400th Squadron aircraft known as "Ho Hum".
.jpeg?width=1920&height=1080&fit=bounds)
.jpeg?width=1920&height=1080&fit=bounds)
3D Image from unknown.
.JPG?width=1920&height=1080&fit=bounds)
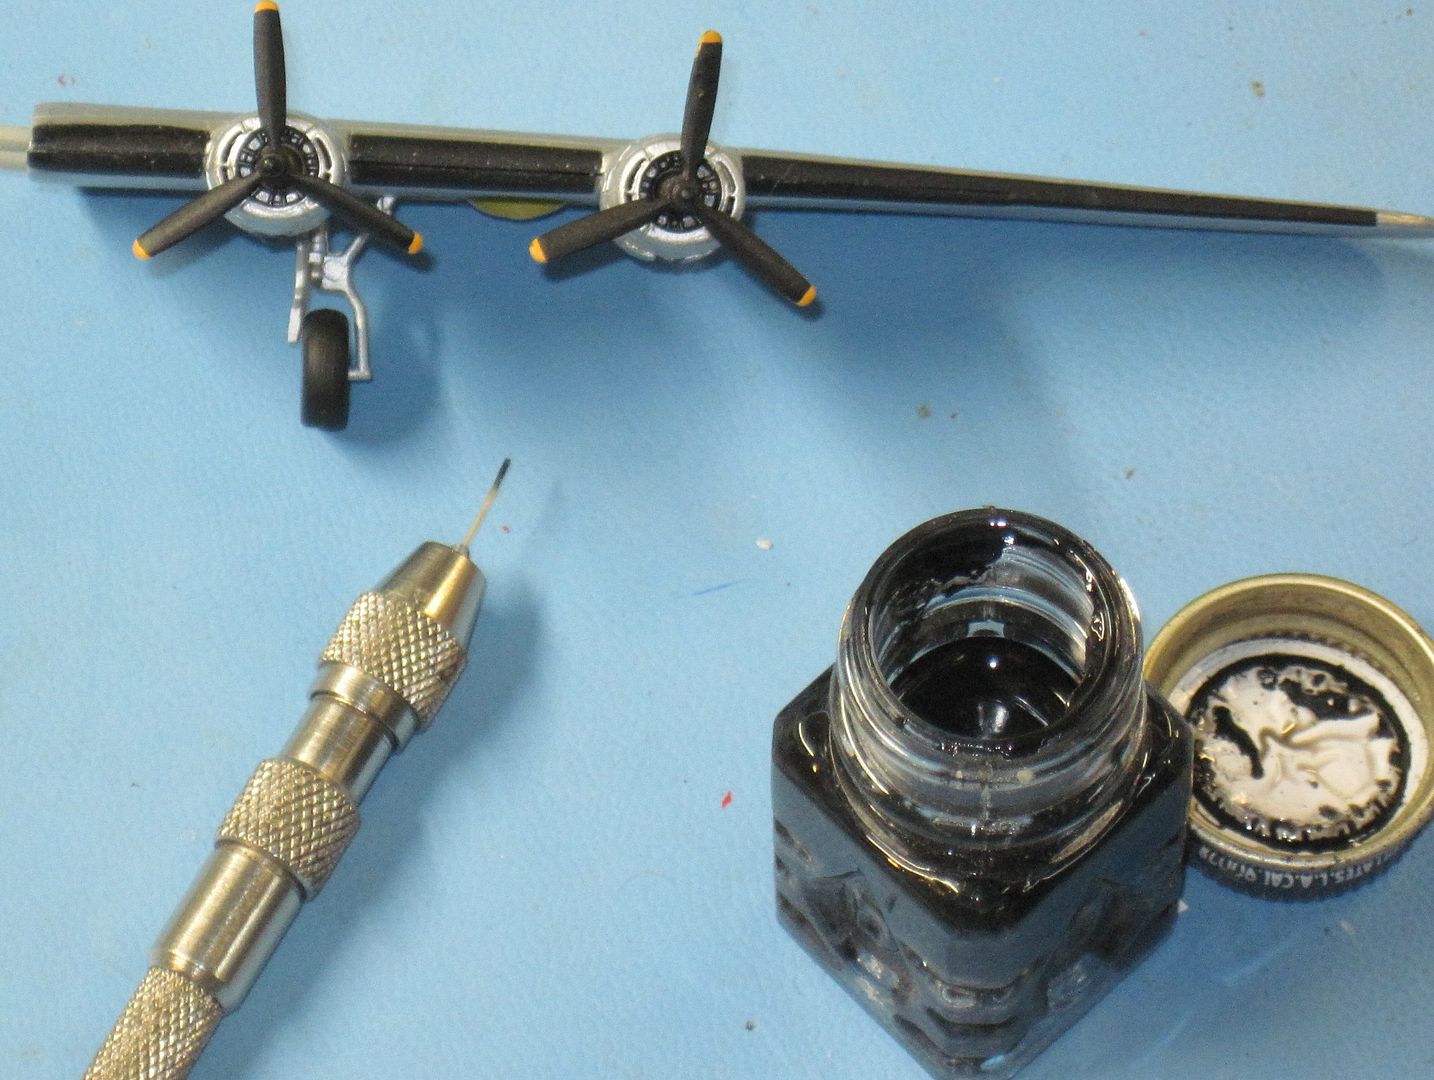
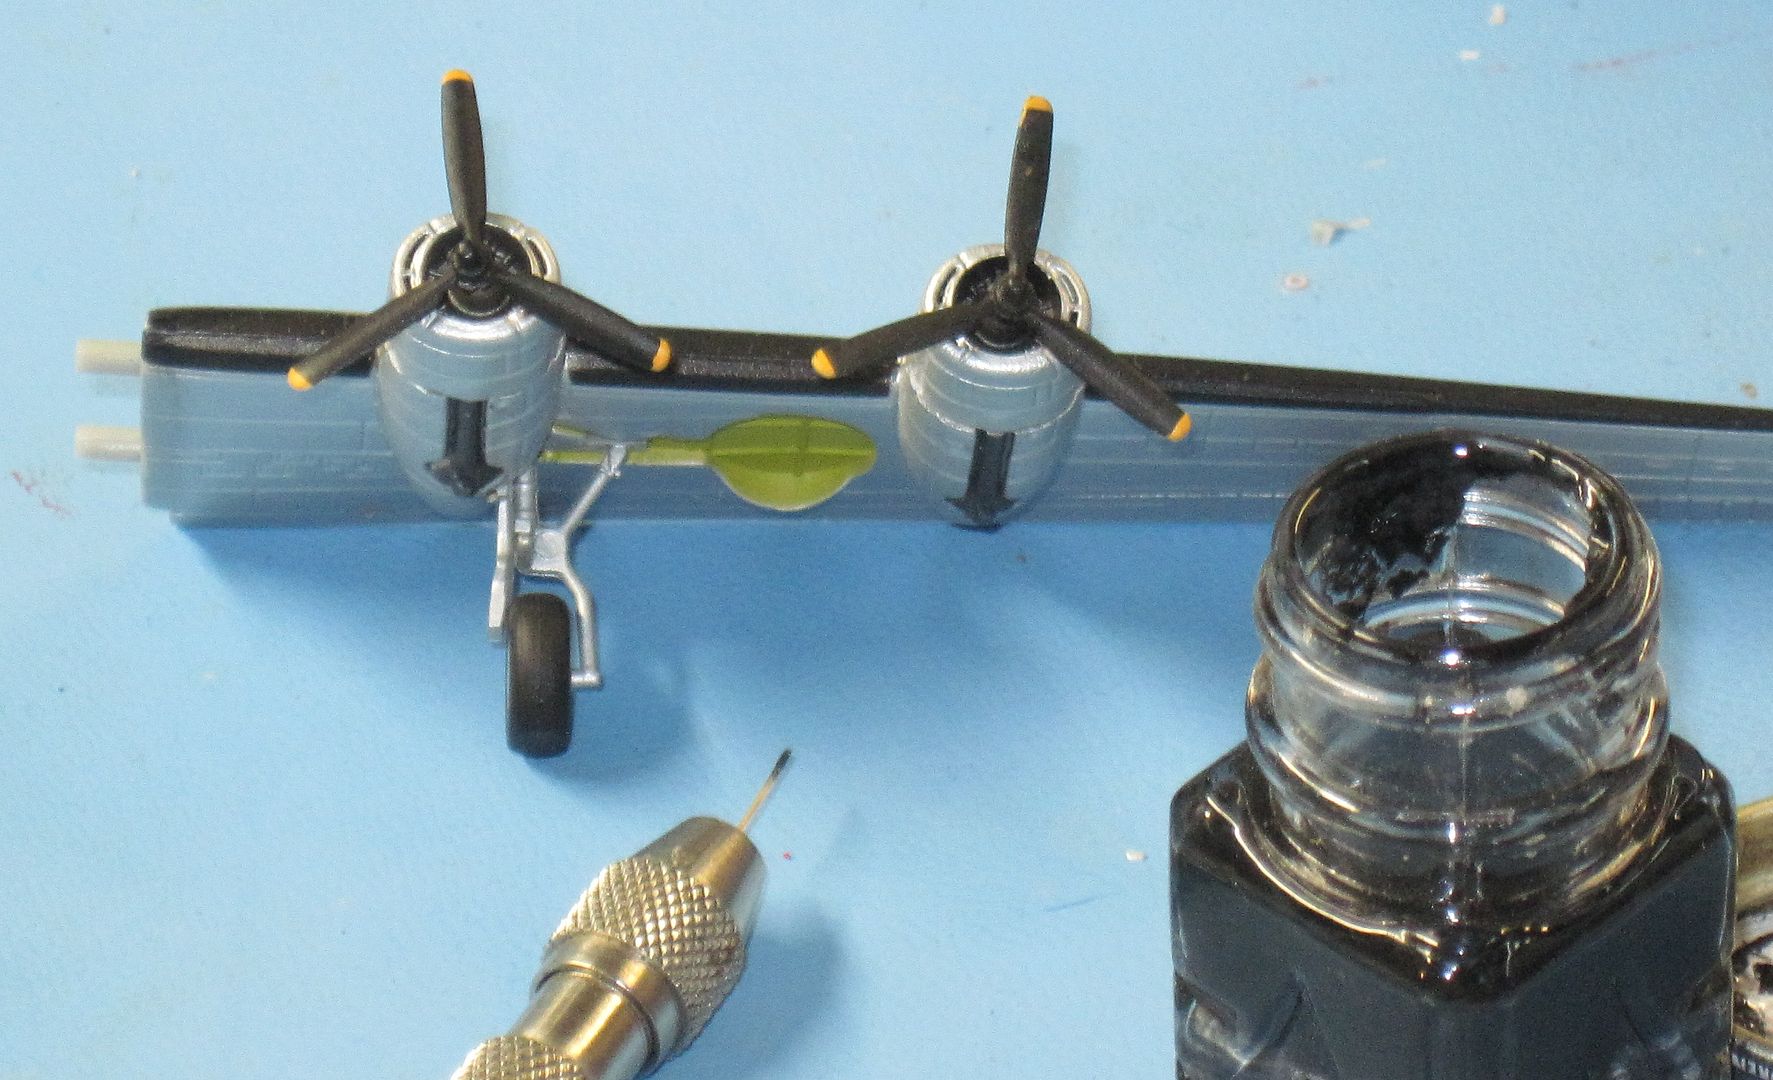
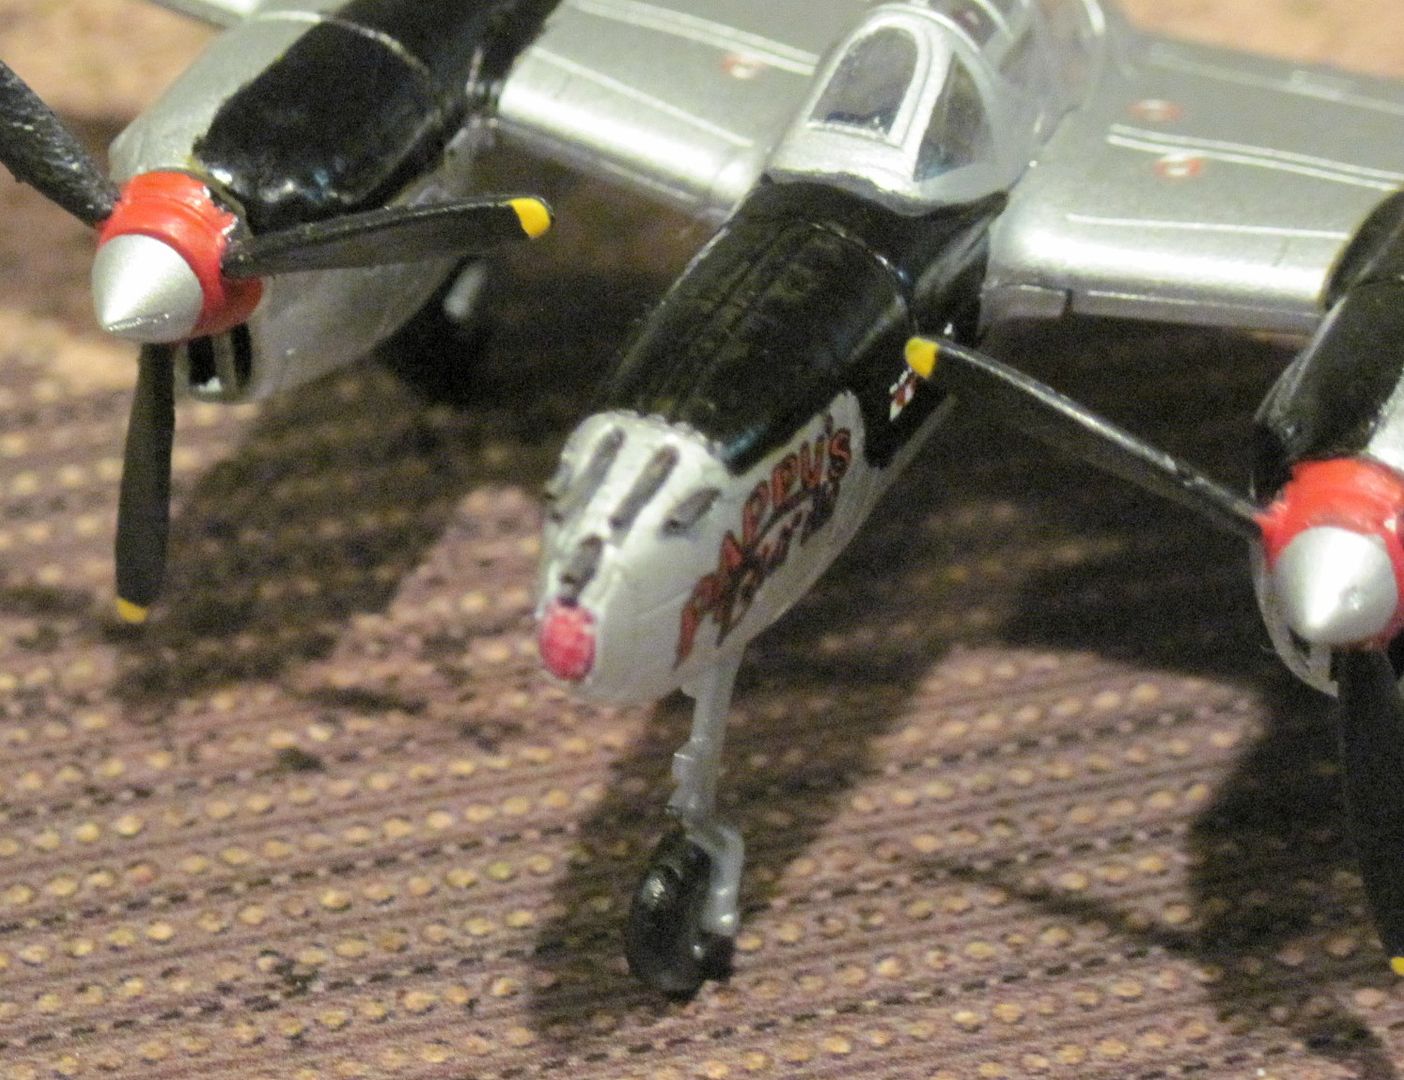
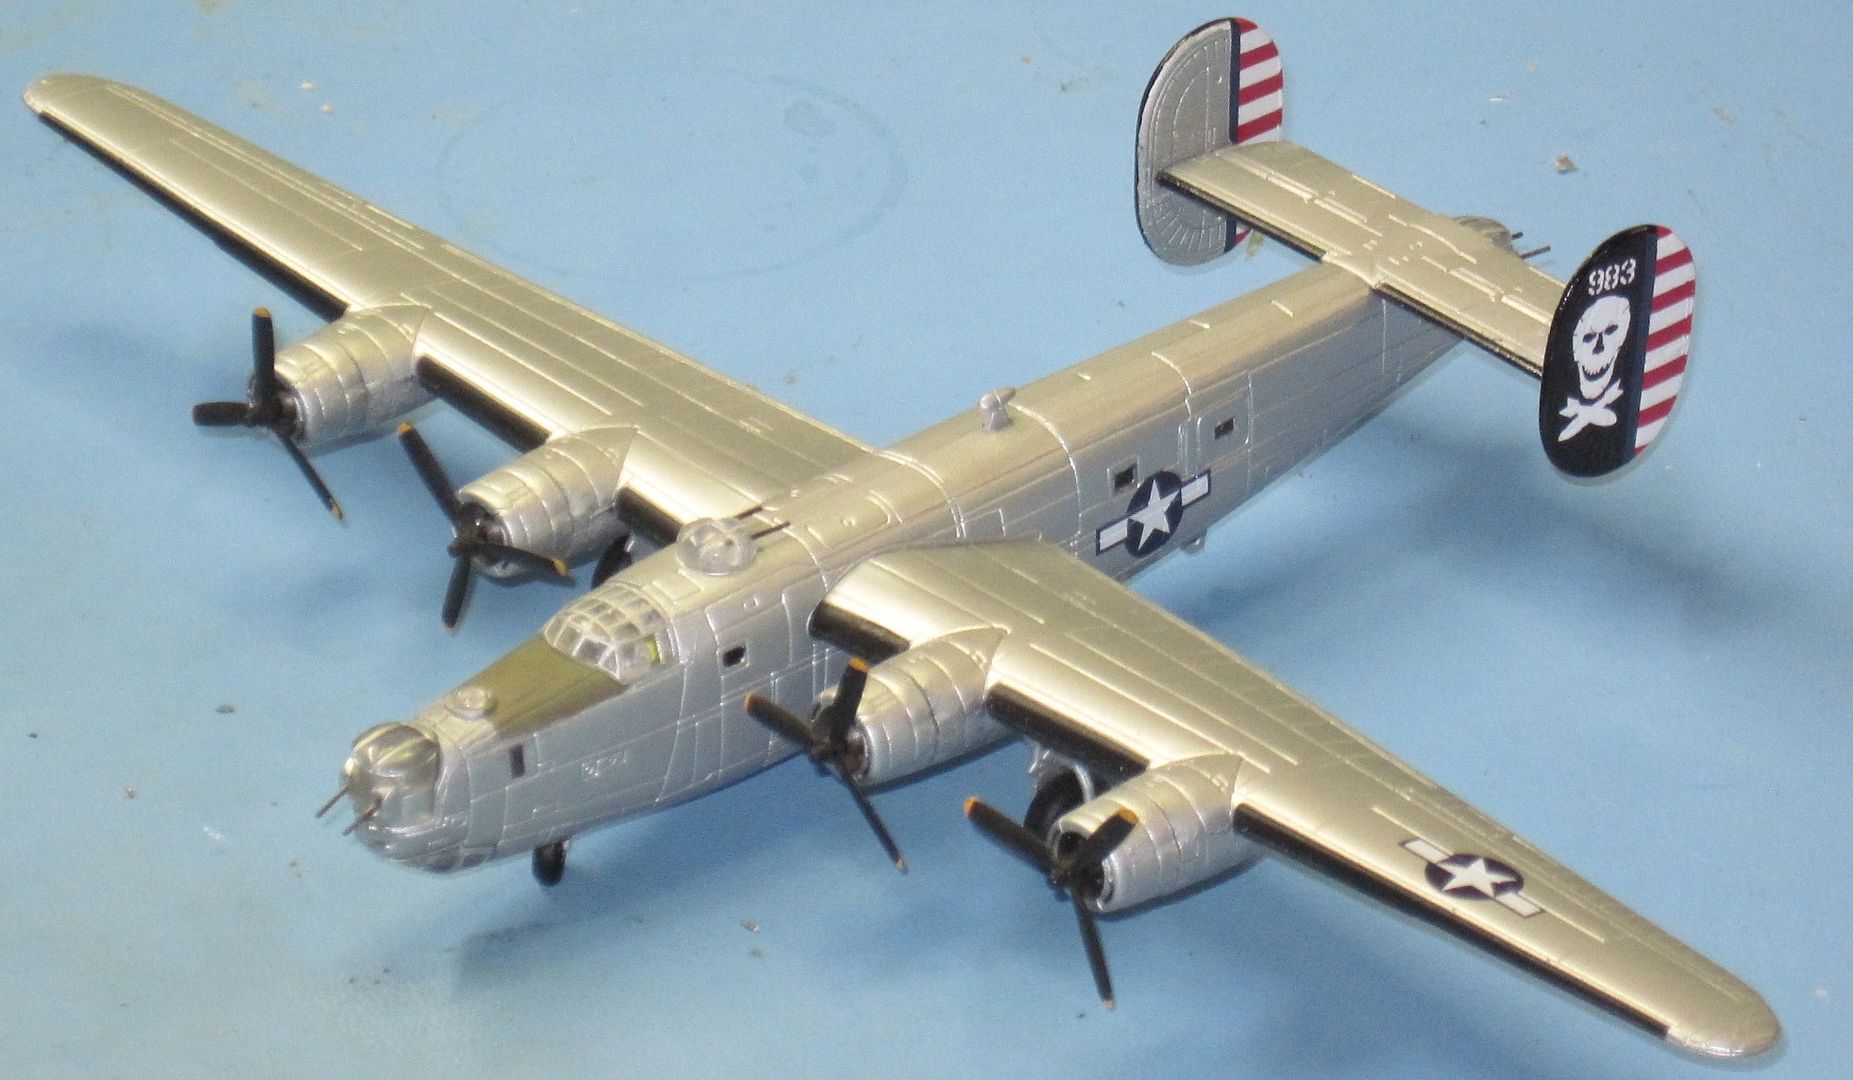
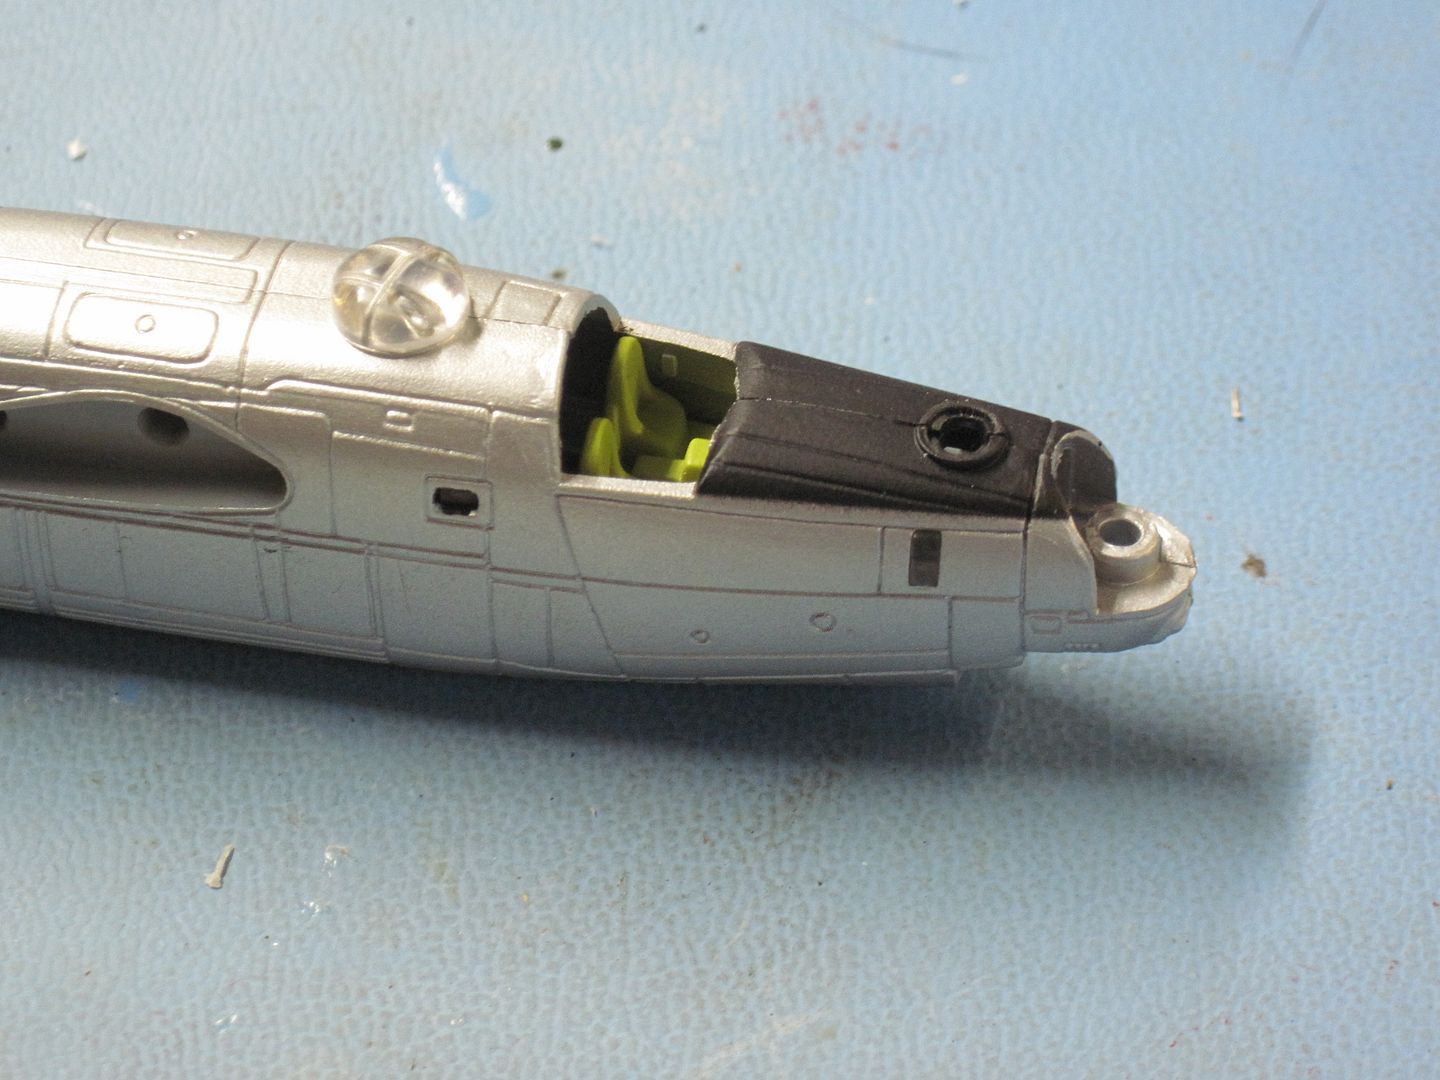
The very thick nose gear doors removed and the nose wheel taken off for re positioning for a more realistic look.
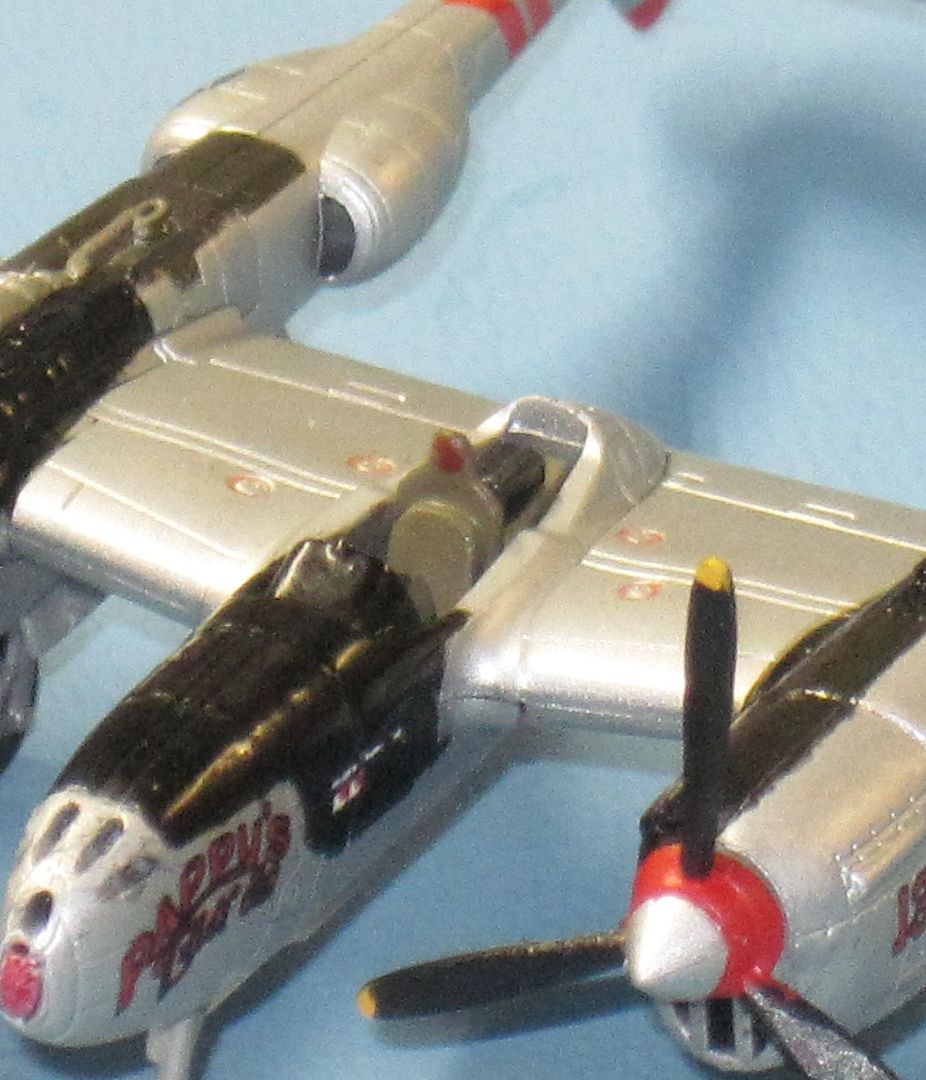
The fuselage windows painted in with fine point ink marker and to be touched up with Kyrstal Klear.
The anti glare panel repainted olive drab with a touch of white to a more original color and shape.
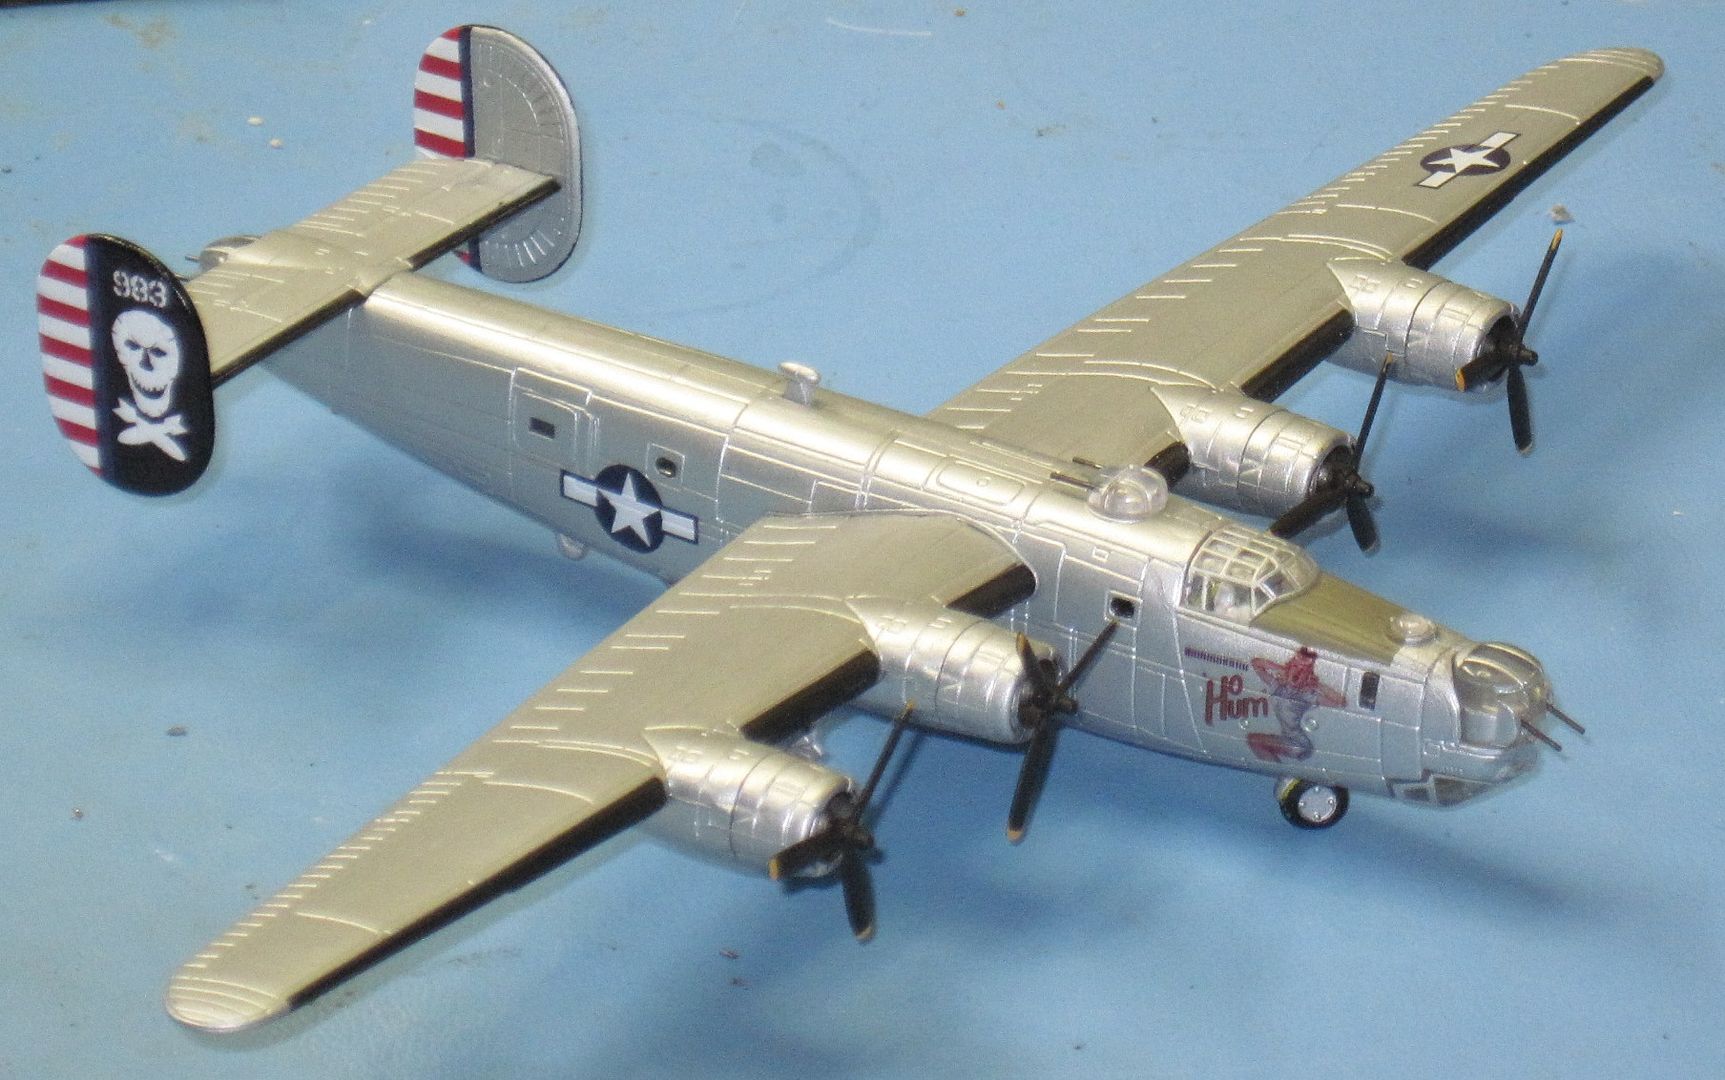
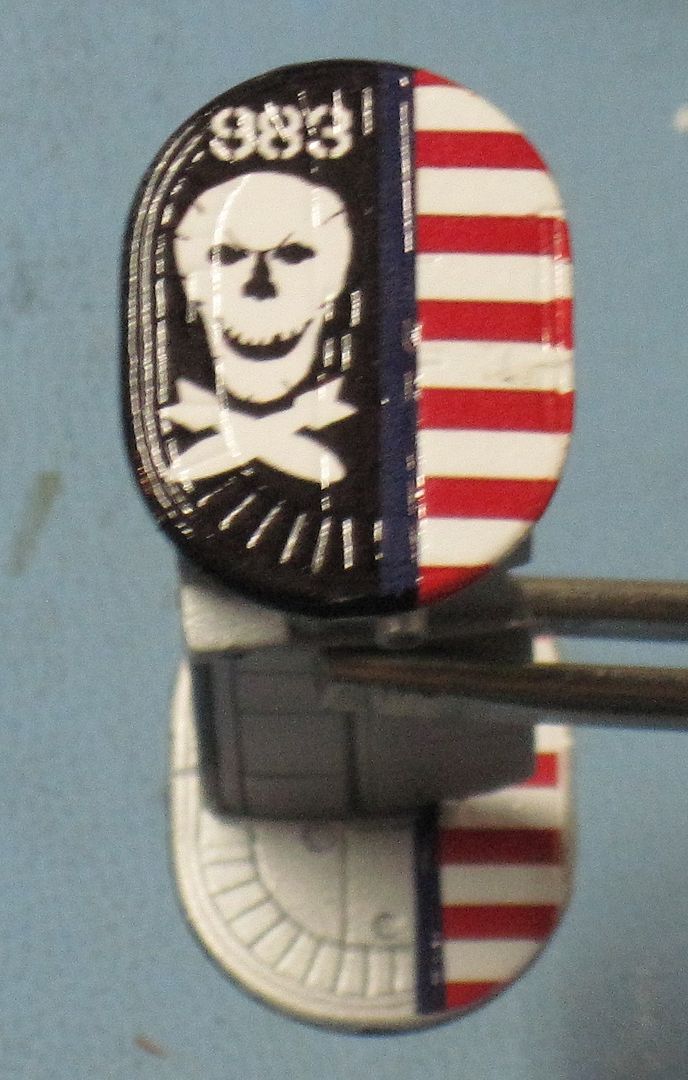
Nose art and tail images were designed and scaled to 1/144 by Chris. They were printed out (nose art on clear and tails on white decal paper) on a ink jet printer then a coat of decal preserver was applied.
.jpeg?width=1920&height=1080&fit=bounds)
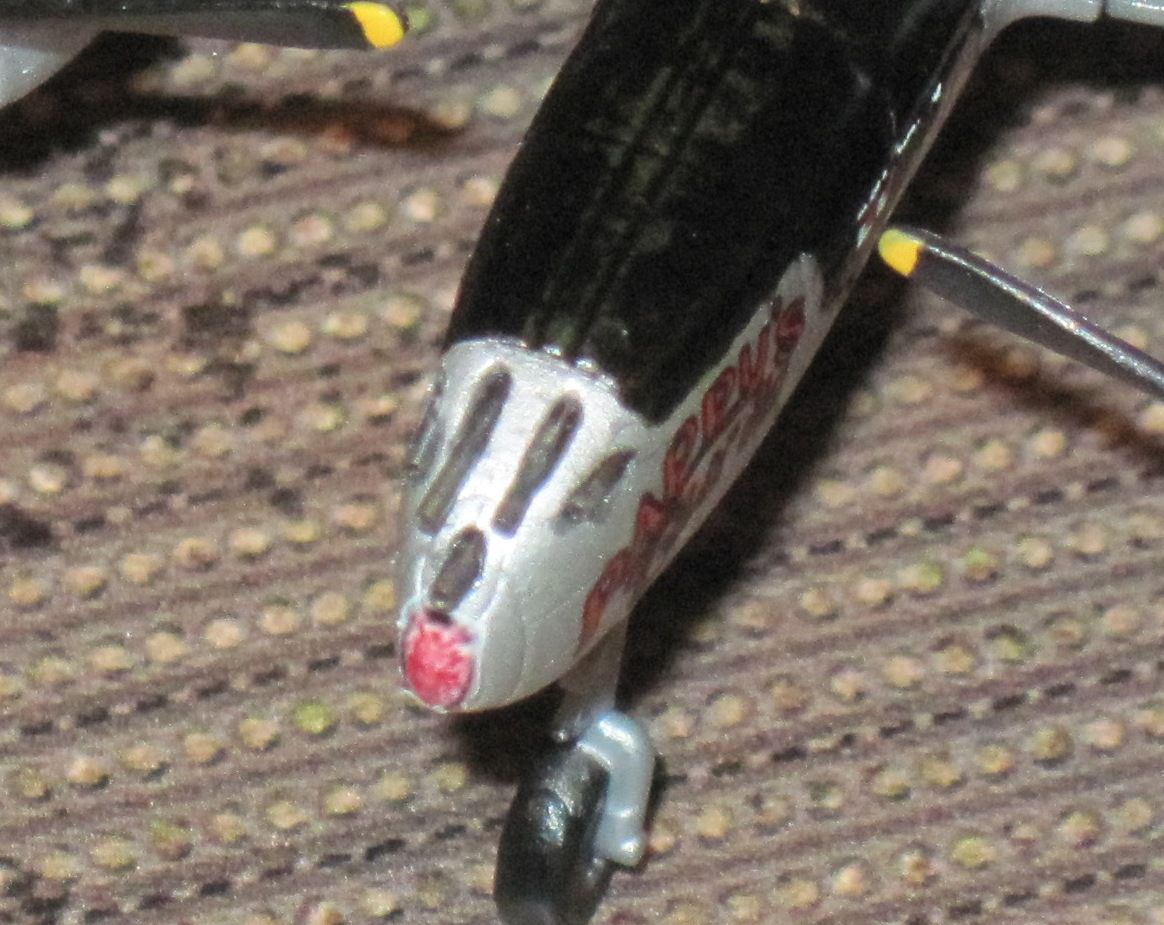
The front part of the black anti glare panel painted aluminum.
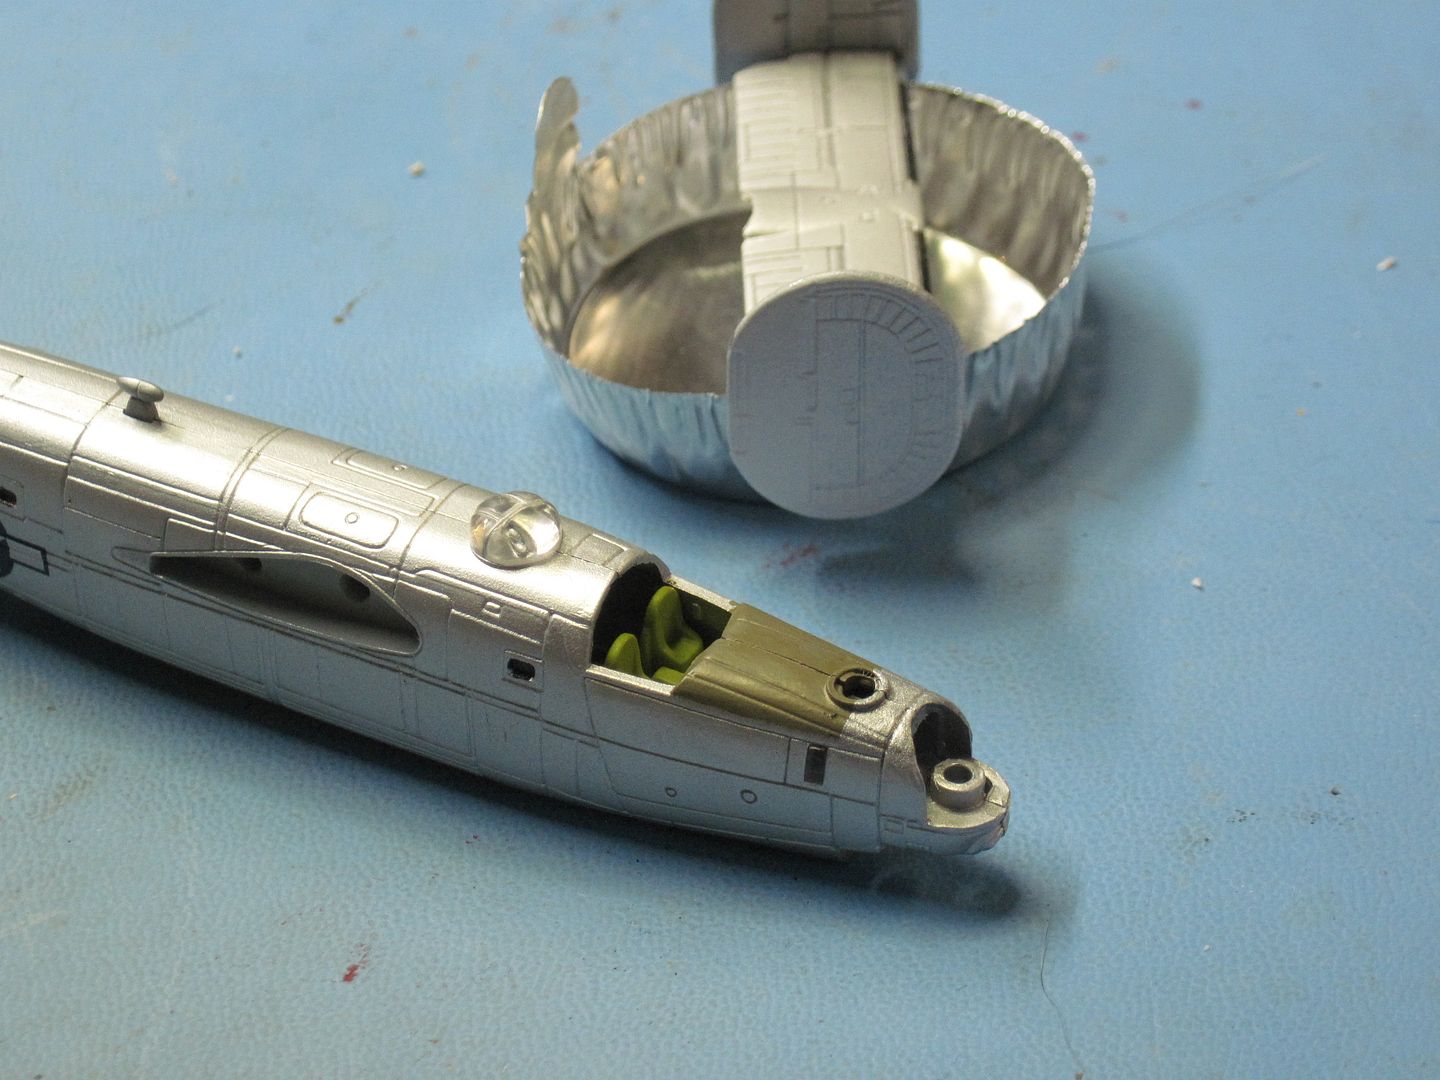
The tails sprayed over with a gray primer and then gloss white.
Putting the cart before the horse.
Usually when building a model, I would build it, paint it, and add whatever else was needed. Then put on the markings last. I found myself excited to see what the markings would look like on this B-24 before I finished it.
.JPG?width=1920&height=1080&fit=bounds)
I guess it being 65% done before I started helped, but I learned a few things. After using many of Chris's decal designs, and printing them on the home computer on the Testors decal paper, I have learned the following...
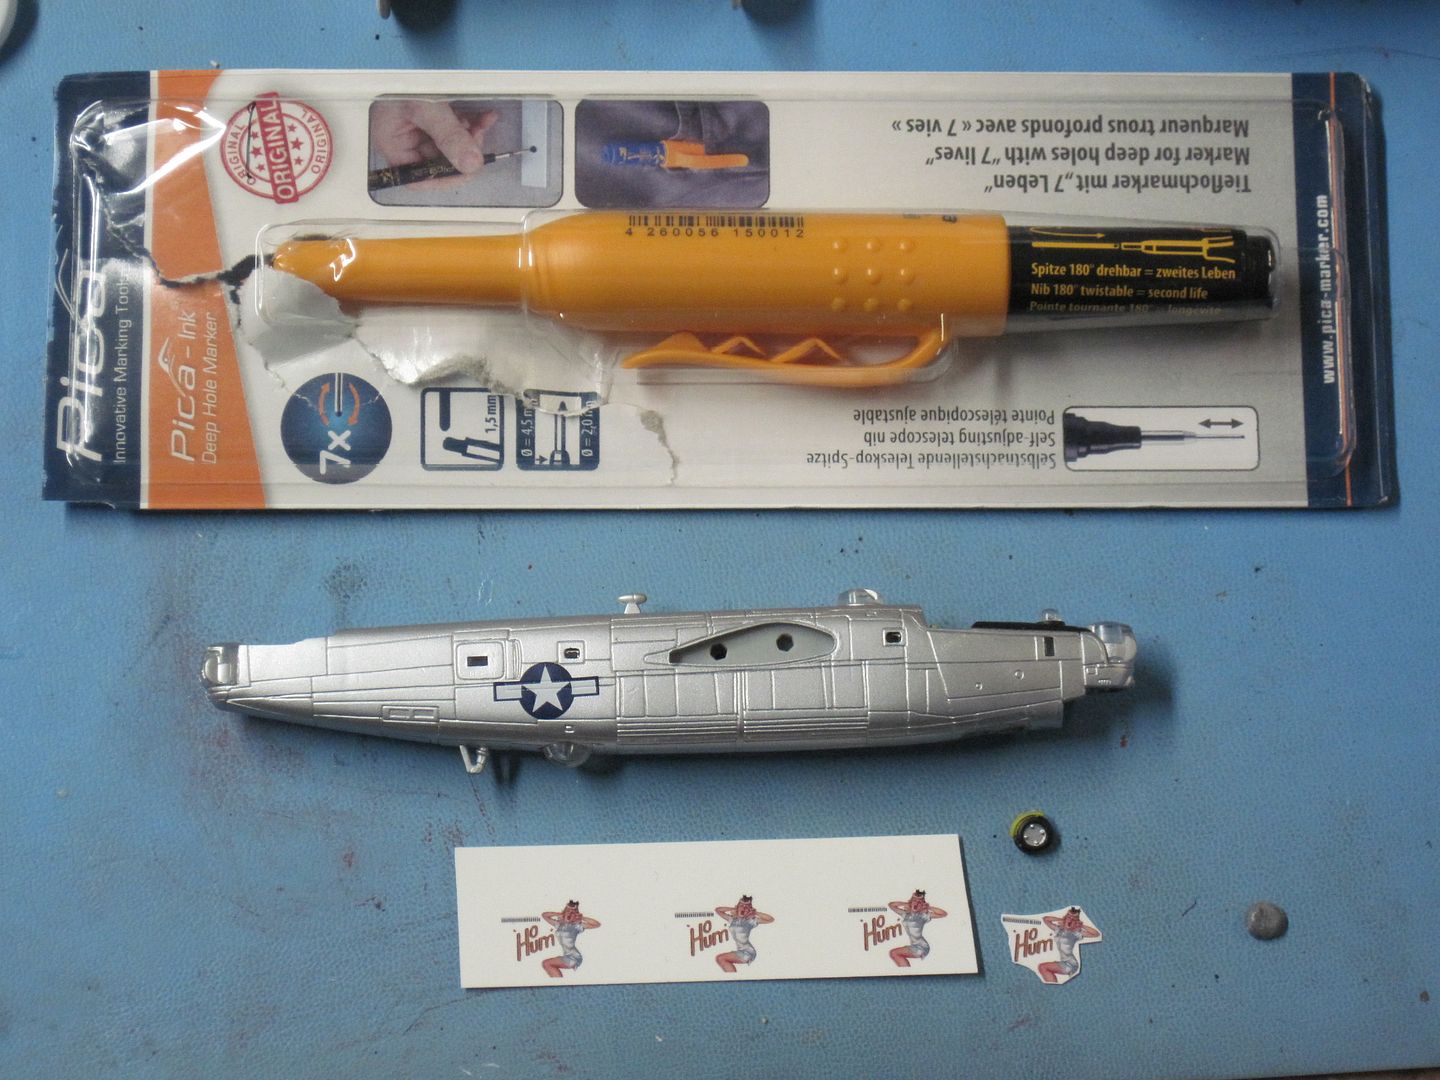
1) After the images are printed out on a ink jet printer, they have to be "misted" several times with decal bonder or the ink will bleed into each other when applied.
2) On clear decal paper, it is ok to put setting solution under and on top of the decal when applied.
3) On white decal paper, you should only put the decal setting solution UNDER the decal, or the ink will bleed into each other if you also put it on top.
.JPG?width=1920&height=1080&fit=bounds)
You cannot wait long enough before you give the decals a wash of fresh water and then after thoroughly dry spray them with a clear satin coat. I will wait about 4 days before I do this. It might be just me, but with the passing of each day, it seems like the decals suck down more and more!
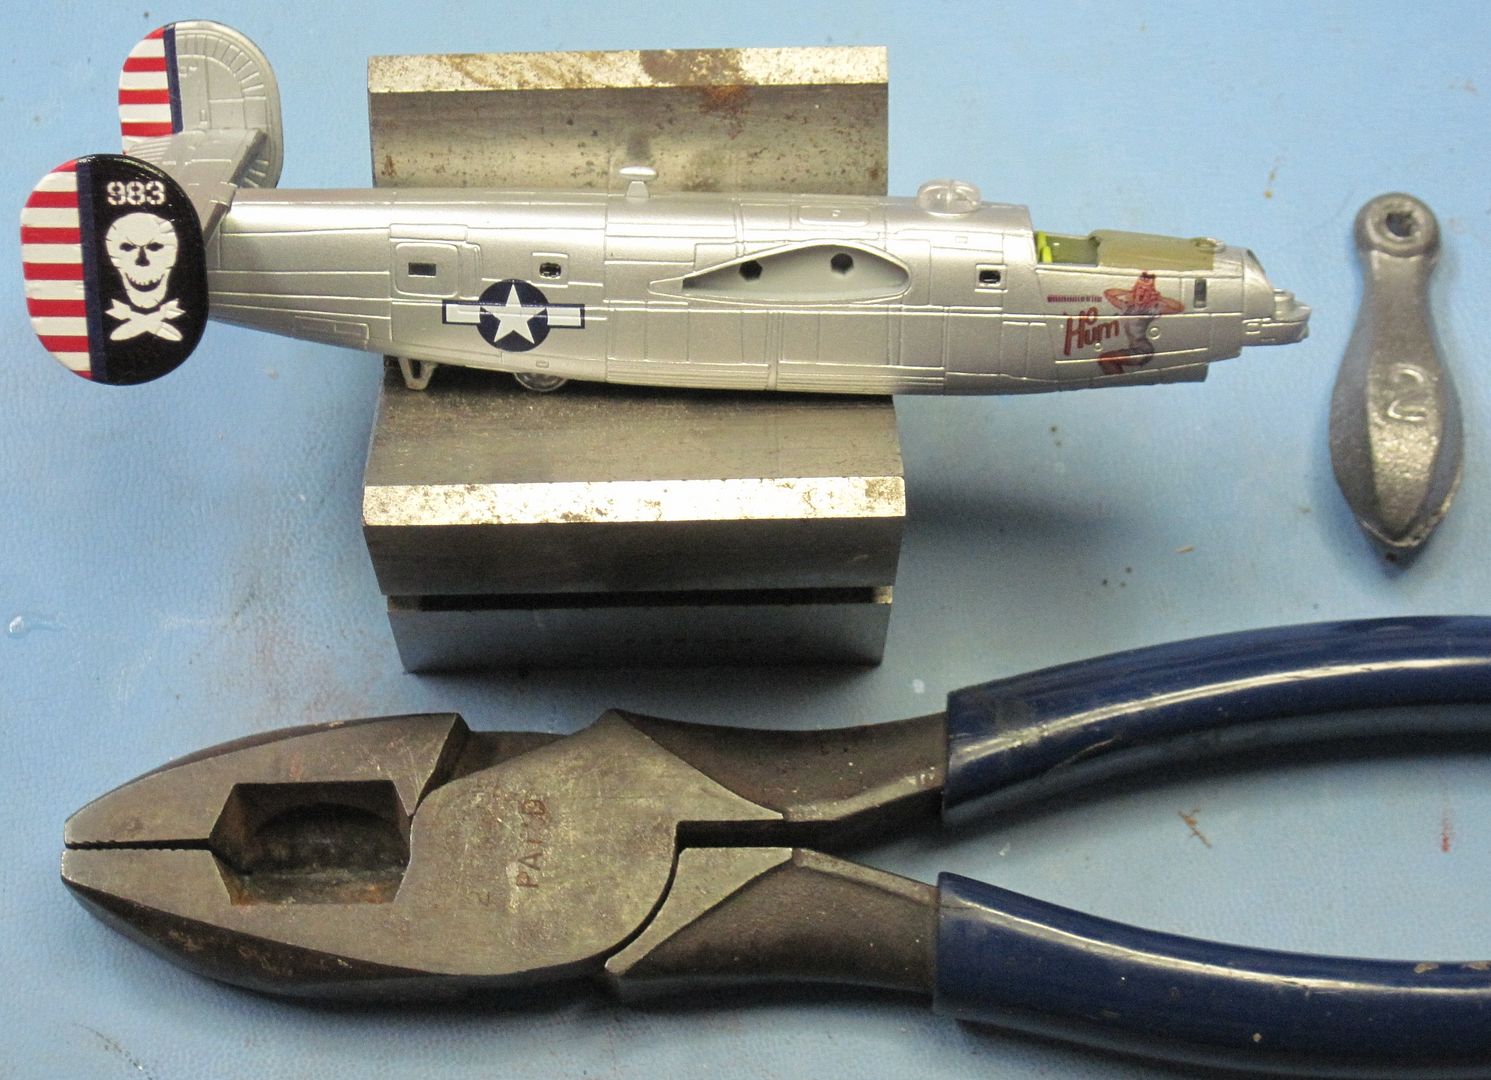
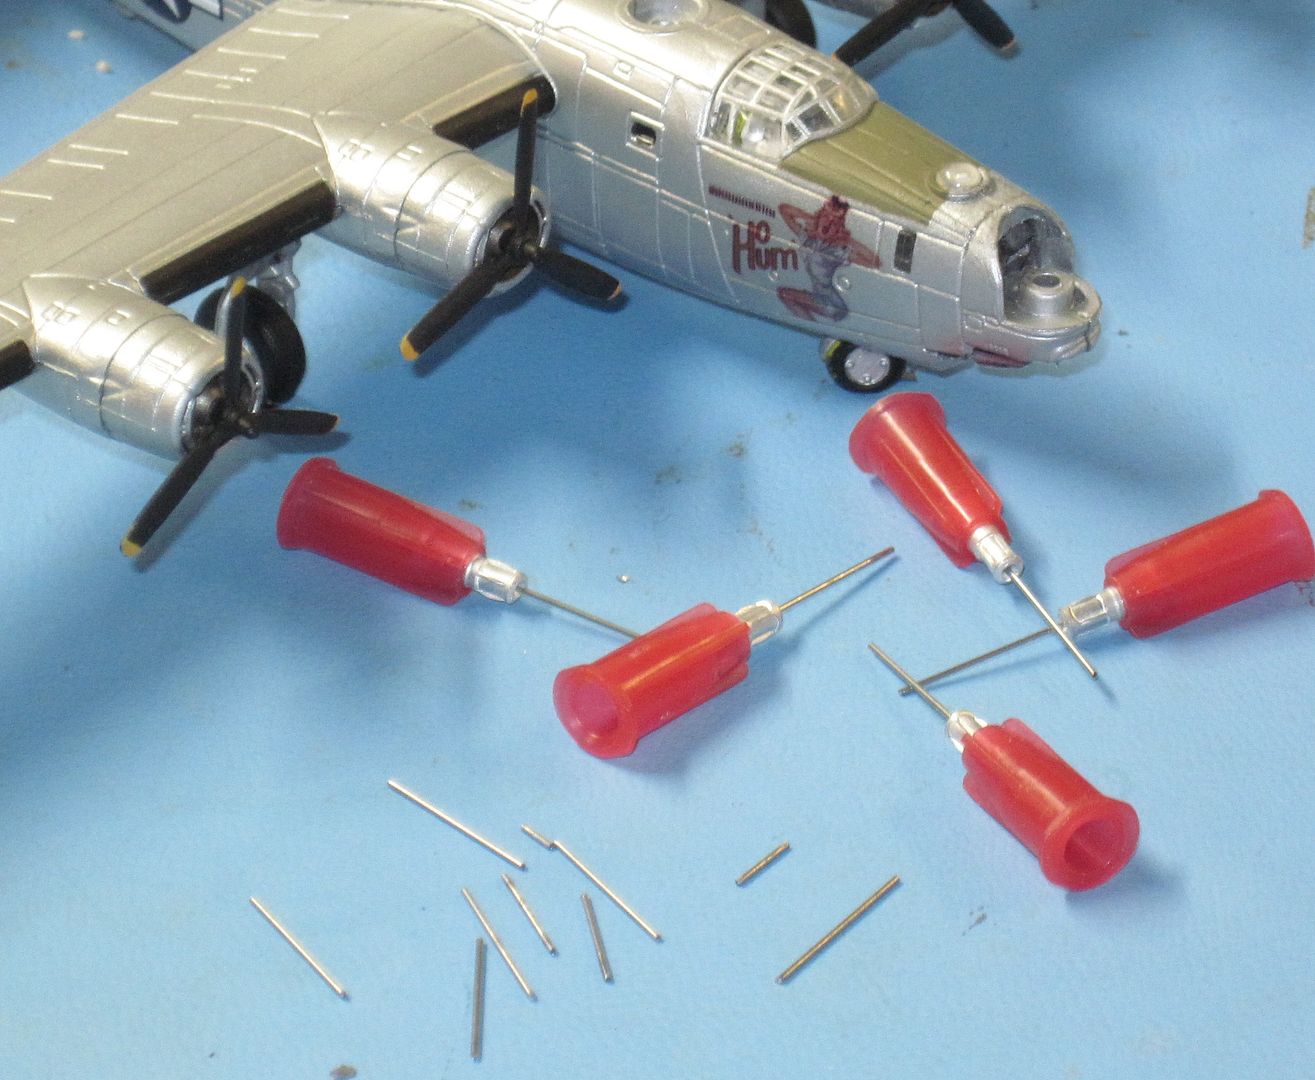
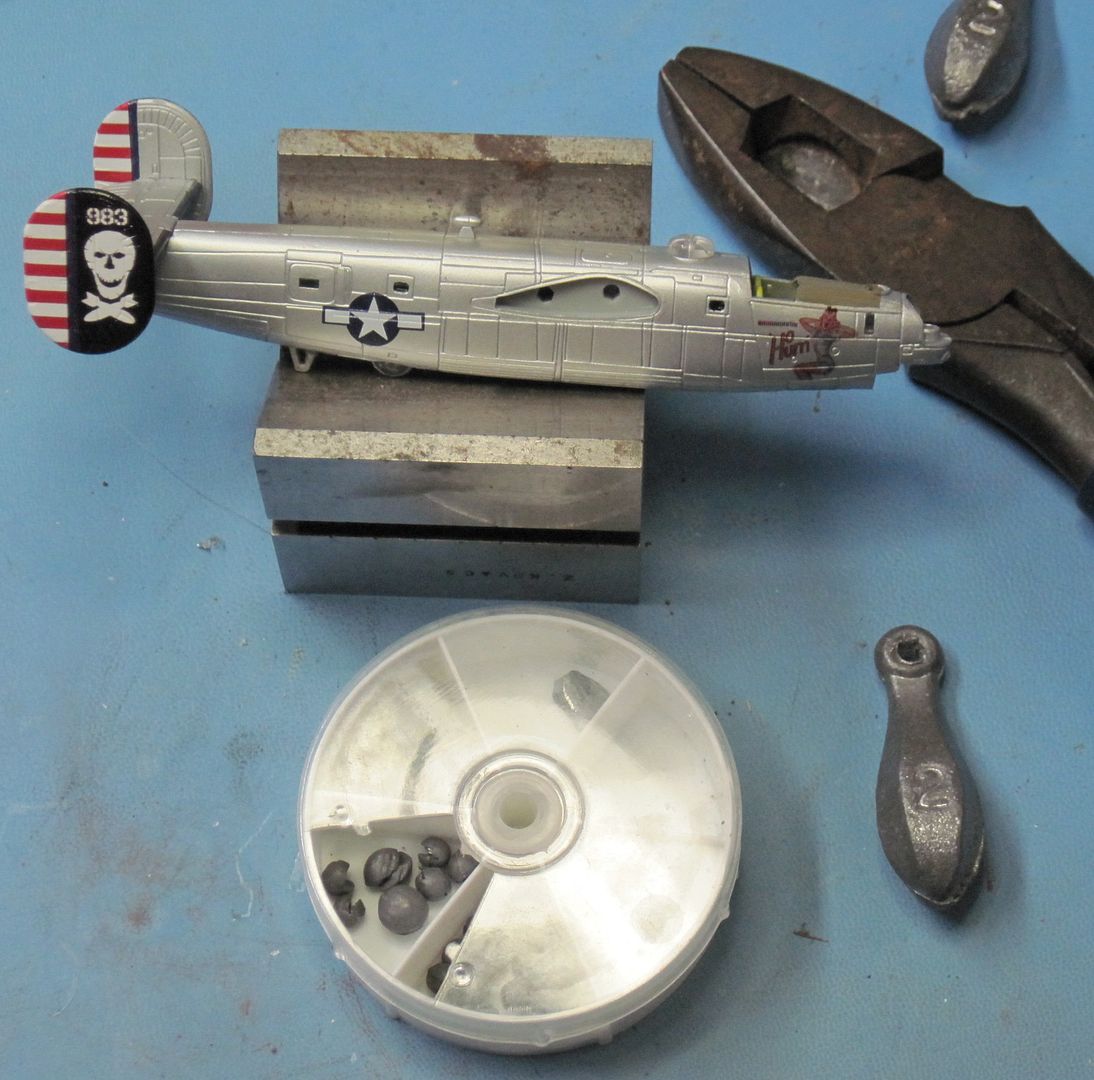
Next up is to add the weight to the nose to keep the aircraft upright. Fishing BB Shot or cutting up a lead sinker and supergluing pieces in every spot you can find in the nose area and behind the cockpit is what's needed.
Thanks for looking!"
What should be a somewhat quick transformation of a CafeReo "BIG BIRD' B-24J (Cocktail Hour) into a 90th Bomb Group 400th Squadron aircraft known as "Ho Hum".
3D Image from unknown.
The very thick nose gear doors removed and the nose wheel taken off for re positioning for a more realistic look.
The fuselage windows painted in with fine point ink marker and to be touched up with Kyrstal Klear.
The anti glare panel repainted olive drab with a touch of white to a more original color and shape.
Nose art and tail images were designed and scaled to 1/144 by Chris. They were printed out (nose art on clear and tails on white decal paper) on a ink jet printer then a coat of decal preserver was applied.
The front part of the black anti glare panel painted aluminum.
The tails sprayed over with a gray primer and then gloss white.
Putting the cart before the horse.
Usually when building a model, I would build it, paint it, and add whatever else was needed. Then put on the markings last. I found myself excited to see what the markings would look like on this B-24 before I finished it.
I guess it being 65% done before I started helped, but I learned a few things. After using many of Chris's decal designs, and printing them on the home computer on the Testors decal paper, I have learned the following...
1) After the images are printed out on a ink jet printer, they have to be "misted" several times with decal bonder or the ink will bleed into each other when applied.
2) On clear decal paper, it is ok to put setting solution under and on top of the decal when applied.
3) On white decal paper, you should only put the decal setting solution UNDER the decal, or the ink will bleed into each other if you also put it on top.
You cannot wait long enough before you give the decals a wash of fresh water and then after thoroughly dry spray them with a clear satin coat. I will wait about 4 days before I do this. It might be just me, but with the passing of each day, it seems like the decals suck down more and more!
Next up is to add the weight to the nose to keep the aircraft upright. Fishing BB Shot or cutting up a lead sinker and supergluing pieces in every spot you can find in the nose area and behind the cockpit is what's needed.
Thanks for looking!"