Warbird Information Exchange

DISCLAIMER: The views expressed on this site are the responsibility of the poster and do not reflect the views of the management.
It is currently Sun May 11, 2025 10:54 pm

All times are UTC - 5 hours


Classic Wings Magazine WWII Naval Aviation Research Pacific Luftwaffe Resource Center
When Hollywood Ruled The Skies - Volumes 1 through 4 by Bruce Oriss


Post new topic Reply to topic  [ 33 posts ]  Go to page 1, 2, 3  Next
Author Message
PostPosted: Mon Apr 18, 2011 10:54 pm 
Offline
User avatar

Joined: Sun Jun 07, 2009 1:13 pm
Posts: 671
Location: Indiana
I was waiting to post this until the model was finished, but my mention of it in another thread sparked some interest so I figured I'd go ahead and post it now. I've been at this thing for about three months now and realistically I've probably got another month to go. I'm having a little trouble staying motivated!

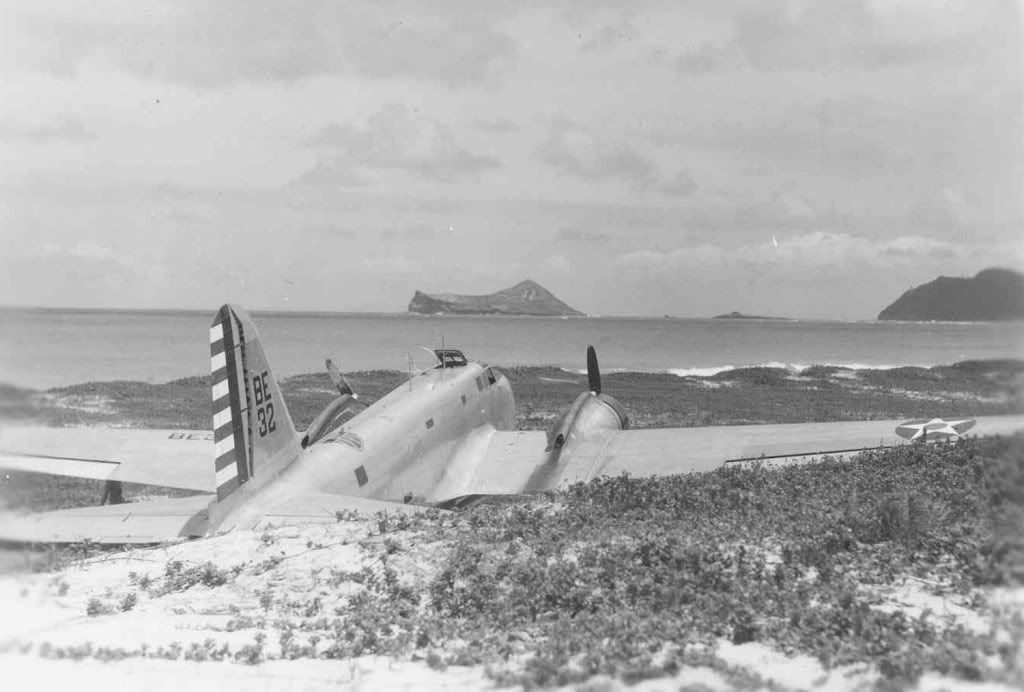
I love the bare metal, prewar insignias, rudder stripes and the checkered cowls, so I decided to do it in these markings.
Image


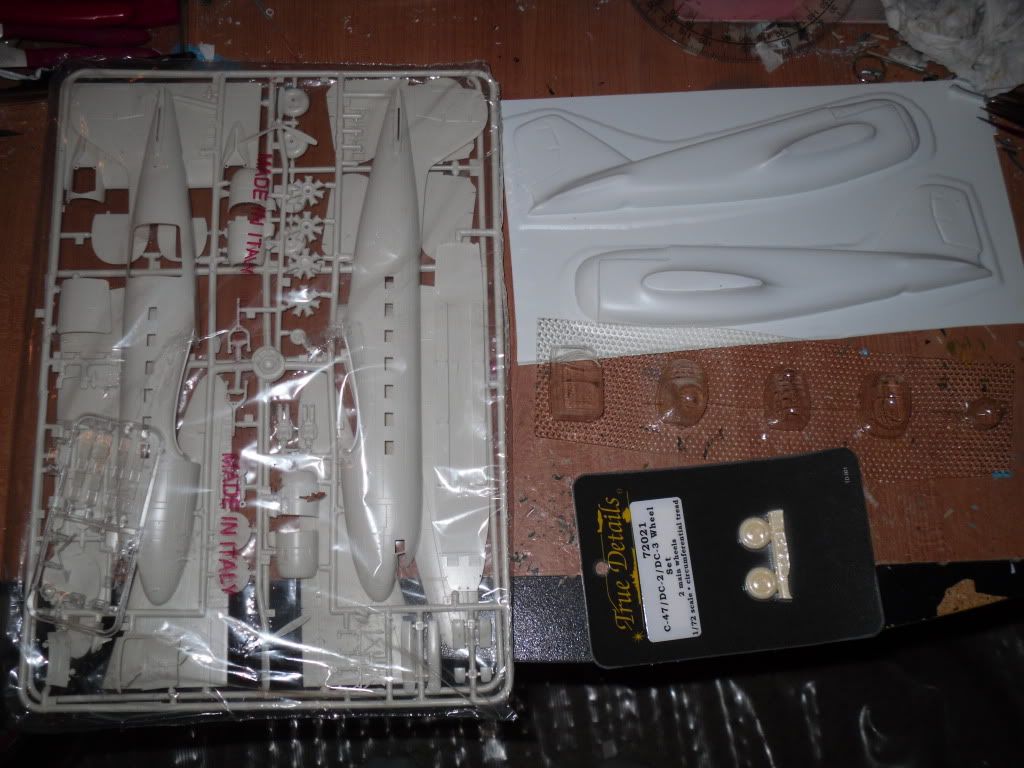
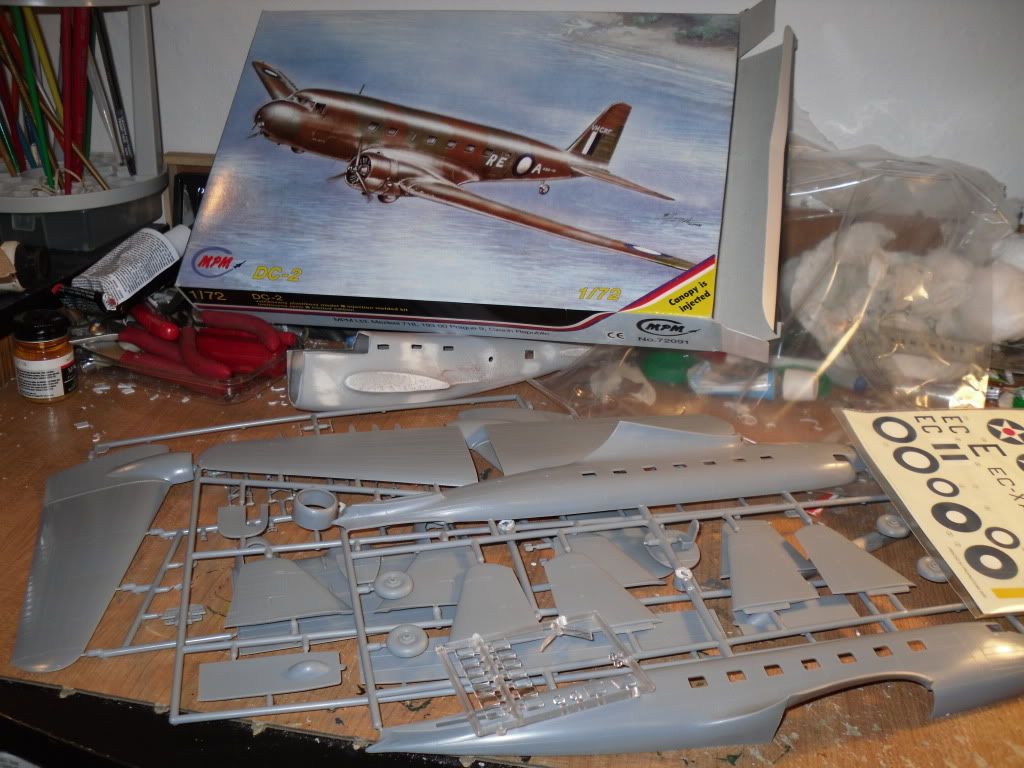
I started with an Airmodel vacuform B-18 conversion kit that I had bought with a DC-3 kit a few years ago. I pretty quick abandoned the DC-3 kit in favor of a DC-2 kit so the wingspan would be closer and the cowls and engines would be correct.
Image


Image


Fuselage together.
Image


I cut the nacelles off the lower center section of the wing.
Image


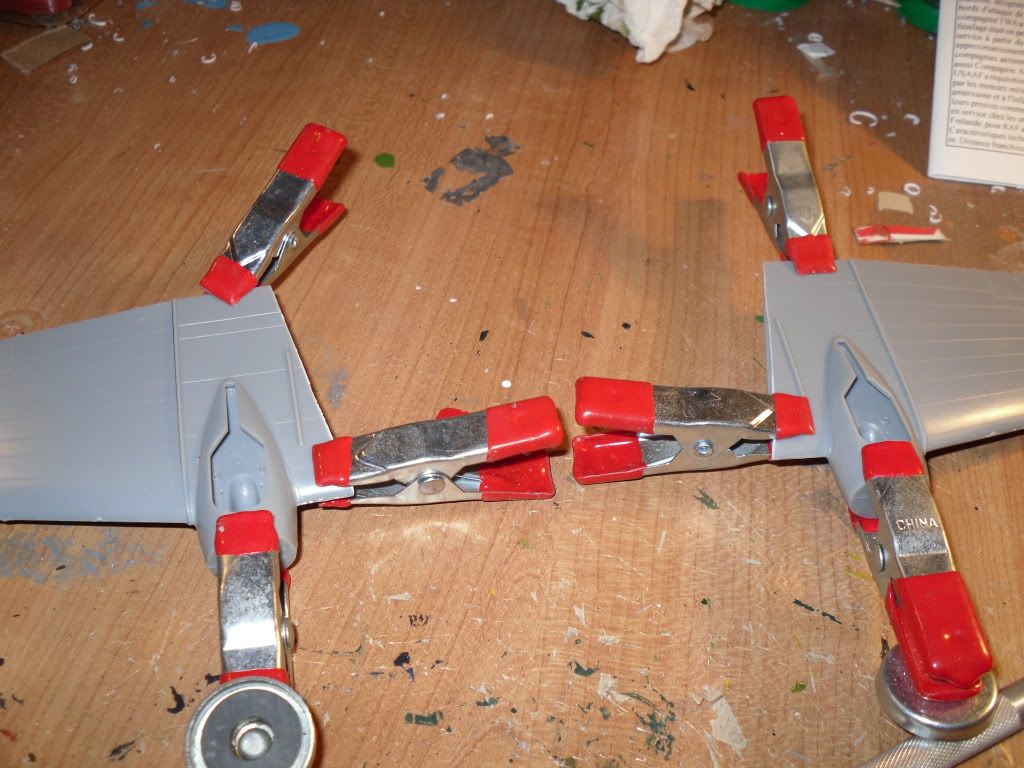
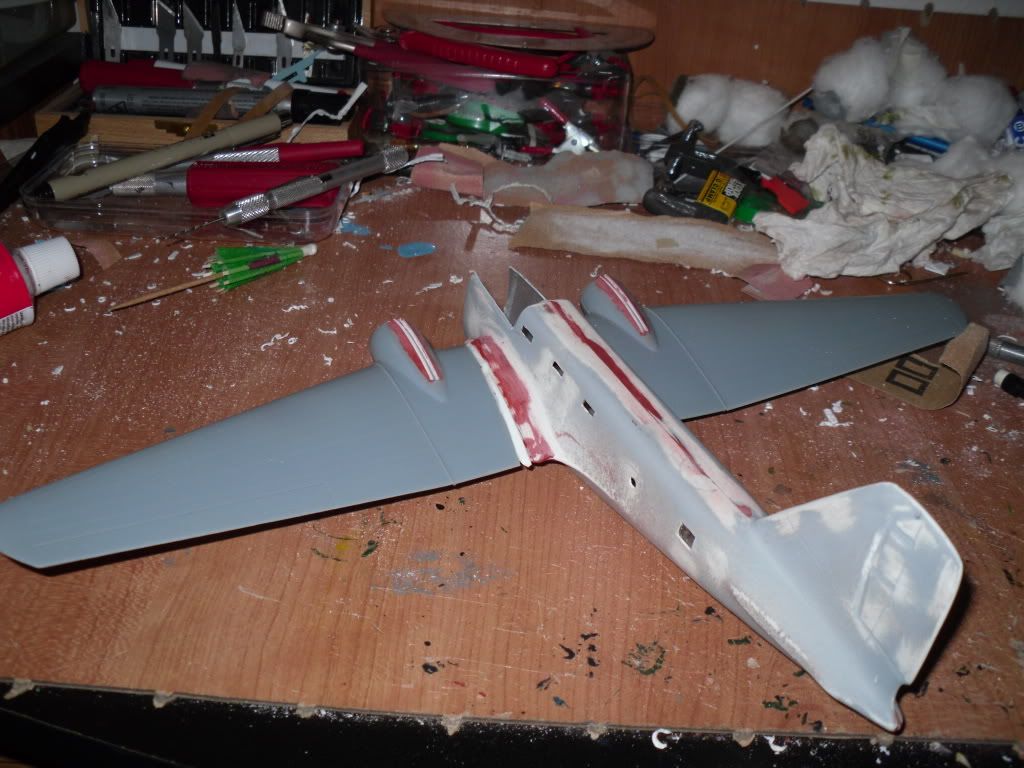
Joined them to the wings.
Image


My exhausts needed to come back across the top of the nacelles.
Image


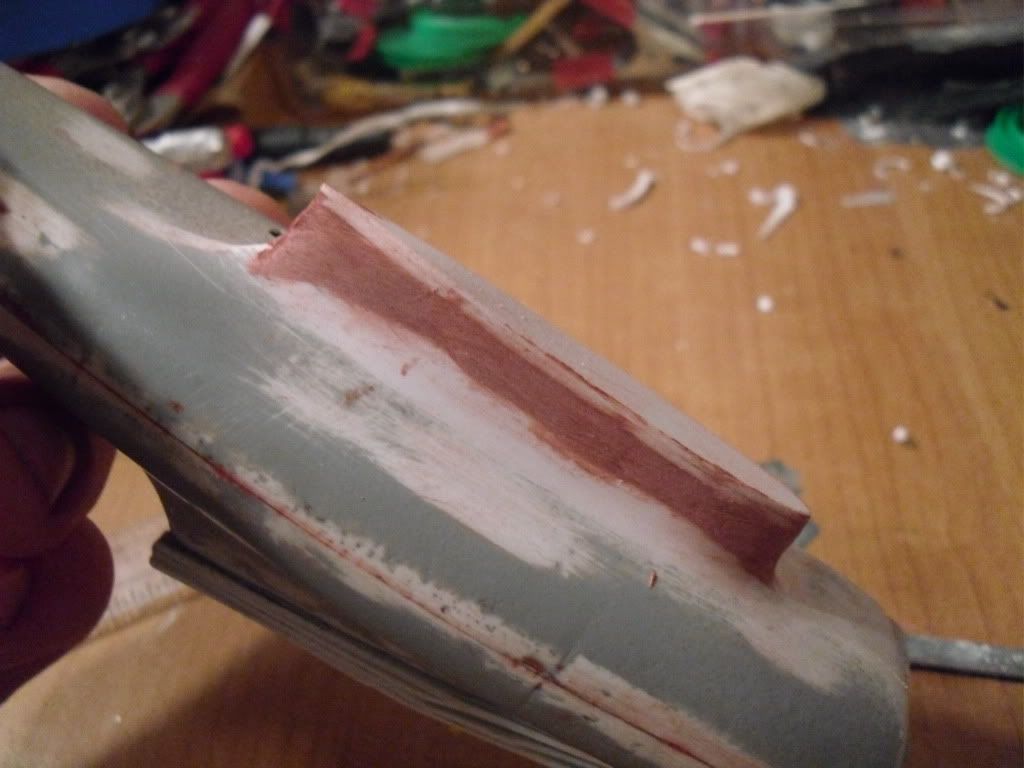
Using some square styrene stock I modified the top of the nacelles and fabricated some exhaust stacks.
Image


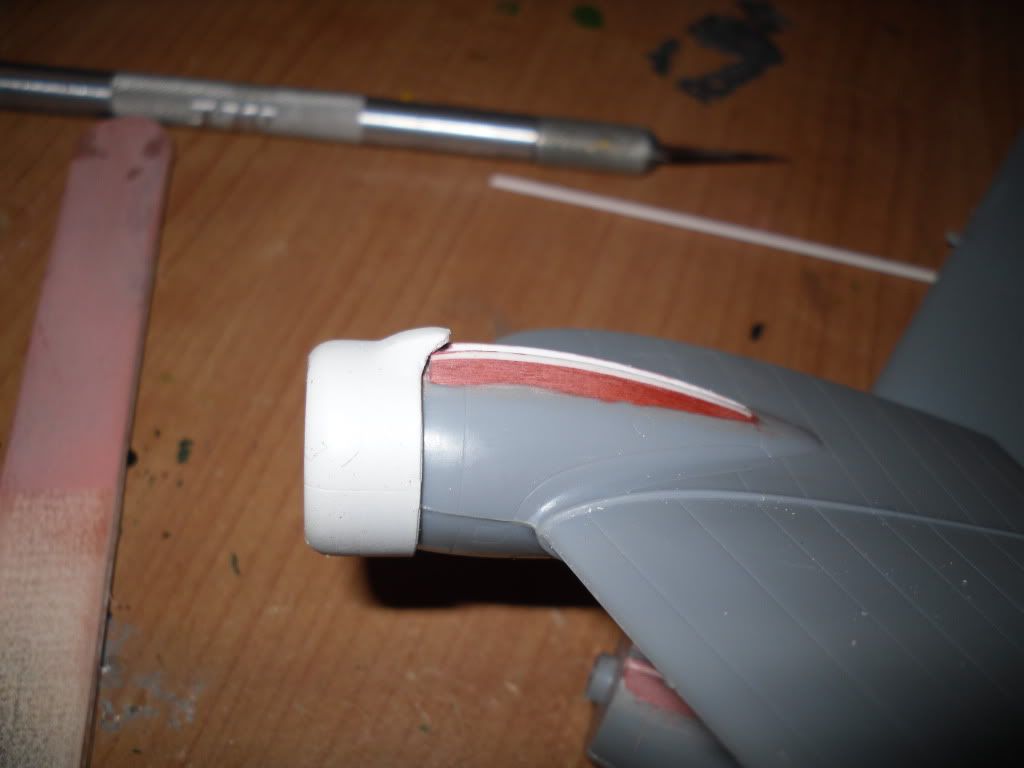
I modified the top of each cowl where the exhaust stack comes out. Here's the original and the first modified one in primer.
Image


Image


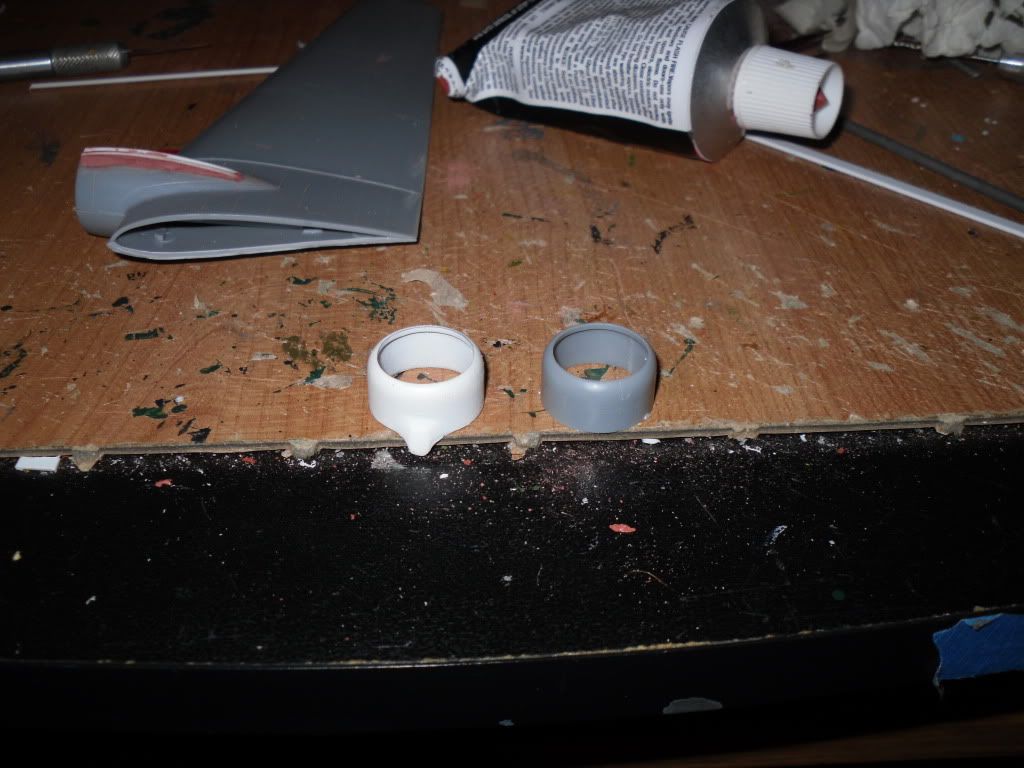
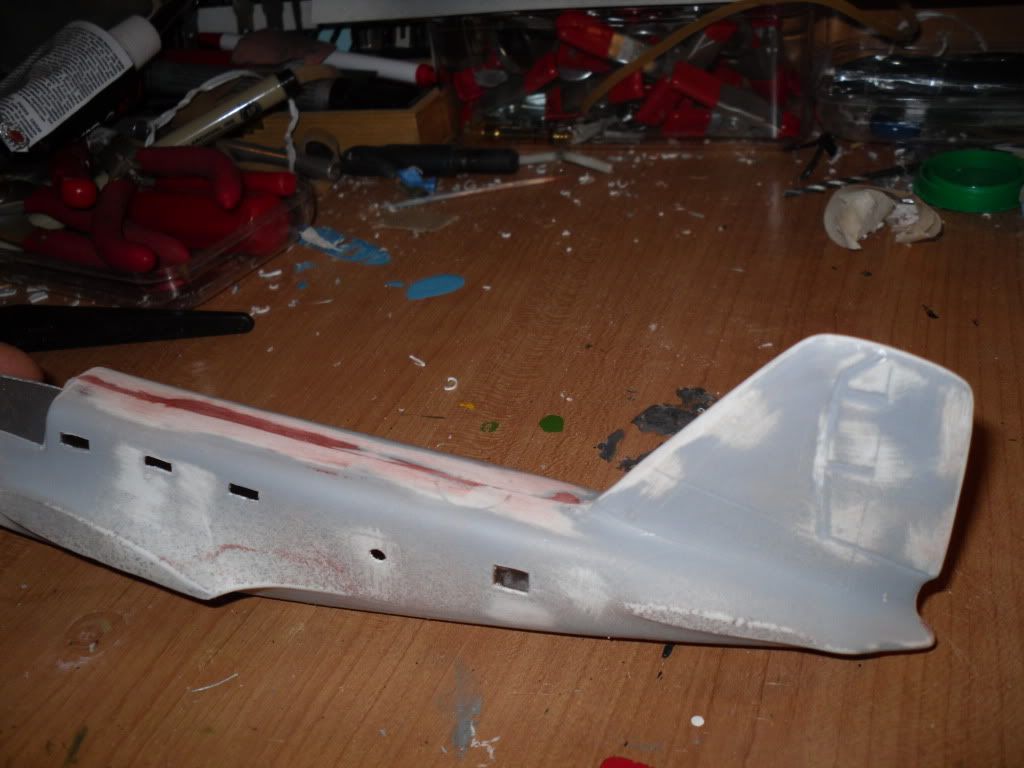
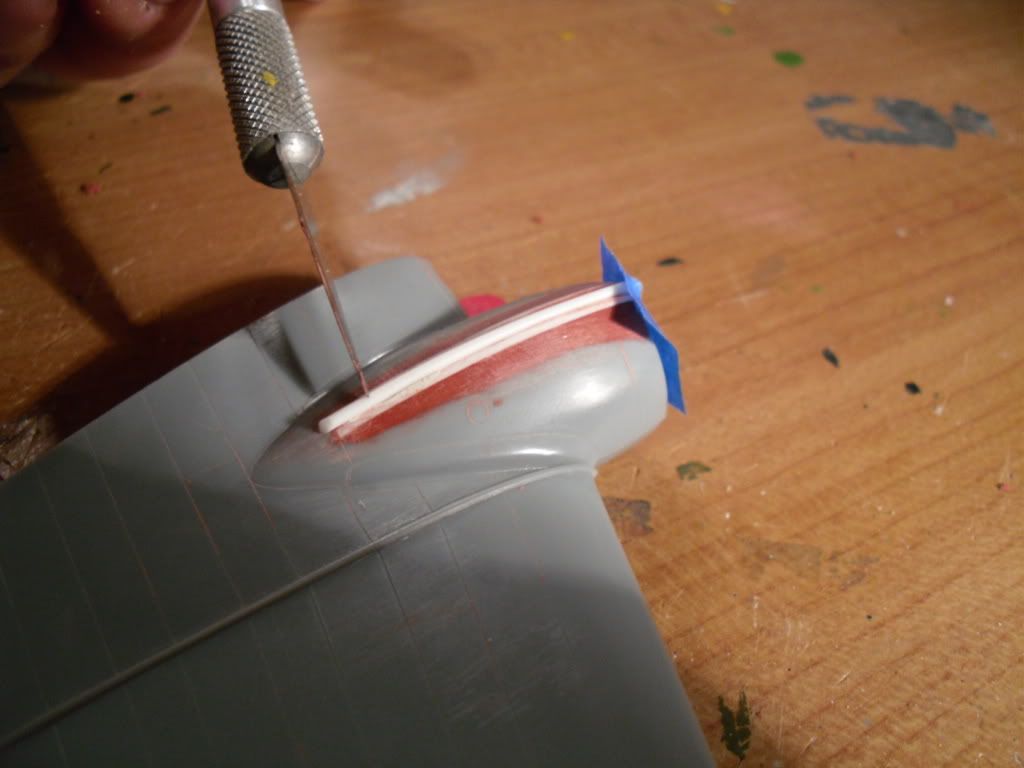
The thickness of the wing roots on the fuselage was thicker than the wings, and the wingspan was a little short of correct 1/72 scale. I added some material to the roots, which added to the span and allowed me to blend the wing into the fuselage. Here it is in the rough stage.
Image


Here it is finished.
Image


Starting to come together.
Image


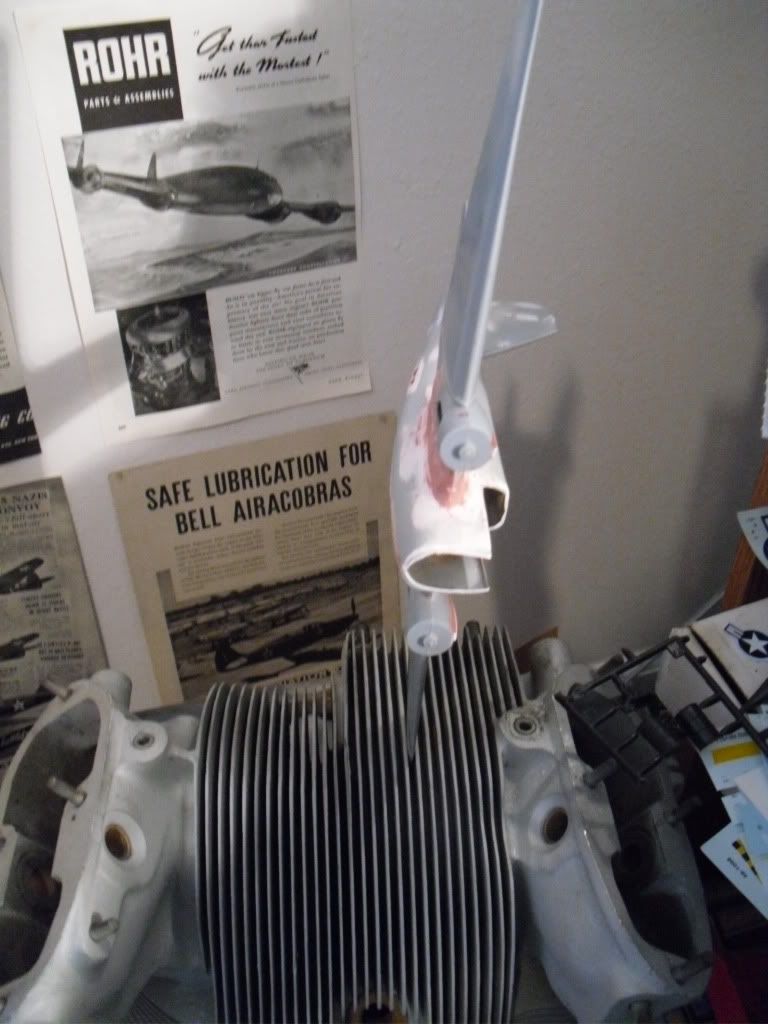
What's the best way to hold a drying wing vertical? A B-25 cylinder!
Image


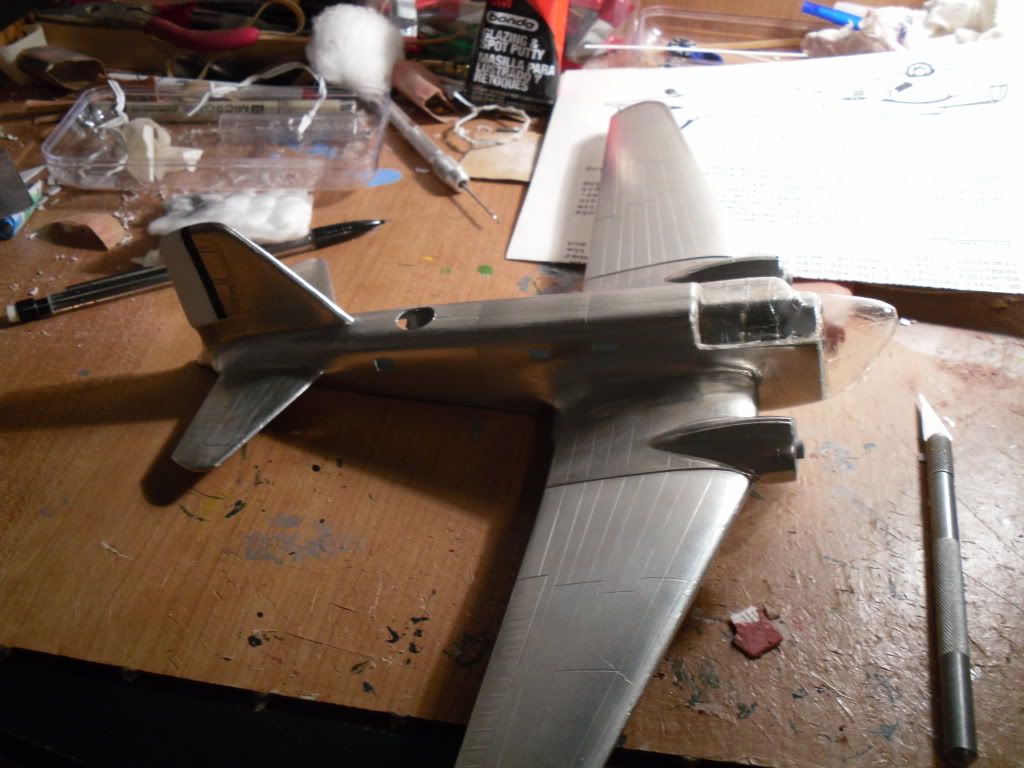
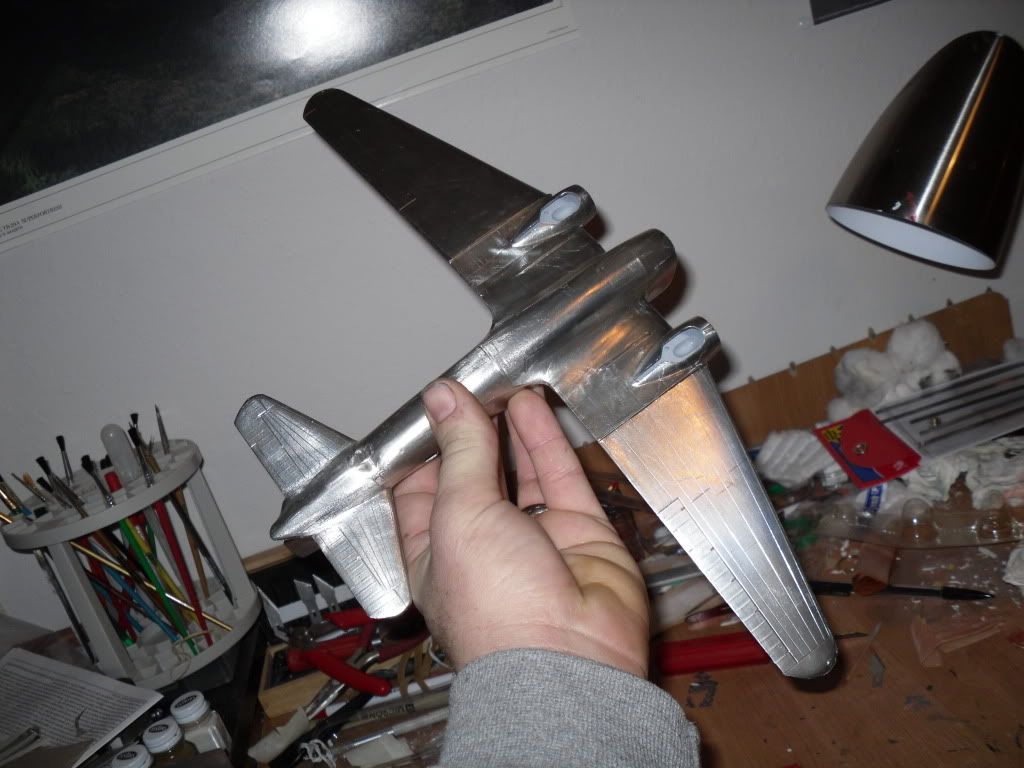
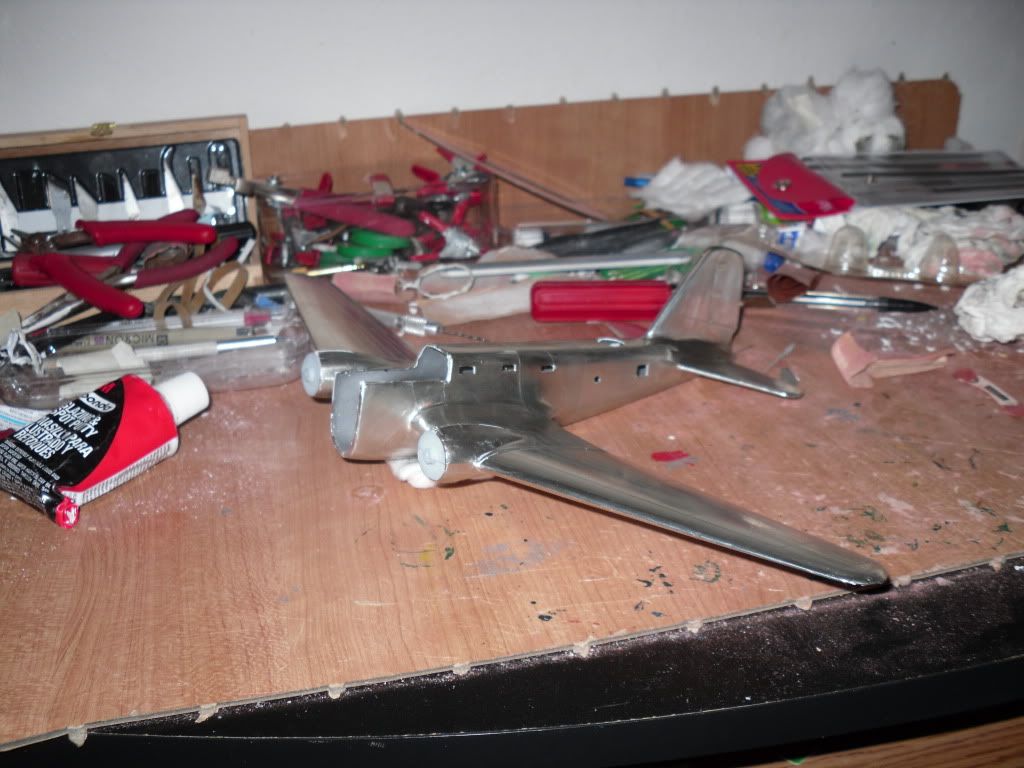
An entire weekend worth of foiling.

Image


Image


Image


The engines are painted up, the yellow and black checkered cowls are partially painted, and tonight I finished up attaching the nose and cockpit glass. I started painting the rudder stripes this weekend but after a full day of trying to revive my red paint a chunk plugged my airbrush and I dumped the rest of the jar in the garbage. This weekend I hope to get the stripes painted, the framing on all the glass foiled, and try to get back to painting the black checkers on the cowls. I'll keep this thread updated when I have decent progress to report.

_________________
Image


Last edited by WIXerGreg on Mon May 23, 2011 5:26 pm, edited 2 times in total.

Top
 Profile  
 
 Post subject: Re: 1/72 B-18 Bolo
PostPosted: Wed Apr 20, 2011 10:53 pm 
Offline

Joined: Mon Oct 13, 2008 1:49 pm
Posts: 116
Location: Newcastle, Australia
:D, G'day Greg,
That's a nice looking model you're building there. I'd always thought the B-18 was a bomber version of the DC-3/C-47 series aircraft but from what you've posted it seems like a hybrid of the DC-2 and the DC-3. Is this correct? To my eye it actually looks as though it may have been more DC-2 than DC-3 with a new fuselage. Again am I correct in thinking this? Anyway, good to see your work on this project. More power to your arm and inspiration and motivation to your mind and thank you for sharing your work so far.

Cheers,
Ross.


Top
 Profile  
 
 Post subject: Re: 1/72 B-18 Bolo
PostPosted: Wed Apr 20, 2011 11:13 pm 
Offline
User avatar

Joined: Sun Jun 07, 2009 1:13 pm
Posts: 671
Location: Indiana
Hi Ross!

You're correct in your thinking. The B-18 basically used the DC-2 wings with a newly designed bomber fuselage. Borrowed from the Boeing site:

Quote:
The twin-engine B-18 Bolo was the first Douglas medium bomber. It was a combat version of the DC-2 commercial transport, absorbed punishment well and was especially useful during the early days of World War II.

The prototype (Douglas Bomber 1 or DB-1), finished in 1935, was designed around the DC-2's wings, but had a deeper and fatter fuselage with a bomb bay under its center section. The single DB-1 later was used to test the firing of large cannons from an aircraft.

Douglas produced 370 of the production model B-18 Bolos, and their availability during the late 1930s allowed the Air Corps to train bomber crews. The B-18 Bolos made up most of the bombers deployed outside the country as the United States entered World War II.

B-18 Bolos were used for anti-submarine operations in American and Caribbean waters and as trainers and transports. Twenty served as general reconnaissance bombers with the Royal Canadian Air Force as Digby Mk1s.

In November 1938, Douglas used the stronger wings of the DC-3, a new and better streamlined fuselage, and large fin and rudder for the Bolo's successor -- the B-23 Dragon. The first of 38 B-23 Dragons built flew July 27, 1939. The 26,500-pound B-23 bomber incorporated the first tail turret installed in an Air Corps bomber and was powered by two 1,600-horsepower Wright R-2600-3 engines. Following the war, many Dragons were adapted as corporate aircraft.

_________________
Image


Top
 Profile  
 
 Post subject: Re: 1/72 B-18 Bolo
PostPosted: Thu Apr 21, 2011 11:08 am 
Offline
3000+ Post Club
3000+ Post Club
User avatar

Joined: Thu Sep 28, 2006 12:56 pm
Posts: 3442
Location: North of Texas, South of Kansas
Looking good, Greg!

I like the markings choice--the Y1B-17 will be from the 38th Recon Squadron as well.

Scott


Top
 Profile  
 
 Post subject: Re: 1/72 B-18 Bolo
PostPosted: Thu Apr 21, 2011 11:27 am 
Offline
Account Suspended
User avatar

Joined: Wed Nov 14, 2007 3:06 pm
Posts: 2713
Awesome.., but one question.

Why did you foil it before you completed it with the fuselage forward?

Will you not have to 'blend' the two parts and destroy your foiling?

Looks awesome!!

I was trying to understand the clear method to your madness! :wink: :drinkers:

_________________
S.


Top
 Profile  
 
 Post subject: Re: 1/72 B-18 Bolo
PostPosted: Thu Apr 21, 2011 11:38 am 
Offline
User avatar

Joined: Sun Jun 07, 2009 1:13 pm
Posts: 671
Location: Indiana
Thanks guys!

the330thbg wrote:
Awesome.., but one question.

Why did you foil it before you completed it with the fuselage forward?

Will you not have to 'blend' the two parts and destroy your foiling?

Looks awesome!!

I was trying to understand the clear method to your madness! :wink: :drinkers:


Hmmm.....Lack of plannning? Lack of skill? :lol: I think I'll be ok though. The rest of the nose is made up of clear vacuform, which I've gotten attached now. I've blended the seam from the fuselage to the vacuform pretty well with Krystal Klear and then I'll foil over it and overlap the joints a little bit, which I hope to have done this weekend. I would have posted this picture last night but Photobucket was still having problems.

Image

_________________
Image


Top
 Profile  
 
 Post subject: Re: 1/72 B-18 Bolo
PostPosted: Thu Apr 21, 2011 12:29 pm 
Offline
Account Suspended
User avatar

Joined: Wed Nov 14, 2007 3:06 pm
Posts: 2713
Awesome!!! :drinkers:

Always loved the Bolo!
Image

Always wanted to see her in 1:48th!

Maybe "Wingscale" will be pushing out a 1:32nd Scale? LOL!

_________________
S.


Top
 Profile  
 
 Post subject: Re: 1/72 B-18 Bolo
PostPosted: Thu Apr 21, 2011 4:55 pm 
Offline
1000+ Posts!
1000+ Posts!
User avatar

Joined: Wed Sep 12, 2007 5:27 am
Posts: 1531
Location: Serbia
Huge work but I think the result will be great!

_________________
Owner: http://www.letletlet-warplanes.com
Owner: http://www.letletlet-warplanes.com/forum
Owner: http://www.sreckobradic.com
Email: srecko.warplane@gmail.com
Skype: sreckobradic
Facebook http://www.facebook.com/pages/LetLetLet ... 8234397758


Top
 Profile  
 
 Post subject: Re: 1/72 B-18 Bolo
PostPosted: Thu Apr 21, 2011 7:44 pm 
Offline
3000+ Post Club
3000+ Post Club
User avatar

Joined: Sun Nov 07, 2004 2:02 am
Posts: 4695
Location: Yucca Valley, CA
Belated response (sorry) but great job, Greg!

Now I'm beginning to remember why I never finished that one... back in 1980 there were no DC-2 kits to cannibalize. And I love the picture of it stuck in the B-25 cylinder - at that angle it looks like the photo of the B-18 stuck on a precipice in Hawaii - missing nose and all.

Don't forget - the dorsal turret in the NMUSAF example is from a straight B-18, not a B-18A.

_________________
Image
All right, Mister Dorfmann, start pullin'!
Pilot: "Flap switch works hard in down position."
Mechanic: "Flap switch checked OK. Pilot needs more P.T." - Flight report, TB-17G 42-102875 (Hobbs AAF)


Top
 Profile  
 
 Post subject: Re: 1/72 B-18 Bolo
PostPosted: Fri Apr 22, 2011 12:54 pm 
Offline
User avatar

Joined: Thu Jun 14, 2007 9:10 am
Posts: 869
Location: Littleton,Colorado
Here are a few B-18 Bolo pictures I have taken over the past few years at this link.
http://www.flickr.com/photos/bluedharma/sets/72157626552954114/

Pictures below are of the Bolo (39-25) at the Wings over the Rockies Museum.

Image

Image

Image

_________________
Live the Good Life
Bluedharma
http://flickr.com/photos/bluedharma/
http://www.airport-data.com/photographe ... arma;1045/
bluedharmawix@gmail.com
Image


Top
 Profile  
 
 Post subject: Re: 1/72 B-18 Bolo
PostPosted: Fri Apr 22, 2011 2:16 pm 
Offline
Long Time Member
Long Time Member

Joined: Sat Dec 22, 2007 12:36 am
Posts: 7961
Location: Mt. Vernon, WA.
Wonderful job! I love it when conversions are done with thought, grunt, and sweat, not just 'shake the box'. Has the question crossed your mind yet as 'what in the heck am I gonna do with an expensive but useless DC-2 fuselage'? And you've got more determination than I do to mess with BARE METAL FOIL.

_________________
Don't make me go get my flying monkeys-


Top
 Profile  
 
 Post subject: Re: 1/72 B-18 Bolo
PostPosted: Fri Apr 22, 2011 2:32 pm 
Offline
3000+ Post Club
3000+ Post Club
User avatar

Joined: Thu Apr 27, 2006 2:10 pm
Posts: 3245
Location: New York
Impressive project!

I'm already jealous of your end result. Have wanted a Digby on my shelf for years, but wouldn't put in the effort. You'll have earned your reward!

August


Top
 Profile  
 
 Post subject: Re: 1/72 B-18 Bolo
PostPosted: Sun Apr 24, 2011 5:29 am 
Offline
3000+ Post Club
3000+ Post Club

Joined: Thu Dec 21, 2006 8:32 am
Posts: 4324
Location: Battle Creek, MI
Quote:
Has the question crossed your mind yet as 'what in the heck am I gonna do with an expensive but useless DC-2 fuselage?

You could always combine it with a set of C-47 wings and tailplanes and make a C-39.

http://www.nationalmuseum.af.mil/factsheets/factsheet.asp?id=3303

From the NMUSAF website:

Quote:
The C-39 was a mixture of DC-2, DC-3 and military specific parts and assemblies. The plane used a basic DC-2 forward and center fuselage section mated to a DC-3 style aft fuselage and tail. The wing consisted of a DC-3 center section and DC-2 outboard wings. The landing gear was based on the design developed for the Douglas B-18 bomber. Because the C-39 was essentially a hybrid of DC-2 and DC-3 assemblies, it was unofficially known as the DC-2½.


SN


Top
 Profile  
 
 Post subject: Re: 1/72 B-18 Bolo
PostPosted: Mon Apr 25, 2011 11:44 am 
Offline
User avatar

Joined: Sun Jun 07, 2009 1:13 pm
Posts: 671
Location: Indiana
Thanks for all the pictures and kind words guys. A little encouragement goes a long way!

I don't know what I'm going to do with the expensive DC-2 fuselage yet (I paid $40 for the kit). If I put it in the stash it might just sit there forever. I thought about throwing it on eBay and let somebody get some use out of it. Now Steve's got me thinking about a C-39 though!

I got the nose foiled up this weekend with less than desired results. My red paint showed up so I was able to finish the rudder stripes. They need to be touched up in a few spots but overall I was pretty happy with the way the rudder turned out.

Image

_________________
Image


Top
 Profile  
 
 Post subject: Re: 1/72 B-18 Bolo
PostPosted: Mon Apr 25, 2011 1:43 pm 
Offline
Long Time Member
Long Time Member

Joined: Sat Dec 22, 2007 12:36 am
Posts: 7961
Location: Mt. Vernon, WA.
Lots of blending with either thinned blue glazing putty and sand like you were milking a nervous tiger with a MICRO-MESH kit, or try good old ELMERS white glue to blend the two together layer by layer. Still lookin' good!

_________________
Don't make me go get my flying monkeys-


Top
 Profile  
 
Display posts from previous:  Sort by  
Post new topic Reply to topic  [ 33 posts ]  Go to page 1, 2, 3  Next

All times are UTC - 5 hours


Who is online

Users browsing this forum: No registered users and 7 guests


You cannot post new topics in this forum
You cannot reply to topics in this forum
You cannot edit your posts in this forum
You cannot delete your posts in this forum
You cannot post attachments in this forum

Search for:
Jump to:  
Powered by phpBB® Forum Software © phpBB Group