Mon Jan 19, 2009 7:24 pm
Very nice engines! I did something similar for my 1/72 B-17C project..I used the engine from the Hasegawa SBD as a master and cast my own replacements. Are you modifying the kit cowls, or making new ones?
As for the "stripes" on the finished Y1B-17, I think that's just the builder's attempt to portray variations in finish on the different panels.
SN
As for the "stripes" on the finished Y1B-17, I think that's just the builder's attempt to portray variations in finish on the different panels.
SN
Wed Jan 21, 2009 1:18 am
Steve, I'm going to modify the kit cowlings. I am still in the planning stages of that little project. I think I'm going to resin cast them so I don't have to make four of everything. The nacelles have turned out to need a lot more work than I'd originally thought they would, what with lengthening the outboards and shortening the inboards. I may as well build some firewalls while I'm in there, and I still have to do the interior of the inboards like you've done on your project.
Scott
Scott
Wed Jan 28, 2009 1:05 am
I've been tinkering with some more of the wing modifications the last few days. It's been too cold and icy outside to get anything done, so the model room has seen some activity.
Here are a couple of shots of the nacelle mods on the right-hand wing. The inboard nacelle has to be shortened a good bit and the outboard needs to be longer. As I was researching the nacelle structure I was amazed at how different the internal details are on the YBs. There is a truss assembly, unlike anything a later Fort has, that is the primary structure. The engine basket bolts directly to this truss, and all the sheet metal attaches to this framework.
Notice the difference in length between the G and YB nacelles. The prop arcs are pretty close on the YB by comparison.

Here is the beginning of the firewall construction and the beveled nacelle front lip that took the place of the later cowl flaps. I still have to detail the inboard nacelle interior (there isn't an oil tank in the nacelle in the YB--the oil tanks were in the leading edge of the wing) and build the flap well structure so I can glue the right wing together.

Scott
Here are a couple of shots of the nacelle mods on the right-hand wing. The inboard nacelle has to be shortened a good bit and the outboard needs to be longer. As I was researching the nacelle structure I was amazed at how different the internal details are on the YBs. There is a truss assembly, unlike anything a later Fort has, that is the primary structure. The engine basket bolts directly to this truss, and all the sheet metal attaches to this framework.
Notice the difference in length between the G and YB nacelles. The prop arcs are pretty close on the YB by comparison.
Here is the beginning of the firewall construction and the beveled nacelle front lip that took the place of the later cowl flaps. I still have to detail the inboard nacelle interior (there isn't an oil tank in the nacelle in the YB--the oil tanks were in the leading edge of the wing) and build the flap well structure so I can glue the right wing together.
Scott
Sat Feb 07, 2009 11:49 pm
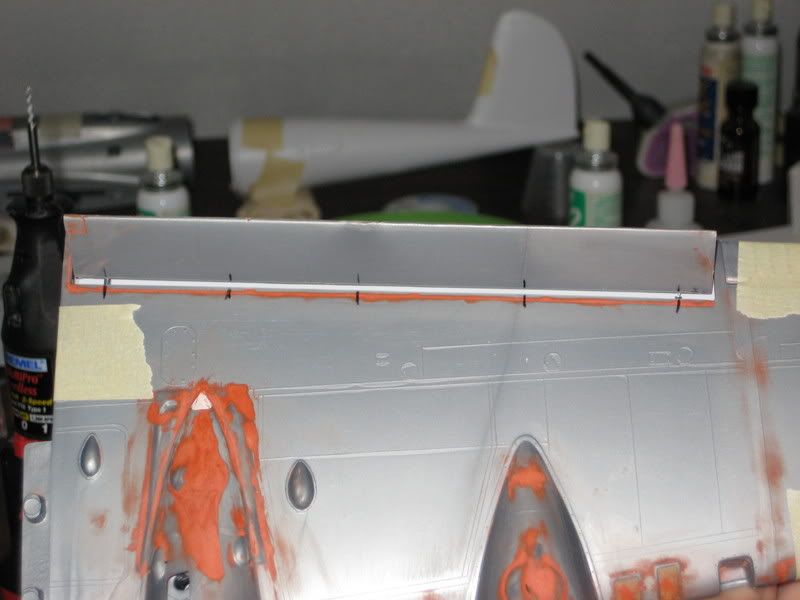
I haven't done a lot on this project lately, but I did figure out the flaps and flap wells recently. The flaps on the YB were fabric covered with no exposed ribs, so making them was quite simple. I was able to make an upper fairing and added this to the material cut from the lower wing. The flap wells in the wing are quite simple as well--there is a sheetmetal fairing that screws to the ribs to close out the well from the aft wing structure on the real thing, so I replicated this with sheet styrene. I still have to finish making the flap actuating rods and hangars, but that is a simple process.
Initial fitting of the flap well fairing:
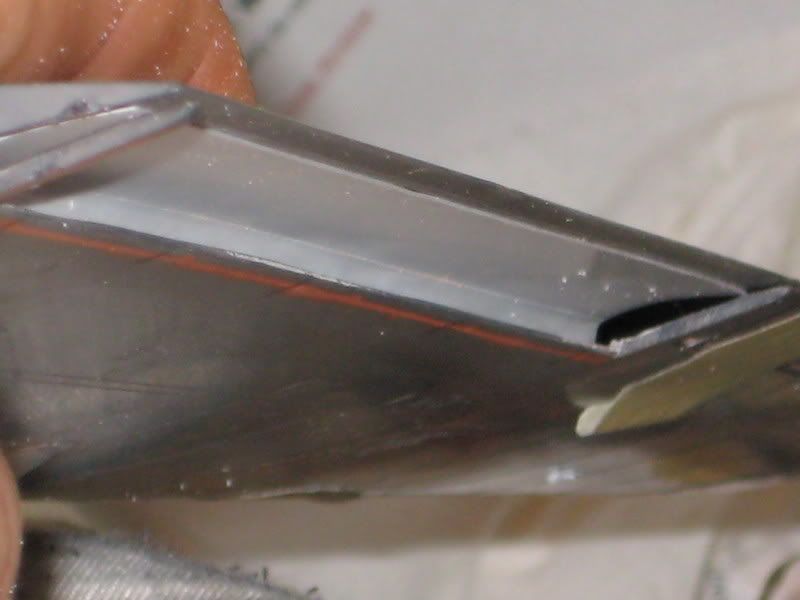
Flap slid into place:
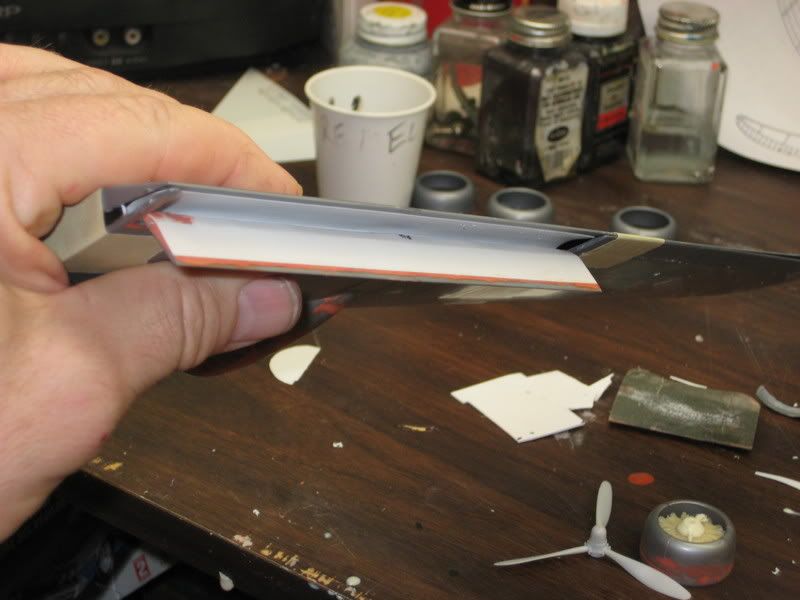
Underside view of the assembly:
I also managed to cast a set of engines and the tire/wheel assemblies.
Scott
Initial fitting of the flap well fairing:
Flap slid into place:
Underside view of the assembly:
I also managed to cast a set of engines and the tire/wheel assemblies.
Scott
Sun Feb 08, 2009 12:19 am
Interesting progress you are making on this project. Should look killer when completed.
By the way, I was looking at that 1/72nd scale on page 2 or 3. Did you notice that the tires appeared to be over inflated. I think it would have lost points on that.
By the way, I was looking at that 1/72nd scale on page 2 or 3. Did you notice that the tires appeared to be over inflated. I think it would have lost points on that.
Sun Feb 08, 2009 12:55 am
I was looking at that 1/72nd scale on page 2 or 3. Did you notice that the tires appeared to be over inflated.
Yeah, I noticed he didn't flatten the bottom of his tires. I always sand the bottom of the tire a bit to give it a "weighted" look. I'm planning to use True Details resin wheels on my B-17C, but I sanded down the overly bulged sides. Unfortunately, True Details always overdoes the side bulge, making the tires look about half flat.
Coming along nicely, Scott..keep us posted!
SN
Sun Feb 08, 2009 8:58 am
The Academy tires are kind of square--I'll use your idea with the True Details set whenever I find my 1/72 kit. Here's how I did the tires for this airplane:
First I had to find a Revell tire in my spare parts boxes, which wasn't as easy as I had thought . Then I sanded off all the tread that I could and used filler to make the surface completely smooth.
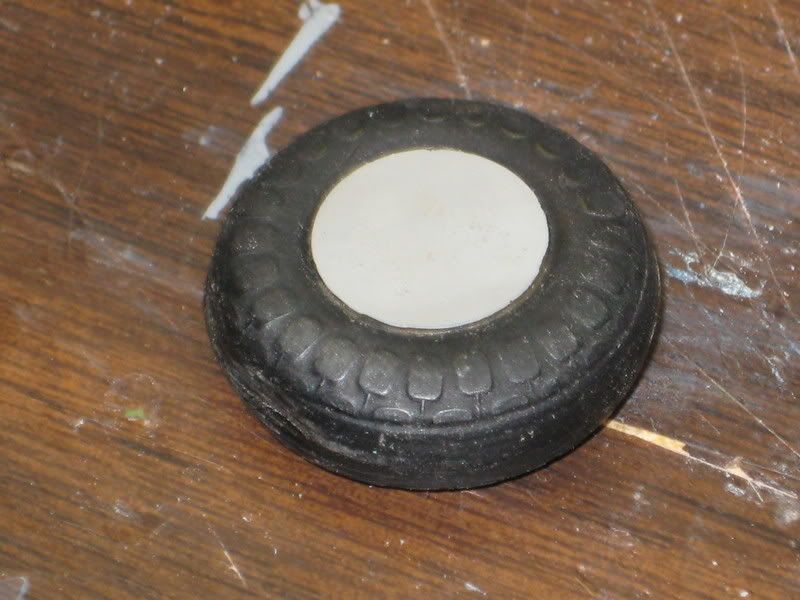
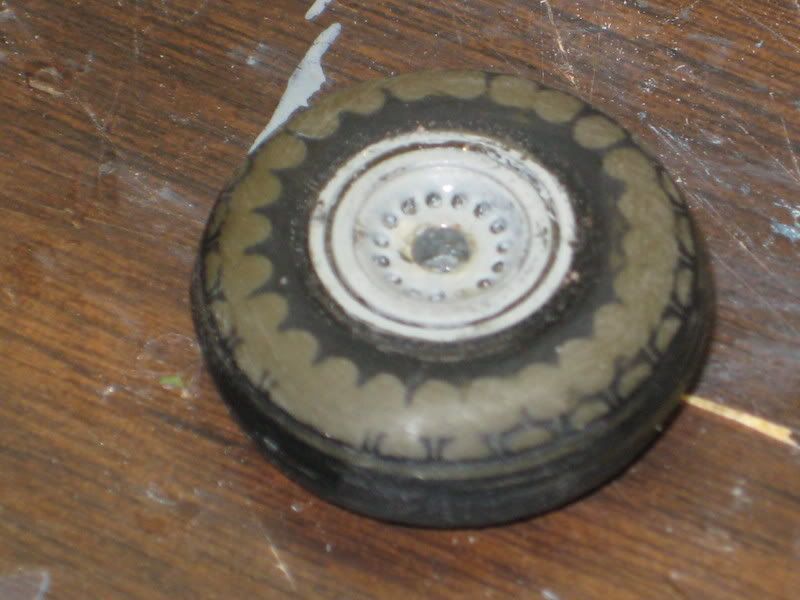
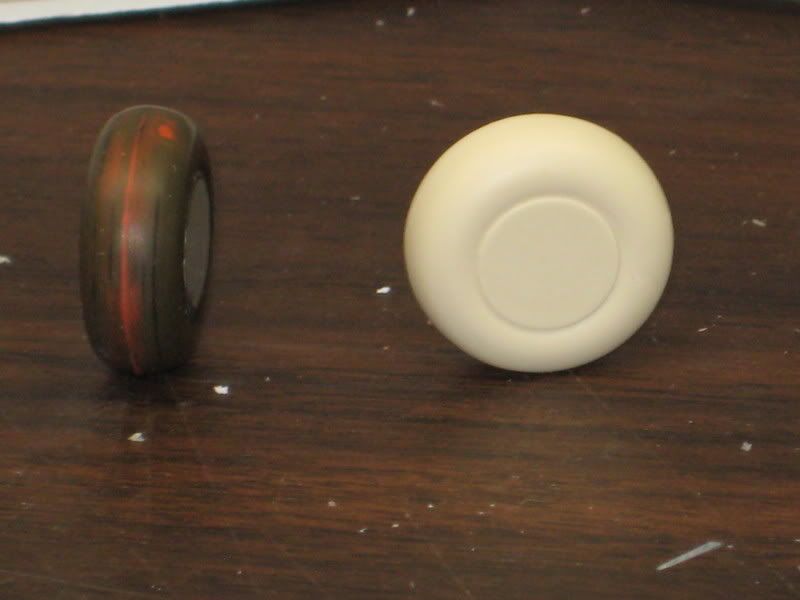
This old tire was already slightly pre-flattened by my early method of heating up a flat screwdriver tip and setting the tire on it.
All I had to do then was make a mold and cast the new tires. I still have to build the backing plate that was used with the pneumatic brake set-up used on these early airplanes.
S
First I had to find a Revell tire in my spare parts boxes, which wasn't as easy as I had thought
This old tire was already slightly pre-flattened by my early method of heating up a flat screwdriver tip and setting the tire on it.
All I had to do then was make a mold and cast the new tires. I still have to build the backing plate that was used with the pneumatic brake set-up used on these early airplanes.
S
Sun Mar 01, 2009 1:08 am
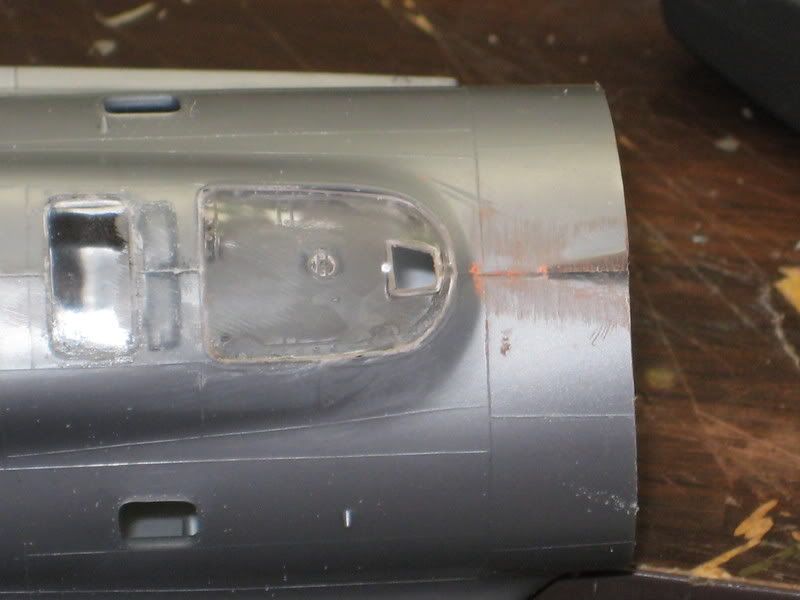
The bombardier station has been a question mark since I first contemplated doing this conversion. Tonight I decided to just hack away with the grinder and some styrene....I think what I came up with will work with a little fine-tuning. The first photo is what's left after I removed the chin turret fairing from the forward fuselage.

The G fuselage really works pretty well to build the YB because the new bombardier sighting cutout goes exactly where the chin turret was.
This is the plug that I came up with. It still needs some adjusting before I glue it down, but you get the general idea of how it will look.

Figuring out how to get the correct window size and shape by adjusting the two side fairings was more of a challenge than I thought it would be.
Scott
The G fuselage really works pretty well to build the YB because the new bombardier sighting cutout goes exactly where the chin turret was.
This is the plug that I came up with. It still needs some adjusting before I glue it down, but you get the general idea of how it will look.
Figuring out how to get the correct window size and shape by adjusting the two side fairings was more of a challenge than I thought it would be.
Scott
Mon Mar 09, 2009 12:25 am
I made small progress on the center section of the fuselage this weekend. I wanted to get the radio room turtledeck fairing rearranged so that I can get to work on the vacuform masters for the four gun blisters. I started by gluing the kit clear parts in the radio hatch and filing off the wind deflector:
After the glue had dried I marked and rough-cut the opening for the new blister. It's hard to see from the photo, but the aft end of the turtledeck had to be narrowed up to represent the YB-17 configuration. I used files and the Dremel to recontour the fairing. Once I was satisfied I laid on some bondo to finish the area:
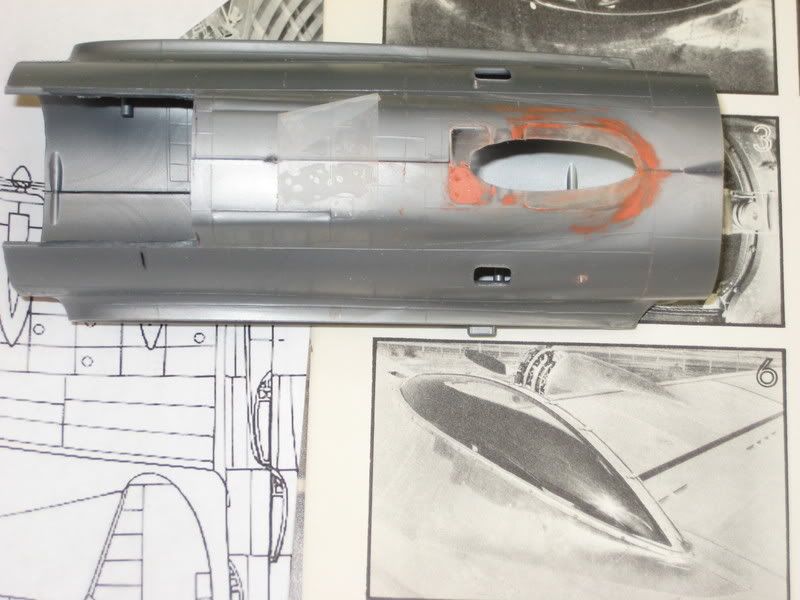
Now that I have the basic structure in place I will be able to whittle a master for the gun blisters. These are one of the neater design features of the early Fortress--you can see the radio room blister that was used on the B-17B in the second photo.
This is really turning into a much larger project than I originally contemplated. All the fuselage bulkheads have to be modified to fit correctly and the bomb bay is going to be a real head scratcher. I almost wish I hadn't decided on open bomb bay doors, but I'm committed.
Scott
After the glue had dried I marked and rough-cut the opening for the new blister. It's hard to see from the photo, but the aft end of the turtledeck had to be narrowed up to represent the YB-17 configuration. I used files and the Dremel to recontour the fairing. Once I was satisfied I laid on some bondo to finish the area:
Now that I have the basic structure in place I will be able to whittle a master for the gun blisters. These are one of the neater design features of the early Fortress--you can see the radio room blister that was used on the B-17B in the second photo.
This is really turning into a much larger project than I originally contemplated. All the fuselage bulkheads have to be modified to fit correctly and the bomb bay is going to be a real head scratcher. I almost wish I hadn't decided on open bomb bay doors, but I'm committed.
Scott
Wed Mar 11, 2009 1:29 pm
Looking good Scott.
When you say "bondo" do you mean actual Bondo? Or just filler?
If you're using actual Bondo, you might have better luck using glazing compound. It sands alot easier and is for filling pin holes when doing bodywork.
When you say "bondo" do you mean actual Bondo? Or just filler?
If you're using actual Bondo, you might have better luck using glazing compound. It sands alot easier and is for filling pin holes when doing bodywork.
Wed Mar 11, 2009 7:49 pm
Yeah, I used the generic term. It's really just spot filler. Works good on these little projects. On the subject of glazing compound and pinholes, I once volunteered to help a guy on his Long EZ project. I don't think there was a square inch of that airplane that didn't need help. One day of that stuff in 100 degree July was enough.
Scott
Scott
Tue Mar 17, 2009 2:35 pm
I saw a B-17C kit several years back. 1:72.., I think it was an 'Academy' kit. Looked really nice!
Tue Mar 17, 2009 5:12 pm
Not that you need any help or assistance!!! Yours looks amazing!!!
Wed Mar 18, 2009 1:17 pm
Steve Nelson is building a 1/72nd scale B-17C on this thread, Smis:
http://warbirdinformationexchange.org/p ... hp?t=26920
That is a nice kit with just a few little drawbacks that Steve is rectifying on his project.
And if you haven't already gotten one, the 1/72nd scale Academy B-29 would make a nice model to do a 330th Group bird.
Scott
http://warbirdinformationexchange.org/p ... hp?t=26920
That is a nice kit with just a few little drawbacks that Steve is rectifying on his project.
And if you haven't already gotten one, the 1/72nd scale Academy B-29 would make a nice model to do a 330th Group bird.
Scott