Scramble at Haleiwa - 1/144th Diorama
Tue Oct 27, 2015 1:07 pm
So I decided (since I already have so many other unfinished 1/144th projects and dioramas) that, why not add another one onto the pile!? So I did!
The concept is simple: Scramble at Haleiwa!
This is the moment I am trying to depict. BUT not the exact scene we saw in either Tora, Tora, Tora, OR Pearl Harbor. I am attempting to depict, as accurately as possible, the real setting and exact type of aircraft. The diorama will consist of three aircraft:
P-40B x2
P-36 x1
I'm still waiting on the newly released AFV P-40B/C kit to use for the P-40s. I do own a few Bandai P-40B/Cs which would be more than appropriate to use, however they are fairly expensive ($35-$40 each!) and would require some reworking. With the new AFV kit, I'd feel much better about cutting into one of these kits which appear to have excellent lines. And their only $7-$10 each!
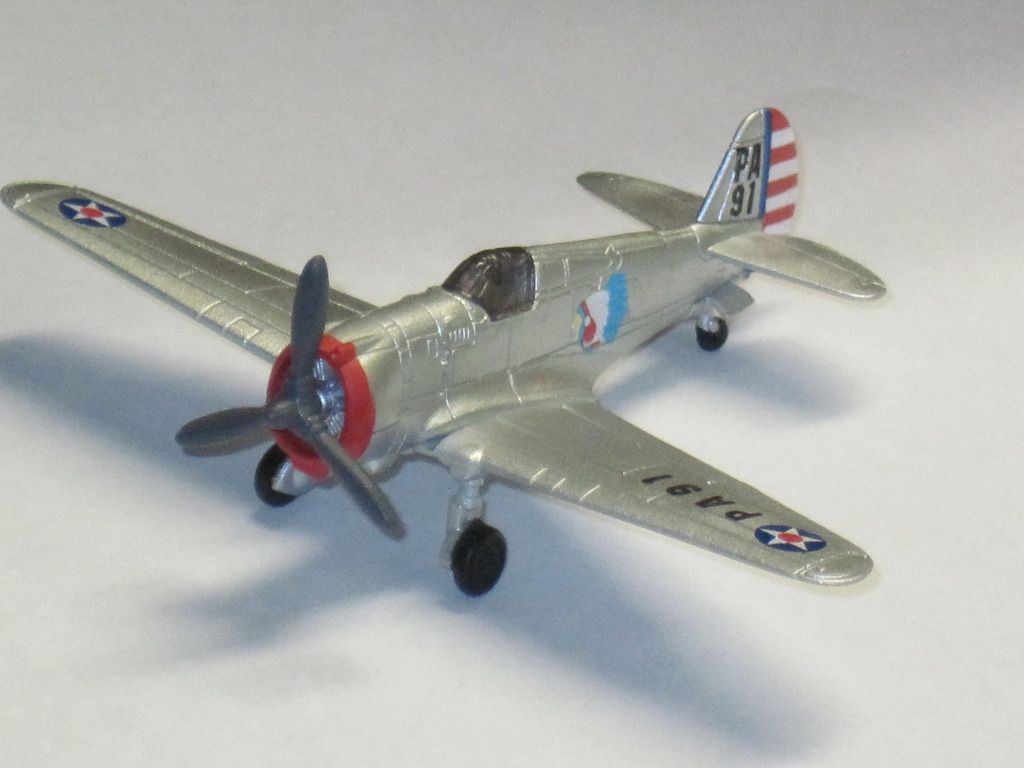
So all I have to work with right now is the P-36. The only decent P-36 in 1/144th scale is the Furuta Choco Egg example. This company makes many different aircraft in a variety of sizes that you have to assemble as they all come partially disassembled in a plastic (egg). We found this P-36 to actually be 1/144 scale though. Here are some pics of an "out of the egg" P-36! Pretty ugly in some places but the necessities are there!
I already did some dremel tool work on the P-36, hollowing out the cockpit and engine compartment. I decided to hand off the P-36 project to my dad since he was interested in helping. And ya know, since he's a master modeler and all.... This allowed me to work on a bigger part of the project... the diorama base itself.
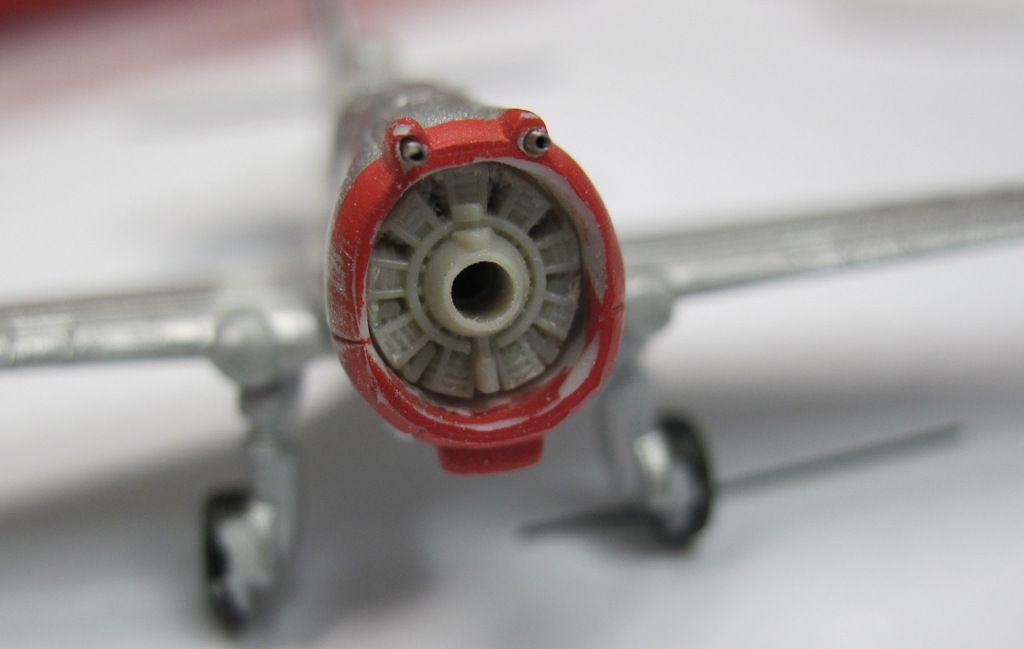
He ended up finding the perfect replacement engine and prop from an F-TOYS Wildcat.

He cleaned it up so that the wings and tail section fit as tight as he could get it. Then added some super glue to the wing root to fill the small gap and also to the fairings for the landing gear. They were flat where they should have a round appearance.

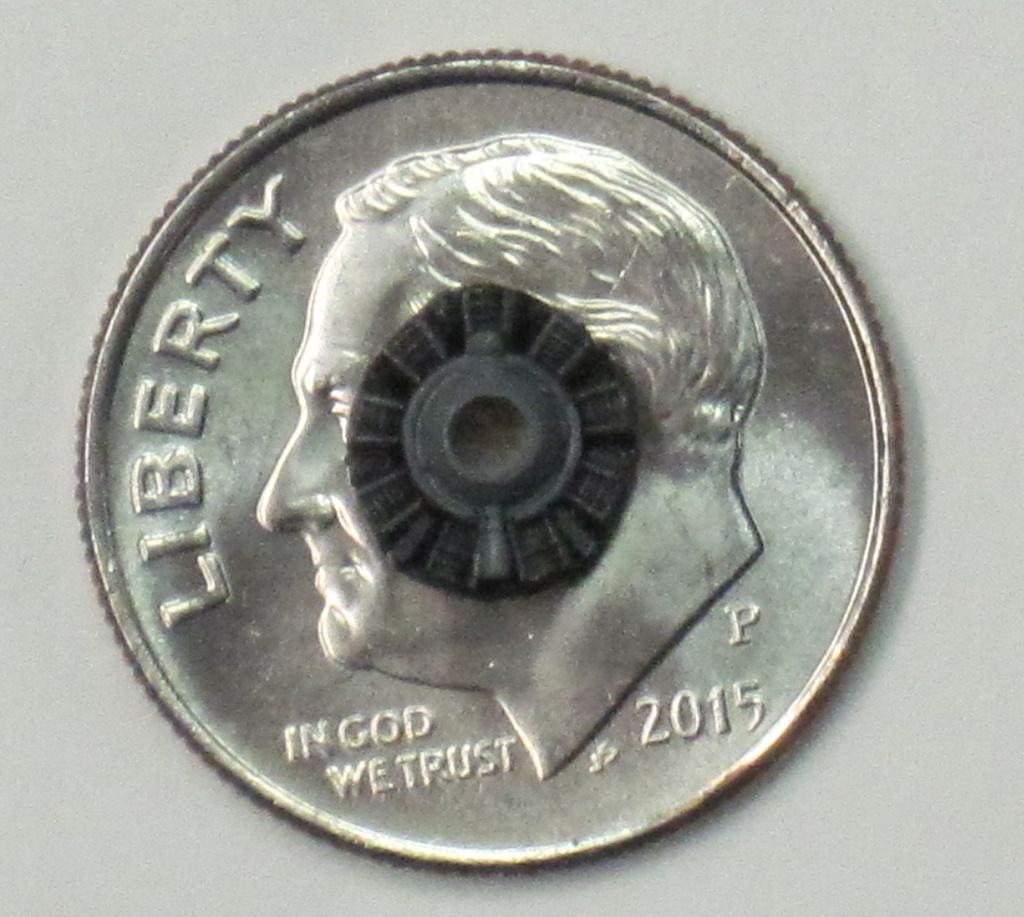
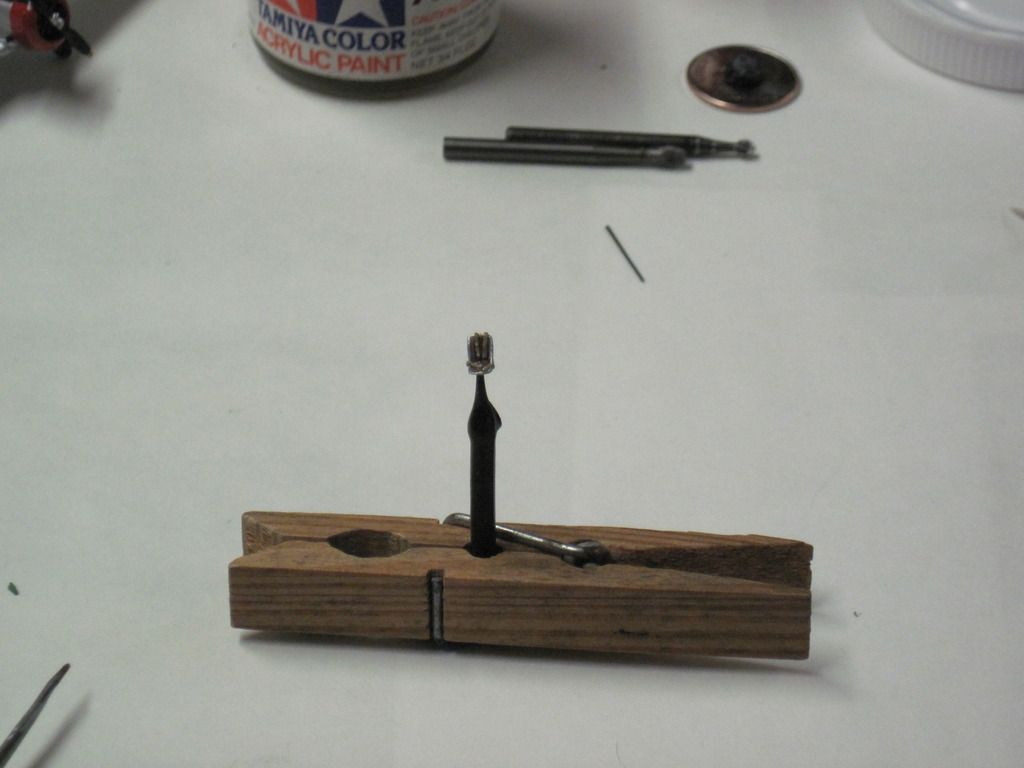
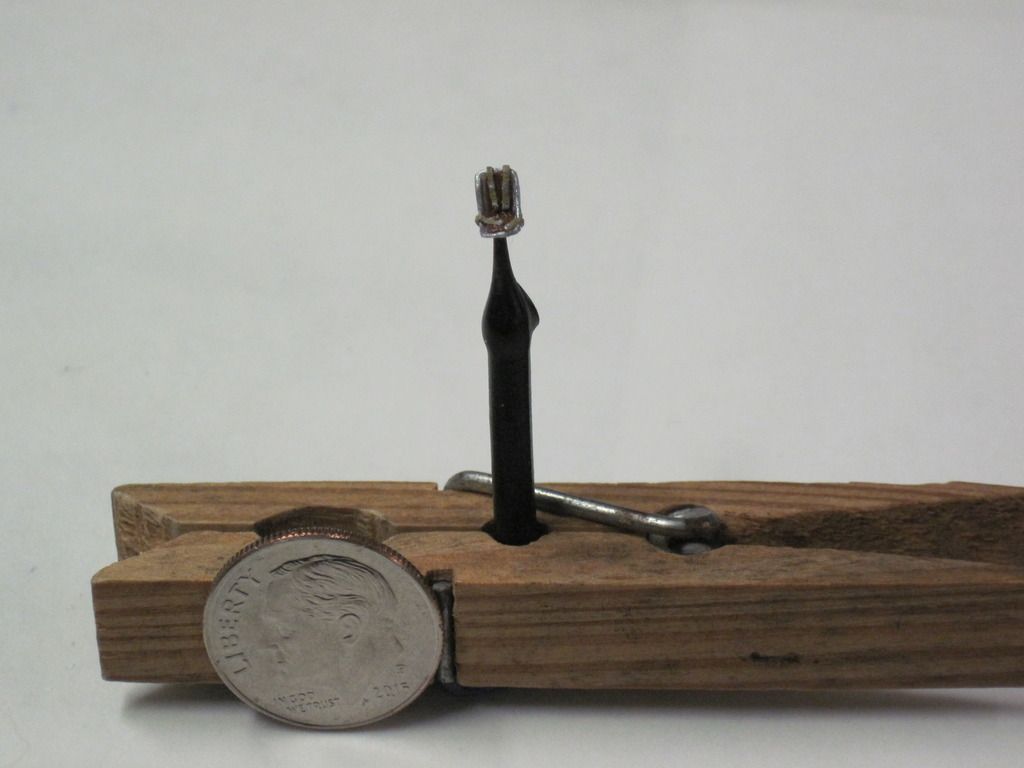
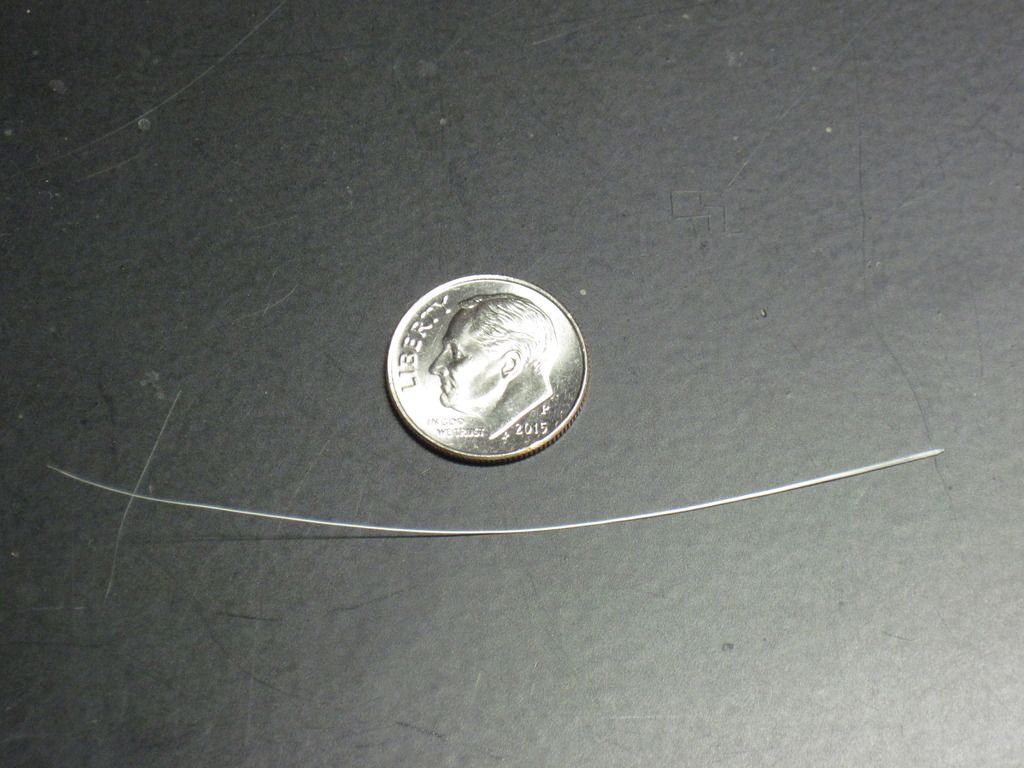
He found that 25 Gauge needle tips were a good match for the cowl guns. They are about .020 ( 20 thousands of an inch) in diameter. After cutting off kit guns my dad used a pin vise and a .015 drill to start the holes ( that's the drill sitting on the quarter. Then the holes were finished to size with a .022 drill.
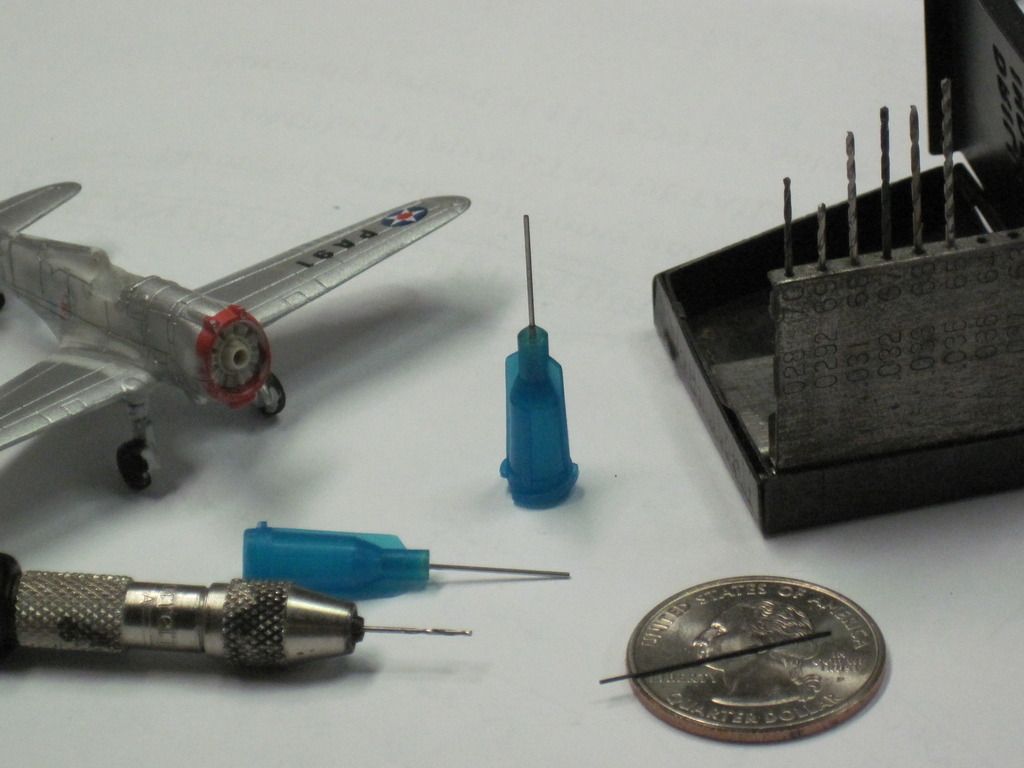

The needle tubes were cut with a pair of cutters ( always use eye protection) and the sharp edges cleaned up. Right now are rough placed to see if they look correct. One of the guns has a piece of plastic on it from the drill thats why it looks like that.
More to come on the P-36 and the diorama itself!
The concept is simple: Scramble at Haleiwa!
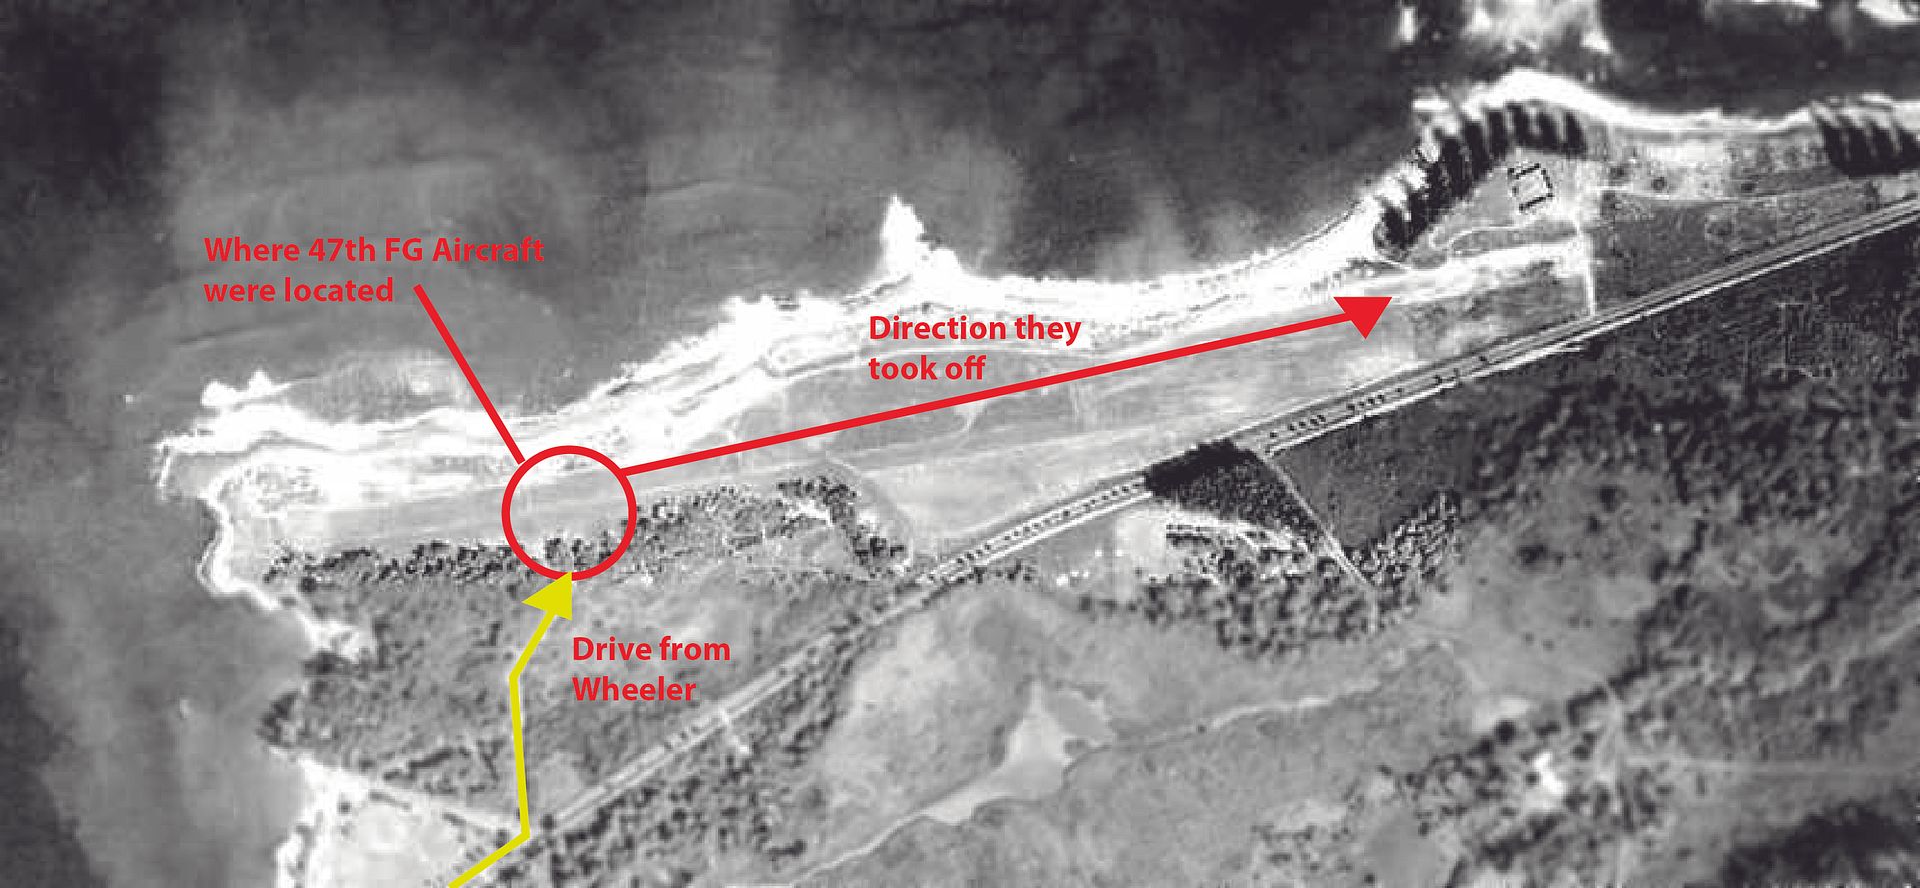
With the planes destroyed at Wheeler, they called Haleiwa Field to get two P-40s ready. Haleiwa Field was used as an emergency airport and had only an unpaved landing strip. Eight Curtiss P-40 Warhawks and two Curtiss P-36 Mohawks were temporarily assigned there with the 47th Fighter Squadron. As they headed towards Haleiwa Field, Zeroes strafed Welch and Taylor three times, but they suffered no injuries. When the two fliers arrived minutes later, two P-40s were waiting for them, armed and ready to go. They took off without waiting for orders. http://www.aviation-history.com/airmen/pearl.htm
This is the moment I am trying to depict. BUT not the exact scene we saw in either Tora, Tora, Tora, OR Pearl Harbor. I am attempting to depict, as accurately as possible, the real setting and exact type of aircraft. The diorama will consist of three aircraft:
P-40B x2
P-36 x1
I'm still waiting on the newly released AFV P-40B/C kit to use for the P-40s. I do own a few Bandai P-40B/Cs which would be more than appropriate to use, however they are fairly expensive ($35-$40 each!) and would require some reworking. With the new AFV kit, I'd feel much better about cutting into one of these kits which appear to have excellent lines. And their only $7-$10 each!
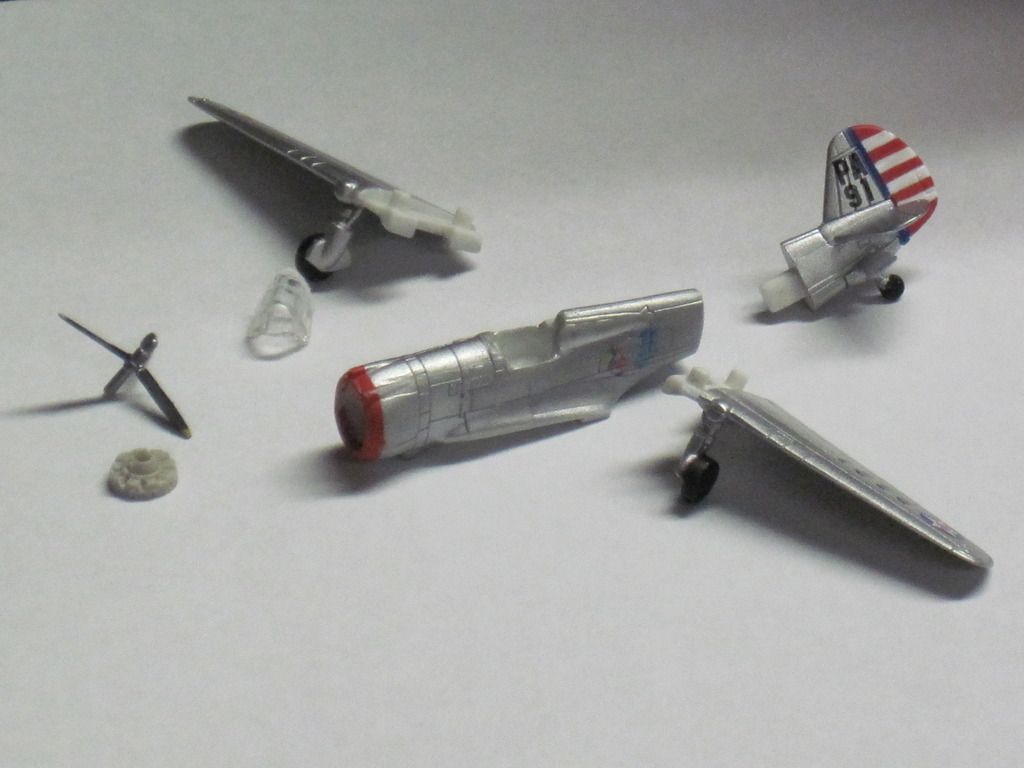
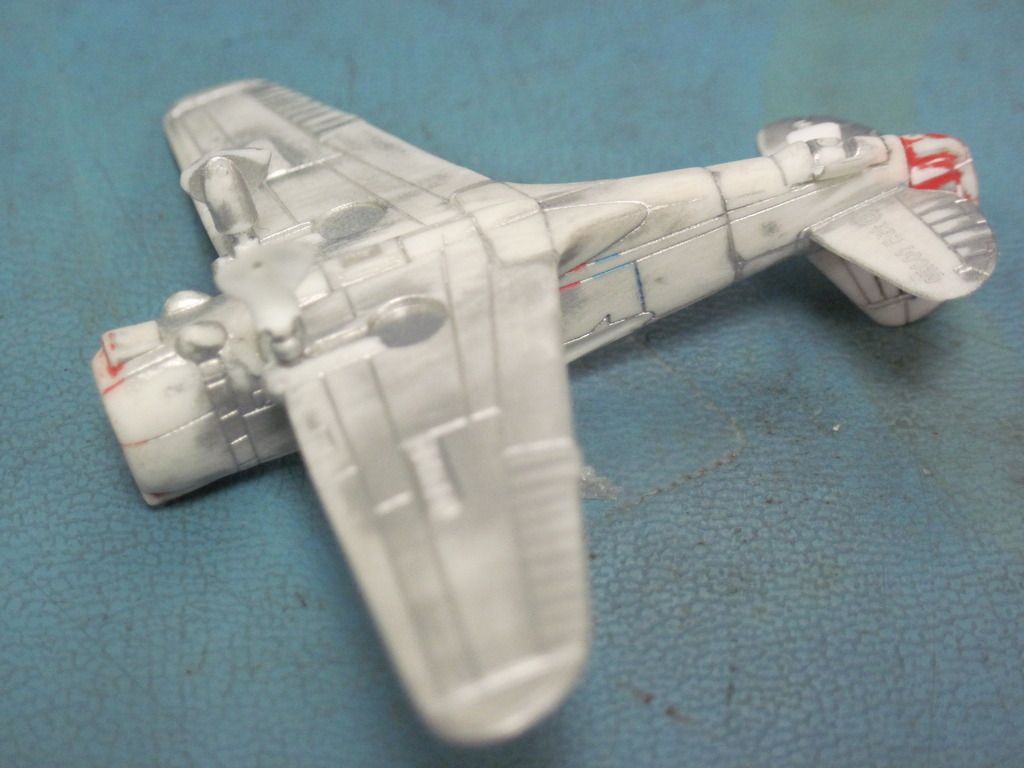
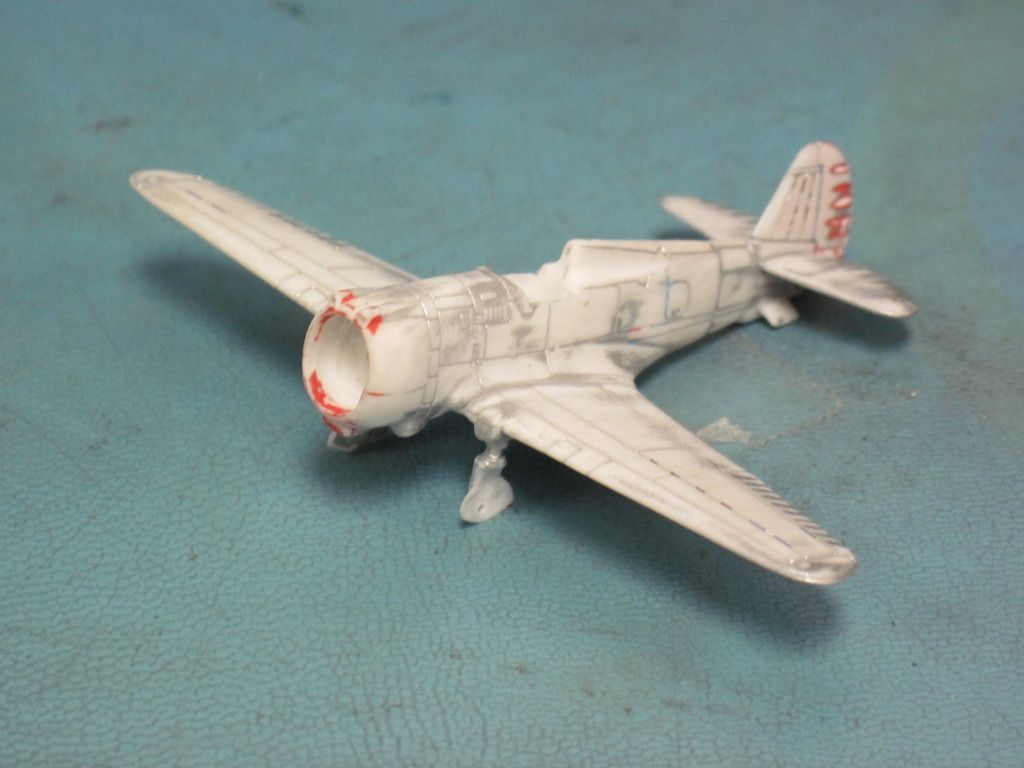
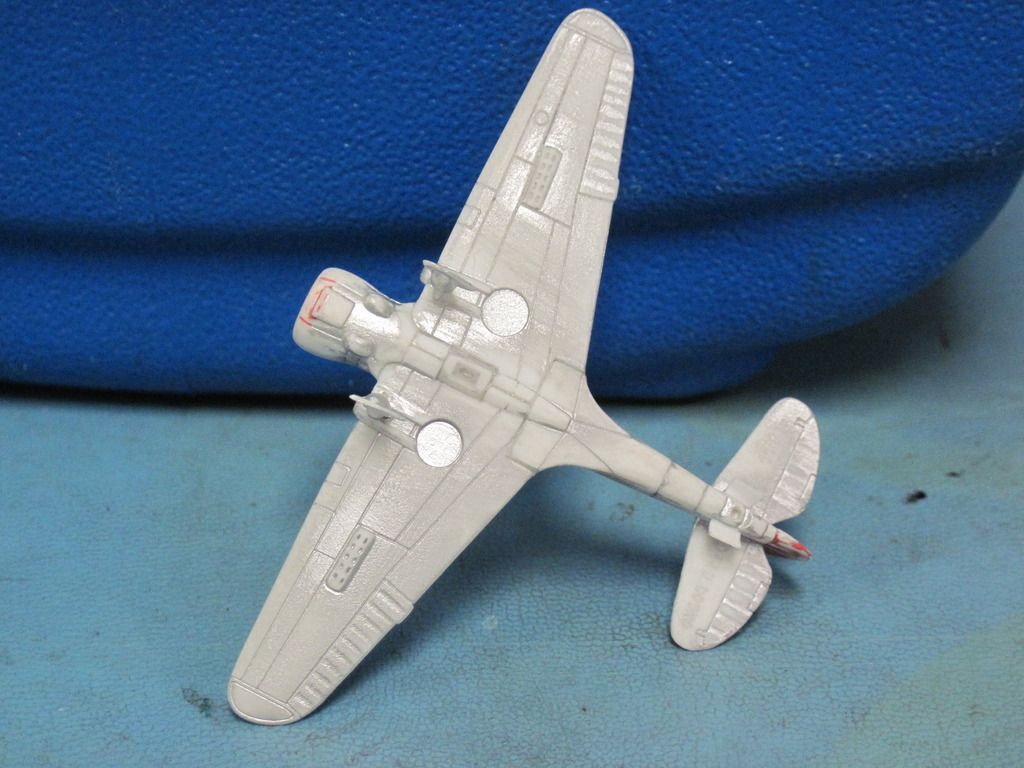
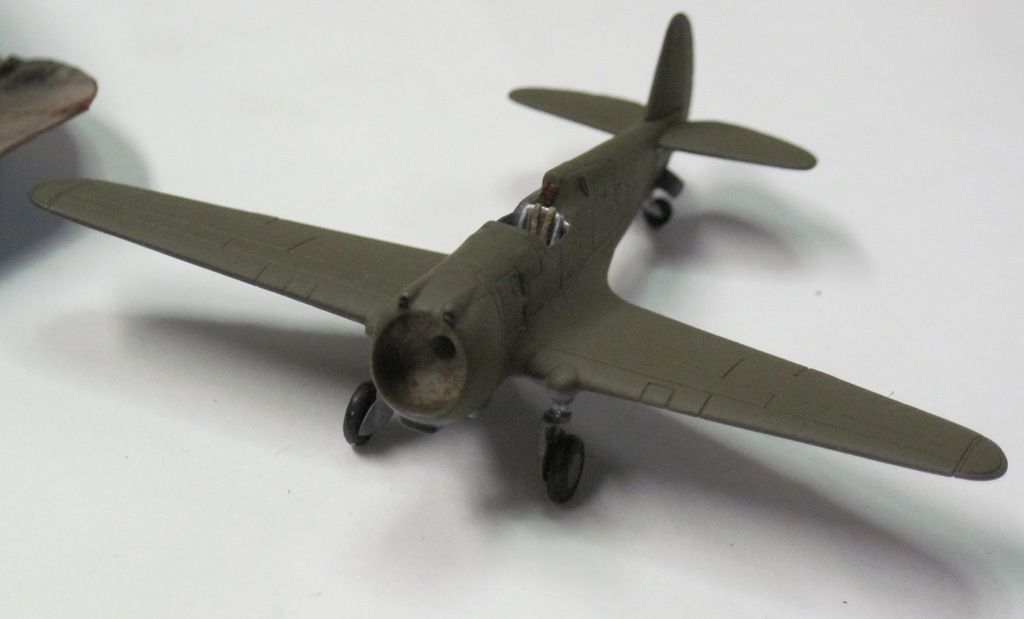
So all I have to work with right now is the P-36. The only decent P-36 in 1/144th scale is the Furuta Choco Egg example. This company makes many different aircraft in a variety of sizes that you have to assemble as they all come partially disassembled in a plastic (egg). We found this P-36 to actually be 1/144 scale though. Here are some pics of an "out of the egg" P-36! Pretty ugly in some places but the necessities are there!

I already did some dremel tool work on the P-36, hollowing out the cockpit and engine compartment. I decided to hand off the P-36 project to my dad since he was interested in helping. And ya know, since he's a master modeler and all.... This allowed me to work on a bigger part of the project... the diorama base itself.
He ended up finding the perfect replacement engine and prop from an F-TOYS Wildcat.


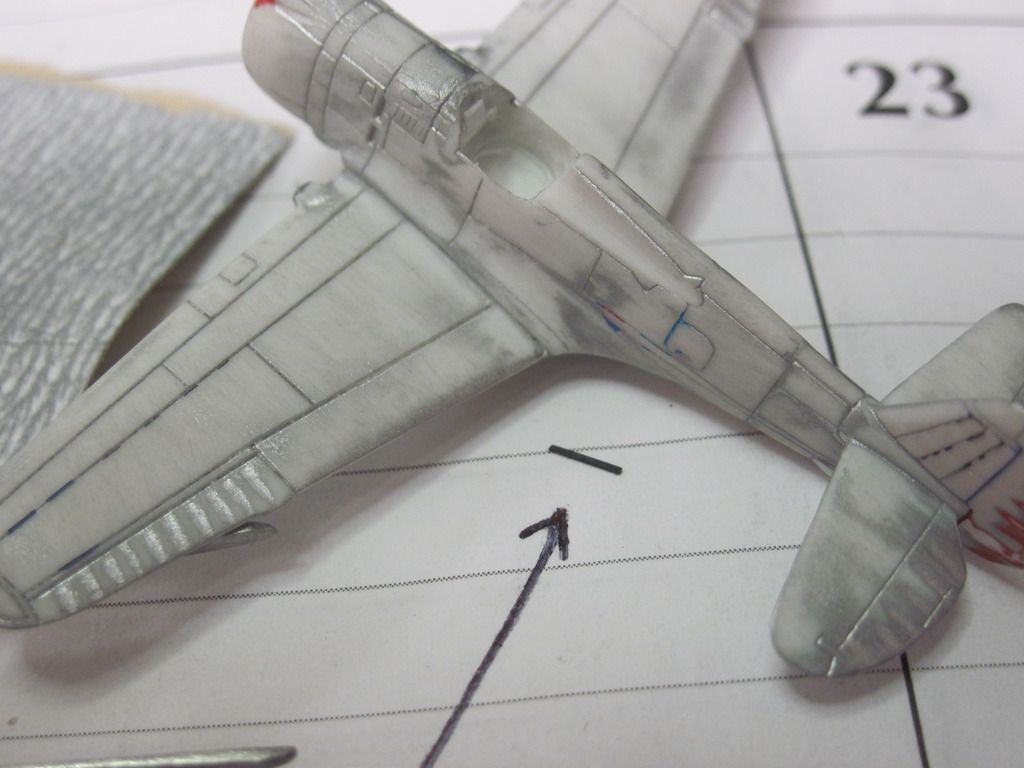
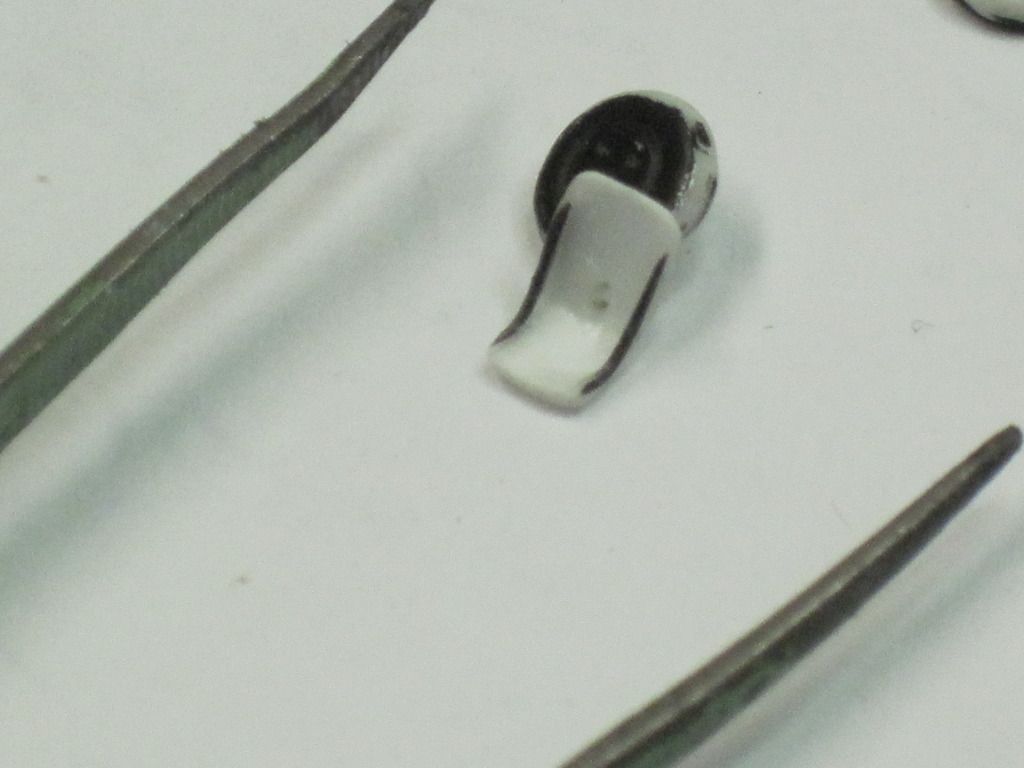
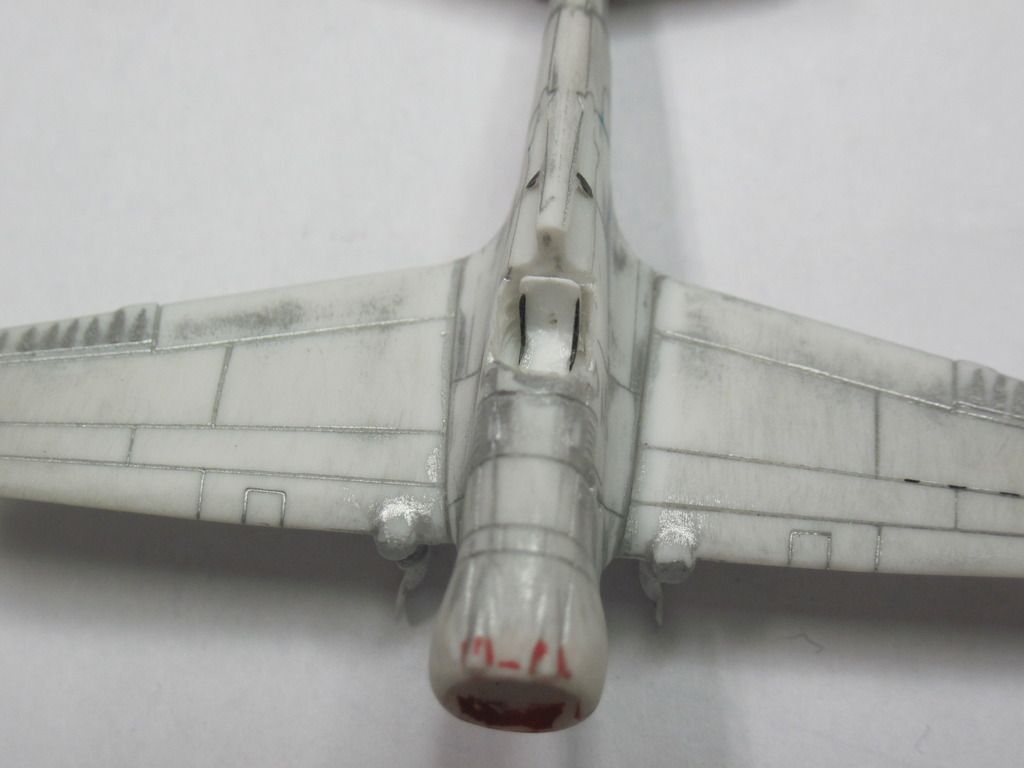
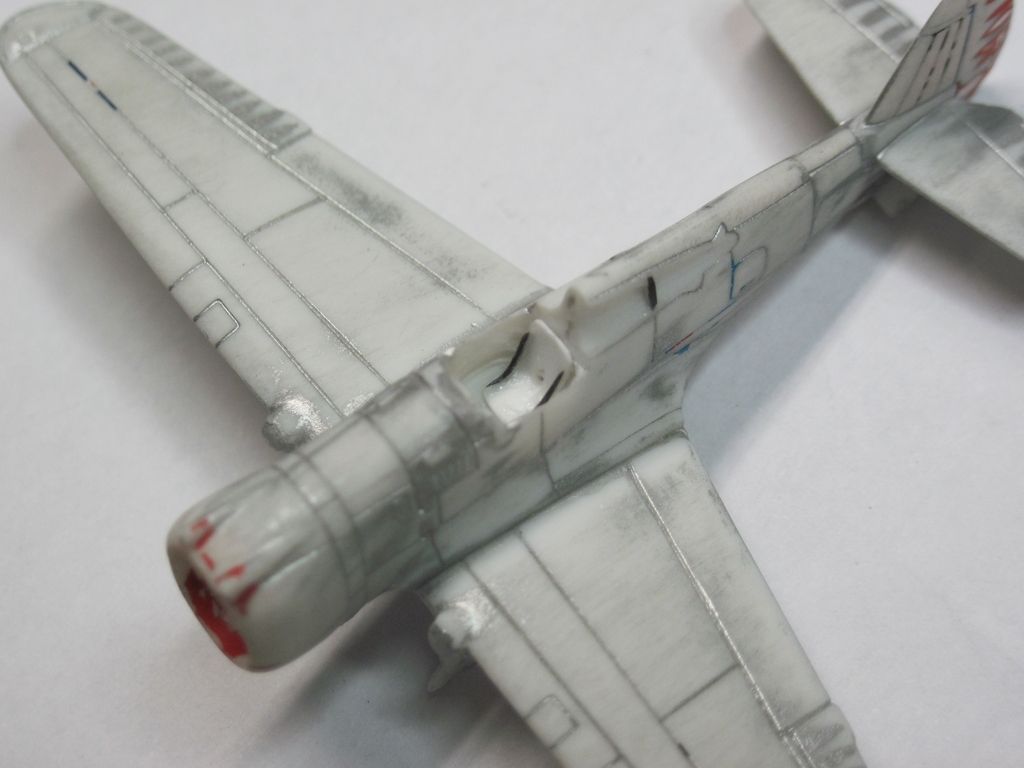
He cleaned it up so that the wings and tail section fit as tight as he could get it. Then added some super glue to the wing root to fill the small gap and also to the fairings for the landing gear. They were flat where they should have a round appearance.


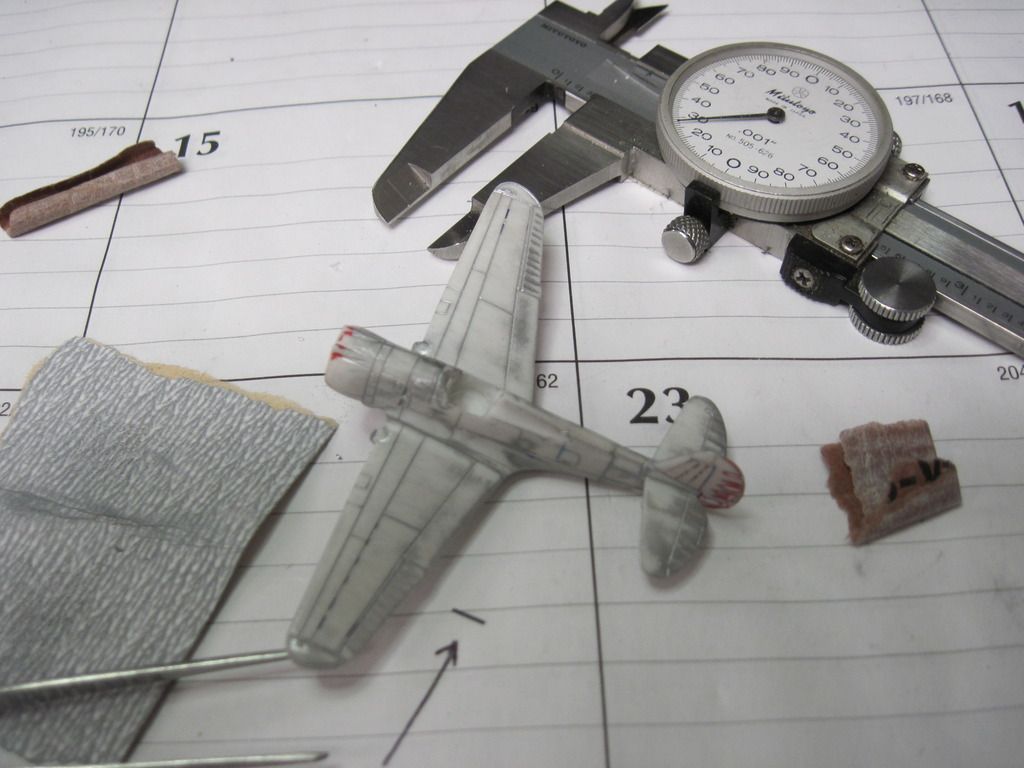
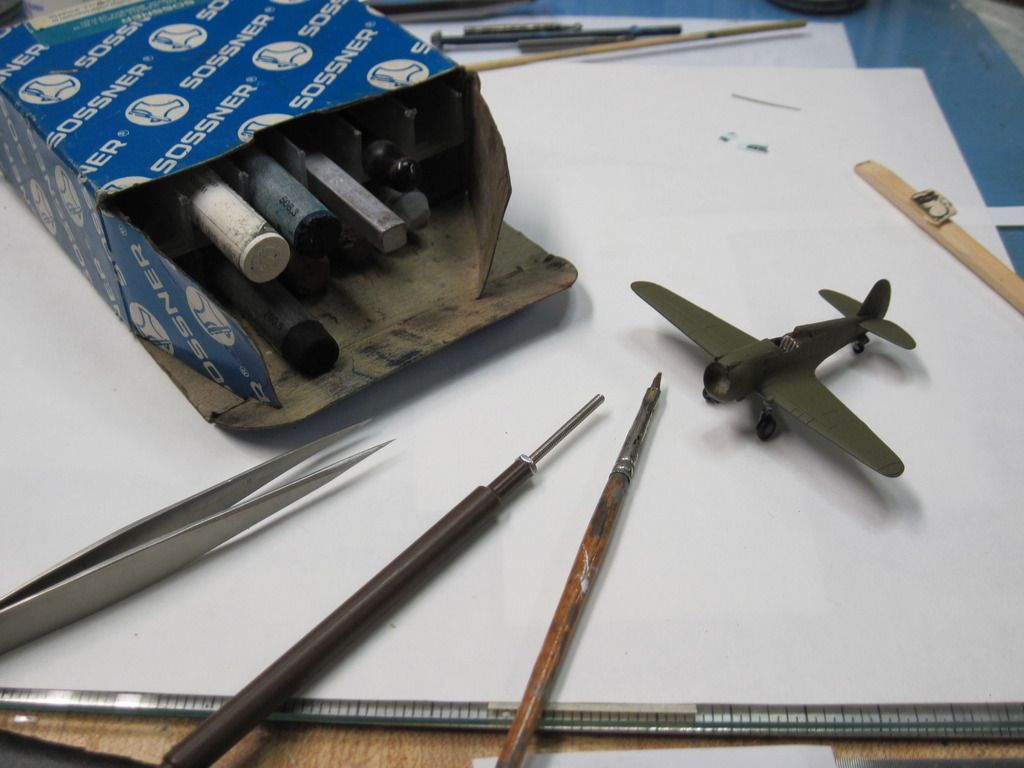
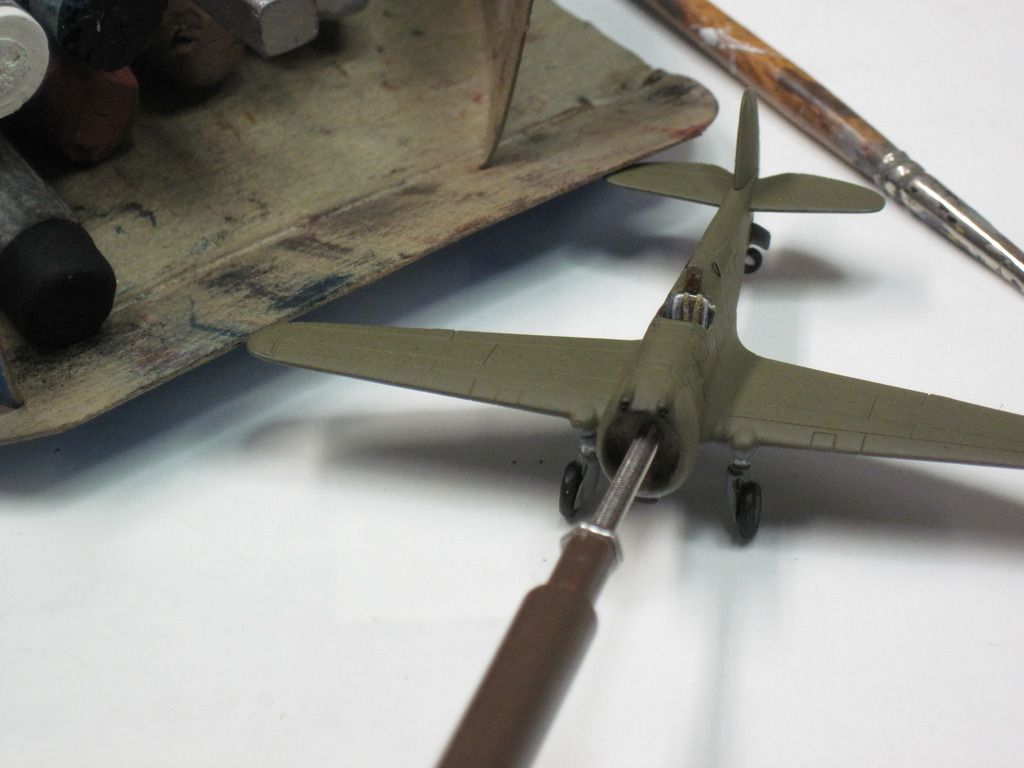
He found that 25 Gauge needle tips were a good match for the cowl guns. They are about .020 ( 20 thousands of an inch) in diameter. After cutting off kit guns my dad used a pin vise and a .015 drill to start the holes ( that's the drill sitting on the quarter. Then the holes were finished to size with a .022 drill.


The needle tubes were cut with a pair of cutters ( always use eye protection) and the sharp edges cleaned up. Right now are rough placed to see if they look correct. One of the guns has a piece of plastic on it from the drill thats why it looks like that.


More to come on the P-36 and the diorama itself!
Last edited by Warbird Kid on Tue Oct 27, 2015 4:12 pm, edited 1 time in total.
Re: Scramble at Haleiwa - 1/144th Diorama
Tue Oct 27, 2015 4:02 pm
This will be pretty cool!
Tom P.
Tom P.
Re: Scramble at Haleiwa - 1/144th Diorama
Tue Oct 27, 2015 4:31 pm
Thanks a lot! I hope I don't disappoint!
To start with the diorama, I had to try and figure out exactly where the aircraft we're located on the field. I talked with WIX's own David Aiken, and he gave me some much needed insight. From our conversations this was the location of the aircraft on December, 7th.
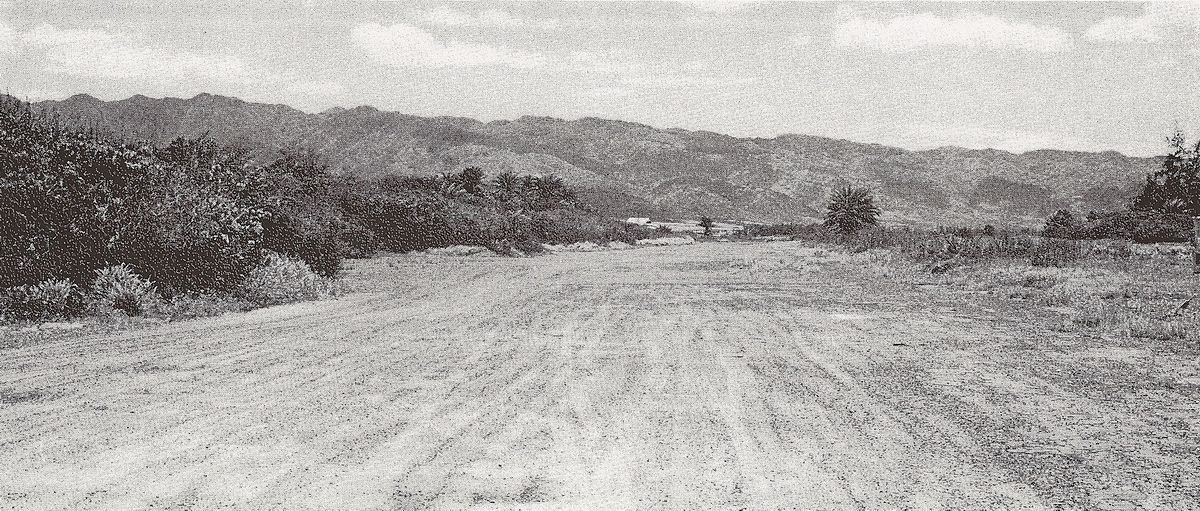
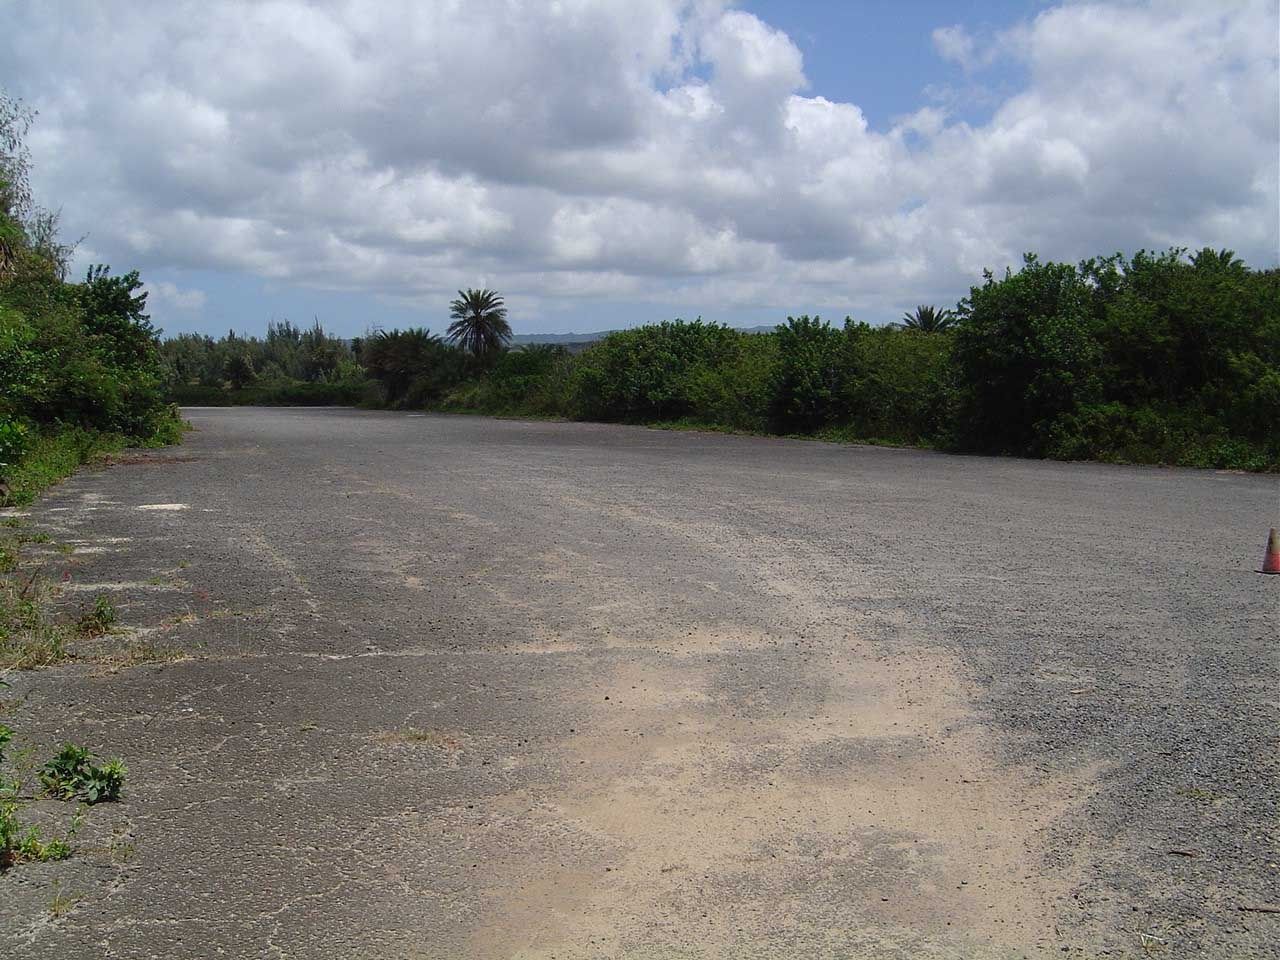
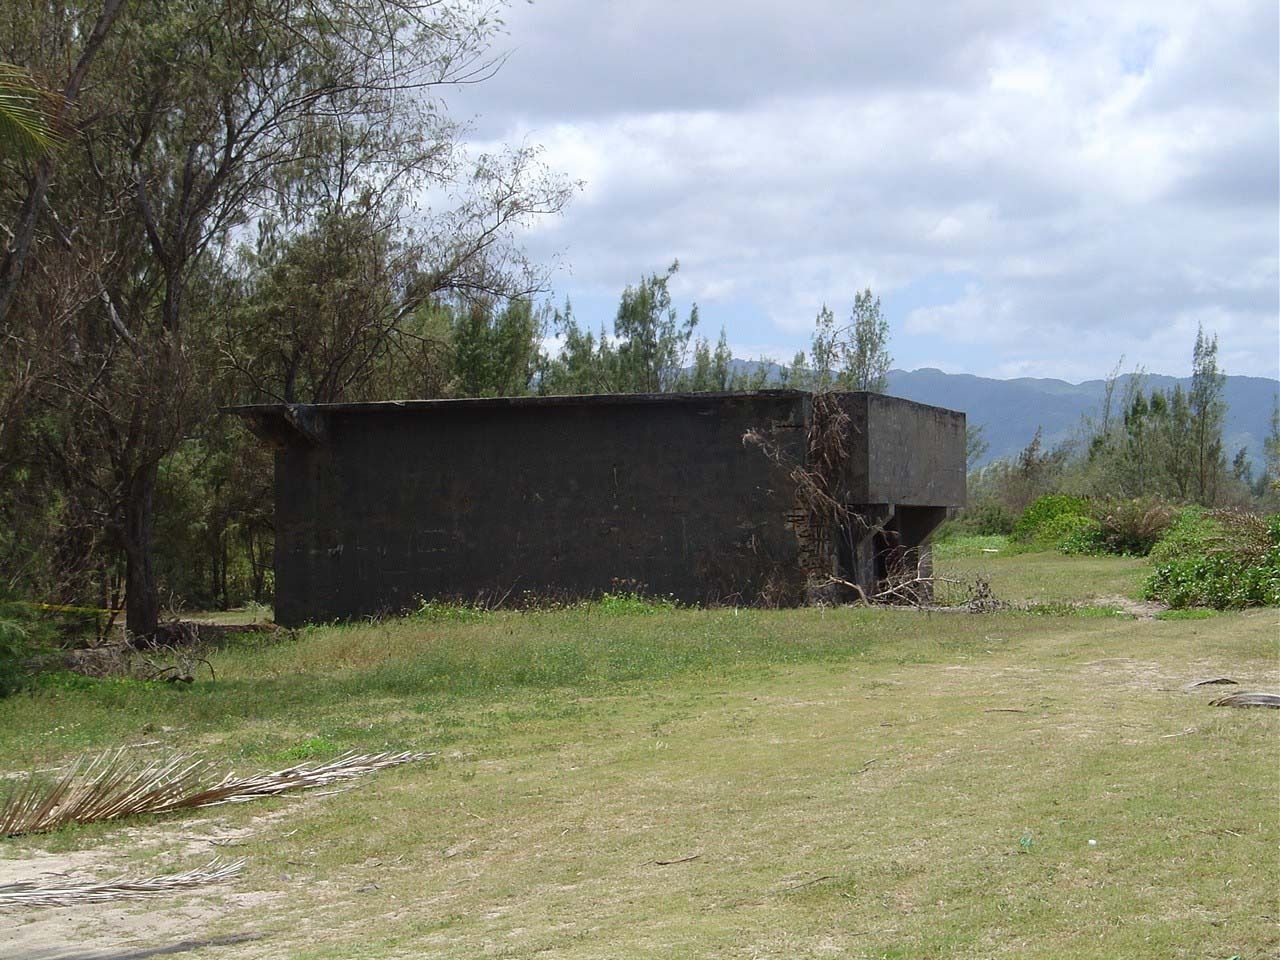
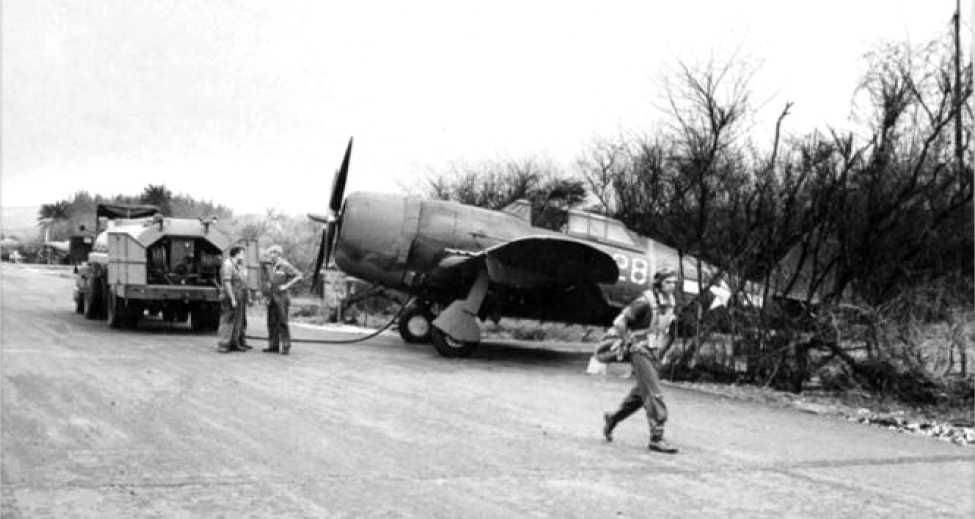
The problem I'm facing right now is the flora and trees that were (and still are) present at the former Haleiwa Airfield. We know that the airfield was gravel and sand at this point until 1942 when PSP / Marston Matting was installed. Not much else then a reserve airstrip. But the plants and trees have proven a bit more difficult to replicate.
As you can see... these period and current images show dense shrubs and tall grass seemingly going right up to the various kinds of trees along the airstrip. Not the standard simple grass and trees that you see on most dioramas.
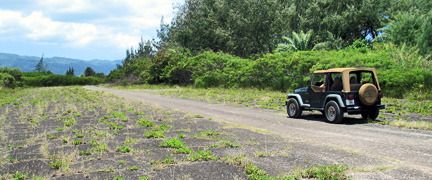
So what I'm seeing is a lot of various types of plants and trees. I've already purchased some trees for the diorama and begun some layouts.
Stay tuned for pictures of the diorama tonight.
To start with the diorama, I had to try and figure out exactly where the aircraft we're located on the field. I talked with WIX's own David Aiken, and he gave me some much needed insight. From our conversations this was the location of the aircraft on December, 7th.

The problem I'm facing right now is the flora and trees that were (and still are) present at the former Haleiwa Airfield. We know that the airfield was gravel and sand at this point until 1942 when PSP / Marston Matting was installed. Not much else then a reserve airstrip. But the plants and trees have proven a bit more difficult to replicate.
As you can see... these period and current images show dense shrubs and tall grass seemingly going right up to the various kinds of trees along the airstrip. Not the standard simple grass and trees that you see on most dioramas.


So what I'm seeing is a lot of various types of plants and trees. I've already purchased some trees for the diorama and begun some layouts.
Stay tuned for pictures of the diorama tonight.
Re: Scramble at Haleiwa - 1/144th Diorama
Tue Oct 27, 2015 4:47 pm
Who took the recent photos? I was told when I was there for school (1990) to be careful wandering around in that area - local 'herbalists' might have a good reason for people not to be poking around. I am really interested to see those photos!
Tom P.
Tom P.
Re: Scramble at Haleiwa - 1/144th Diorama
Tue Oct 27, 2015 5:01 pm
wendovertom wrote:Who took the recent photos? I was told when I was there for school (1990) to be careful wandering around in that area - local 'herbalists' might have a good reason for people not to be poking around. I am really interested to see those photos!
Tom P.
Various shots I found online. Sad to say I haven't had the opportunity to visit yet. But will one day!
Re: Scramble at Haleiwa - 1/144th Diorama
Tue Oct 27, 2015 8:14 pm
Here is the display base currently.
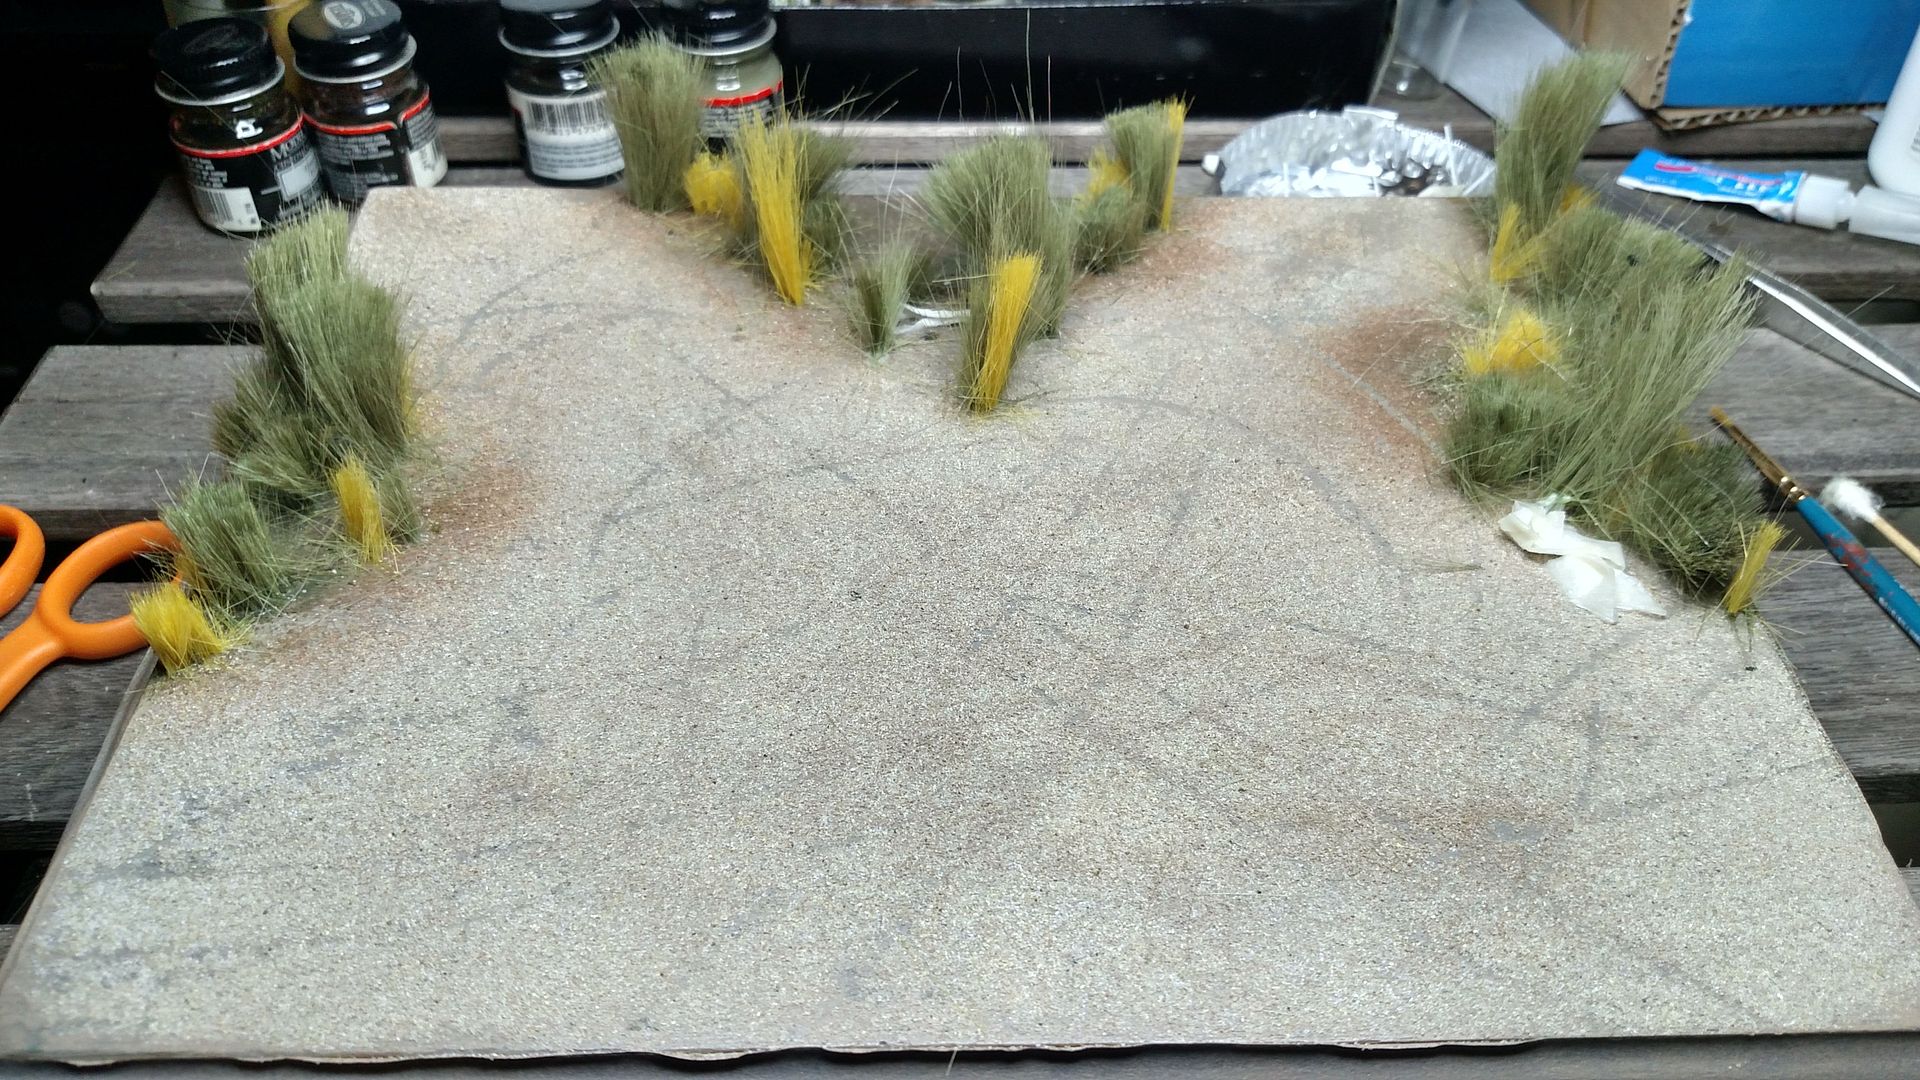
Unfortunately, I didn't take shots of all the steps leading up to this point, but here is a recap.
1. After I decided on the location, I drew out what would be trees and plants, and what would be tarmac.
2. I drilled three to four holes in the base in the wilderness areas.
3. I first covered the base with squadron green putty, adding little ridges and crevices.
4. Then it got a base coat of primer,
5. Then green/brown in the dark areas, and tan in the sandy dispersal area.
6. Sand was then added to the wet tan paint.
7. Next I scratched tire tracks through the sand.
8. I also had yellow and green modeling grass and applied it with Elmer's glue.
The grass has been the most troublesome. Rouge strands keep slipping out and keeps fraying. It looks okay, but doesn't look great yet. Fear not, I'm still planning on trimming back the grass a bit.
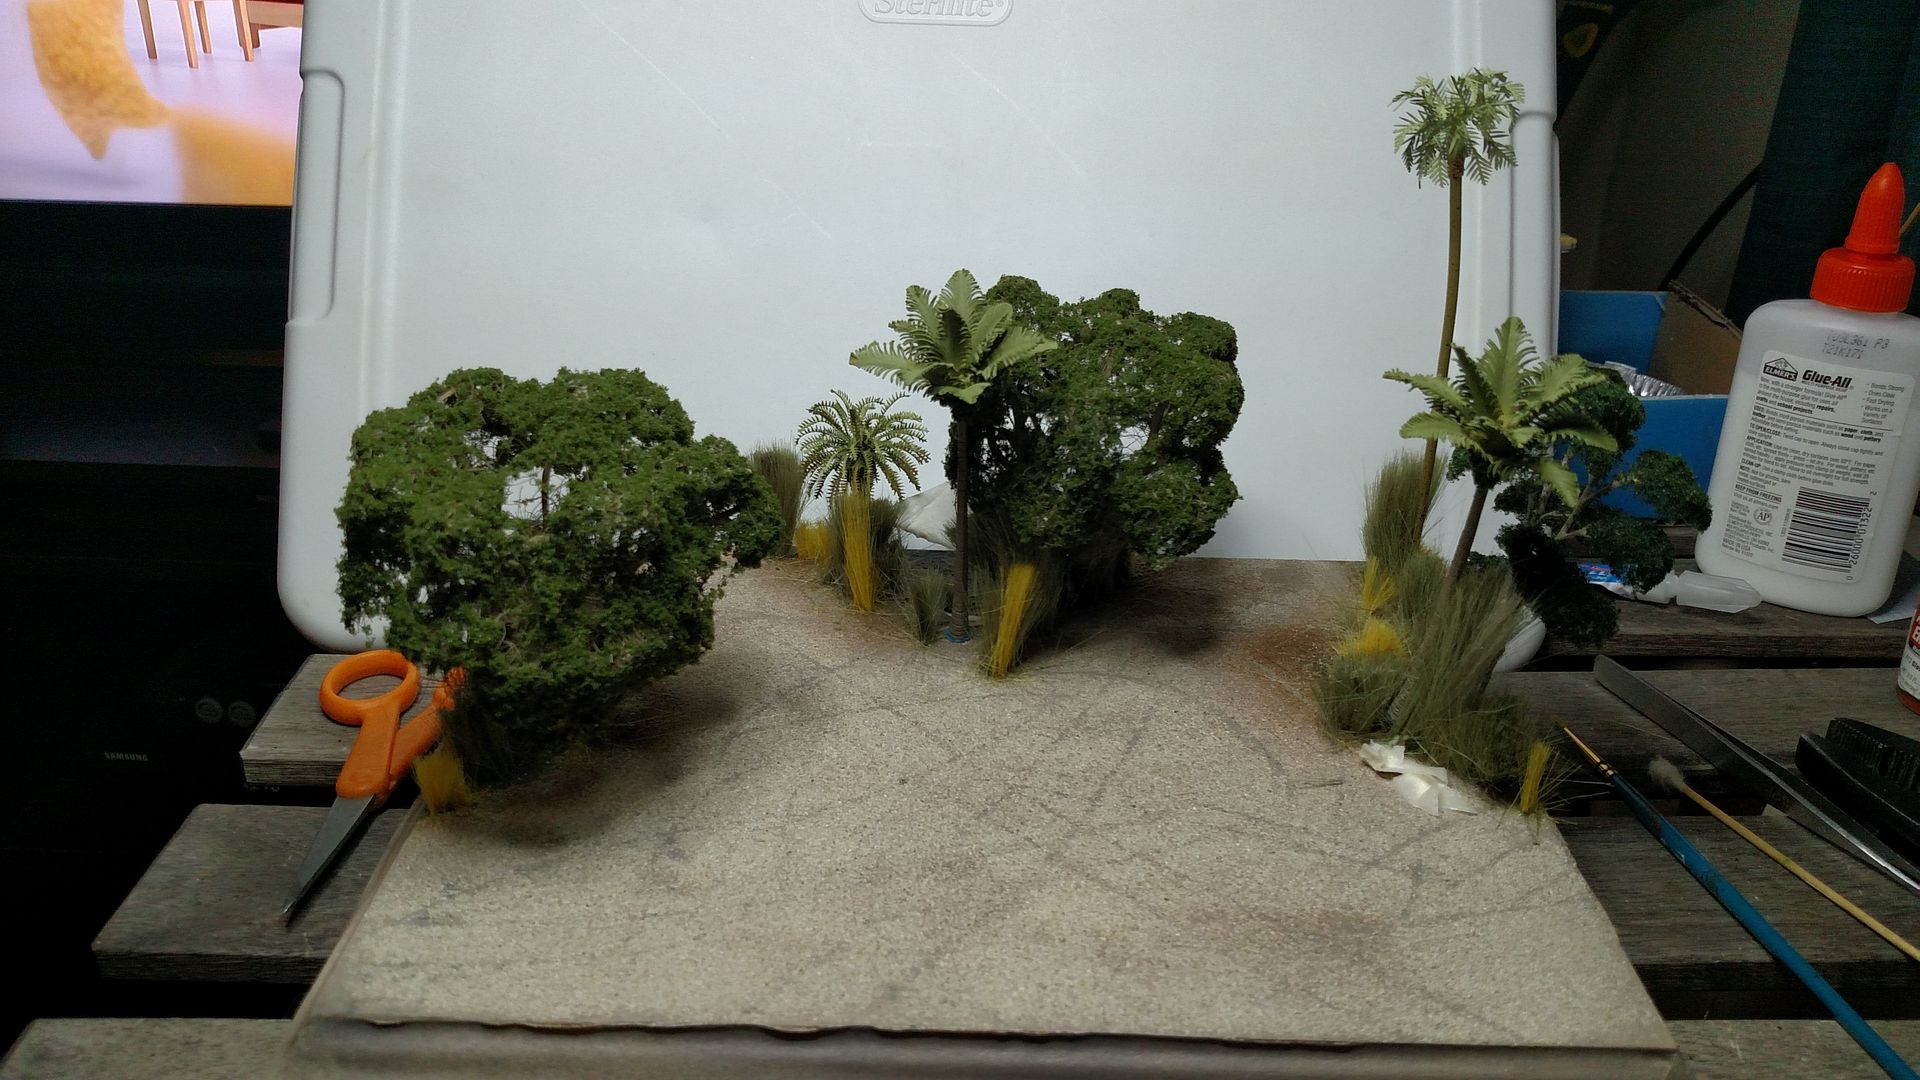
A few days ago I received a package from the UK from the Model Tree Shop. Great stuff. https://www.themodeltreeshop.co.uk
This is what the diorama looks like with a few trees applied. What do you guys think? Am I on the right track at all?

Unfortunately, I didn't take shots of all the steps leading up to this point, but here is a recap.
1. After I decided on the location, I drew out what would be trees and plants, and what would be tarmac.
2. I drilled three to four holes in the base in the wilderness areas.
3. I first covered the base with squadron green putty, adding little ridges and crevices.
4. Then it got a base coat of primer,
5. Then green/brown in the dark areas, and tan in the sandy dispersal area.
6. Sand was then added to the wet tan paint.
7. Next I scratched tire tracks through the sand.
8. I also had yellow and green modeling grass and applied it with Elmer's glue.
The grass has been the most troublesome. Rouge strands keep slipping out and keeps fraying. It looks okay, but doesn't look great yet. Fear not, I'm still planning on trimming back the grass a bit.
A few days ago I received a package from the UK from the Model Tree Shop. Great stuff. https://www.themodeltreeshop.co.uk
This is what the diorama looks like with a few trees applied. What do you guys think? Am I on the right track at all?

Re: Scramble at Haleiwa - 1/144th Diorama
Wed Oct 28, 2015 9:12 am
Looks good to me. I love modeling but have so little time and patience for it that my work is not nearly as good as this is looking. Keep it up!
Tom P.
Tom P.
Re: Scramble at Haleiwa - 1/144th Diorama
Wed Oct 28, 2015 7:48 pm
Thanks man! Never give up. I find its a never ending art form that you only get better at. Here's an update up from the ole man.
----->
Well I thought I would be able to let the thick tires and landing gear go (they were one whole piece) , but I couldn't and got the jewelers saw out and cut the tires off. I proceeded to thin down the landing gear doors and tires to a somewhat proper thickness.
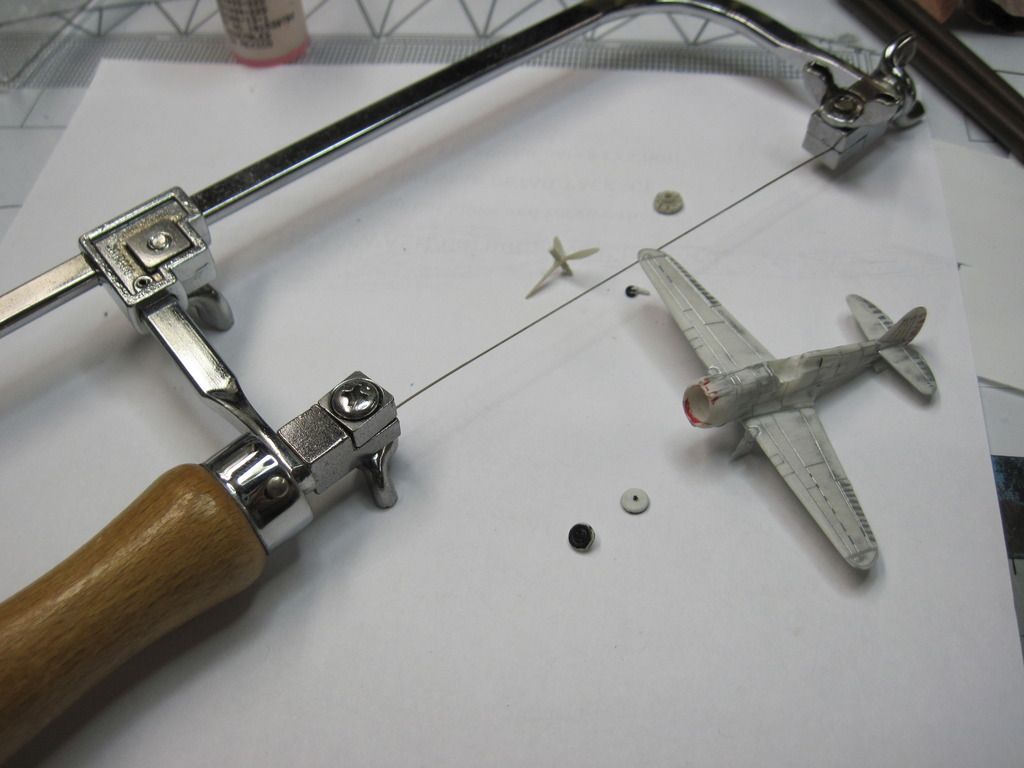
Also the cowling was reshaped a bit and more of the original paint sanded off trying to diminish the heavy panel lines.
Back to the super glue to fill in more seams and then sand smooth
Next was added the 2 side window brace frames. I used stretched spru that measured .010. After the glue dried it was sanded evenly with the fuselage.
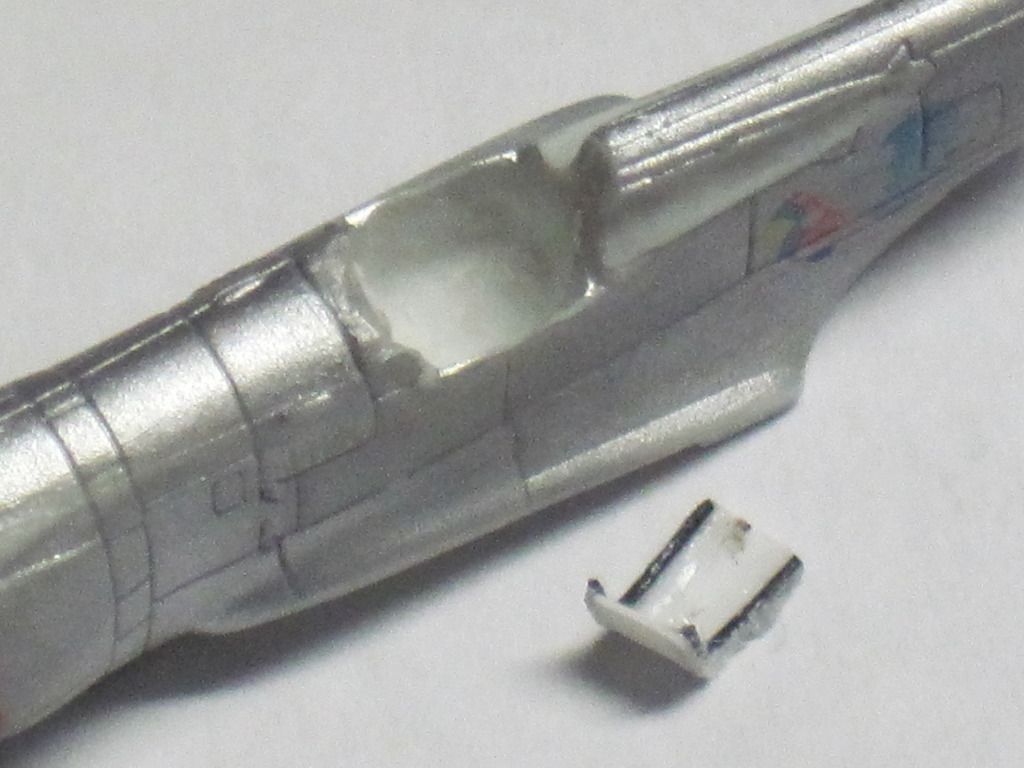
Worked on the seat for awhile to get it down what looked right.
Placed the seat in to see how it looks. You can also see the side window frames in and sanded to fit flush. It seems that every time I pick it up to do something I also grab the sand paper and take a little more paint off.
----->
Well I thought I would be able to let the thick tires and landing gear go (they were one whole piece) , but I couldn't and got the jewelers saw out and cut the tires off. I proceeded to thin down the landing gear doors and tires to a somewhat proper thickness.


Also the cowling was reshaped a bit and more of the original paint sanded off trying to diminish the heavy panel lines.

Back to the super glue to fill in more seams and then sand smooth

Next was added the 2 side window brace frames. I used stretched spru that measured .010. After the glue dried it was sanded evenly with the fuselage.


Worked on the seat for awhile to get it down what looked right.

Placed the seat in to see how it looks. You can also see the side window frames in and sanded to fit flush. It seems that every time I pick it up to do something I also grab the sand paper and take a little more paint off.


Re: Scramble at Haleiwa - 1/144th Diorama
Fri Oct 30, 2015 6:45 pm
Another update from the old man:
Well after much gluing, sanding, seam filling, re-shaping etc. I had to paint something to break up the monotony. I gave the engine a wash of thinned flat black paint. The front case was then painted in Tamiya gray and then was dry brushed with aluminum powder from a pastel stick.
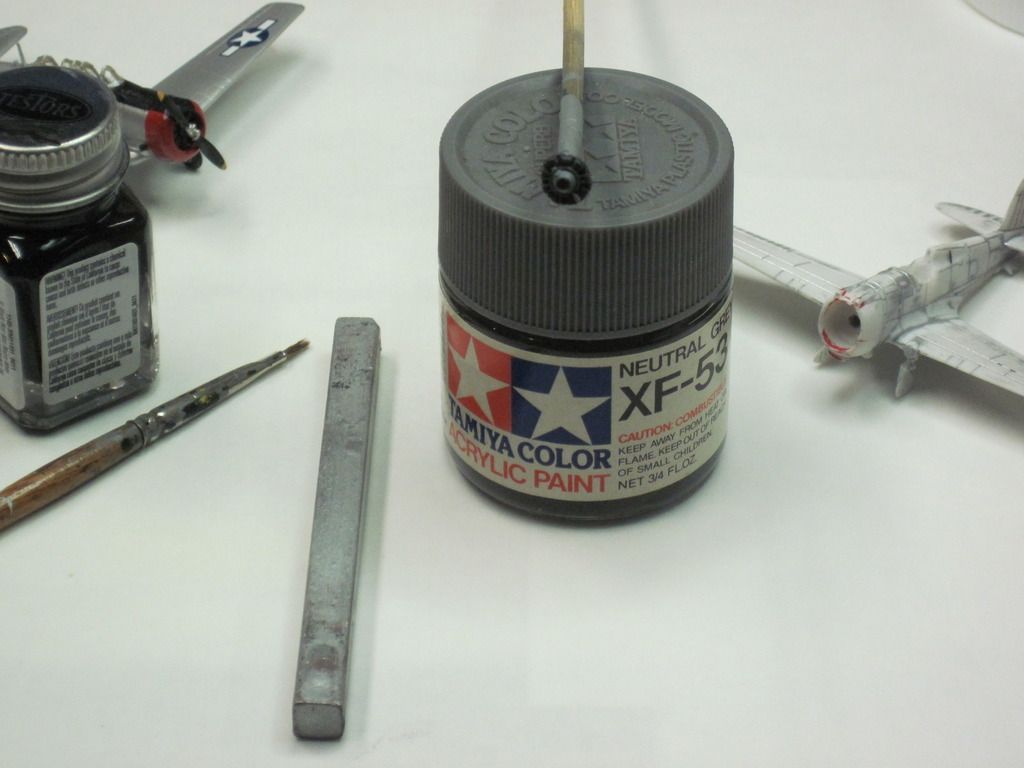
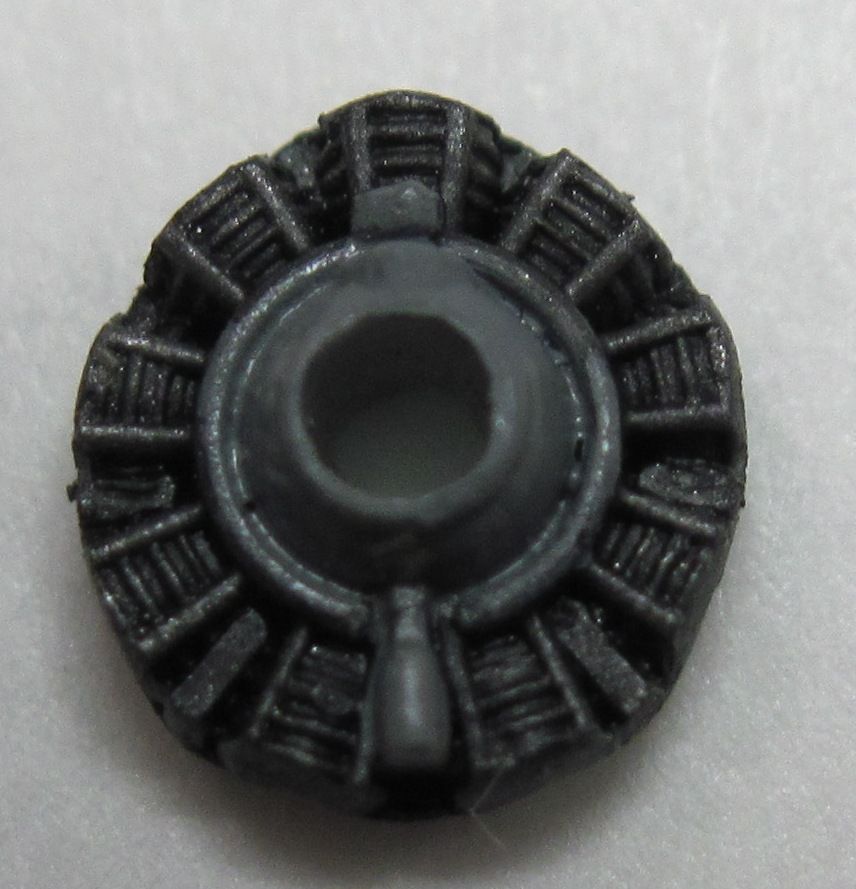
I went to the seat next by attaching it to a piece of stretched spru. It was painted aluminum. The seat pad was cut from masking tape and painted with Model Master leather. Then the seat belt's were cut from masking tape, given a coat of Tamiya dark yellow and added to the seat. The last part was adding the buckles with some dabs of aluminum paint.


Re: Scramble at Haleiwa - 1/144th Diorama
Mon Nov 02, 2015 9:35 am
Like a pastel stick from a basic art kit? That is a cool idea!
Tom P.
Tom P.
Re: Scramble at Haleiwa - 1/144th Diorama
Mon Nov 02, 2015 9:56 am
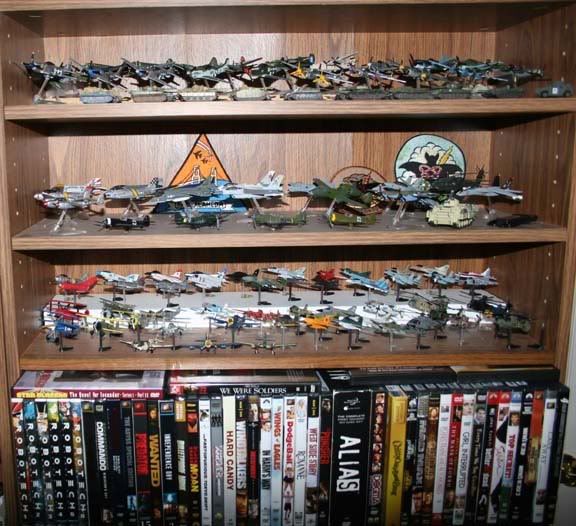
Neat stuff! I have a whole collection of those chocolate egg aircraft, third shelf down in the picture below are all chocolate egg aircraft
Re: Scramble at Haleiwa - 1/144th Diorama
Mon Nov 02, 2015 10:21 am
Thanks Scott! Nice set! Some of those planes can be turned into something special! Some others are left to be desired.
Heres another update on the 36. Diorama is in a bit of a holding pattern at the moment.
--------------------------------------->
Surprisingly the canopy was very cleanly molded and fits very well. But it was molded in a smoke color plastic. Before I painted the plane I wanted to see if I could hand vac u form a new canopy using the models as a master.
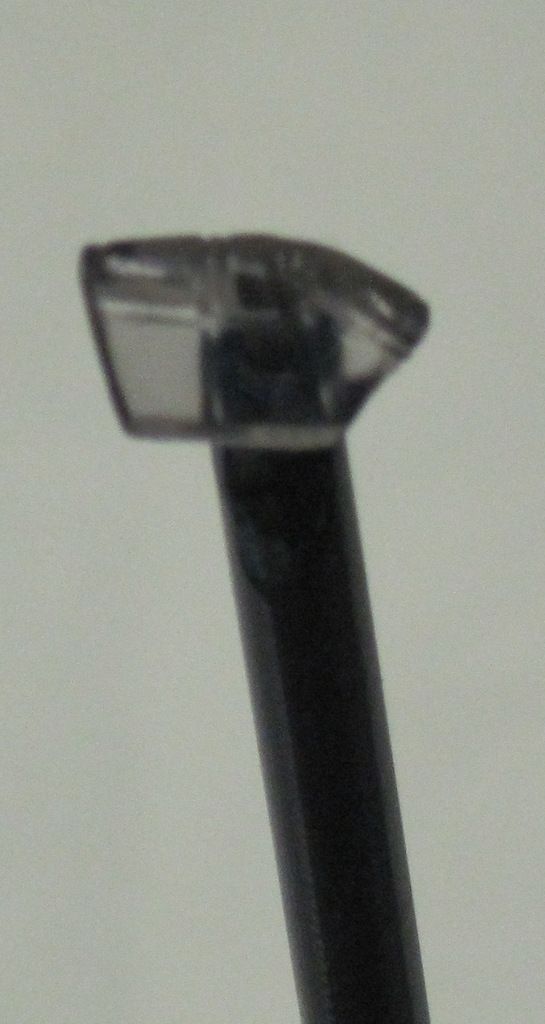
If I did not succeed I would have to make a canopy frame out of stretched spru like I did for the P-38F then sand it smooth to the fuselage and I really didn't want to do that again. After several attempts of wasting the .005 clear plastic I took a break.

The next day I tried again and this time as odd as it sounds I used a different candle and a few attempts later I got one that would pass.

I trimmed and cut and sanded and finally I think it fits pretty close.

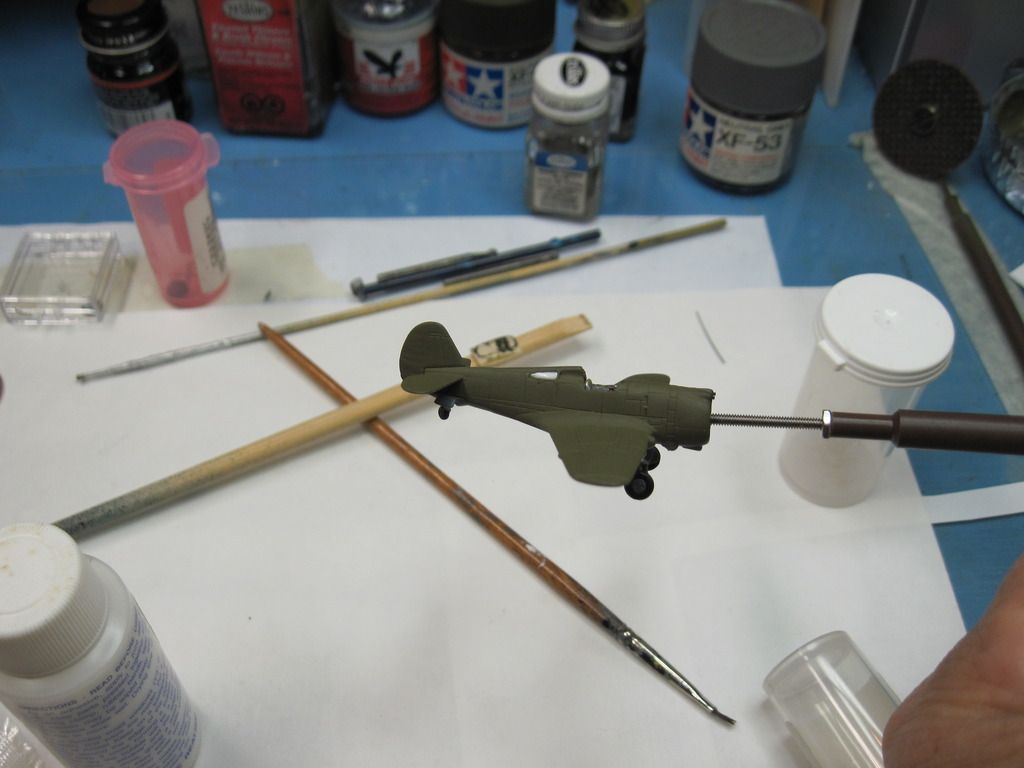
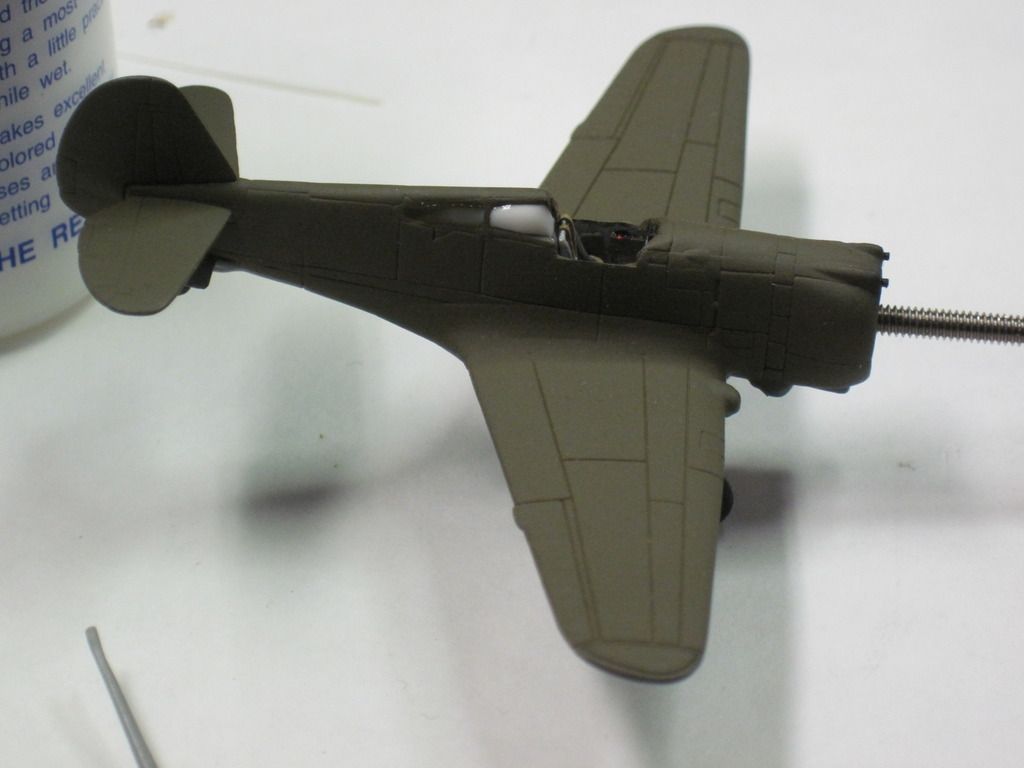
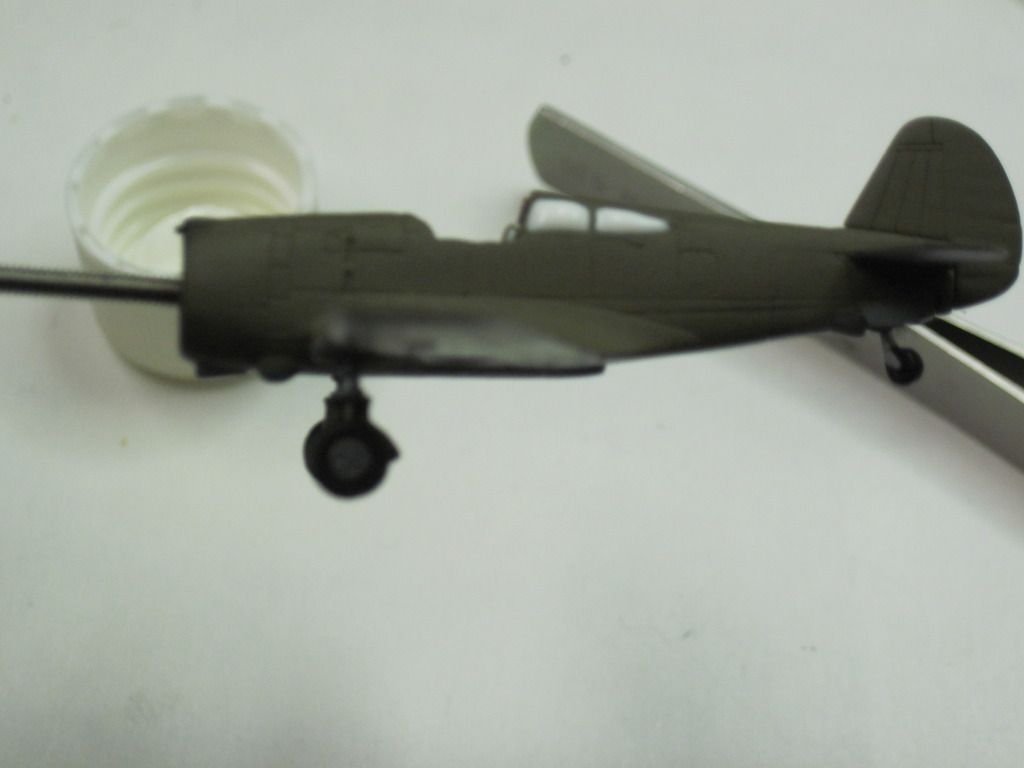
With canopy a partial success I put it aside and went on to paint the P-36. I used Model Master Olive Drab rattle can for the top and brushed Tamiya Neutral Gray for the bottom.
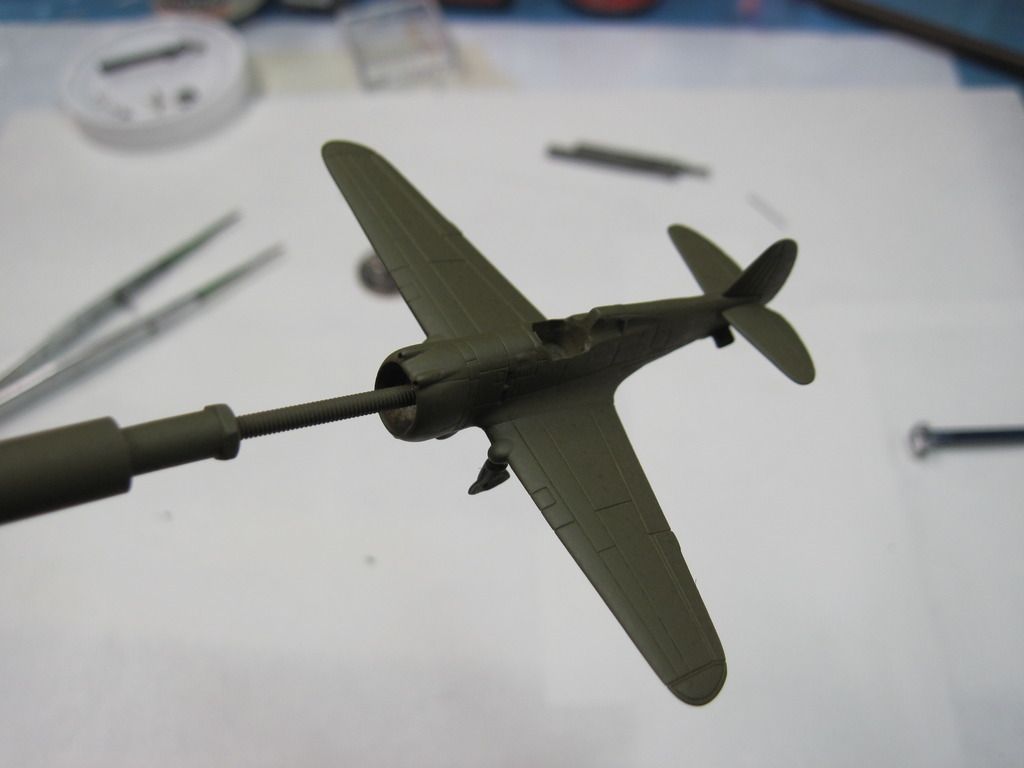
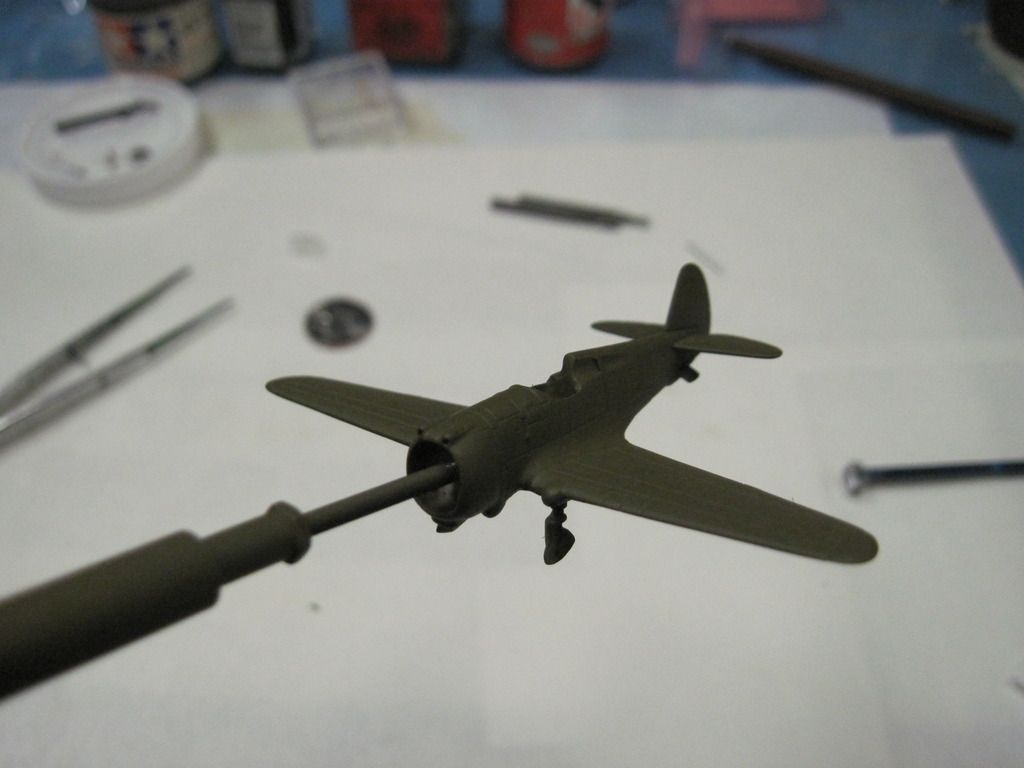
Again I pulled some stretched spru out to about .025 to be the landing gear struts. (Stretched spru and super glue are 2 of the scratch builders best friends).

Here is the landing gear strut on the right gear, the left already has the reworked wheel on.
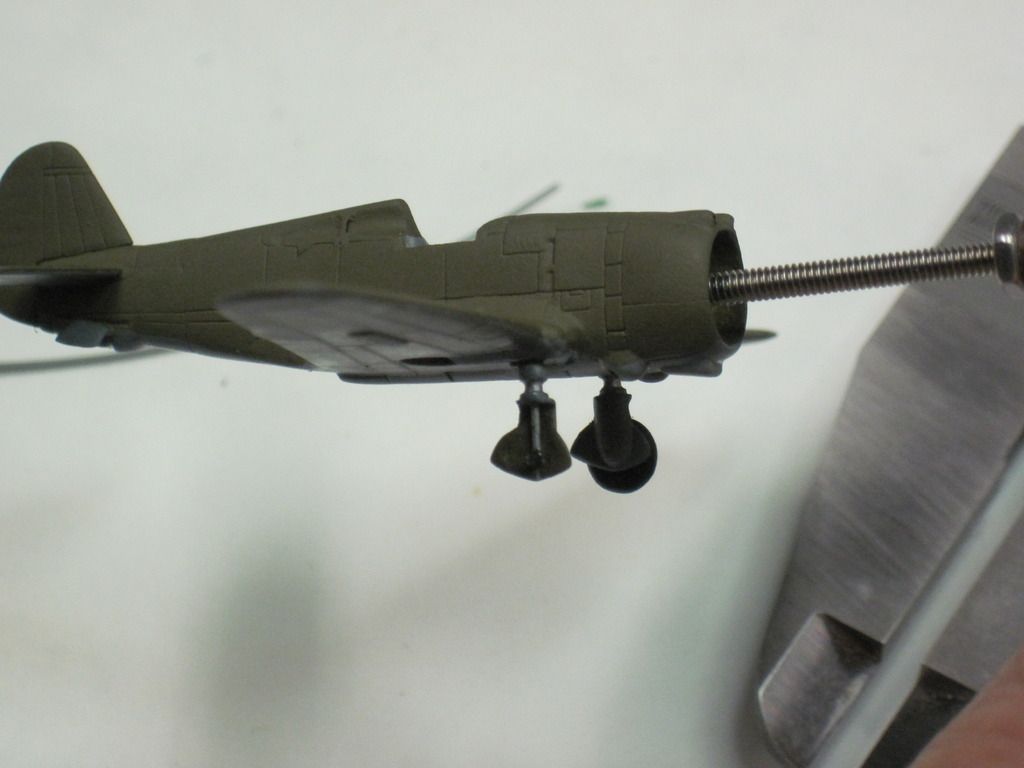
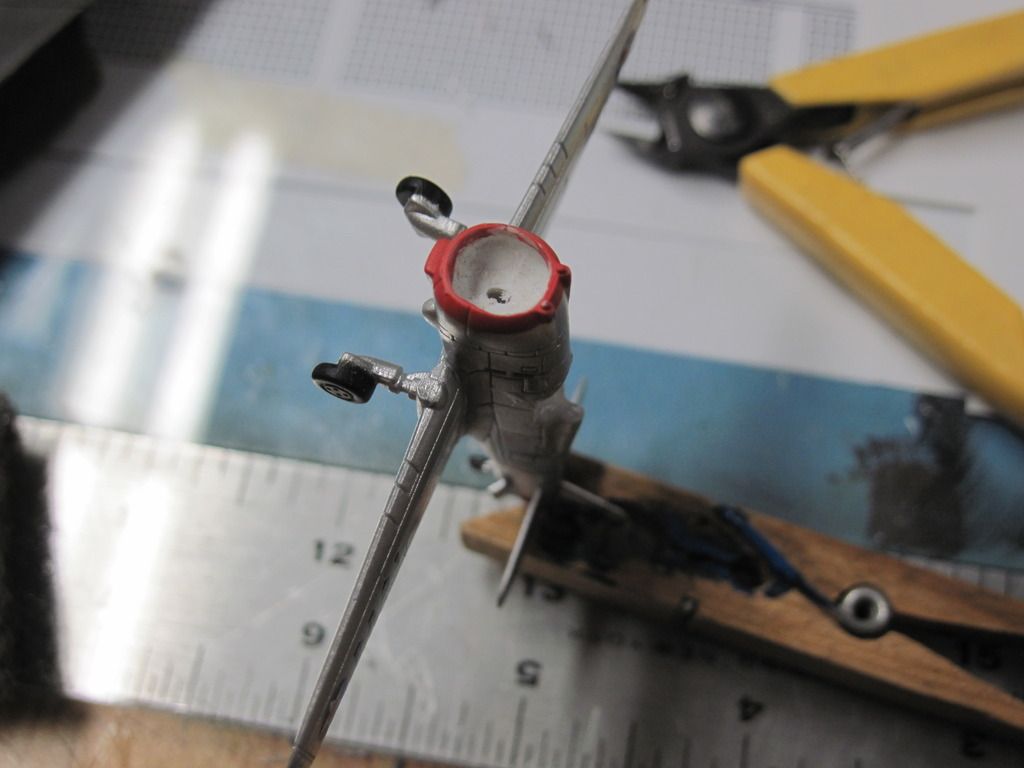
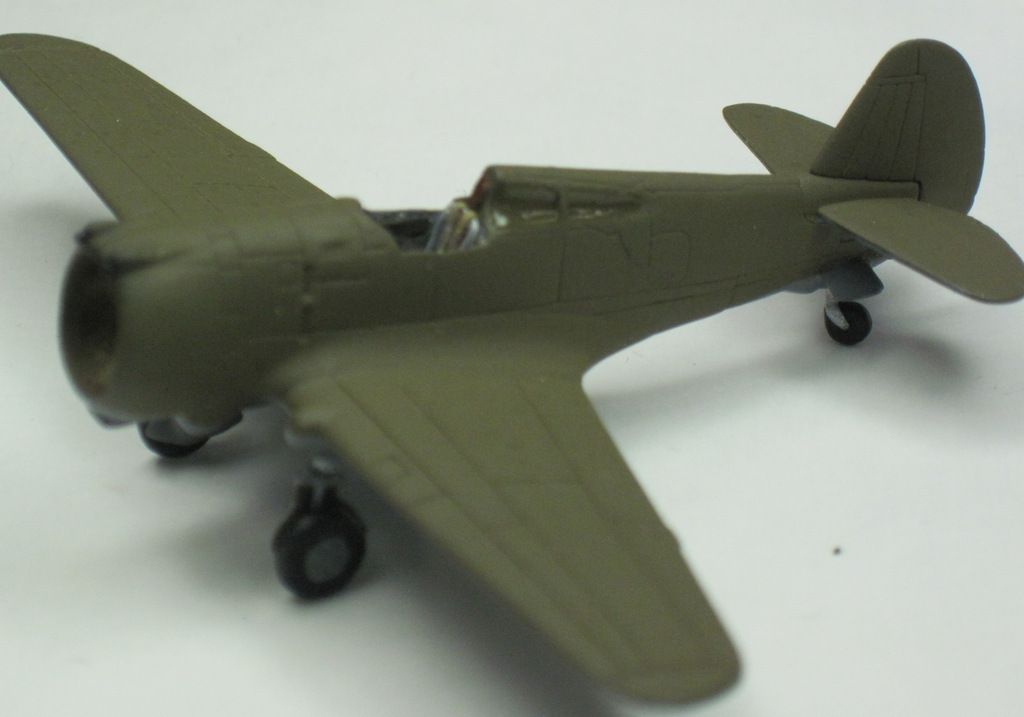
Seats in, tail wheel installed. The engine and prop are placed for test fit. A few more items to complete like the cowl guns, headrest, maybe some cockpit side panels and stick. I am trying to stall a little before I get back to the canopy.
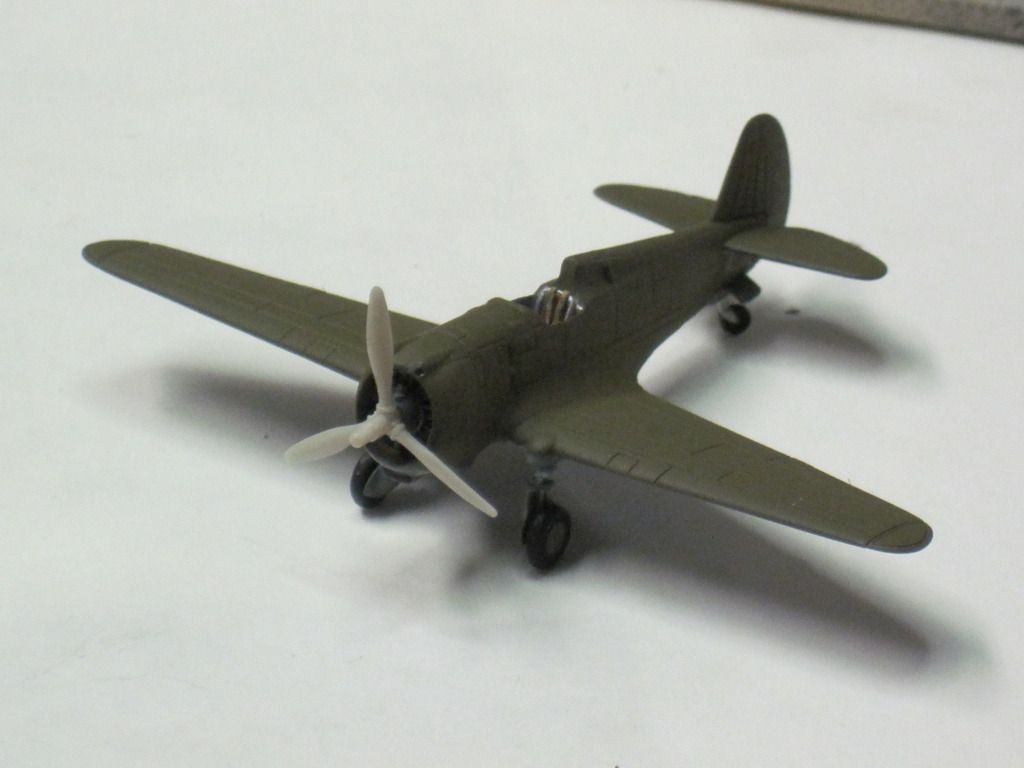
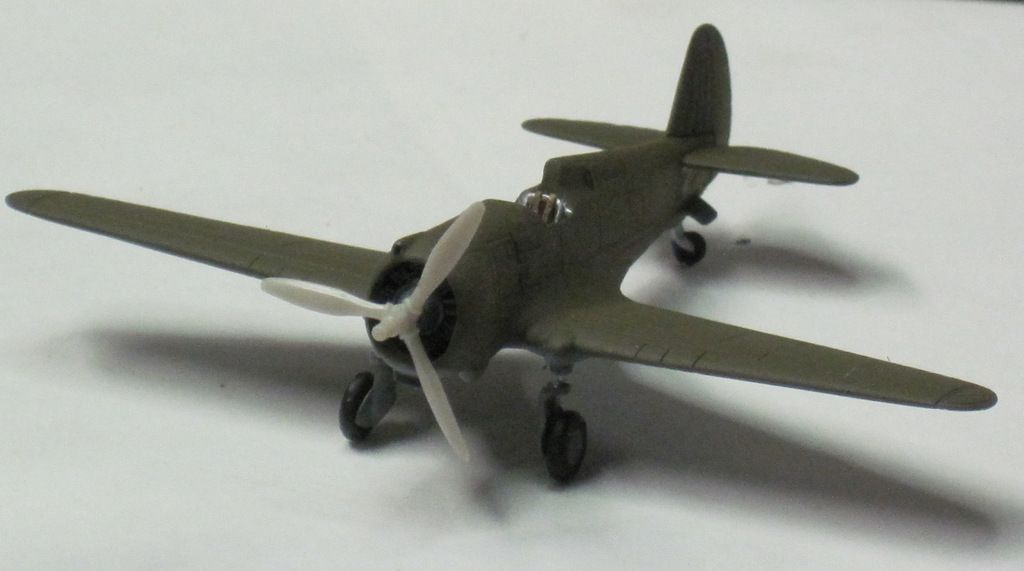
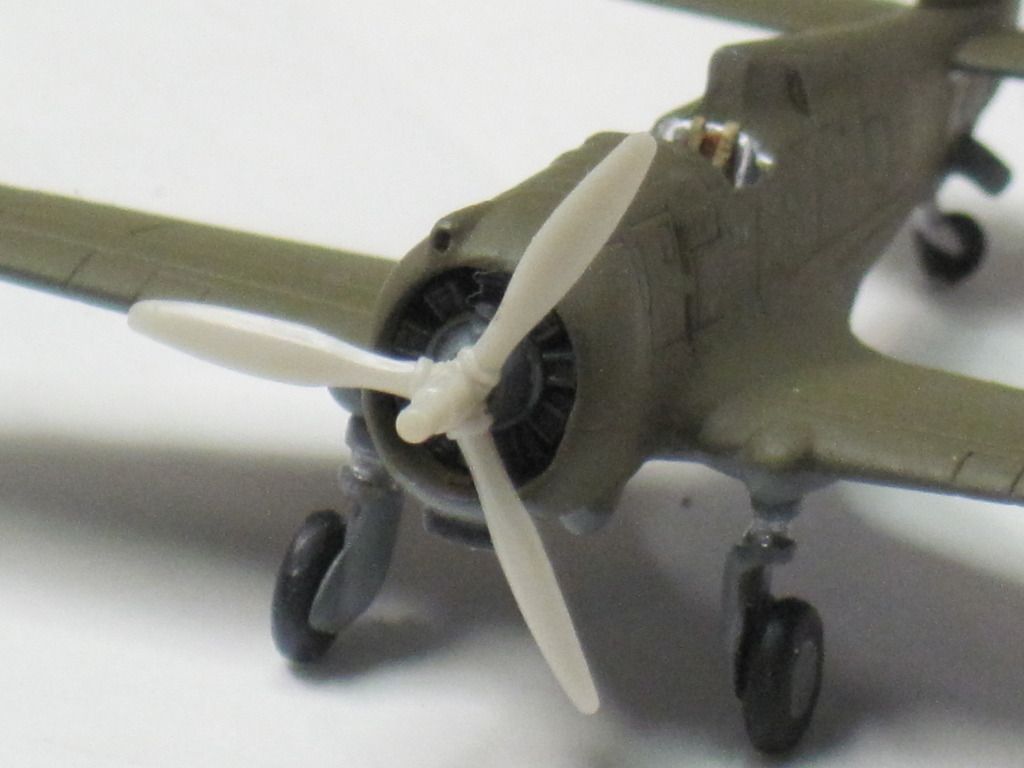
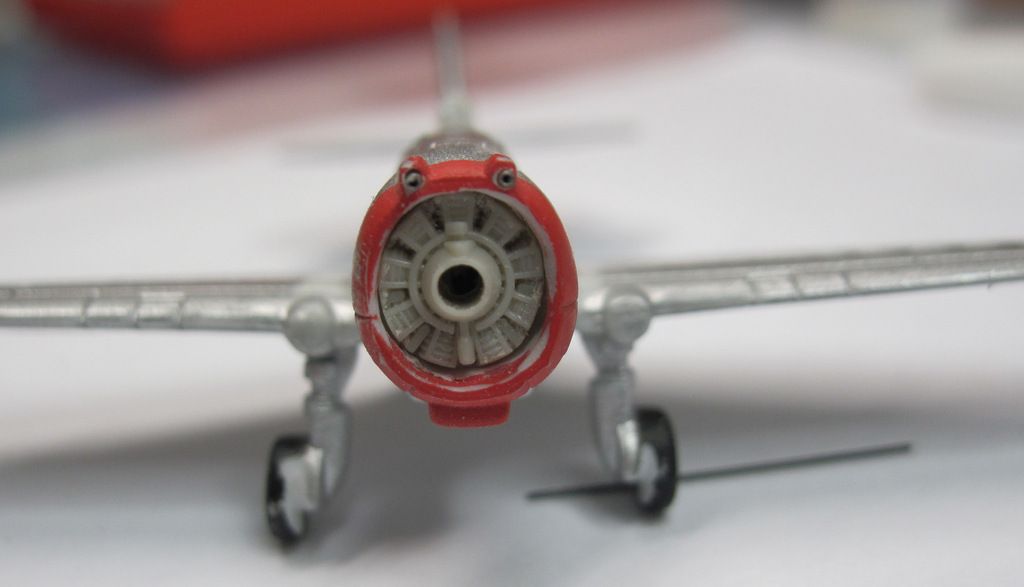
I'm looking for some in put on the prop hub. Does it look too big or is it a good size. I keep going back and forth.
Heres another update on the 36. Diorama is in a bit of a holding pattern at the moment.
--------------------------------------->
Surprisingly the canopy was very cleanly molded and fits very well. But it was molded in a smoke color plastic. Before I painted the plane I wanted to see if I could hand vac u form a new canopy using the models as a master.

If I did not succeed I would have to make a canopy frame out of stretched spru like I did for the P-38F then sand it smooth to the fuselage and I really didn't want to do that again. After several attempts of wasting the .005 clear plastic I took a break.

The next day I tried again and this time as odd as it sounds I used a different candle and a few attempts later I got one that would pass.


I trimmed and cut and sanded and finally I think it fits pretty close.

With canopy a partial success I put it aside and went on to paint the P-36. I used Model Master Olive Drab rattle can for the top and brushed Tamiya Neutral Gray for the bottom.


Again I pulled some stretched spru out to about .025 to be the landing gear struts. (Stretched spru and super glue are 2 of the scratch builders best friends).

Here is the landing gear strut on the right gear, the left already has the reworked wheel on.

Seats in, tail wheel installed. The engine and prop are placed for test fit. A few more items to complete like the cowl guns, headrest, maybe some cockpit side panels and stick. I am trying to stall a little before I get back to the canopy.


I'm looking for some in put on the prop hub. Does it look too big or is it a good size. I keep going back and forth.
Re: Scramble at Haleiwa - 1/144th Diorama
Wed Nov 04, 2015 11:29 am
The diorama is still at a standstill. I need to trim more grass back to fit the P-36 comfortably, and apply some other small plant life to round out the display. I've also ordered more trees for this, and another diorama. I plan on adding a few more to fill it out. I've painted the staff car, and while it's starting to look good, it still needs some work. Next is the "airfield filler' and the orange 41 Buick.
Update from he old man
------------------------------------------------------->
Let me start this update edition by making a little clarification. This P-36 project is not going as first planned. I figured I would make this aircraft for Chris's diorama by cleaning it up and adding a few modifications. Sometimes thing's work out much better than planned. I consider myself an adequate model / scratch builder. I have friends that are great model builders and a couple that I consider master modelers where their projects leave me in awe. By my posting all the pictures and info along the way I am hoping to initiate someone else to maybe give me some tips or my work to help another modeler. As I move on with this model and things luckily keep working out great, all it makes me do is push my skills of 50 years as far as I can go.
I have stumbled on a few new tricks as you will see in this next update.
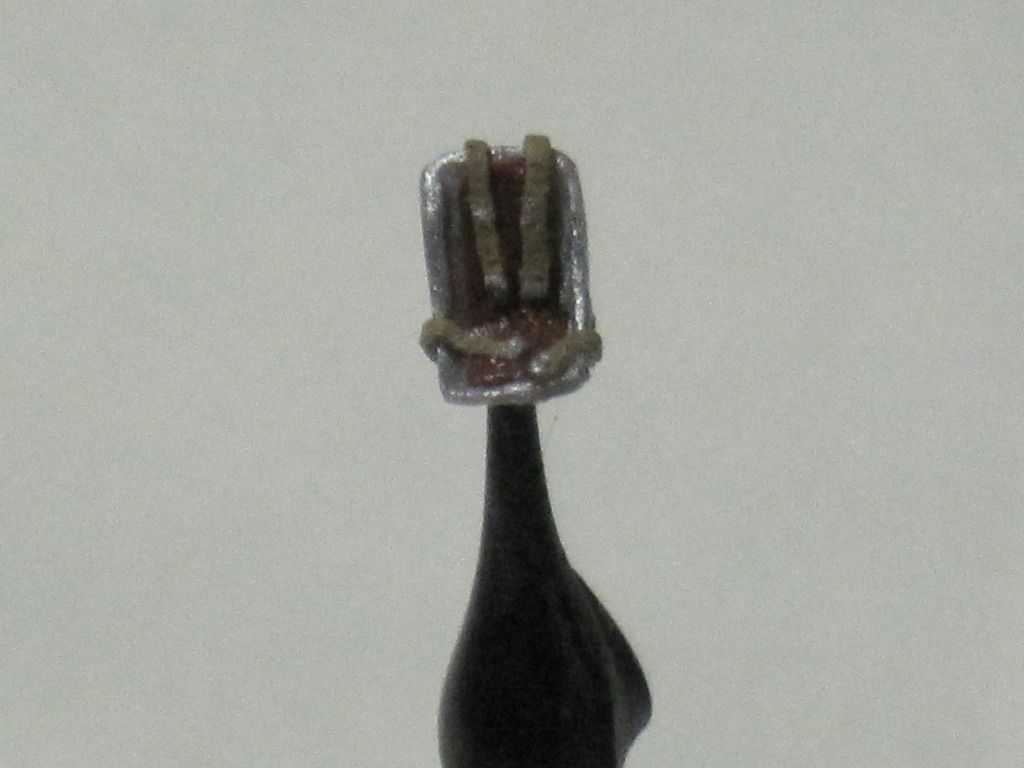
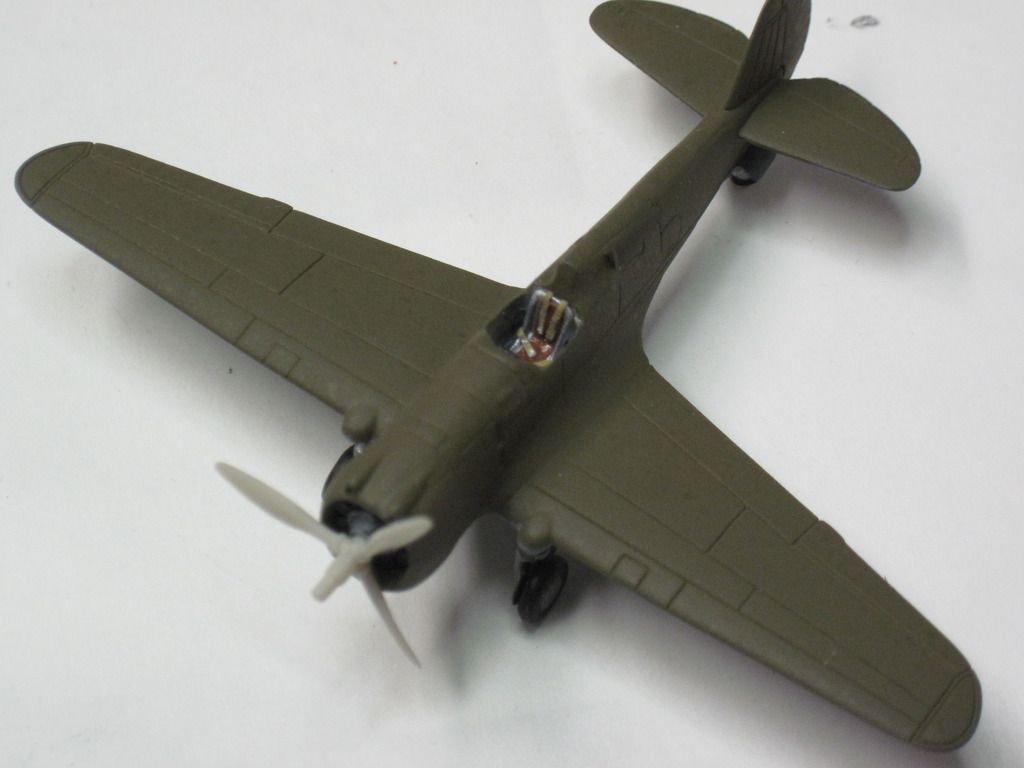
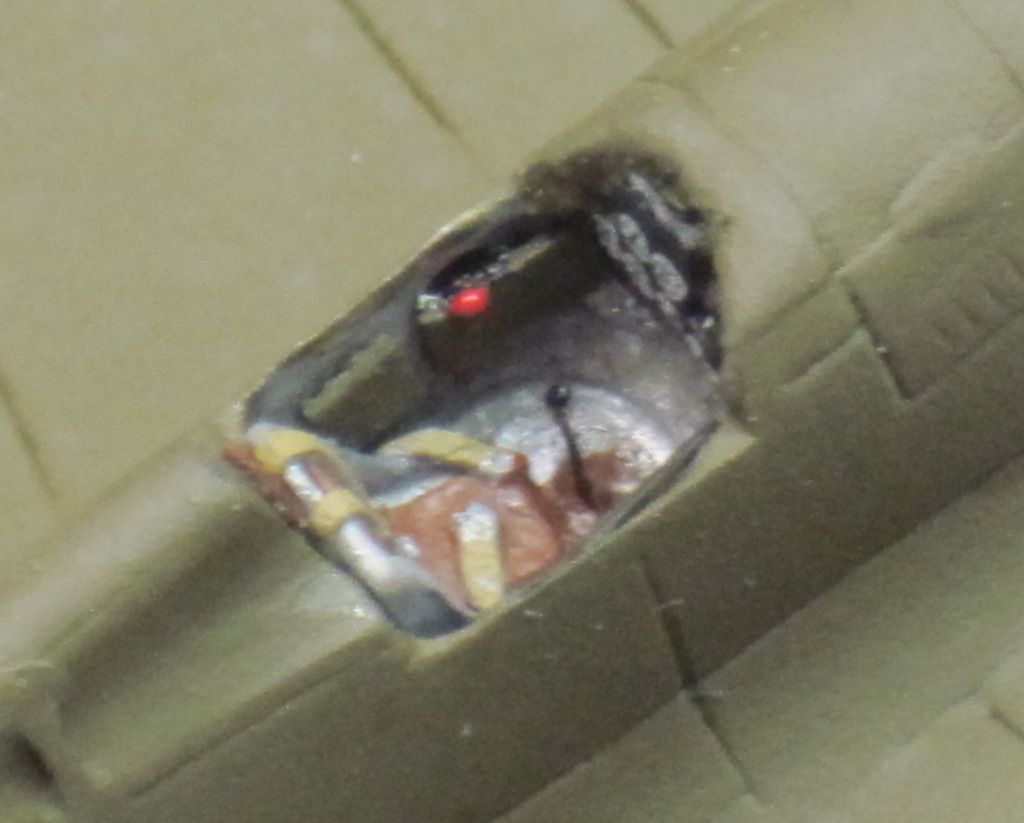
I held the cowl guns in a pin vise and gave them a light coat of flat black. A very tiny bit of Krystil Klear ( Its what is used to make windows- kind of like elmers glue) was put in the holes for the guns and the guns inserted. It takes a few minutes for the Klear to start to set up so it gives you time to position the guns in the proper place. I have already put the headrest in place. The headrest is a small piece of masking tape painted Leather.
I grabbed the pastel chalks again and brushed the guns with black, I did around the guns a little bit. It makes it look like residue after firing the guns. This is ok as long as you are not going to touch where the chalk is. If you might handle the model later a coat of clear will seal it.
I wanted to try to add a little more detail to the cockpit seeing I plan to have the canopy back. I added some side panels and was looking around for something I could use for the control stick when something on the floor caught my eye. It was one of my cats whiskers!!!!! Looking at it I thought it was purrrfect ( sorry). Can you imagine the armour model builders. These things would make great whip antennas. ( NOW lets wait for the whiskers to fall out by themselves which they do.)
The decal for the instrument panel went on, the throttle knob went next then a piece of whisker was painted and put in. A dot of glue for the hand grip and black paint when dried.
Update from he old man
------------------------------------------------------->
Let me start this update edition by making a little clarification. This P-36 project is not going as first planned. I figured I would make this aircraft for Chris's diorama by cleaning it up and adding a few modifications. Sometimes thing's work out much better than planned. I consider myself an adequate model / scratch builder. I have friends that are great model builders and a couple that I consider master modelers where their projects leave me in awe. By my posting all the pictures and info along the way I am hoping to initiate someone else to maybe give me some tips or my work to help another modeler. As I move on with this model and things luckily keep working out great, all it makes me do is push my skills of 50 years as far as I can go.
I have stumbled on a few new tricks as you will see in this next update.
I held the cowl guns in a pin vise and gave them a light coat of flat black. A very tiny bit of Krystil Klear ( Its what is used to make windows- kind of like elmers glue) was put in the holes for the guns and the guns inserted. It takes a few minutes for the Klear to start to set up so it gives you time to position the guns in the proper place. I have already put the headrest in place. The headrest is a small piece of masking tape painted Leather.

I grabbed the pastel chalks again and brushed the guns with black, I did around the guns a little bit. It makes it look like residue after firing the guns. This is ok as long as you are not going to touch where the chalk is. If you might handle the model later a coat of clear will seal it.


I wanted to try to add a little more detail to the cockpit seeing I plan to have the canopy back. I added some side panels and was looking around for something I could use for the control stick when something on the floor caught my eye. It was one of my cats whiskers!!!!! Looking at it I thought it was purrrfect ( sorry). Can you imagine the armour model builders. These things would make great whip antennas. ( NOW lets wait for the whiskers to fall out by themselves which they do.)

The decal for the instrument panel went on, the throttle knob went next then a piece of whisker was painted and put in. A dot of glue for the hand grip and black paint when dried.


Re: Scramble at Haleiwa - 1/144th Diorama
Wed Nov 04, 2015 4:16 pm
tip me over - I cannot believe the cockpit detail!! amazing to me.
Tom P.
Tom P.
Re: Scramble at Haleiwa - 1/144th Diorama
Fri Nov 06, 2015 6:00 pm
Thanks Tom! My dad appreciates it. He may not have an account on WIX but he sure lurks.
Another update!
------------------------------------------>
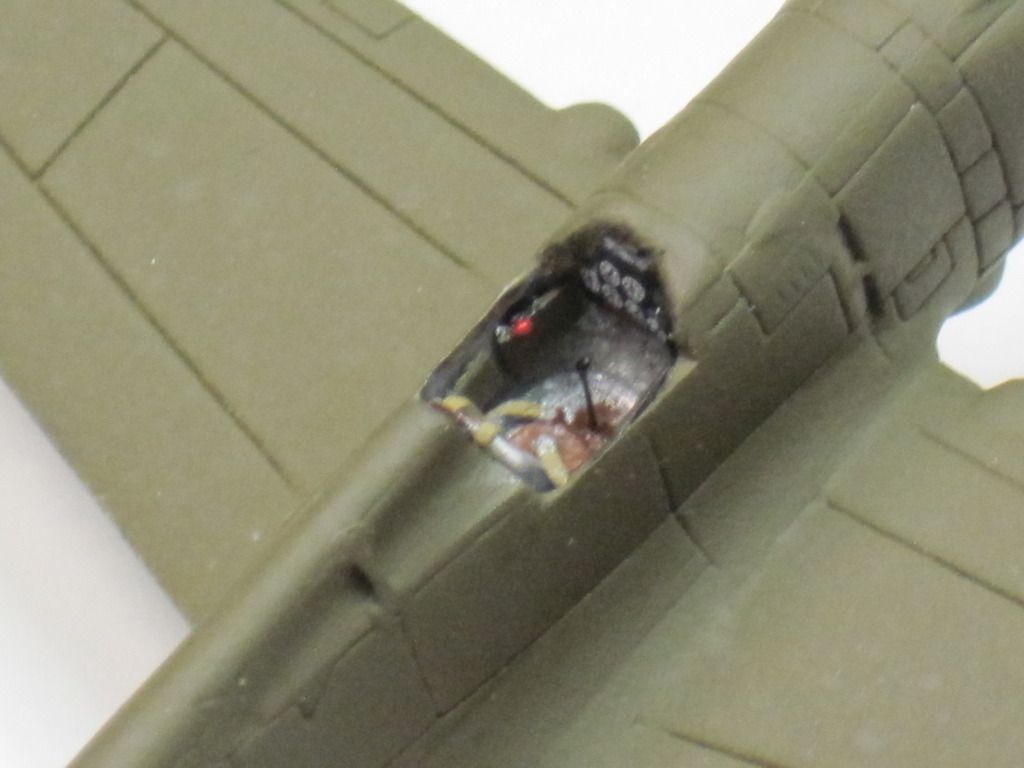
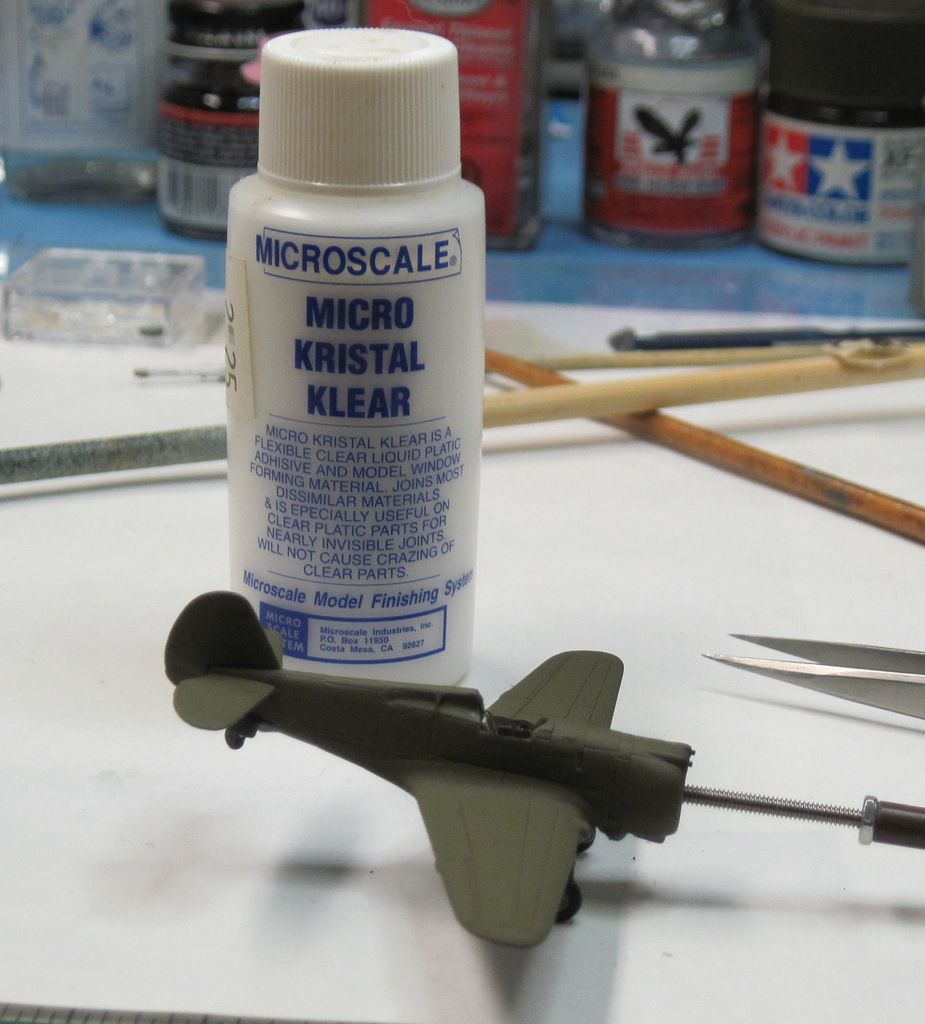
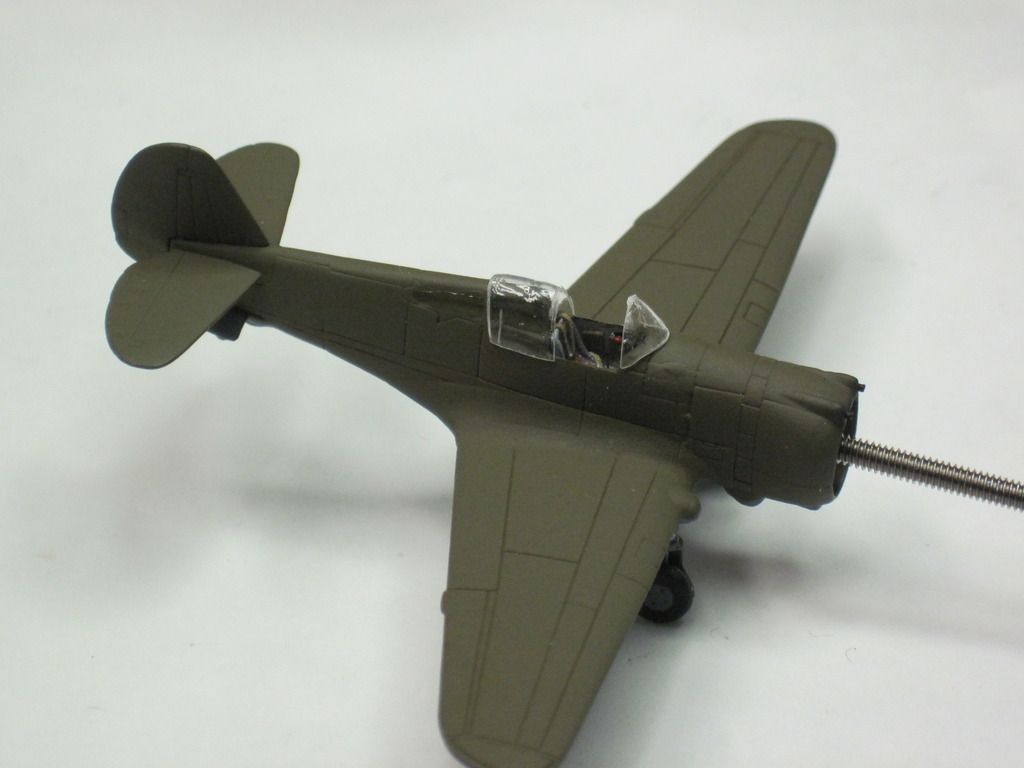
Time to add the side windows. I used Micro Kristal Klear. It is a great product, It reminds me of Elmers Glue but dries clear.
I also use it to attach small items because it does not bond instantly like super glue. You have some time to work with it. It is great to attach canopy's seeing that it dries clear. As you can see here once it dries it does look like a window.
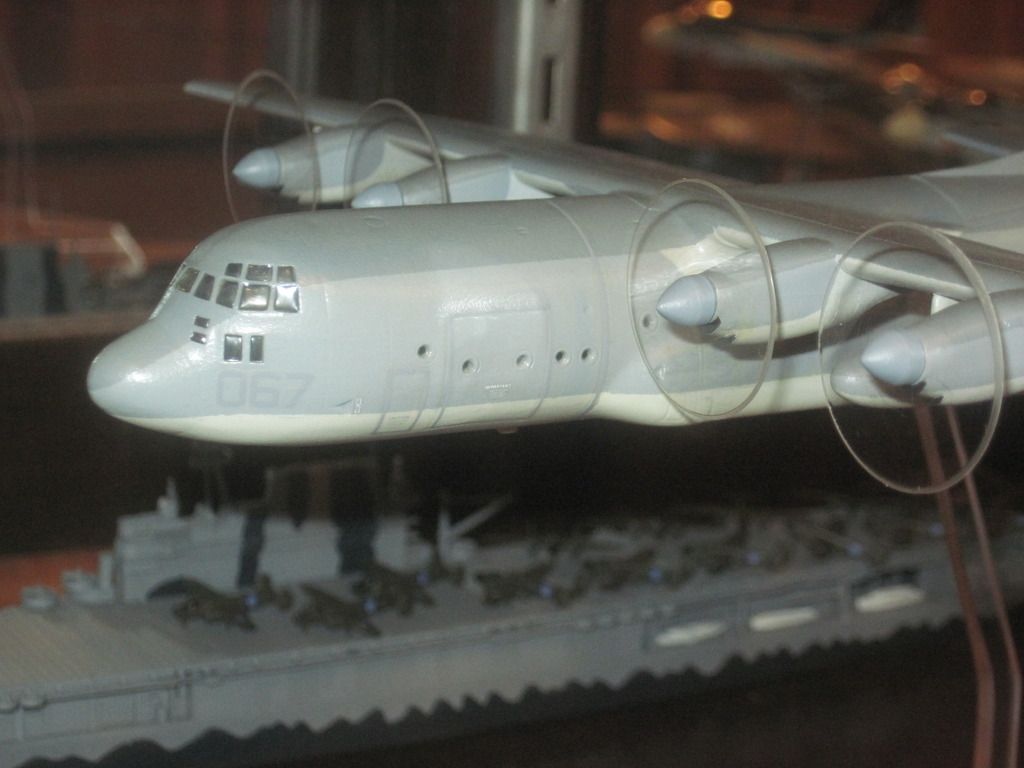
I have used the Klear many times. Here are a few examples. I wanted to air brush a Revelle 1/144 C-130 that was converted to a KC-130 Tanker but the cockpit glass was thick and had to be inserted from the inside which meant it had to be masked. I made the frame work from stretched spru like the P-38F and filled all the glass including all the fuselage windows with the Klear.
Another example that I had to use it on was the right side canopy window on a 1/32 scale P-51A that was converted from a Revell P-51B kit. This was the biggest area that I have ever used it on. It was time consuming because once I finally got the area filled I had to continually keep rolling the the frame back and forth as it dried so it would keep the contour.
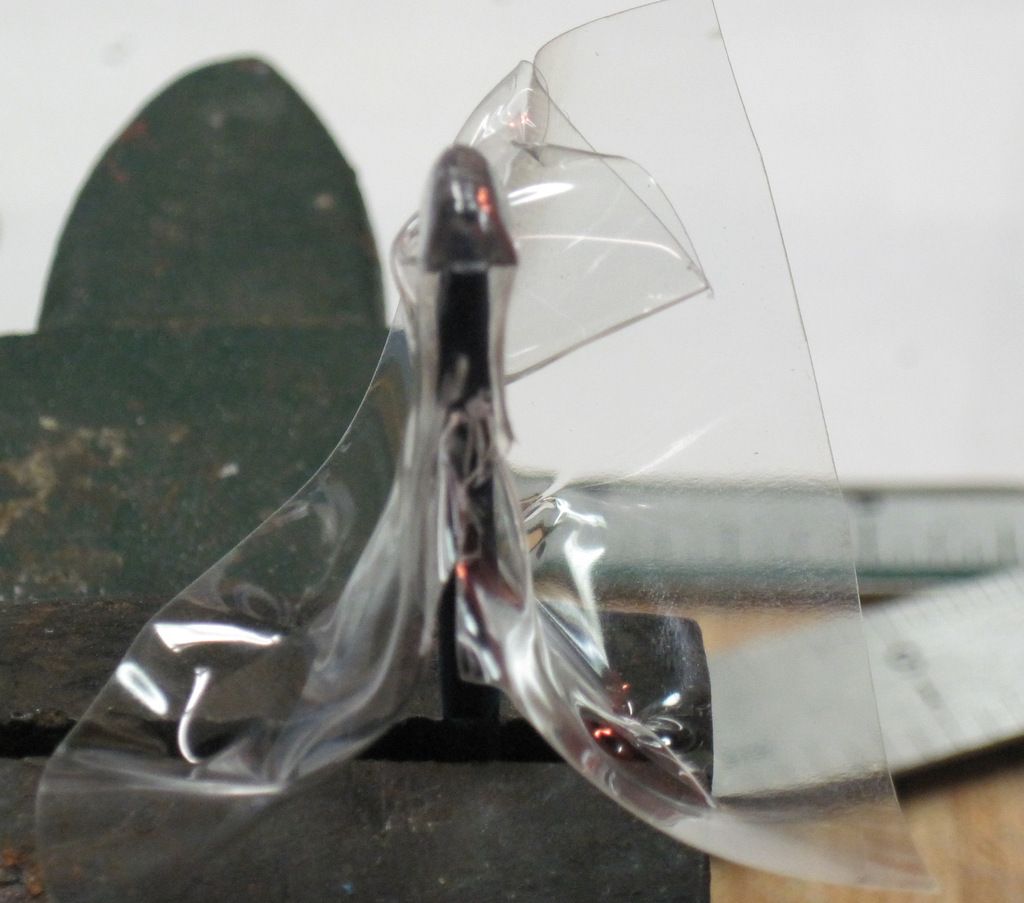
With the side glass dried I added one more Throttle Knob ( white ) and decided to separate the hand formed canopy from the front windscreen. I was trying to think how to cut it. I gave it a few small snips with a pair of new scissors but did not like the way that was cutting. I figured I would place it back on the original kit canopy to hold it in place and cut it with an xacto blade.
The procedure went as follows: Place canopy on original mold, Insert brand new xacto blade in handle, make several rolling cuts on canopy, go get band aid after slipping and stabbing finger with new blade.
The separated canopy is seen here just to see how it lines up.
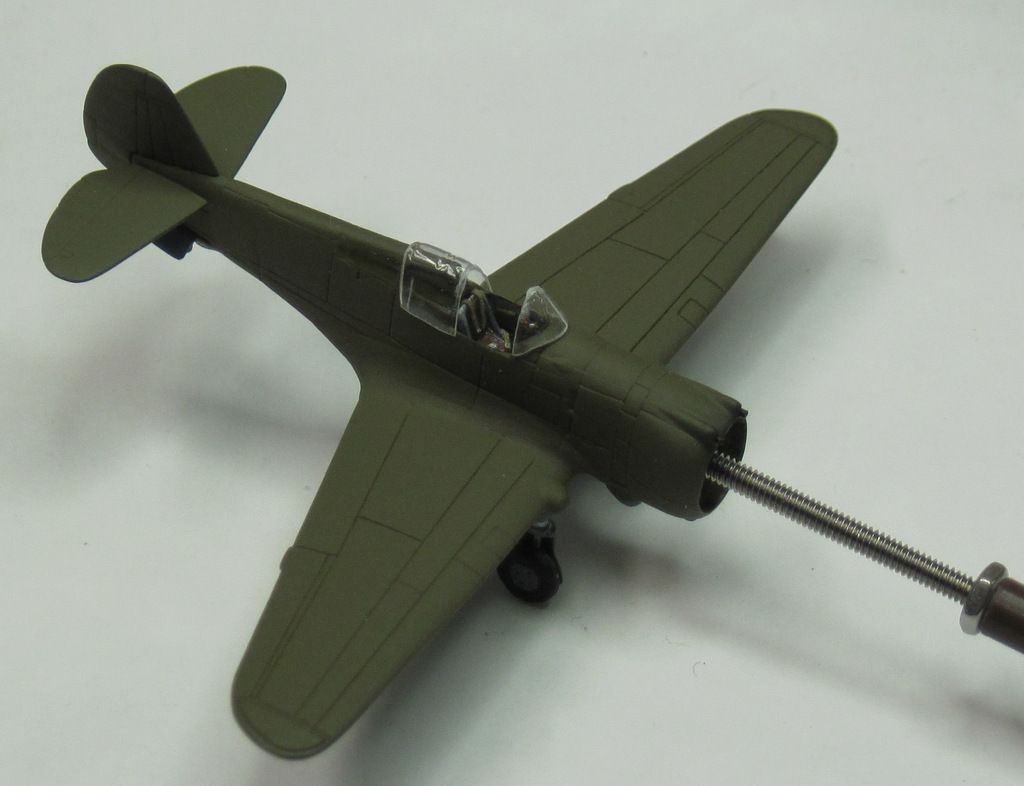
It has to cleaned up a bit for a little better fit. The front windscreen will be attached with the Klear and then painted.
Another update!
------------------------------------------>
Time to add the side windows. I used Micro Kristal Klear. It is a great product, It reminds me of Elmers Glue but dries clear.


I also use it to attach small items because it does not bond instantly like super glue. You have some time to work with it. It is great to attach canopy's seeing that it dries clear. As you can see here once it dries it does look like a window.

I have used the Klear many times. Here are a few examples. I wanted to air brush a Revelle 1/144 C-130 that was converted to a KC-130 Tanker but the cockpit glass was thick and had to be inserted from the inside which meant it had to be masked. I made the frame work from stretched spru like the P-38F and filled all the glass including all the fuselage windows with the Klear.

Another example that I had to use it on was the right side canopy window on a 1/32 scale P-51A that was converted from a Revell P-51B kit. This was the biggest area that I have ever used it on. It was time consuming because once I finally got the area filled I had to continually keep rolling the the frame back and forth as it dried so it would keep the contour.


With the side glass dried I added one more Throttle Knob ( white ) and decided to separate the hand formed canopy from the front windscreen. I was trying to think how to cut it. I gave it a few small snips with a pair of new scissors but did not like the way that was cutting. I figured I would place it back on the original kit canopy to hold it in place and cut it with an xacto blade.
The procedure went as follows: Place canopy on original mold, Insert brand new xacto blade in handle, make several rolling cuts on canopy, go get band aid after slipping and stabbing finger with new blade.

The separated canopy is seen here just to see how it lines up.

It has to cleaned up a bit for a little better fit. The front windscreen will be attached with the Klear and then painted.
