Warbird Information Exchange

DISCLAIMER: The views expressed on this site are the responsibility of the poster and do not reflect the views of the management.
It is currently Thu Apr 18, 2024 10:42 pm

All times are UTC - 5 hours


Classic Wings Magazine WWII Naval Aviation Research Pacific Luftwaffe Resource Center
When Hollywood Ruled The Skies - Volumes 1 through 4 by Bruce Oriss


Post new topic Reply to topic  [ 798 posts ]  Go to page Previous  1 ... 27, 28, 29, 30, 31, 32, 33 ... 54  Next
Author Message
PostPosted: Thu May 28, 2015 10:18 pm 
Offline
1000+ Posts!
1000+ Posts!
User avatar

Joined: Sat Nov 19, 2011 11:18 am
Posts: 1573
Location: Northwest Ohio
Shhh, quiet. I'm almost done. :drink3: :drink3:

_________________
A&P/I.A., A.A.S./Aviation Maintenance technology
Warbird salvage/recovery
One day I'll get that P-40!


Top
 Profile  
 
PostPosted: Fri May 29, 2015 8:52 pm 
Offline
2000+ Post Club
2000+ Post Club
User avatar

Joined: Sun Jul 31, 2005 7:28 pm
Posts: 2184
Location: Waukesha, WI
Man, those armorers would have loved having a Pullmax. Shaped the blanks in the Pullmax then finished in the wheel. The wheel polishes the surface as well then a spot on the polishing wheel, look at the difference. These are three piece spaulders (shoulder protection) and will have three lames that will cover the upper arm. You'll see.

Image

Wheeling after Pullmax
Image

Image

Three piece spaulders (shoulder protection)
Image

Formed and some wheeling done
Image

The wheel does some polishing inherently. The lames in the center were then polished after
Image

_________________
"There are old pilots and bold pilots but few old, bold pilots."


Top
 Profile  
 
PostPosted: Sat May 30, 2015 6:26 am 
Offline
2000+ Post Club
2000+ Post Club

Joined: Tue Oct 02, 2012 7:26 pm
Posts: 2002
Location: Creemore Ontario Canada
I guess historically this would have been done by hammer, shot bag, blood, sweat and tears huh?

What, do you suppose, is the time difference using the pullmax and wheel. It has to be 10 times faster at least!

Cool stuff Scott.

Love seeing your craftsmanship and ingenuity :supz:

Andy


Top
 Profile  
 
PostPosted: Sat May 30, 2015 9:17 am 
Offline
2000+ Post Club
2000+ Post Club
User avatar

Joined: Sun Jul 31, 2005 7:28 pm
Posts: 2184
Location: Waukesha, WI
Andy, hammer and hollowed out stumps for forming and lots of time. The Pullmax forming took about a minute and the wheel saves hours of hand planishing. The tools have definitely made it easier but it is the effect the customer is after, not my manufacturing techniques. 8)

_________________
"There are old pilots and bold pilots but few old, bold pilots."


Top
 Profile  
 
PostPosted: Sun Jun 07, 2015 7:33 pm 
Offline
2000+ Post Club
2000+ Post Club
User avatar

Joined: Sun Jul 31, 2005 7:28 pm
Posts: 2184
Location: Waukesha, WI
So, to get out of the 15th Century, I spent Saturday and Sunday finishing for the King. Hope he doesn't want my head... This is 18ga cold rolled steel and simple brass trim.

Image

Nibbling out the trim for the spaulder lames

Image

Fitting the trim and Tudor Rose to the gorget

Image

Made washers to hold the buffalo hide neck piece trim

Image

Finished gorget

Image

Image

Spaulder lames assembled with hand cut leather strips and buckle assemblies

Image

Image

Finished pieces

Image

_________________
"There are old pilots and bold pilots but few old, bold pilots."


Top
 Profile  
 
PostPosted: Mon Jun 08, 2015 5:57 am 
Offline
2000+ Post Club
2000+ Post Club

Joined: Tue Oct 02, 2012 7:26 pm
Posts: 2002
Location: Creemore Ontario Canada
pop2 Arts and crafts at it's finest!

Really nice Scott.

Always enjoying.

Andy


Top
 Profile  
 
PostPosted: Sat Jun 13, 2015 6:35 pm 
Offline
2000+ Post Club
2000+ Post Club
User avatar

Joined: Sun Jul 31, 2005 7:28 pm
Posts: 2184
Location: Waukesha, WI
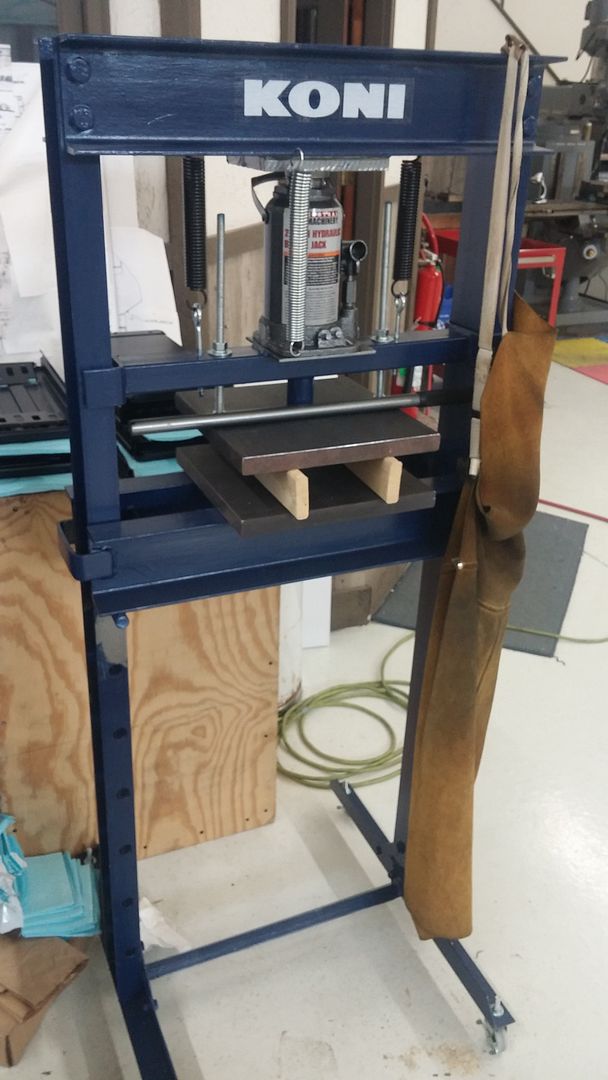
Meanwhile back at the "Werx", lots been going on. Built a simple 20T press to do some Corsair hydroforming. Added 12" square by 1" thick platten plates and a little extra retract help. Rubber pads in transit.

Image

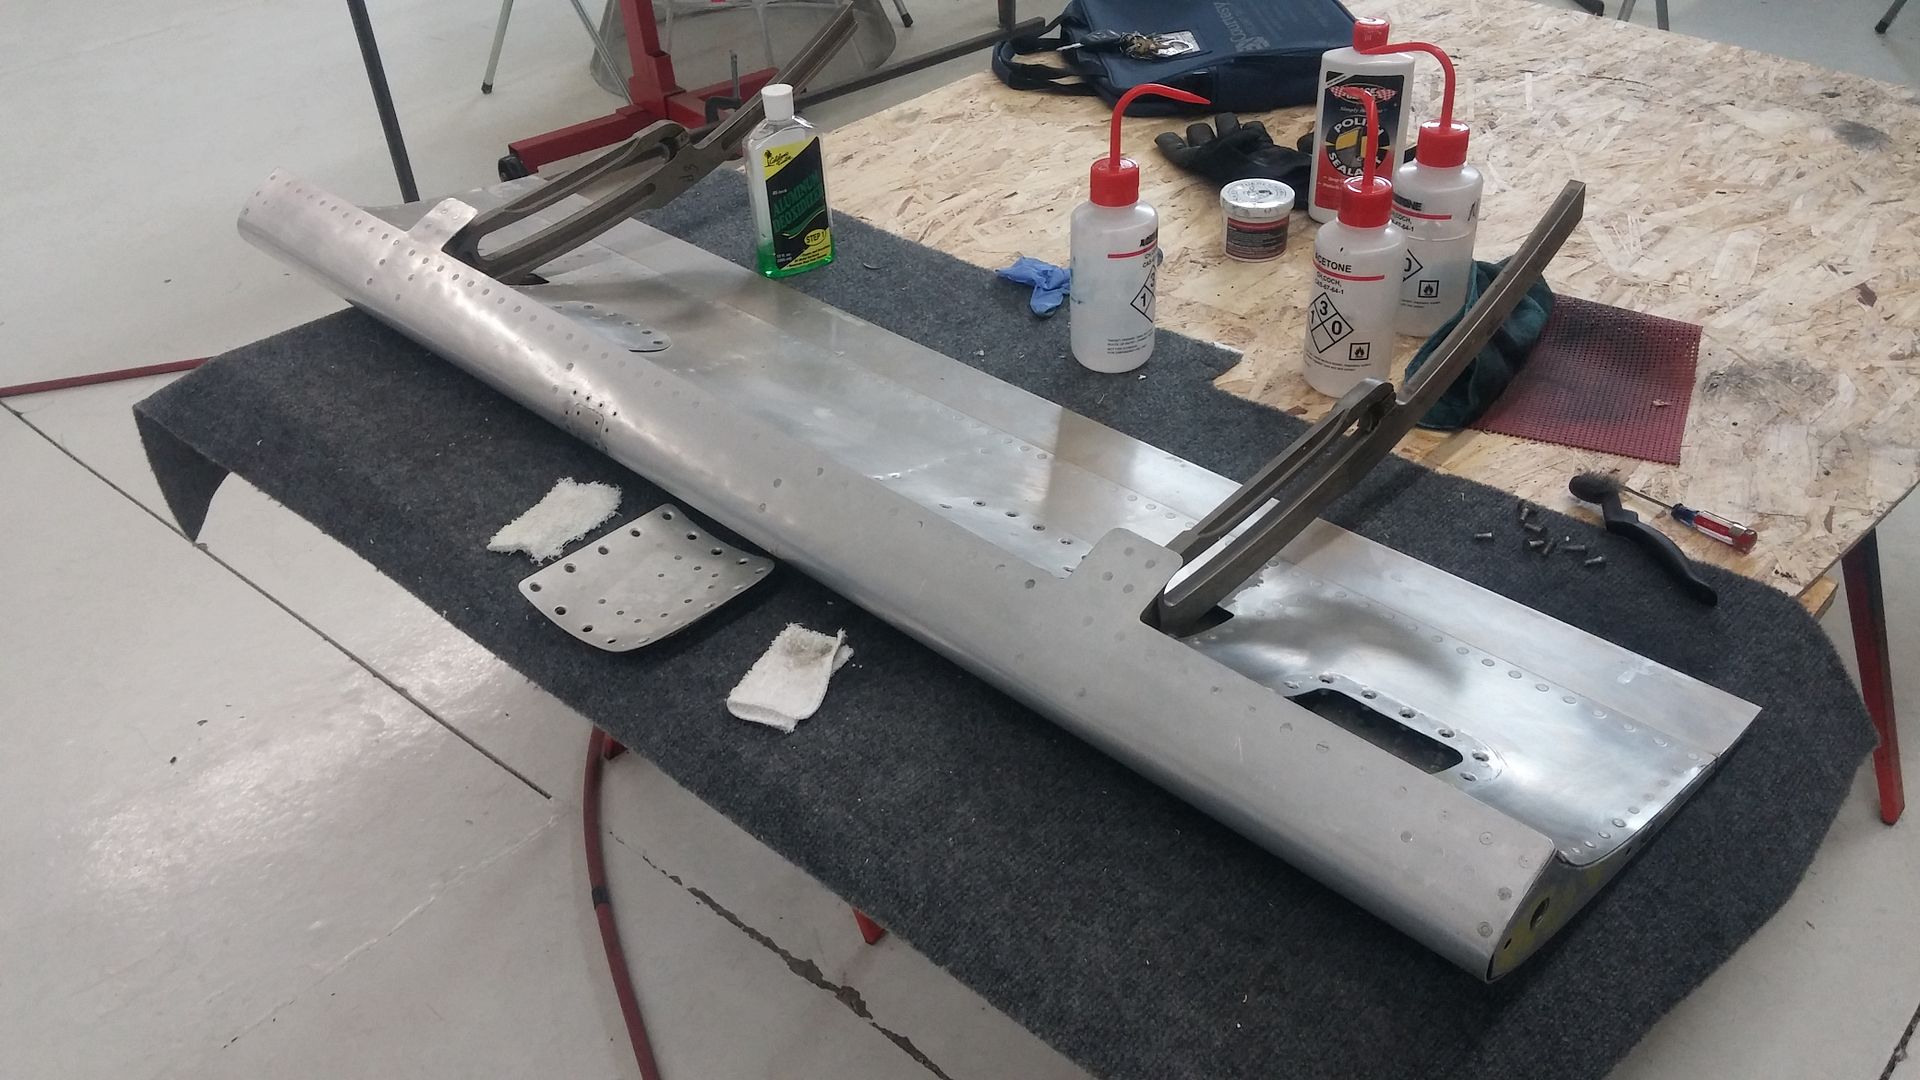
More jet work. Last section of leading edge slats.

Image

More stripping...easier there Munchkin. Paint stripping...

Image

Image

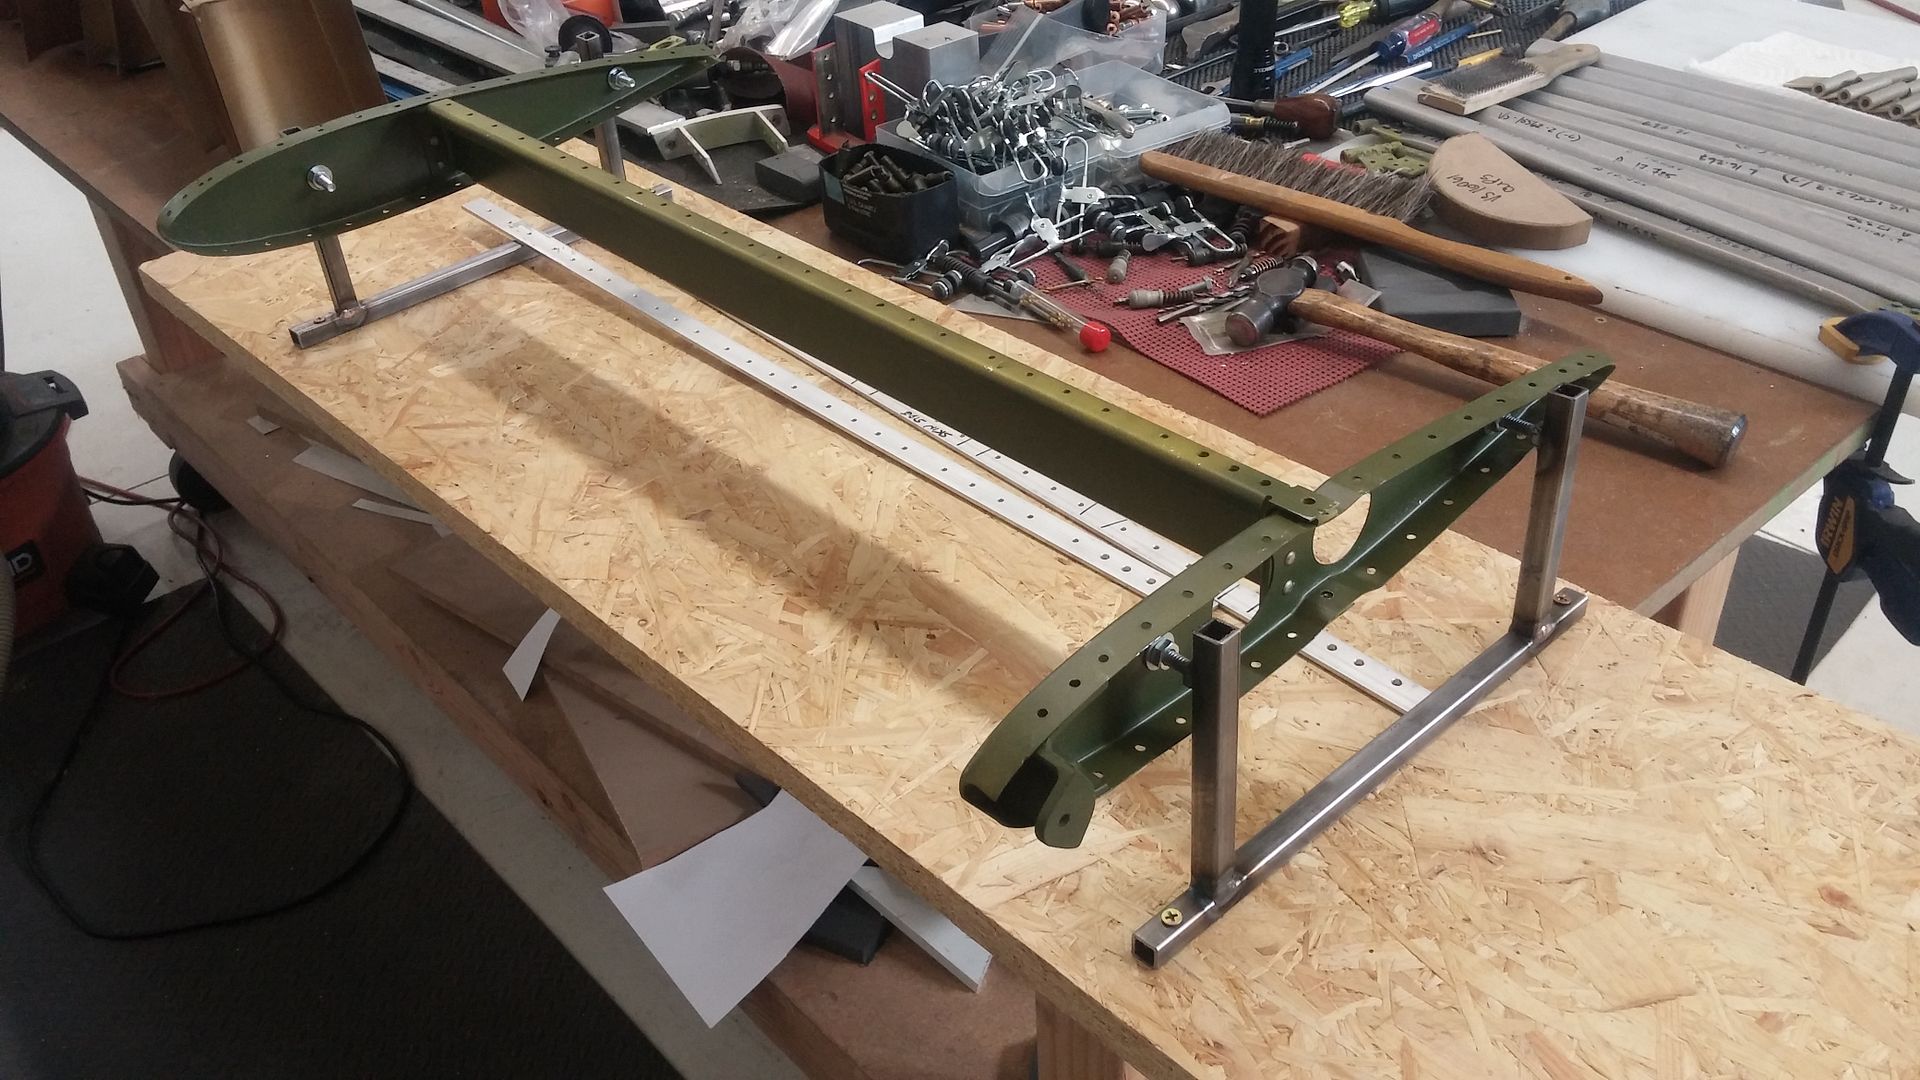
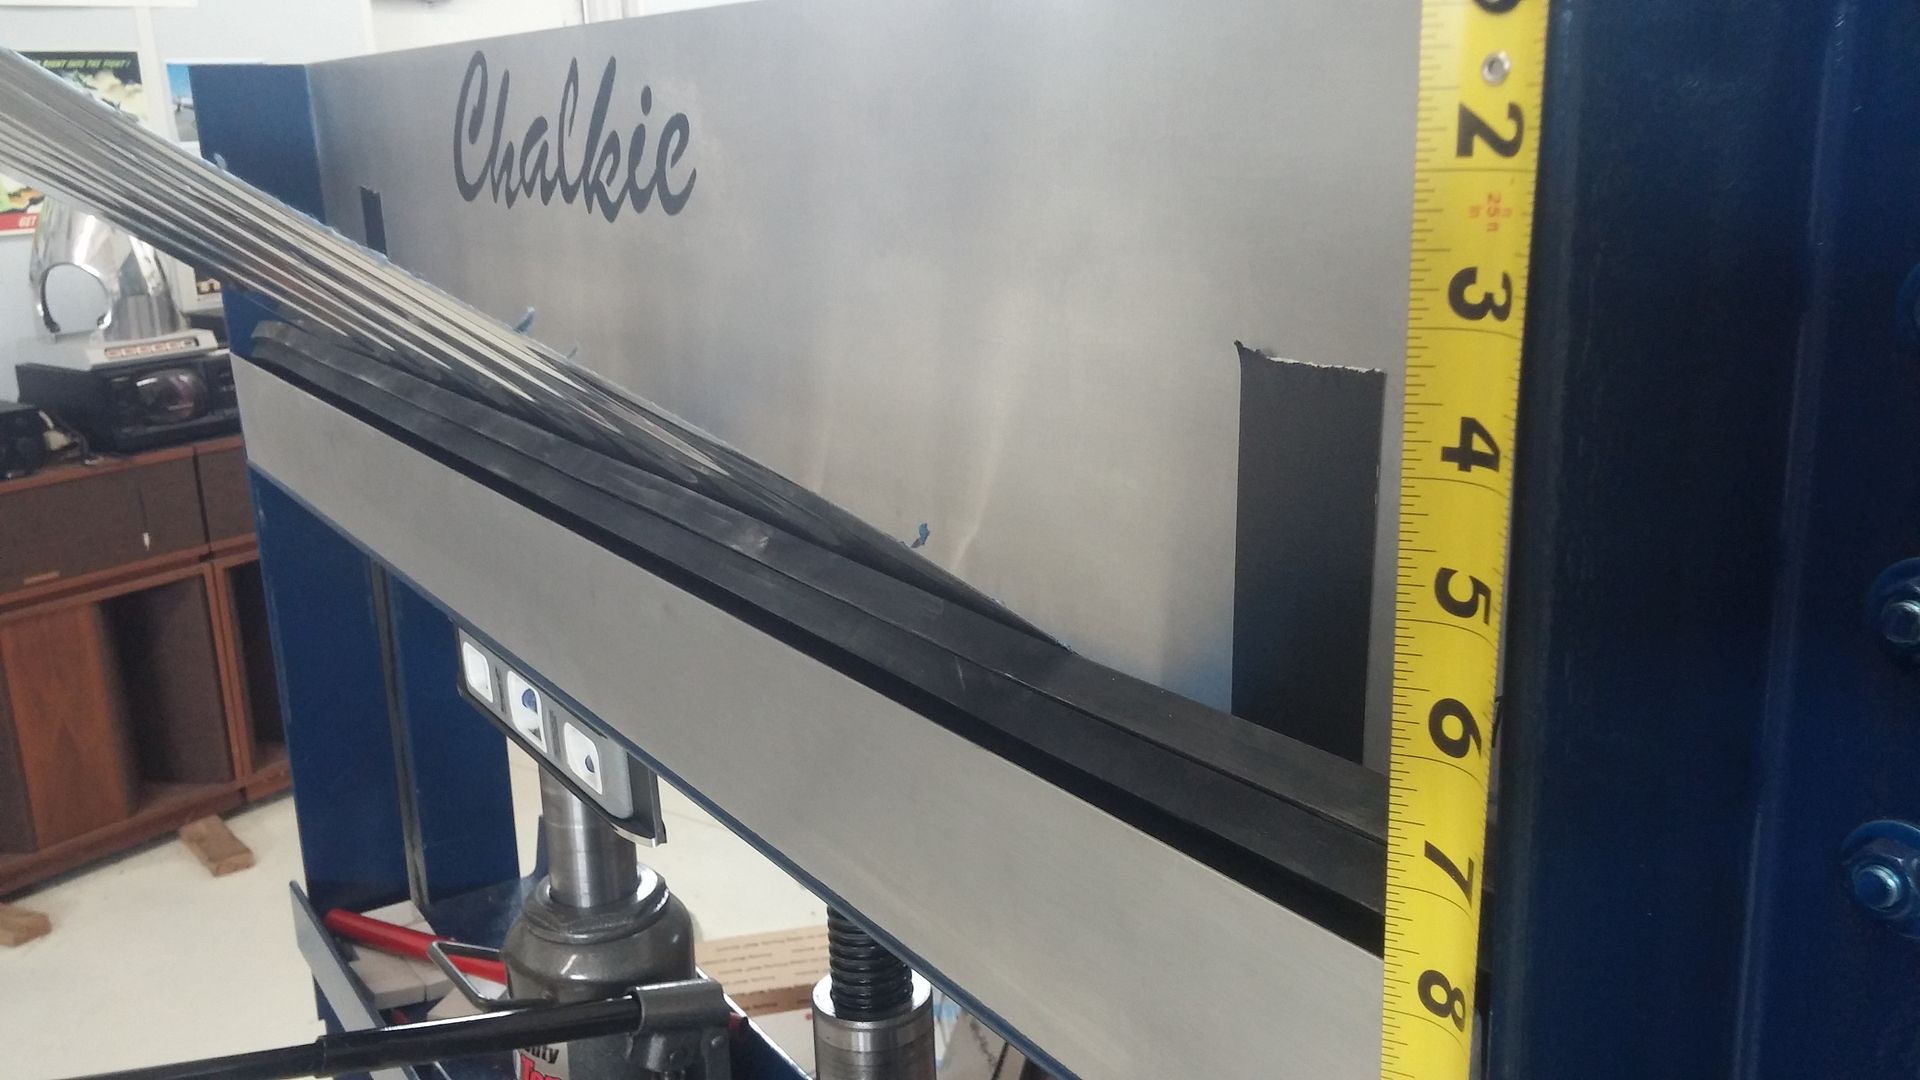
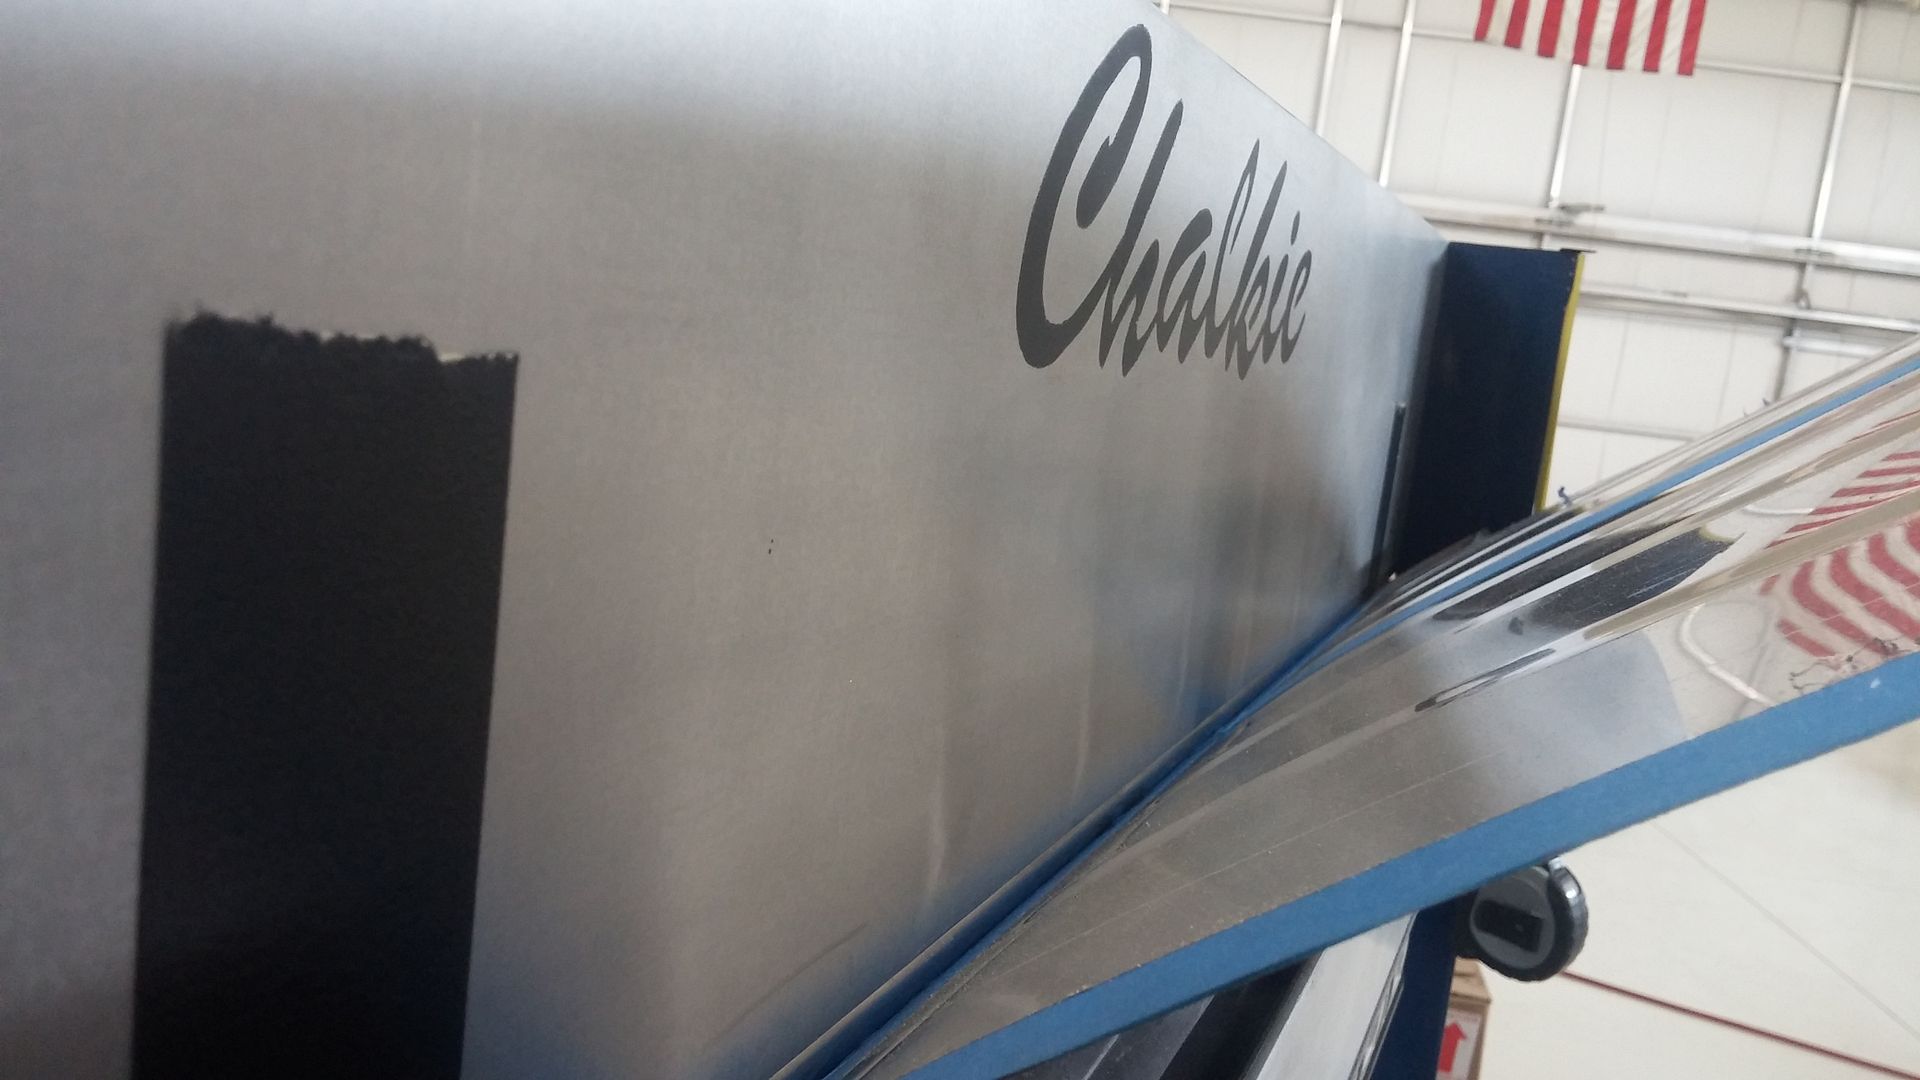
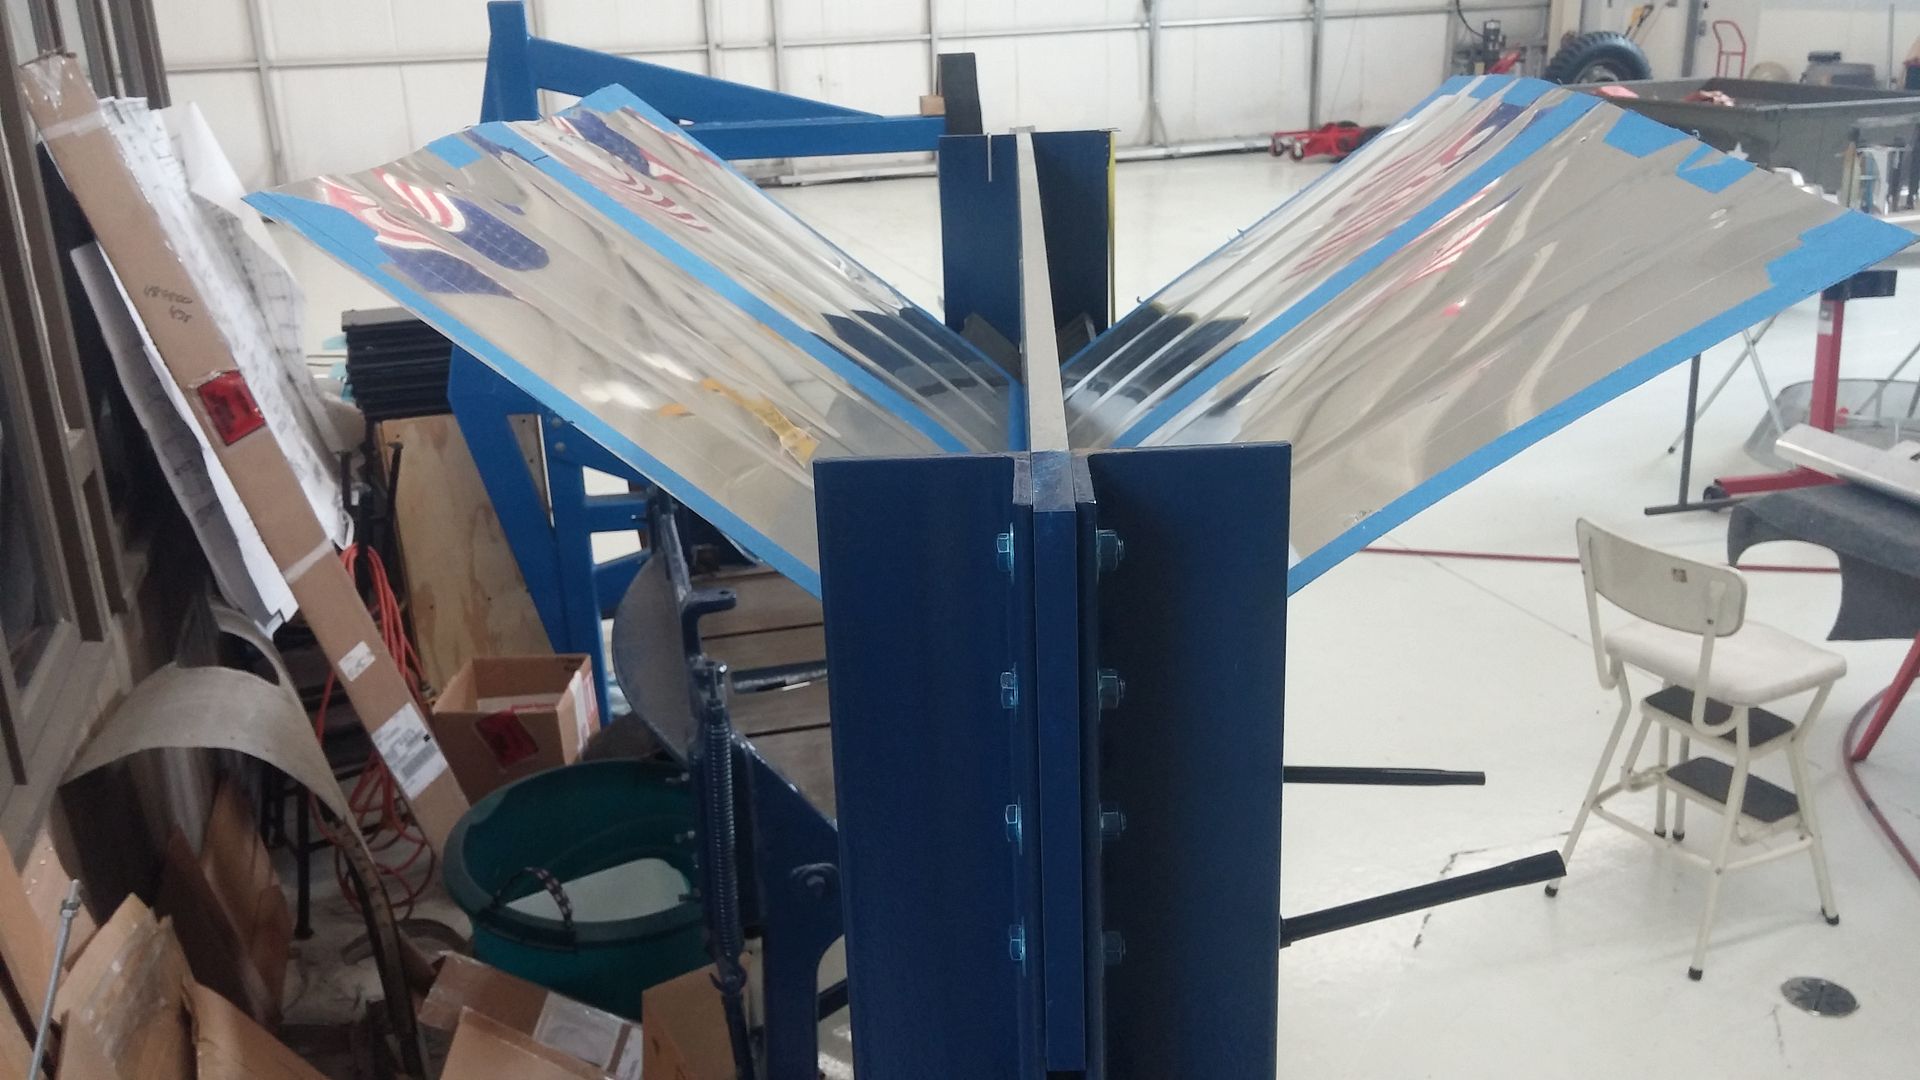
Then finishing the reskinning of a TH55A horizontal stabilizer. This uses my "Chalkie" press to form the leading edge bend. I covered making this press earlier in this thread. Here is how it is used. I had determined that a 1/2" form matched the ribs. I then bent a small test strip to determine how much I needed to press the skin to achieve the correct bend. I am using a test skin that I had "pooched" earlier when forming the beads. This way I can get my process down for the good and final skin. I made some simple tooling to hold the spar and two end ribs.

Image

So, I feed the skin into the press to line up the leading edge center line with the 1/2" form bar.

Image

This is the 1/2" bar

Image

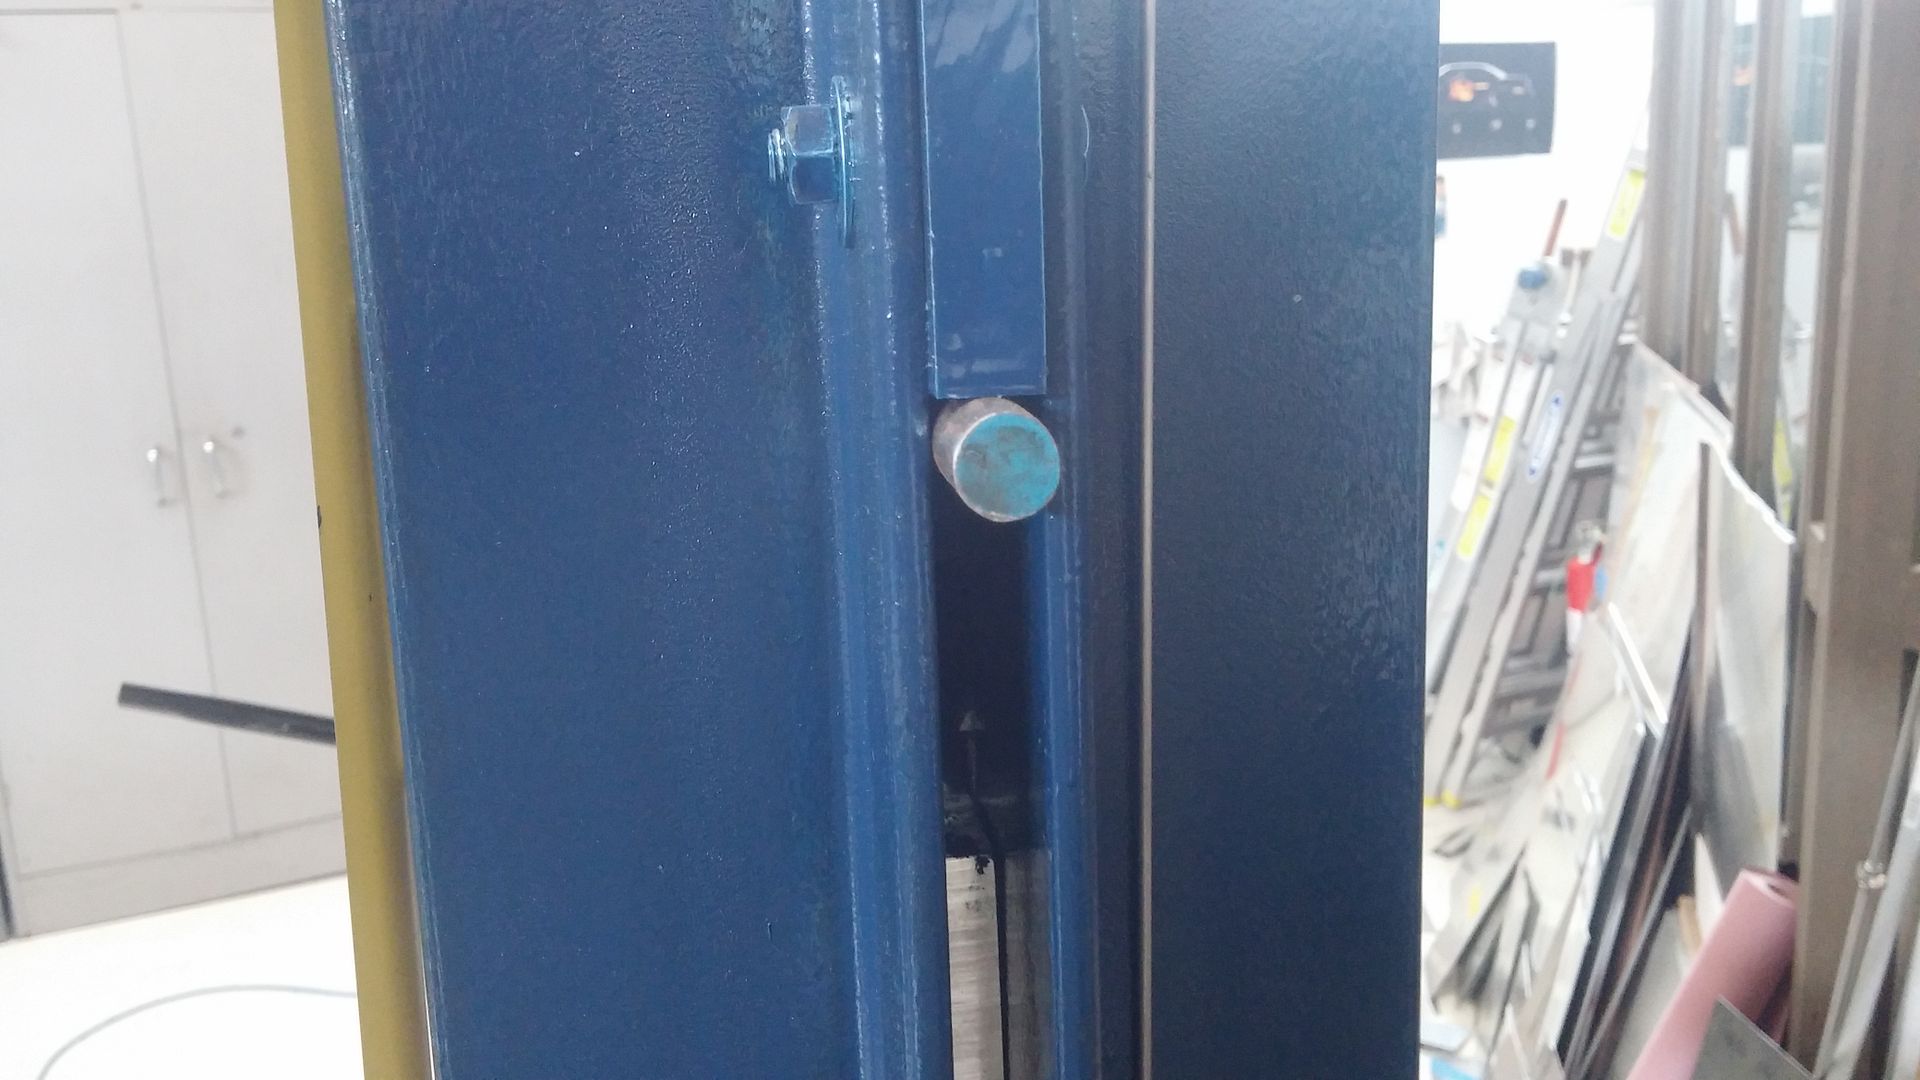
I start jacking up the forming trough and use the scale to reach the pre-determined amount of bend. The neoprene forms the bend as the skin is pressed into the trough.

Image

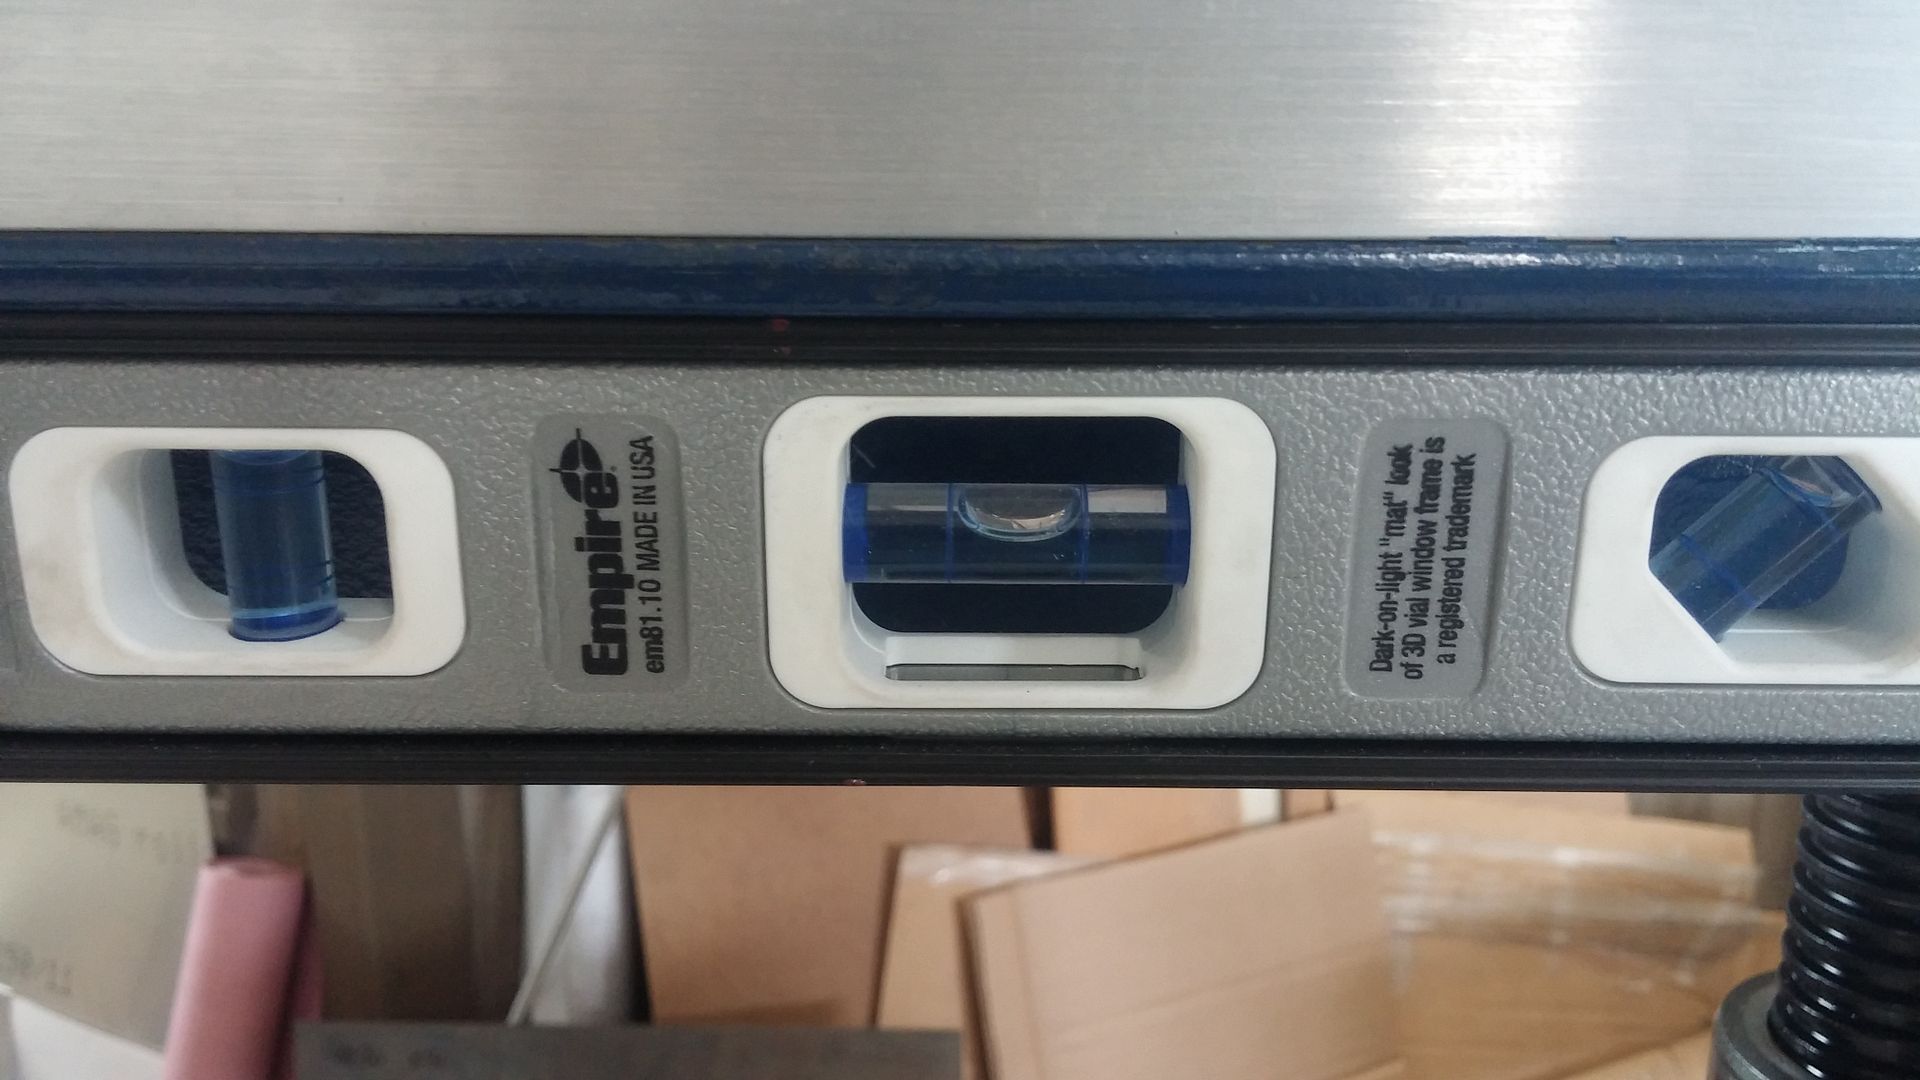
I use a level to make sure I keep the tough level as I operate the two jacks.

Image

This is the total bend required.

Image

Image

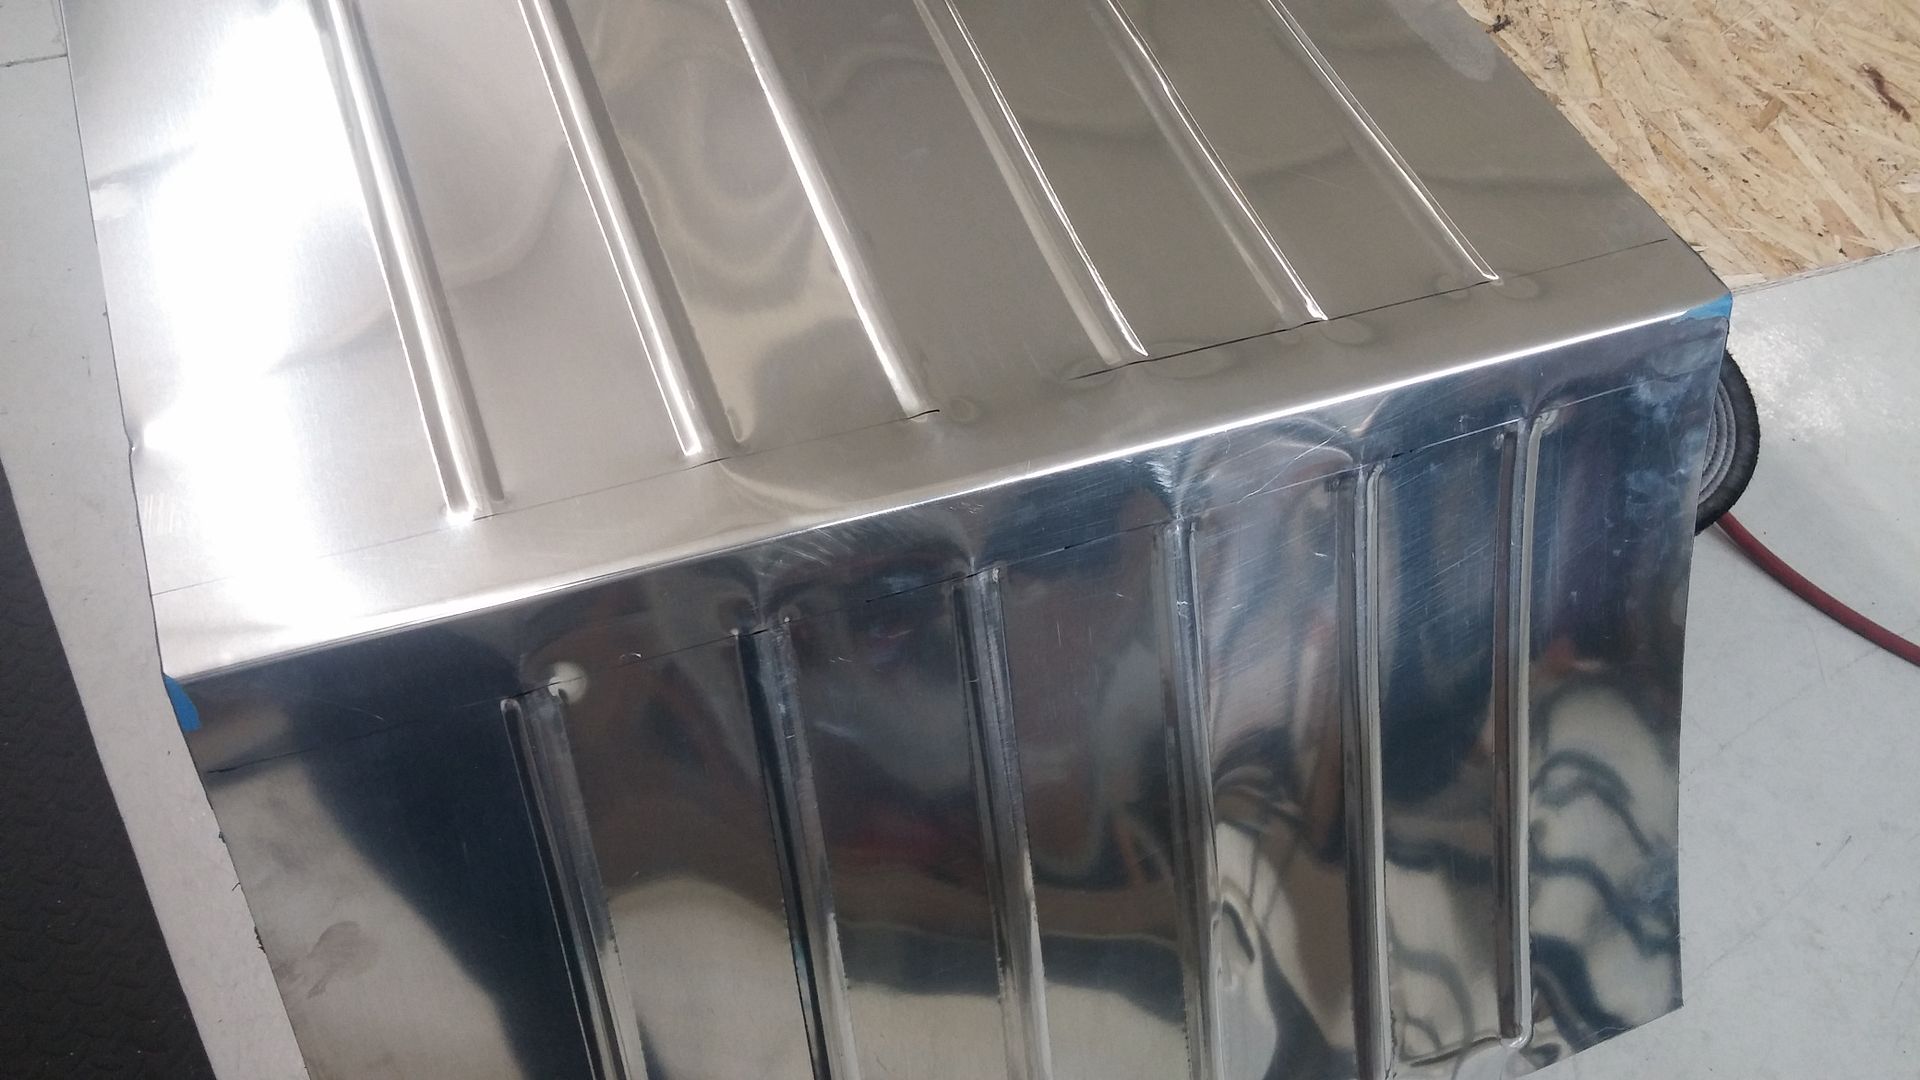
The skin after bending

Image

Next fit on the structure.

Image

Image

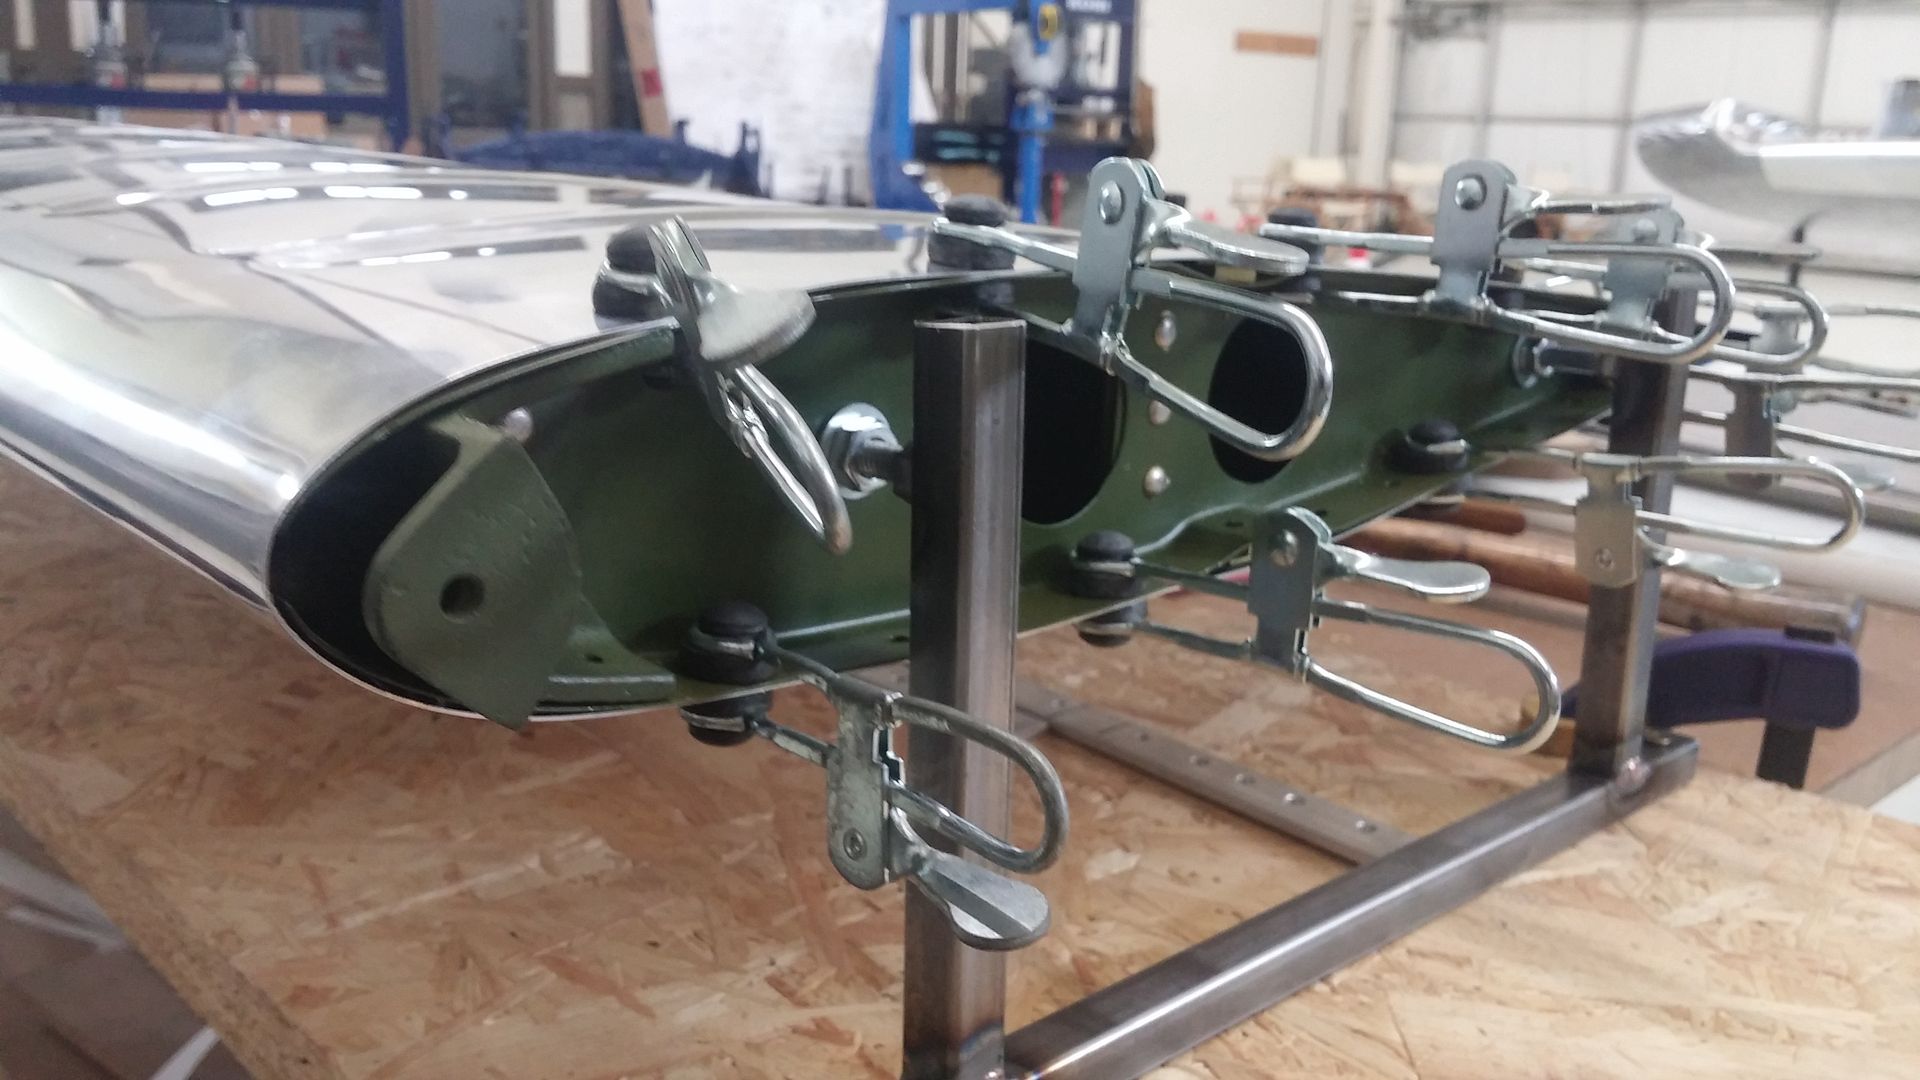
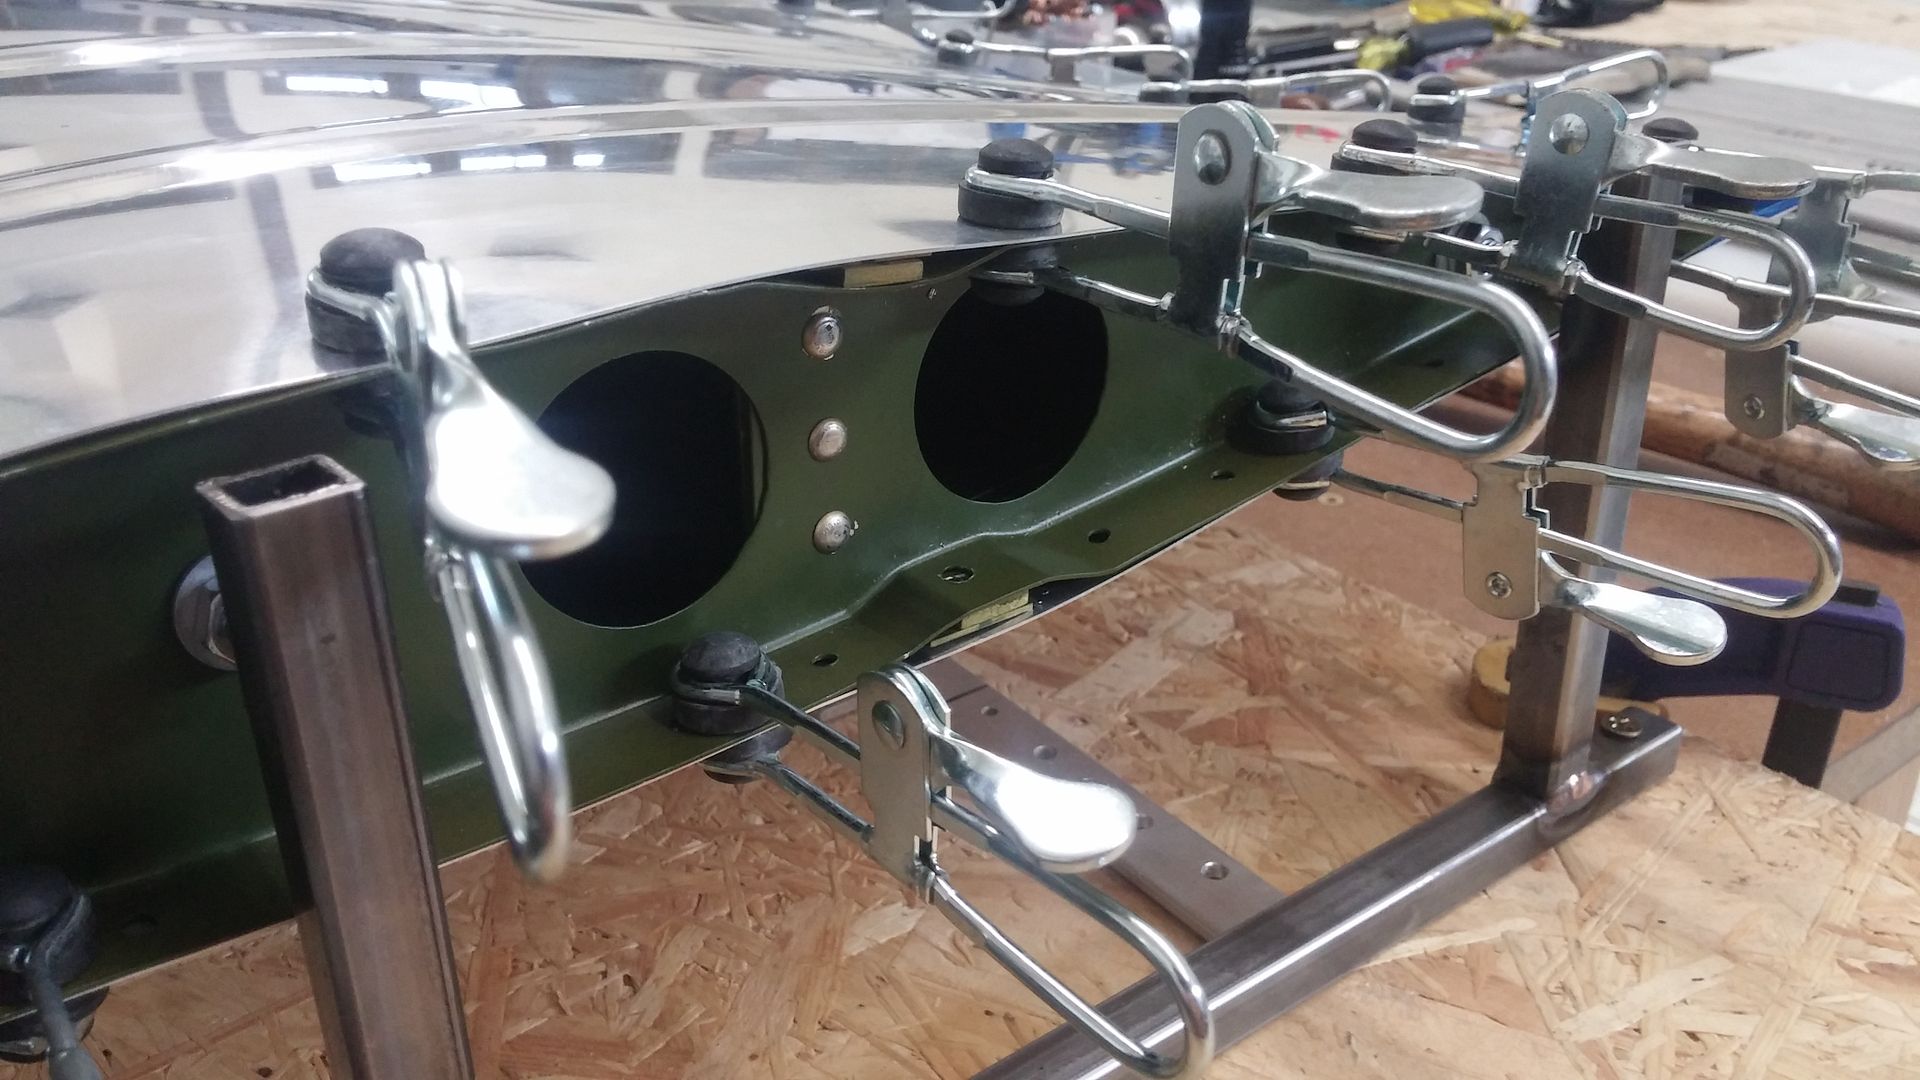
Rivet hole drilling next. More to come.

_________________
"There are old pilots and bold pilots but few old, bold pilots."


Top
 Profile  
 
PostPosted: Sun Jun 14, 2015 6:34 pm 
Offline
1000+ Posts!
1000+ Posts!
User avatar

Joined: Mon Dec 25, 2006 10:21 pm
Posts: 1325
Location: Dallas TX
Looks great, man! I love this thread...

_________________
Taylor Stevenson


Top
 Profile  
 
PostPosted: Thu Jun 18, 2015 7:56 pm 
Offline
2000+ Post Club
2000+ Post Club
User avatar

Joined: Sun Jul 31, 2005 7:28 pm
Posts: 2184
Location: Waukesha, WI
Gotta love a product called "Aircraft Paint Stripper" that has blatantly printed on the can, "Do no use on aircraft..." Huh? :shock:

Buying in 6 packs now it seems. Between the F-86 and the FG-1D, I'm getting pretty comfortable with this wonderful cocktail as long as you remain careful. I can't begin to actually start putting things back together for good until these sections are free of many coats of paint.

This is an upper inlet section that many new replacement pieces have been made for. Once these are clean and fresh and the new bits get alodined, I can actually start to rivet bits made back on to return to the original configuration.

Before
Image

Round one down. Another day of noxious fumes will finish off both sides.
Image

_________________
"There are old pilots and bold pilots but few old, bold pilots."


Top
 Profile  
 
PostPosted: Fri Jun 19, 2015 11:17 am 
Offline

Joined: Mon Jun 01, 2015 9:18 am
Posts: 20
Perhaps it means 'do not use inside aircraft'? Does it list dichloromethane (methylene dichloride) in the active ingredients?..That works excellently but it's very toxic and probably prohibited now.


Top
 Profile  
 
PostPosted: Fri Jun 19, 2015 7:55 pm 
Offline
2000+ Post Club
2000+ Post Club
User avatar

Joined: Sun Jul 31, 2005 7:28 pm
Posts: 2184
Location: Waukesha, WI
civvystreet wrote:
Perhaps it means 'do not use inside aircraft'? Does it list dichloromethane (methylene dichloride) in the active ingredients?..That works excellently but it's very toxic and probably prohibited now.


Ammonia, methanol, methylene chloride. Maybe they dropped one chloride to keep it safe. :lol: Does work for sure.

_________________
"There are old pilots and bold pilots but few old, bold pilots."


Top
 Profile  
 
PostPosted: Fri Jun 19, 2015 8:01 pm 
Offline
2000+ Post Club
2000+ Post Club
User avatar

Joined: Sun Jul 31, 2005 7:28 pm
Posts: 2184
Location: Waukesha, WI
I dare say these aluminum skins have not seen the light of day since 1945. It is kind of exciting to see them in this condition and wonder about their origin at Goodyear. Sorry to not see any original notes or markings under the paint. At any rate, lots of PIA work but they came out nice.

Image

Image

The final step was to wipe down with a terry cloth and acetone to make sure no stripper remained anywhere in nooks and cranny's.

Now, who knows of structural adhesives being used back then? One side seems to have witness marks of some but the other side does not.

Image

_________________
"There are old pilots and bold pilots but few old, bold pilots."


Top
 Profile  
 
PostPosted: Sat Jun 20, 2015 9:06 am 
Offline

Joined: Sun Oct 27, 2013 5:53 pm
Posts: 30
Scott,
I have been reading your post for the past several months and have enjoyed it and learned a lot from your pictures and explanations. Thanks for taking the time to show your craft. Could you elaborate on your stripping process as I am amazed at how clean you are able to get these complicated pieces. I understand you are using a chemical stripper. How many applications? Do you use water to remove? What tools do you use to get the paint out of the corners and edges?, etc? I know this is not a high skill job but is probably something I would actually do myself vs. the fabrication wizardry you perform.


Top
 Profile  
 
PostPosted: Sat Jun 20, 2015 11:37 am 
Offline
2000+ Post Club
2000+ Post Club
User avatar

Joined: Sun Jul 31, 2005 7:28 pm
Posts: 2184
Location: Waukesha, WI
Smaehr wrote:
Scott,
I have been reading your post for the past several months and have enjoyed it and learned a lot from your pictures and explanations. Thanks for taking the time to show your craft. Could you elaborate on your stripping process as I am amazed at how clean you are able to get these complicated pieces. I understand you are using a chemical stripper. How many applications? Do you use water to remove? What tools do you use to get the paint out of the corners and edges?, etc? I know this is not a high skill job but is probably something I would actually do myself vs. the fabrication wizardry you perform.


Thank you for the kind words. Doing this is tedious but when it needs to be done, just take the time. These took about four separate applications of the stripping agent each. I would just work sectional at a time after doing the initial gross application. Once the stripper is applied, wait time was 15 to 30 minutes. Then using tooth brushes, kitchen scrub brushes, each compartment was worked over trying to get into the corners and the joints and seams. Then, wipe out the most material I could with paper towels and then wash with water, dry, repeat.

When I was happy with the work the agent did, I did the final with a small piece of terry cloth soaked in acetone. The remaining bits of any paint were already softened by the stripper and the acetone cleaned that up nicely. The advantage of doing it that way is you get a good look at all the nooks and cranny's for any residual stripper. Just takes time.

_________________
"There are old pilots and bold pilots but few old, bold pilots."


Top
 Profile  
 
PostPosted: Sat Jun 20, 2015 7:17 pm 
Offline
User avatar

Joined: Thu Mar 04, 2010 10:48 pm
Posts: 937
Location: Westchester New York
What brand stripper are you using? We use JASCO and have diffrent results depending on the type of paint, cheap enamels peeling right up but older military paint taking forever.

_________________
Andrew King
Air Museum Director with no Museum to Direct
Open to Suggestions


Top
 Profile  
 
Display posts from previous:  Sort by  
Post new topic Reply to topic  [ 798 posts ]  Go to page Previous  1 ... 27, 28, 29, 30, 31, 32, 33 ... 54  Next

All times are UTC - 5 hours


Who is online

Users browsing this forum: Bradburger, Google [Bot], Google Adsense [Bot] and 145 guests


You cannot post new topics in this forum
You cannot reply to topics in this forum
You cannot edit your posts in this forum
You cannot delete your posts in this forum
You cannot post attachments in this forum

Search for:
Jump to:  
Powered by phpBB® Forum Software © phpBB Group