Warbird Information Exchange

DISCLAIMER: The views expressed on this site are the responsibility of the poster and do not reflect the views of the management.
It is currently Fri Apr 19, 2024 5:09 am

All times are UTC - 5 hours


Classic Wings Magazine WWII Naval Aviation Research Pacific Luftwaffe Resource Center
When Hollywood Ruled The Skies - Volumes 1 through 4 by Bruce Oriss


Post new topic Reply to topic  [ 798 posts ]  Go to page Previous  1 ... 34, 35, 36, 37, 38, 39, 40 ... 54  Next
Author Message
PostPosted: Mon Dec 28, 2015 4:35 pm 
Offline
1000+ Posts!
1000+ Posts!
User avatar

Joined: Wed Aug 18, 2010 12:51 pm
Posts: 1185
Location: Chandler, AZ
wendovertom wrote:
so for the mechanically disinclined . . what do you use a Snoopy tool for?

Tom P.


It's for operating Dzus type cowling fasteners on aircraft made after October 4, 1950.

Before that date, it would be a Mickey Mouse tool <G>

_________________
Lest Hero-worship raise it's head and cloud our vision, remember that World War II was fought and won by the same sort of twenty-something punks we wouldn't let our daughters date.


Top
 Profile  
 
PostPosted: Mon Dec 28, 2015 5:28 pm 
Offline
2000+ Post Club
2000+ Post Club
User avatar

Joined: Sun Jul 31, 2005 7:28 pm
Posts: 2184
Location: Waukesha, WI
Tom P. it is a dzus button wrench.... :drink3:

_________________
"There are old pilots and bold pilots but few old, bold pilots."


Top
 Profile  
 
PostPosted: Tue Dec 29, 2015 7:22 pm 
Offline
User avatar

Joined: Sun Jul 29, 2007 2:42 pm
Posts: 296
Location: Ball Ground, GA
sdennison wrote:
Tom P. it is a dzus button wrench.... :drink3:


And it works well! I used mine today while doing some work on the "Movie Memphis Belle". :)

_________________
Rod Schneider
Ball Ground, Ga


Top
 Profile  
 
PostPosted: Tue Dec 29, 2015 8:02 pm 
Offline
Long Time Member
Long Time Member

Joined: Fri Feb 03, 2012 1:48 pm
Posts: 7557
Always looking out for ya Scott ...

Happy New Year!!!

Image
Photo states: P-47 60th FS 33rd FG (what do you think? getting closer?)

_________________
[Thread title is ridiculous btw]


Top
 Profile  
 
PostPosted: Tue Dec 29, 2015 8:34 pm 
Offline
2000+ Post Club
2000+ Post Club
User avatar

Joined: Sun Jul 31, 2005 7:28 pm
Posts: 2184
Location: Waukesha, WI
Mark Allen M wrote:
Always looking out for ya Scott ...

Happy New Year!!!

Image
Photo states: P-47 60th FS 33rd FG (what do you think? getting closer?)

Right on, Tyrone! Here's what I have...only one. ADF antennas match. Thank Mark and Happy New Year to you, my Friend. :drink3:

Image

_________________
"There are old pilots and bold pilots but few old, bold pilots."


Top
 Profile  
 
PostPosted: Sat Jan 09, 2016 8:07 pm 
Offline
2000+ Post Club
2000+ Post Club
User avatar

Joined: Sun Jul 31, 2005 7:28 pm
Posts: 2184
Location: Waukesha, WI
I have been struggling with thisTH55A horizontal stabilizer for ever. The skin is 2024-T3 .016" and has strengthening ribs as there are no internal ribs to the structure. Forming these ribs has driven me crazy. So, based on a lot of input from my metalsmith friends, I came up with this die design for my Pullmax. This way I can form the bead and close the ends in one operation. Still won't be easy but Ithink it will work.

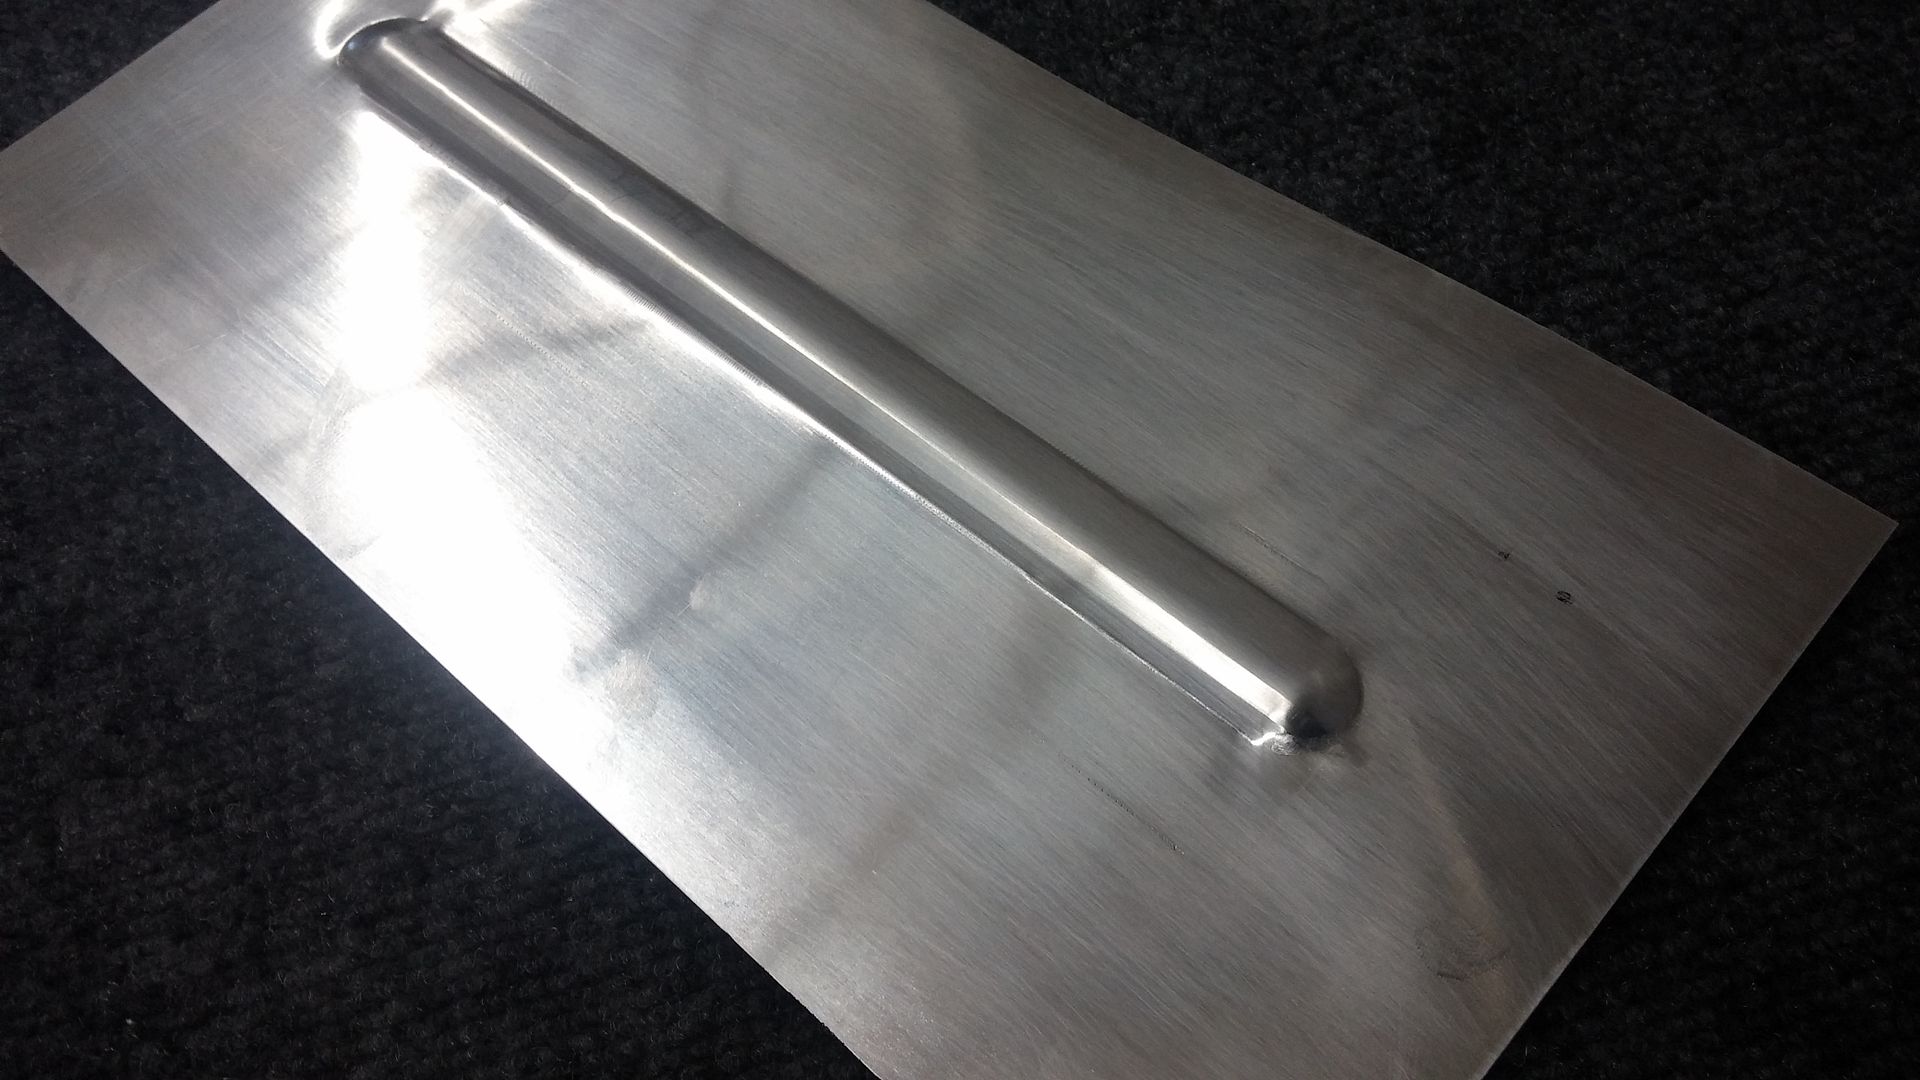
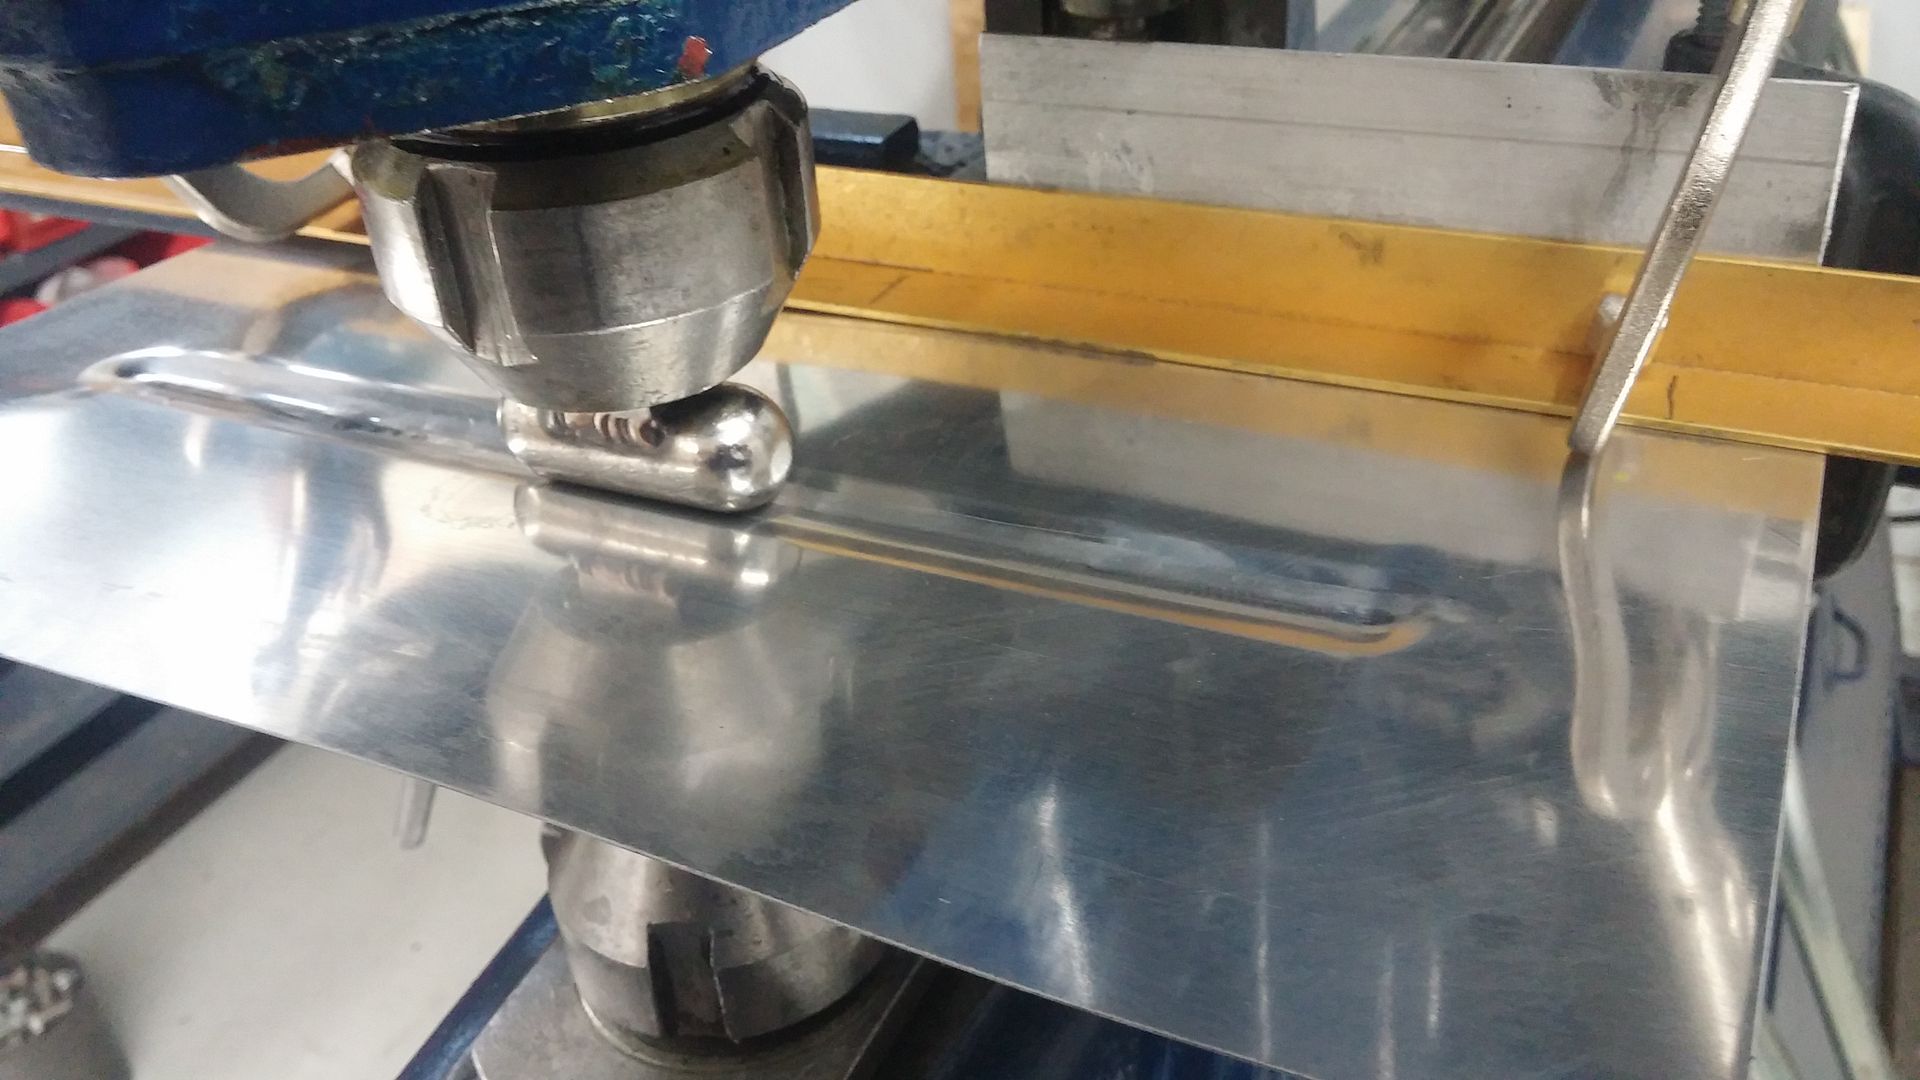
I am pre-stretcing on the English wheel with a 1/2" radius lower wheel. The attached photos have more detailed explanations. Not out of the woods yet but close.

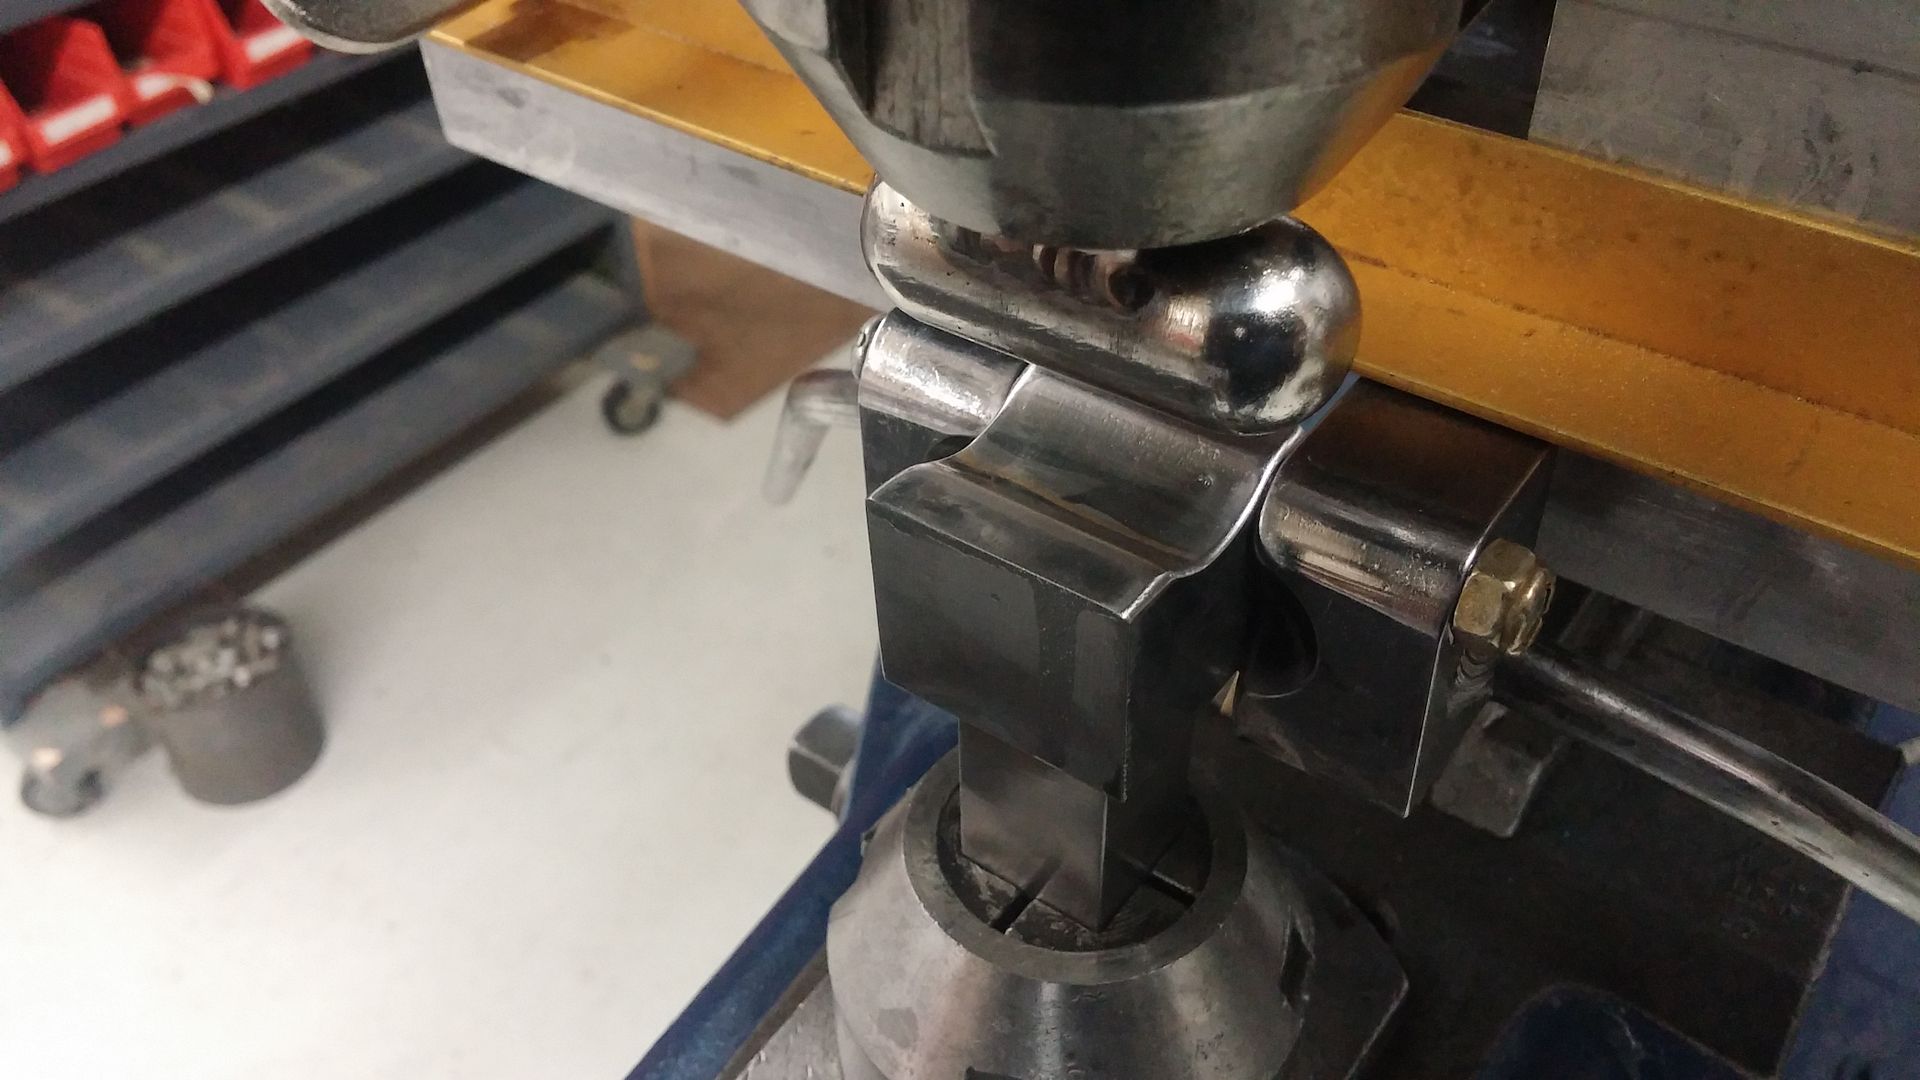
Here is the die. I can run the bead without the end closing sections in place, then close each end separately.
Image

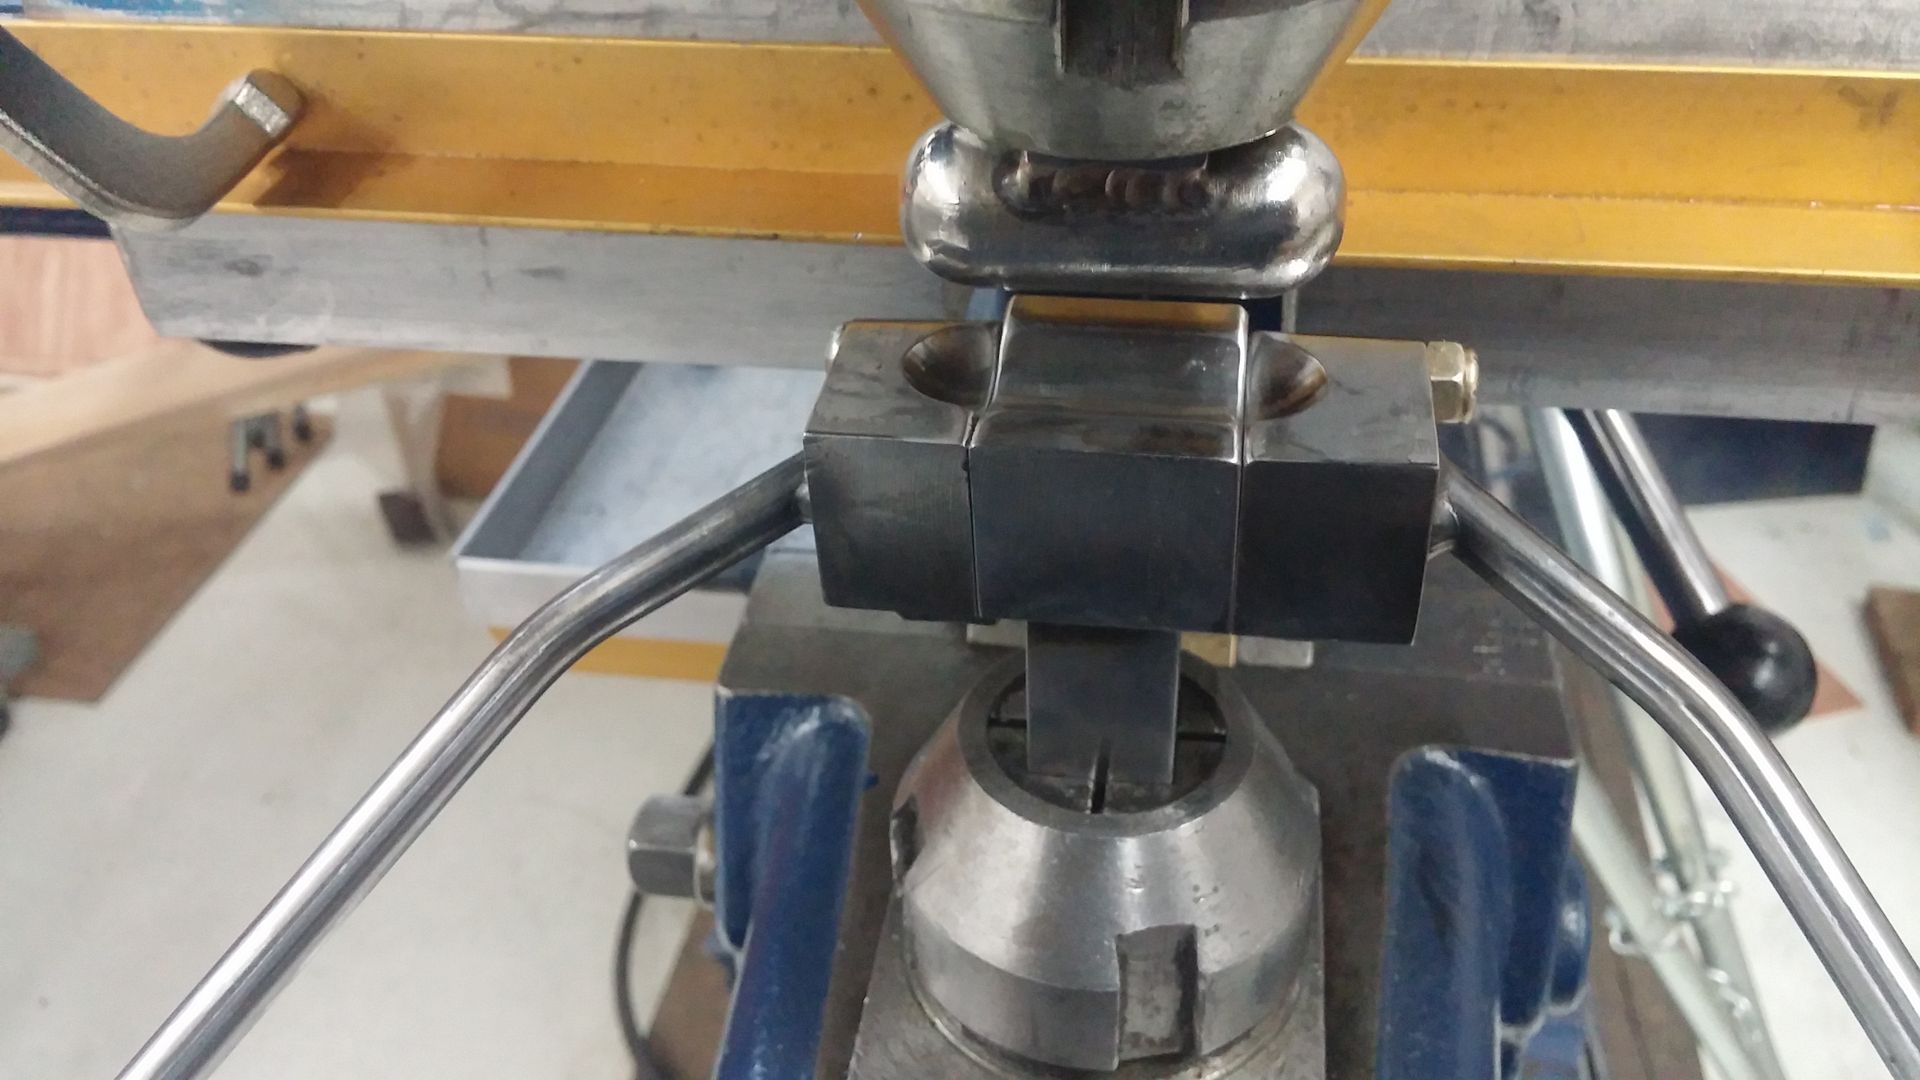
Obviously, this would close off the left end bead. By rotating the left side down and running to the end of the right side, I swing that side up and close the bead.
Image


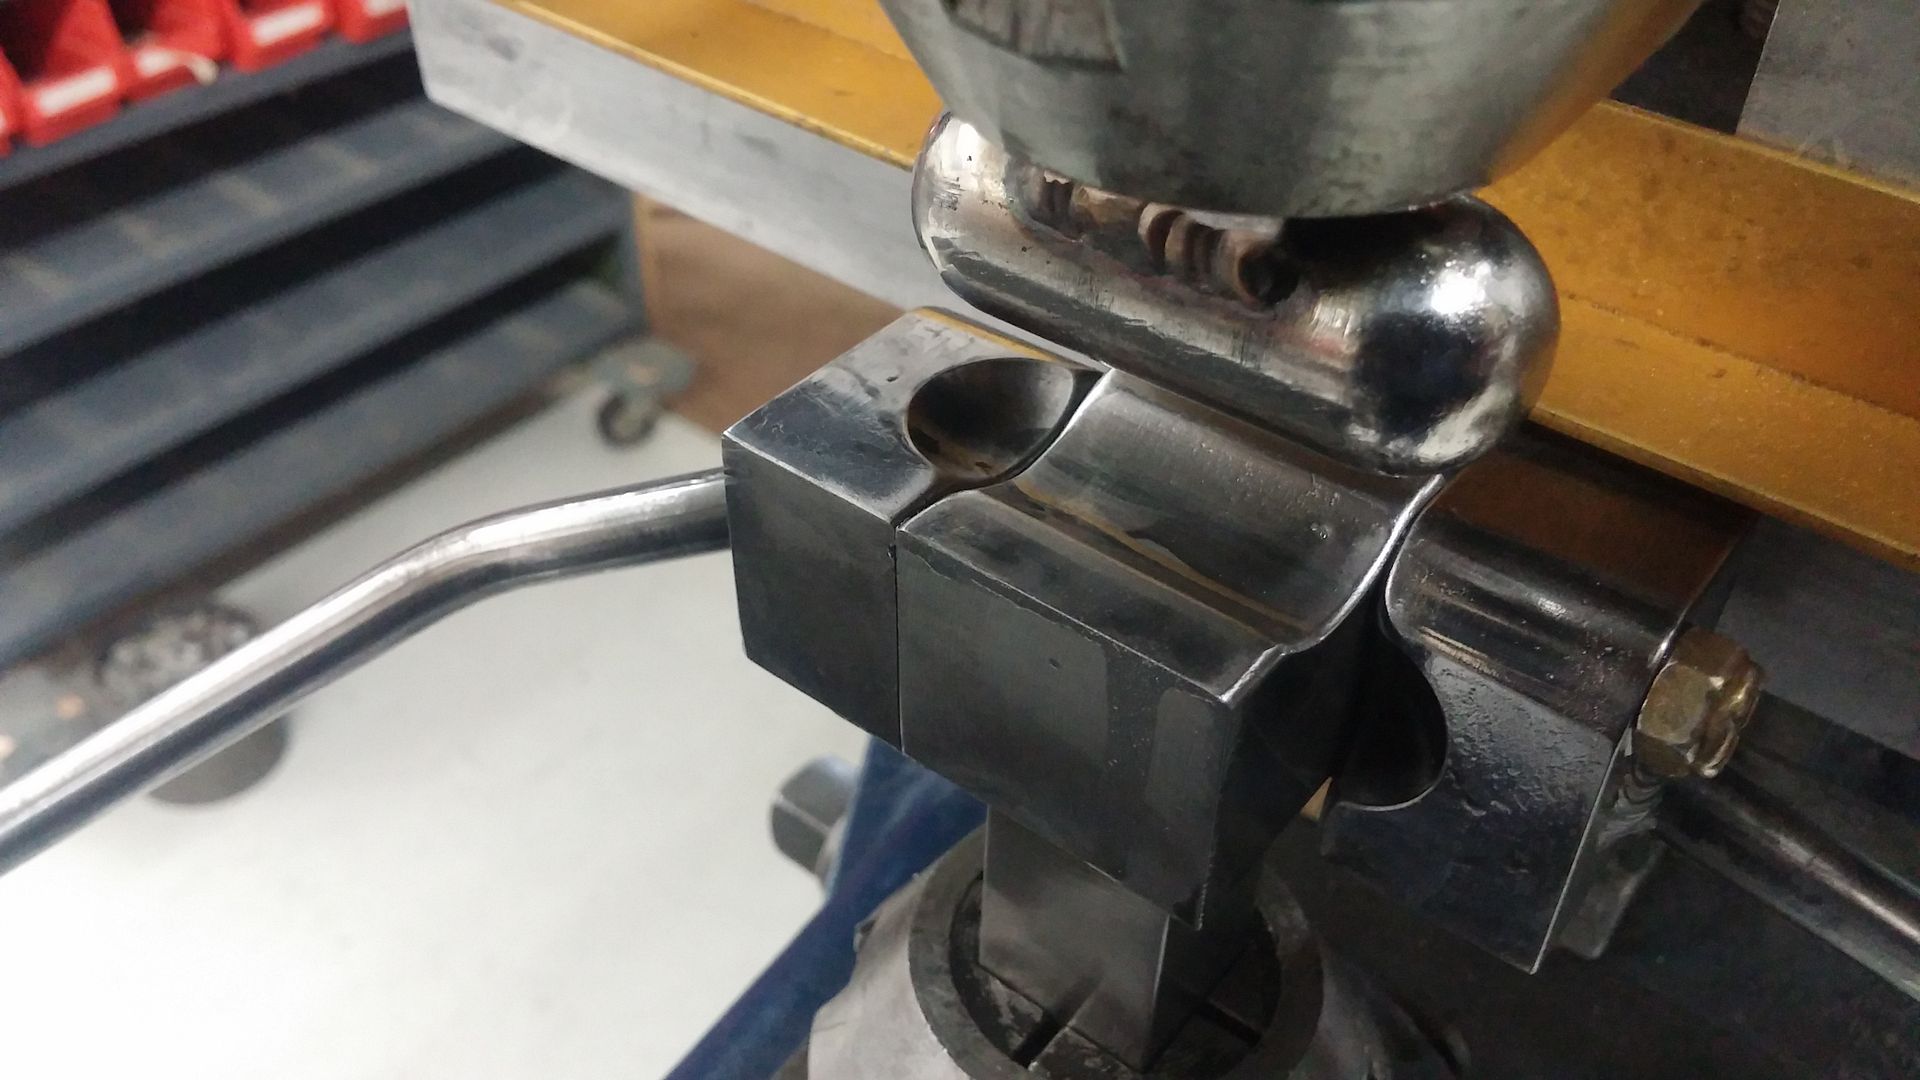
This would form the bead itself.
Image


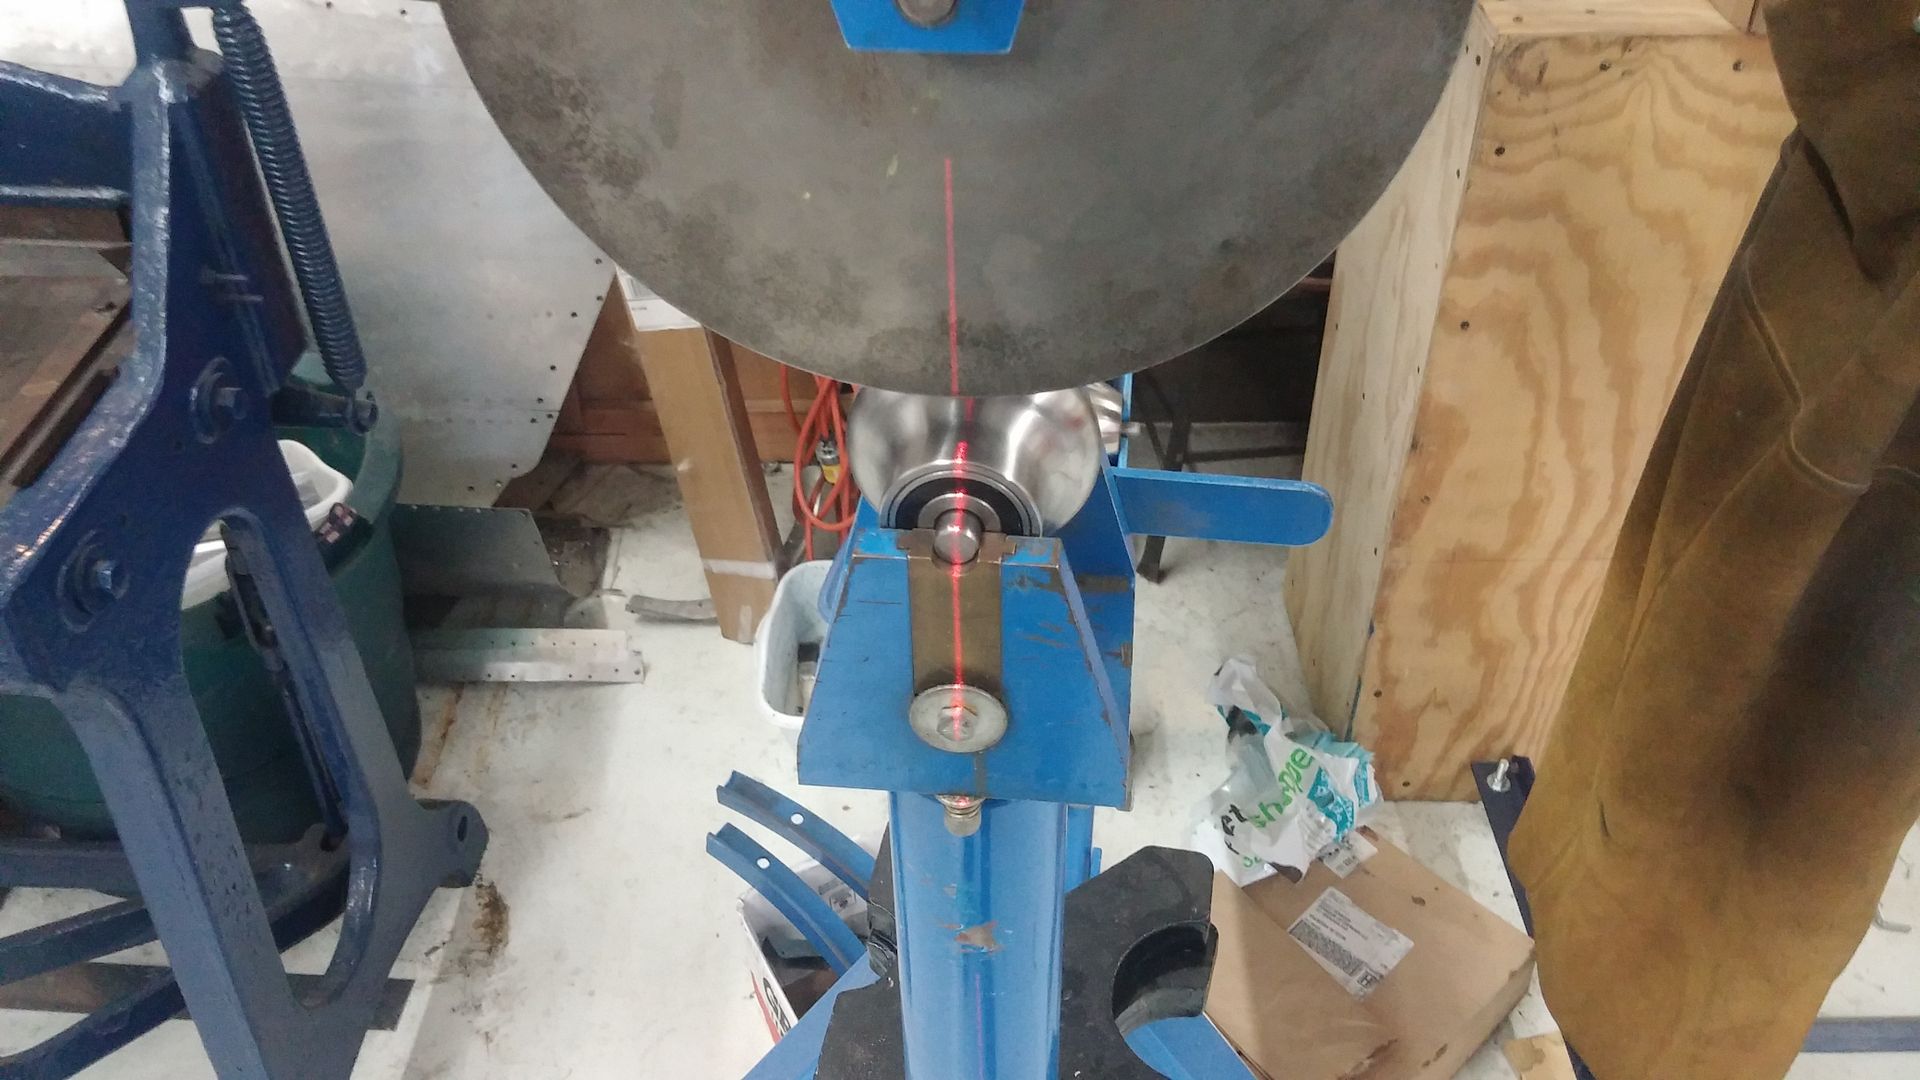
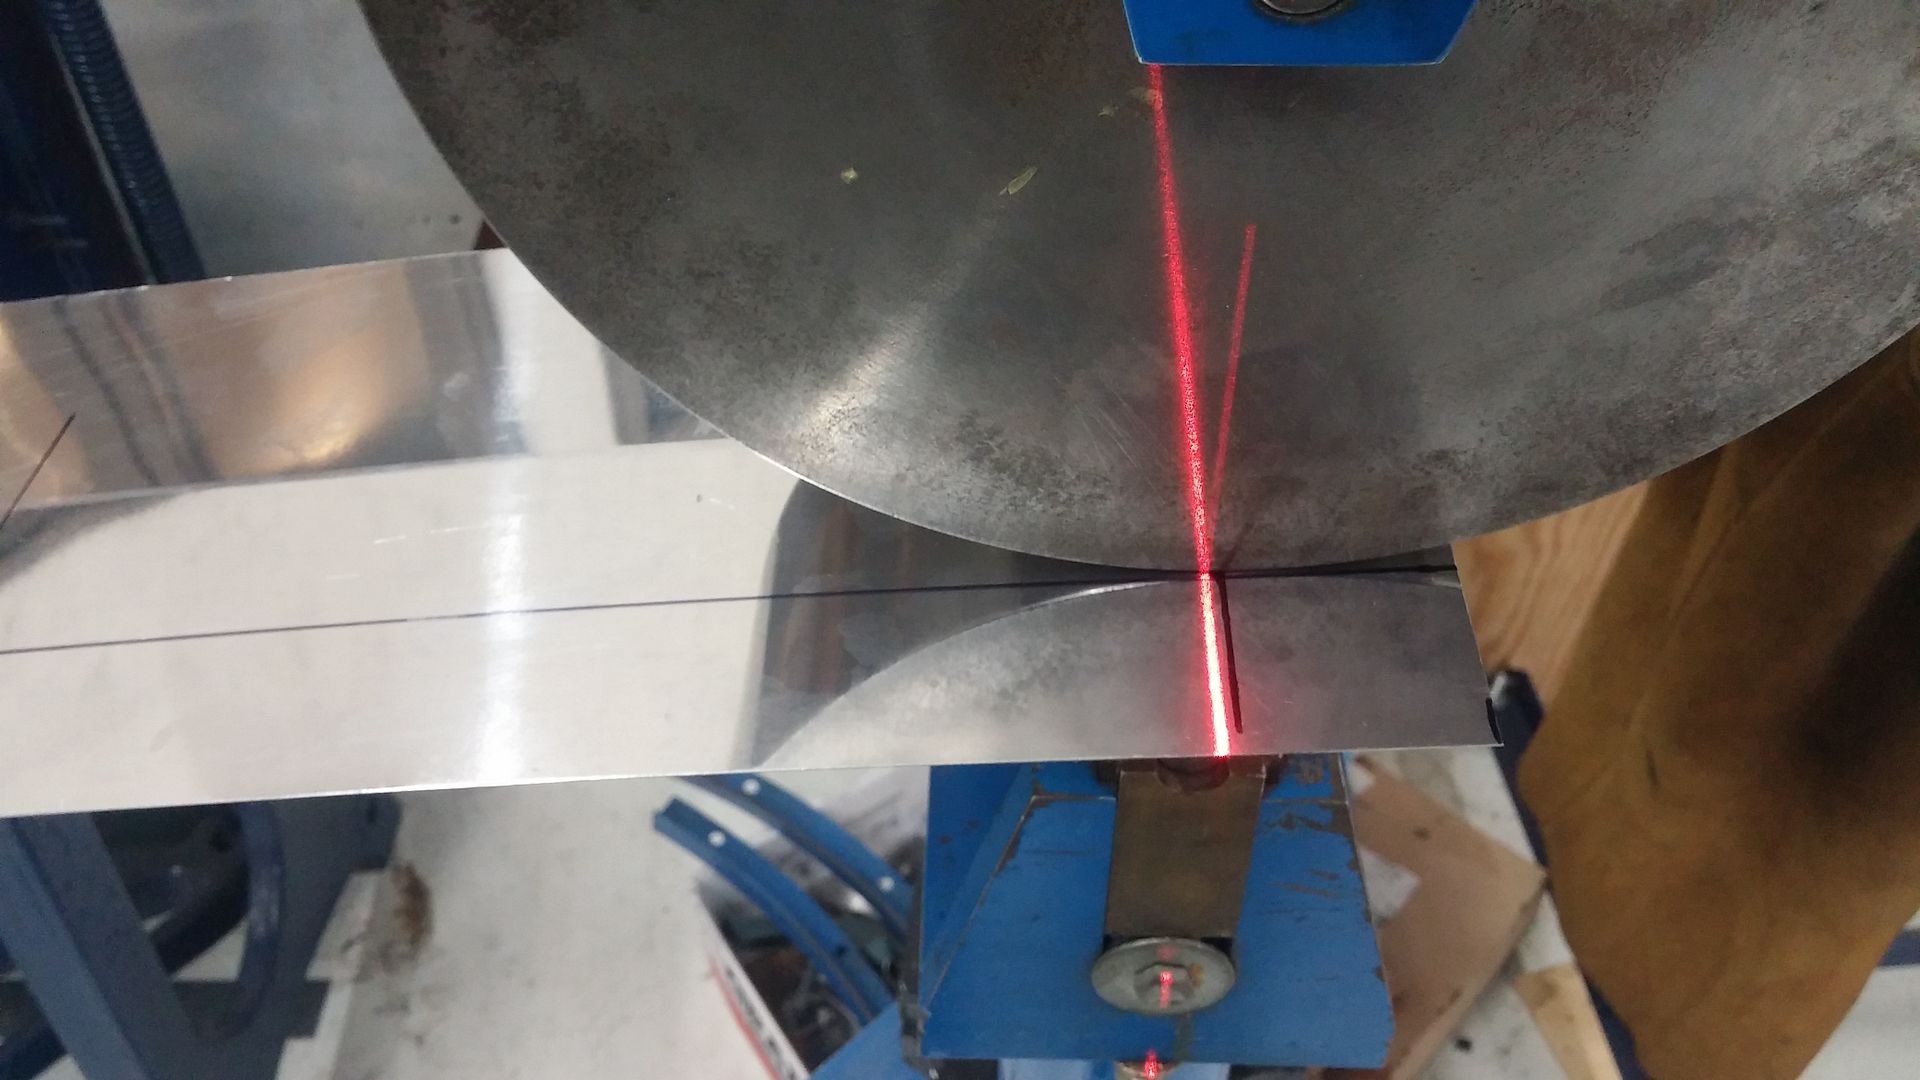
Pre stretching on the wheel. I have a laser set up to aid with start stop points.
Image


These are sample pieces to establish process. I lay out a line to run the edge of the upper wheel.
Image


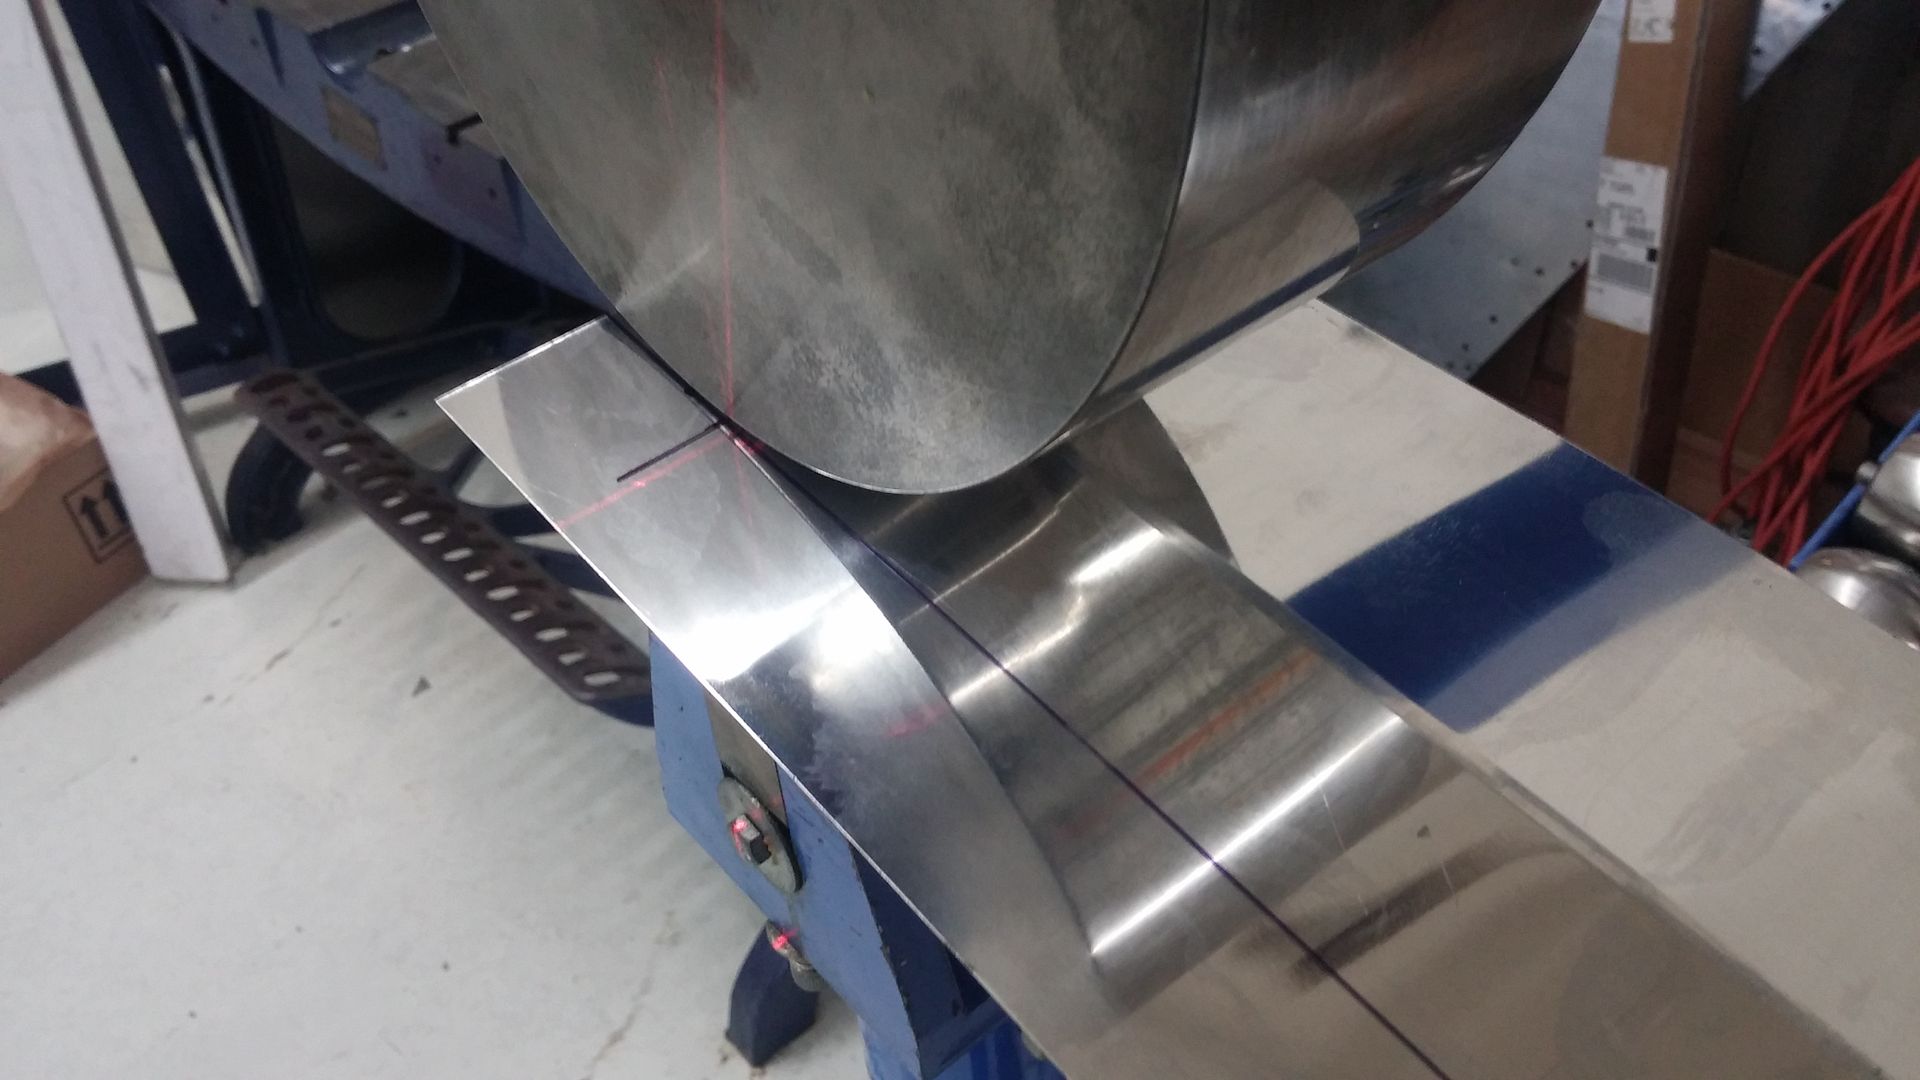
The small laser beam is the actual, the bright one is reflected off the piece.
Image


Forming the bead I found it necessary to control the material against the fence so the angle keeps the thin material from folding up and messing up the bead.
Image


Close. I have tried a number of pre-stretch processes to see how much is needed to keep any distortion to a minimum. Still would like to massage the close offs and the more samples I did, the better they got.
Image

_________________
"There are old pilots and bold pilots but few old, bold pilots."


Top
 Profile  
 
PostPosted: Sat Jan 09, 2016 9:41 pm 
Offline
3000+ Post Club
3000+ Post Club
User avatar

Joined: Fri Apr 30, 2004 11:44 am
Posts: 3274
Location: Las Vegas, NV
I love to see one of the oldest metal-working rigs combined with a laser.

_________________
ellice_island_kid wrote:
I am only in my 20s but someday I will fly it at airshows. I am getting rich really fast writing software and so I can afford to do really stupid things like put all my money into warbirds.


Top
 Profile  
 
PostPosted: Sun Jan 10, 2016 2:34 am 
Offline
Long Time Member
Long Time Member

Joined: Fri Feb 03, 2012 1:48 pm
Posts: 7557
Another photo to add to the collection (if you haven't already got this one)

M

Image

_________________
[Thread title is ridiculous btw]


Top
 Profile  
 
PostPosted: Sun Jan 10, 2016 8:25 pm 
Offline
2000+ Post Club
2000+ Post Club
User avatar

Joined: Sun Jul 31, 2005 7:28 pm
Posts: 2184
Location: Waukesha, WI
Mark Allen M wrote:
Another photo to add to the collection (if you haven't already got this one)

M

Image


Thanks Mark. Can never have enough CBI info.

_________________
"There are old pilots and bold pilots but few old, bold pilots."


Top
 Profile  
 
PostPosted: Mon Jan 18, 2016 9:08 pm 
Offline
2000+ Post Club
2000+ Post Club
User avatar

Joined: Sun Jul 31, 2005 7:28 pm
Posts: 2184
Location: Waukesha, WI
Continuing the TH55A horizontal stab skin project...we hit the Pullmax for real.

Image

Image

This is the skin deformed after the English wheel. After going through the Pullmax and forming the beads, the panel flattens out nicely.

Image
Image

Next, to the Chalkie press I built specifically for this job and others. The skin gets centered on the press bed.
Image

I had made samples to determine the press stopping point.
Image

As the lower tray is pressed upwards, the skin is pressed into the neoprene trough.
Image
Image

Now fitting begins.
Image

_________________
"There are old pilots and bold pilots but few old, bold pilots."


Top
 Profile  
 
PostPosted: Tue Jan 19, 2016 6:35 am 
Offline
2000+ Post Club
2000+ Post Club

Joined: Tue Oct 02, 2012 7:26 pm
Posts: 2002
Location: Creemore Ontario Canada
Well you've gotta be happy with that!

Really sweet.

This has been quite the multi step challenge.

Andy


Top
 Profile  
 
PostPosted: Wed Jan 20, 2016 11:34 pm 
Offline

Joined: Thu Oct 15, 2015 4:22 pm
Posts: 10
Scott, sorry to hear about your son. I was hoping to learn a lot of the sheet metal trade from my father but I lost him in August. I must say that your work is very impressive. I believe I read earlier that you are going to make the ribs that the intercoolers mount to for the corsair. If you need measurements I have a set that is not in an airplane. Again, sorry to hear of your loss. God Bless.
Bill


Top
 Profile  
 
PostPosted: Thu Jan 21, 2016 9:34 am 
Offline
3000+ Post Club
3000+ Post Club
User avatar

Joined: Fri Apr 30, 2004 11:44 am
Posts: 3274
Location: Las Vegas, NV
Such awesome looking work, Scott!

_________________
ellice_island_kid wrote:
I am only in my 20s but someday I will fly it at airshows. I am getting rich really fast writing software and so I can afford to do really stupid things like put all my money into warbirds.


Top
 Profile  
 
PostPosted: Sat Jan 23, 2016 5:15 am 
Offline

Joined: Mon Sep 13, 2010 3:13 pm
Posts: 97
Location: Pittsburgh, PA
I probably missed the reason, but why would a "regular" bead roller not work in this instance? I have very little metalwork experience but a lot of interest in learning.


Top
 Profile  
 
PostPosted: Sat Jan 23, 2016 12:13 pm 
Offline
2000+ Post Club
2000+ Post Club
User avatar

Joined: Sun Jul 31, 2005 7:28 pm
Posts: 2184
Location: Waukesha, WI
Probably could if you get enough pre stretch prior to rolling. That was my first attempt but distorted too much. With the bead roller you still face the challenge of closing the bead nicely.

_________________
"There are old pilots and bold pilots but few old, bold pilots."


Top
 Profile  
 
Display posts from previous:  Sort by  
Post new topic Reply to topic  [ 798 posts ]  Go to page Previous  1 ... 34, 35, 36, 37, 38, 39, 40 ... 54  Next

All times are UTC - 5 hours


Who is online

Users browsing this forum: Cubs2jets, rcaf_100 and 155 guests


You cannot post new topics in this forum
You cannot reply to topics in this forum
You cannot edit your posts in this forum
You cannot delete your posts in this forum
You cannot post attachments in this forum

Search for:
Jump to:  
Powered by phpBB® Forum Software © phpBB Group