1/72 T-33A - The new Sword kit - now complete!
Tue Sep 28, 2010 7:32 am
Hi Again,
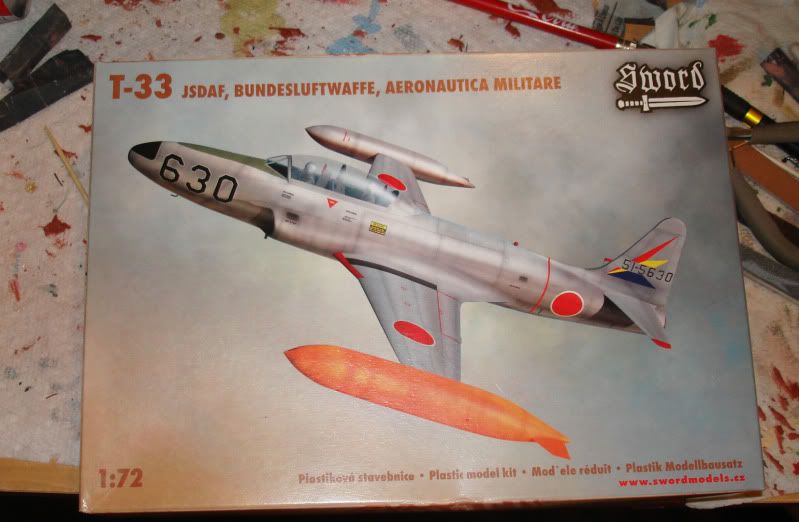
I thought some of you here might like to see my in progress build of the new Sword 1/72 T-33A kit. I have another thread about this on ARC but for those of you who don't visit ARC I thought I'd post it here too.
I was able to track down a copy of the new Sword 1/72 T-33 kit a few weeks ago. I plan on doing a USAF bird, just not sure which just yet.
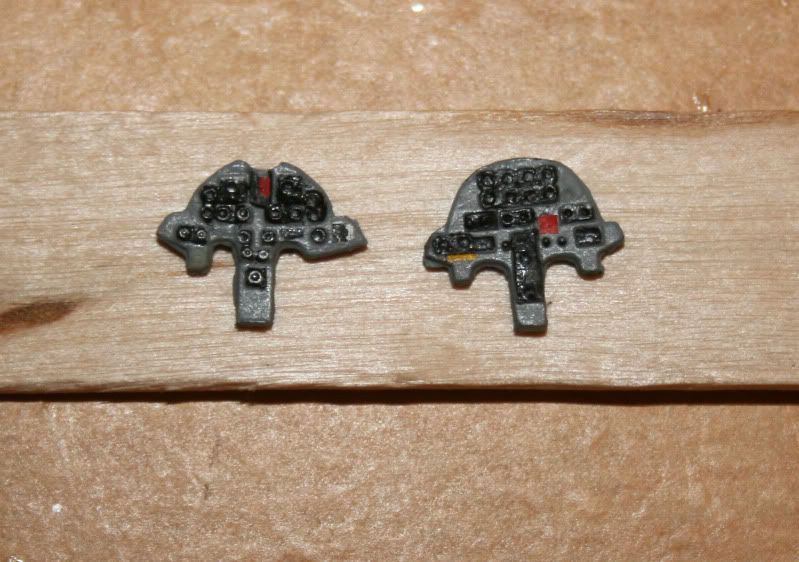
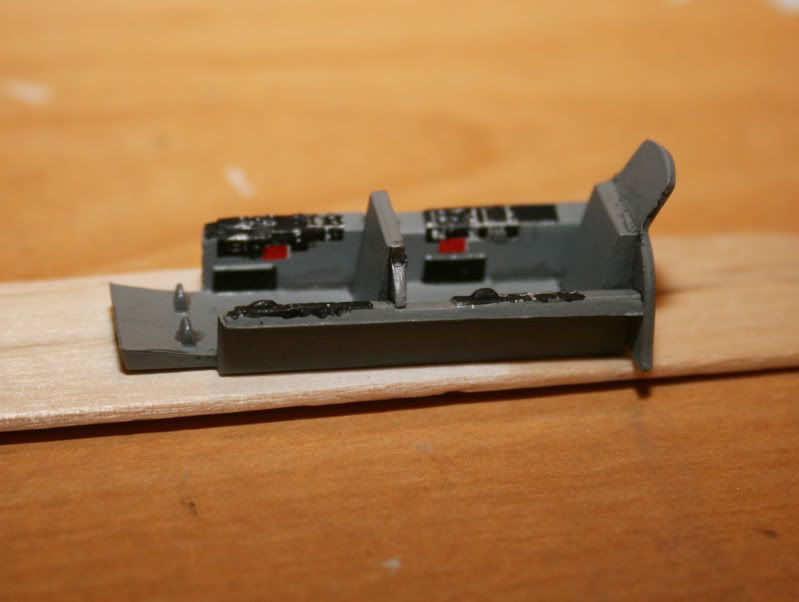
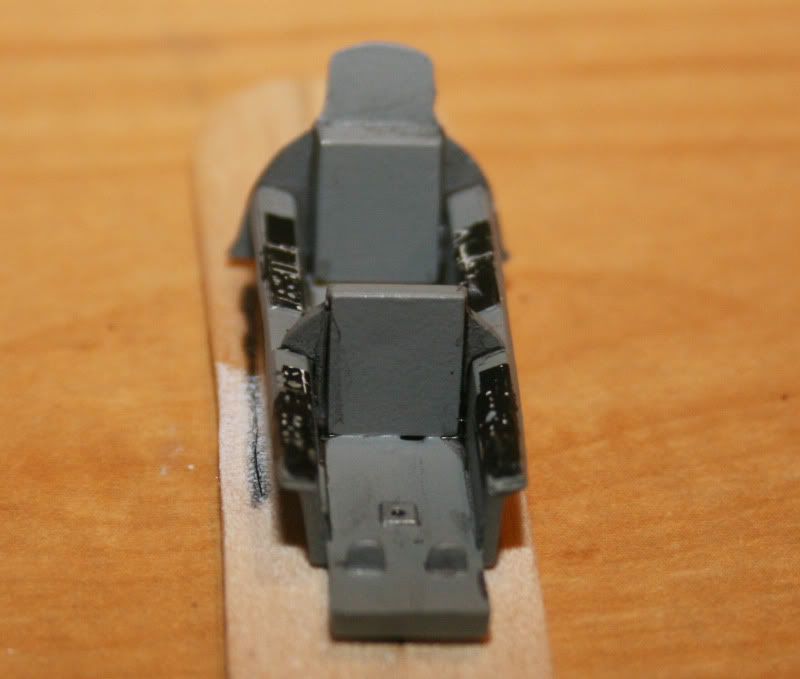
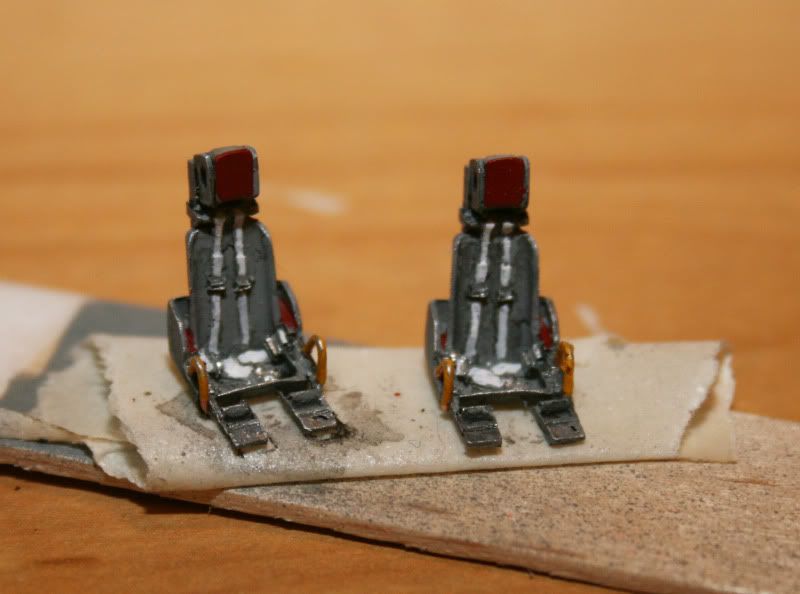
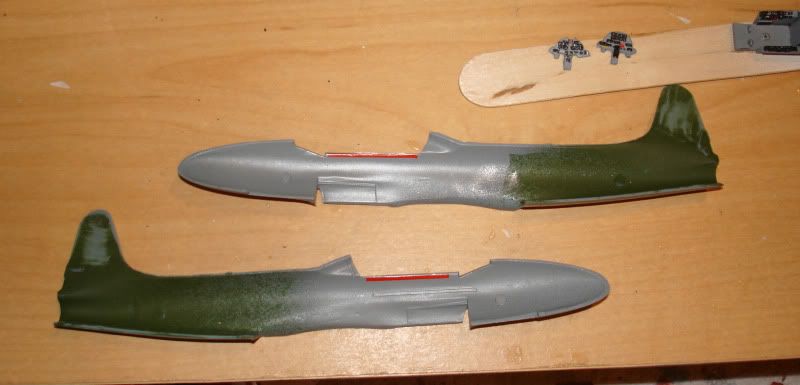
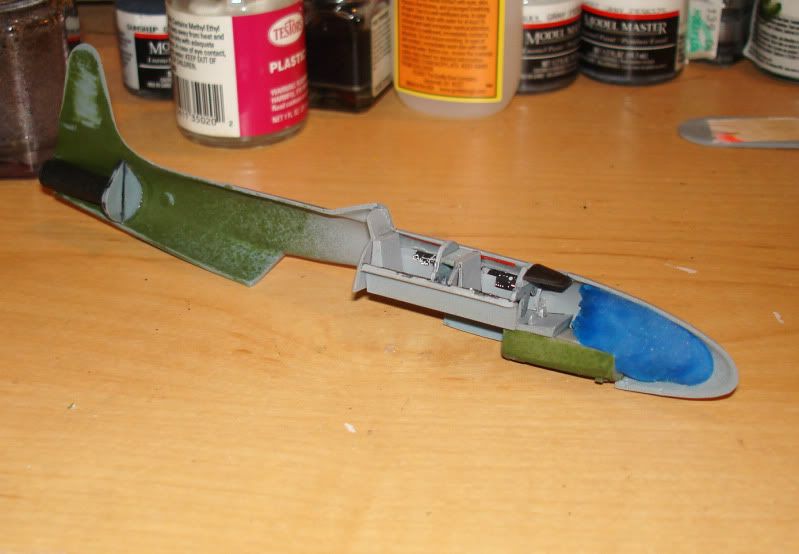
I've been painting the interior bits and I'm about ready to get the nose well, cockpit (minus sticks and seats of course), and tail pipe glued in place so the fuselage halves can be joined.
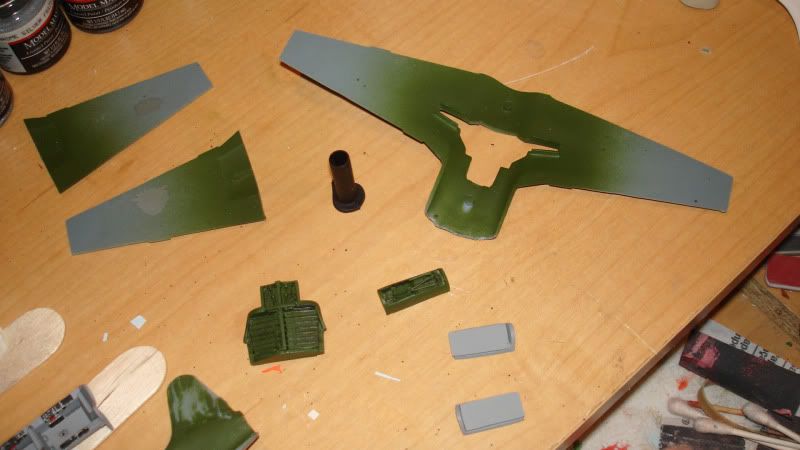
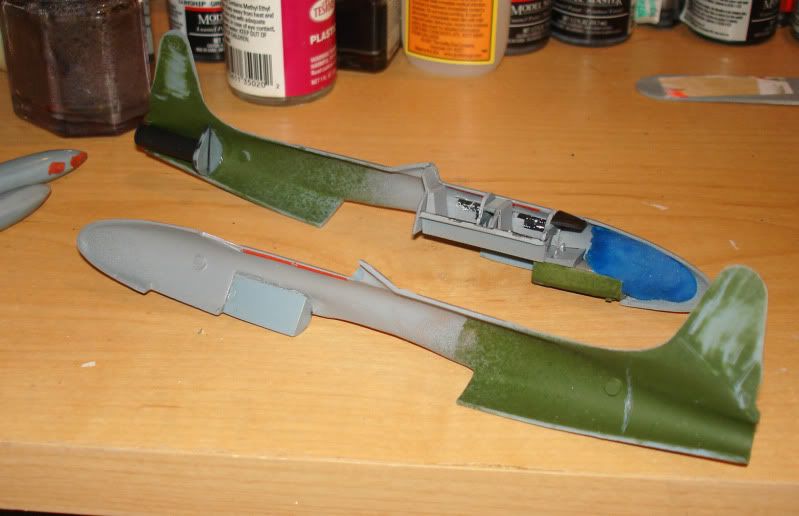
Here's the landing gear wells and wings along with some other bits and pieces.
I've been very happy with this kit and it's level of detail. The resin bits are nicely cast. There are many tall ejector pins on the plastic that have to be removed from the wings and fuselage. A few passes with the Dremel tool and they are gone.
I hope the fit is going to be okay. There aren't any locating pins on anything so I'll have to be careful joining the fuselage halves to make sure they are lined up correctly.
I've already glued in the tail pipe and nose gear well as of this morning. The cockpit is assembled and ready to be glued in as soon as the nose gear well is set. Lead weight has been glued in place as well in the nose.
More pics later today or tomorrow as time permits.
-Derek
I thought some of you here might like to see my in progress build of the new Sword 1/72 T-33A kit. I have another thread about this on ARC but for those of you who don't visit ARC I thought I'd post it here too.
I was able to track down a copy of the new Sword 1/72 T-33 kit a few weeks ago. I plan on doing a USAF bird, just not sure which just yet.
I've been painting the interior bits and I'm about ready to get the nose well, cockpit (minus sticks and seats of course), and tail pipe glued in place so the fuselage halves can be joined.
Here's the landing gear wells and wings along with some other bits and pieces.
I've been very happy with this kit and it's level of detail. The resin bits are nicely cast. There are many tall ejector pins on the plastic that have to be removed from the wings and fuselage. A few passes with the Dremel tool and they are gone.
I hope the fit is going to be okay. There aren't any locating pins on anything so I'll have to be careful joining the fuselage halves to make sure they are lined up correctly.
I've already glued in the tail pipe and nose gear well as of this morning. The cockpit is assembled and ready to be glued in as soon as the nose gear well is set. Lead weight has been glued in place as well in the nose.
More pics later today or tomorrow as time permits.
-Derek
Last edited by viking73 on Fri Jan 21, 2011 6:39 pm, edited 1 time in total.
Re: 1/72 T-33A - The new Sword kit in progress pics
Tue Sep 28, 2010 7:57 pm
Here's a quick update from today.
I've got the tail pipe, cockpit, front instrument panel coaming, nose gear well, and intake splinter plates all in glued in place. I've also added some lead fishing sinkers in the nose. I used a little blue play-doh to keep it in place even though I super-glued the lead down. I don't like my lead to rattle around
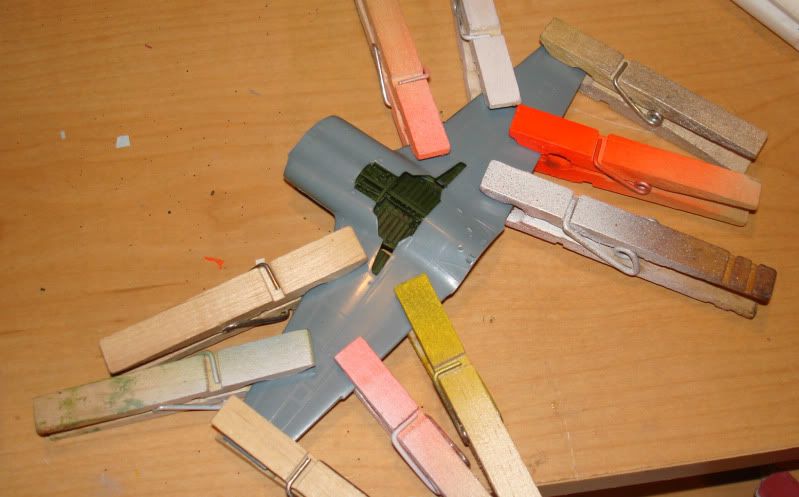
I then super-glued the resin main gear/speed brake well piece into the wing bottom. When that set I carefully lined up the wings halves and glued the wings together.
Next up will be to getting the fuselage halves together.
-Derek
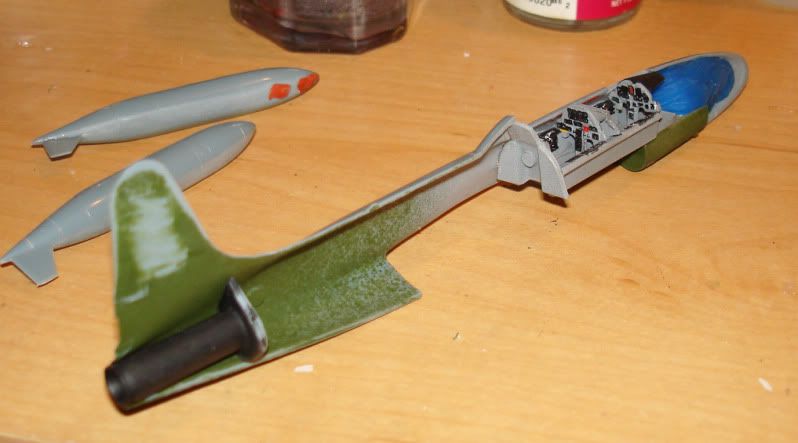
I've got the tail pipe, cockpit, front instrument panel coaming, nose gear well, and intake splinter plates all in glued in place. I've also added some lead fishing sinkers in the nose. I used a little blue play-doh to keep it in place even though I super-glued the lead down. I don't like my lead to rattle around
I then super-glued the resin main gear/speed brake well piece into the wing bottom. When that set I carefully lined up the wings halves and glued the wings together.
Next up will be to getting the fuselage halves together.
-Derek
Re: 1/72 T-33A - The new Sword kit in progress pics
Wed Sep 29, 2010 3:29 pm
Thanks for the posts. Always nice to see how well kits go together.
Re: 1/72 T-33A - The new Sword kit in progress pics
Thu Sep 30, 2010 1:03 am
Looking good! I built the Sword P-66 Vanguard some years ago..I hope the T-33 goes together more easily.
SN
SN
Re: 1/72 T-33A - The new Sword kit in progress pics
Sun Dec 05, 2010 1:10 pm
Here's a few shots of the wing to fuselage joint so you can see what I've been up against:
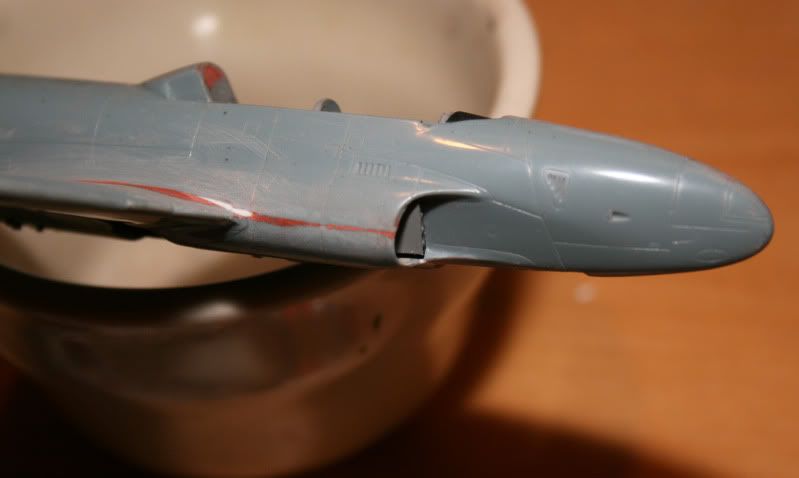
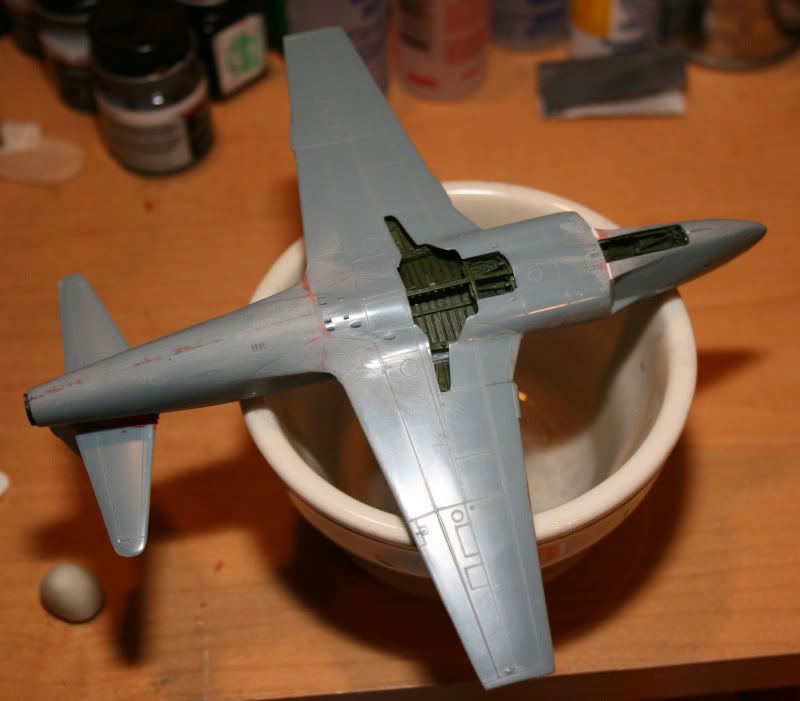
These shots are about a week old now. I think I'm almost ready for a primer coat to see what seams need a bit more work.
Here's a review of the Xtradecal sheet I recently bought for it:
http://www.hyperscale.com/2010/reviews/ ... ewbg_1.htm
I'm thinking of doing the 49th FIS bird but the Montana ANG scheme is nice too...
-Derek
Re: 1/72 T-33A - The new Sword kit in progress pics
Sat Dec 18, 2010 11:51 am
Okay, well I think I finally have the wing root seams fixed up. Bondo putty was used and then a final coat of super glue sanded smooth seemed to do the trick. This part was a major chore in the construction of this kit and that's why it's taken so long to get to this stage. It really had me bogged down for quite awhile.
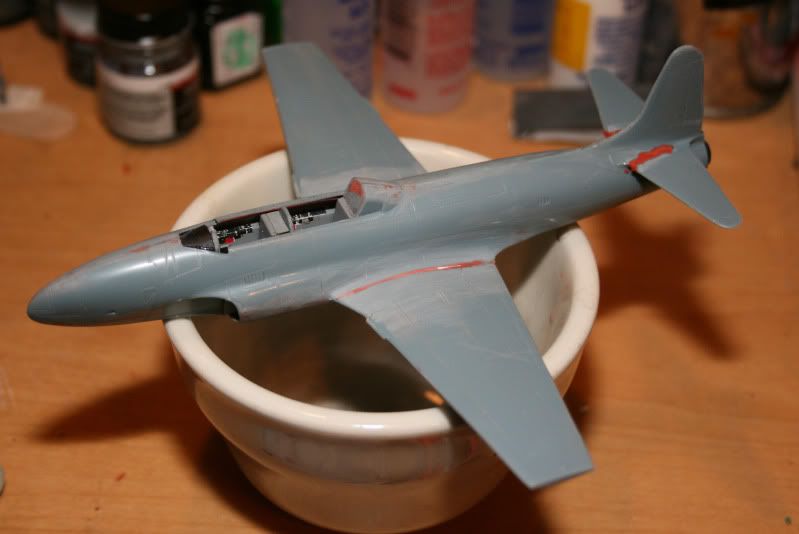
It's primed and I just rescribed lost panel lines on the wings, fuselage, and tip tanks:
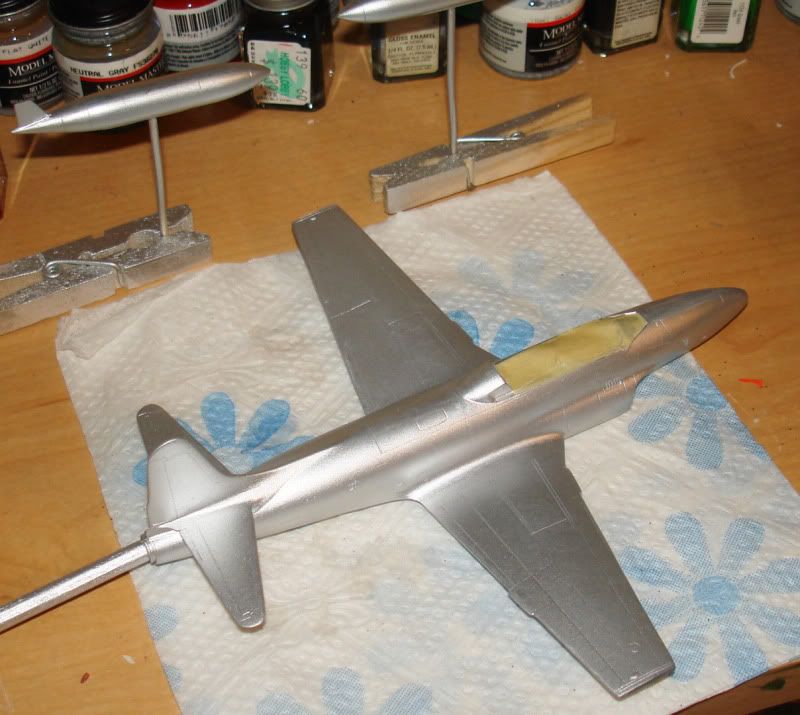
I'm all set to head to the paint shop a little later today. I'm going to spray it with Model Master Aircraft Gray (aka ADC Gray). Then when that dries I'll need to spray the inner portion of the tip tanks and the dielectric panels on the nose black. The kit provides a neat decal for the anti-glare panel on the nose in front of the windscreen and I'm thinking of using that instead of painting it.
I'm still not sure which scheme to do - 49th FIS or Montana ANG. Guess I better ponder that today...
-Derek
It's primed and I just rescribed lost panel lines on the wings, fuselage, and tip tanks:
I'm all set to head to the paint shop a little later today. I'm going to spray it with Model Master Aircraft Gray (aka ADC Gray). Then when that dries I'll need to spray the inner portion of the tip tanks and the dielectric panels on the nose black. The kit provides a neat decal for the anti-glare panel on the nose in front of the windscreen and I'm thinking of using that instead of painting it.
I'm still not sure which scheme to do - 49th FIS or Montana ANG. Guess I better ponder that today...
-Derek
Re: 1/72 T-33A - The new Sword kit in progress pics
Sun Dec 19, 2010 7:30 pm
Lookin' good. I peek at this thing everytime I go to the hobby shop and between the price and knowing the work to get it looking good I keep putting it down. Maybe i'll snag it in a clearance bin someday.
Both those markings look great. I'd vote Montana but it's by such a small margin.
Both those markings look great. I'd vote Montana but it's by such a small margin.
Re: 1/72 T-33A - The new Sword kit in progress pics
Mon Dec 20, 2010 3:39 pm
spookythecat wrote:Lookin' good. I peek at this thing everytime I go to the hobby shop and between the price and knowing the work to get it looking good I keep putting it down. Maybe i'll snag it in a clearance bin someday.
Both those markings look great. I'd vote Montana but it's by such a small margin.
Thanks for the kind words Al. Don't forget that Platz is coming out with another new tool 1/72 T-33 kit - I thought it was supposed to be this month but haven't seen or heard anything more about it. I'm curious to see what that one looks like. If you can get this kit for a good price (less than $20?), I'd say go for it. Maybe you will have better luck than me attaching the wings to the fuselage.
I've got the ADC Gray sprayed on and hopefully today I can mask off the areas to be sprayed black. I was trying to get the tip tanks masked off this morning before work but I was having a tough time getting a straight line down the entire length of the tank. I gave up since I ran out of time and had to leave for work. I found out this weekend that I can't use the kit suppled anti-glare decal after all since it's a dark green color and not black
I have finally decided to use the Montana ANG decals! I've got a photo of both the right and left side of this bird in two different books. On thing that's funny is that in one shot, the windscreen frames are black yet in the other photo, they are ADC Gray like the rest of the bird. I'm thinking I'm going to leave it gray since I like the contrast better.
I hope to have another update before I leave town for the holidays but if not, see you next year
-Derek
Re: 1/72 T-33A - The new Sword kit in progress pics
Wed Dec 22, 2010 8:17 am
Okay, one more update for this year.
This weekend I managed to spray the ADC Gray paint. Yesterday I masked off and painted the black and red areas on my little T-Bird. I used the little square bottles of Testors paint for both. Here's what it looks like now. I need to do a few touch-ups here and there, especially in and around the cockpit:
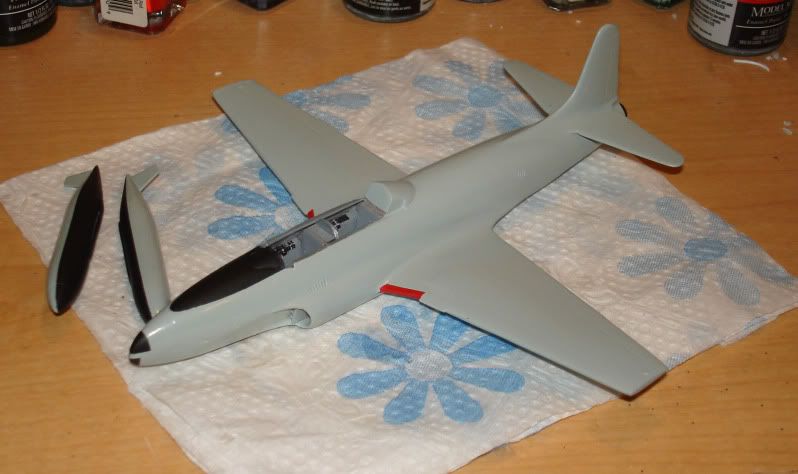
Since I'll be away on vacation, the paint will have plenty of time to harden... When I get back, I will spray with Future and then start on my favorite part - decaling
See you next year.
-Derek
This weekend I managed to spray the ADC Gray paint. Yesterday I masked off and painted the black and red areas on my little T-Bird. I used the little square bottles of Testors paint for both. Here's what it looks like now. I need to do a few touch-ups here and there, especially in and around the cockpit:
Since I'll be away on vacation, the paint will have plenty of time to harden... When I get back, I will spray with Future and then start on my favorite part - decaling
See you next year.
-Derek
Re: 1/72 T-33A - The new Sword kit - now complete!
Fri Jan 21, 2011 6:44 pm
First off, Happy New Year to everyone here.
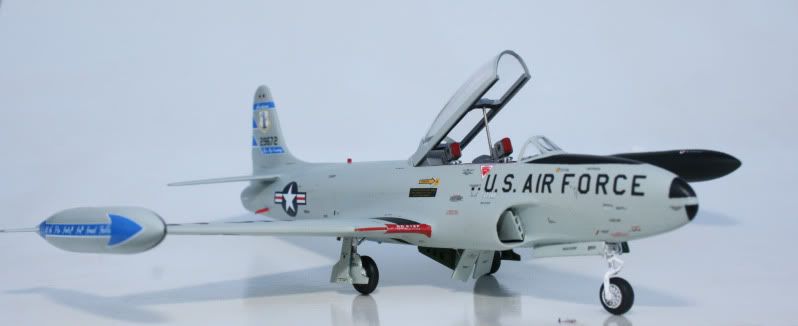
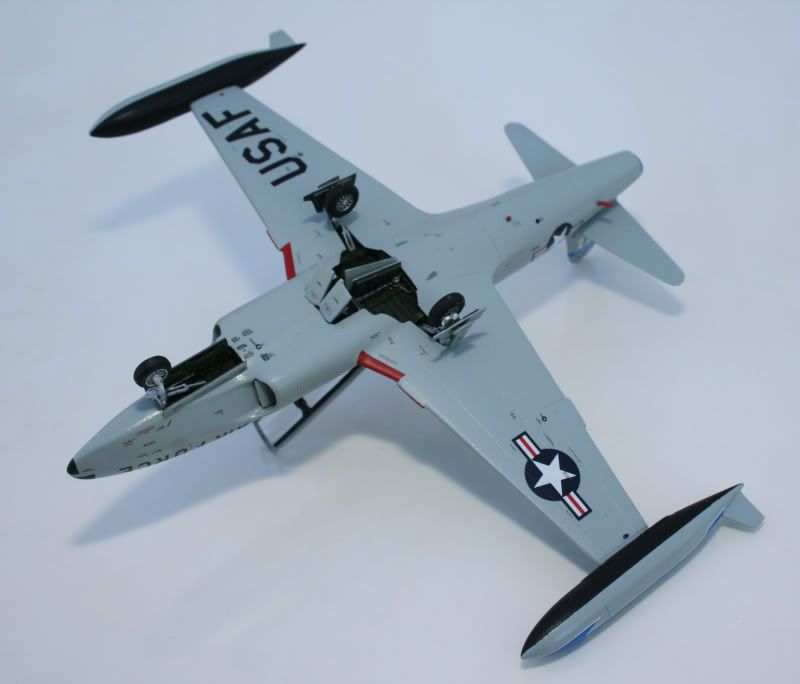
I’ve got my 1/72 Sword finished. It was a lot of fun once I got those ugly wing root seams fixed up! Here are some photos of the completed model.
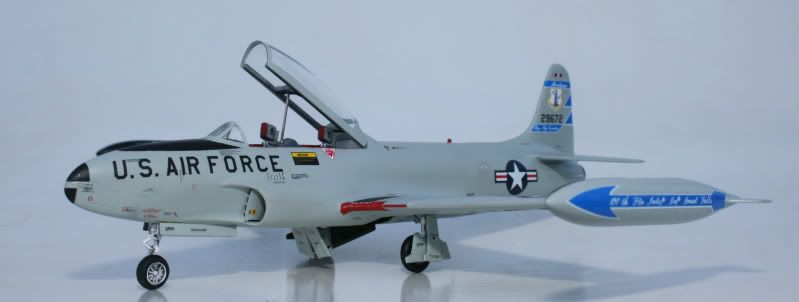
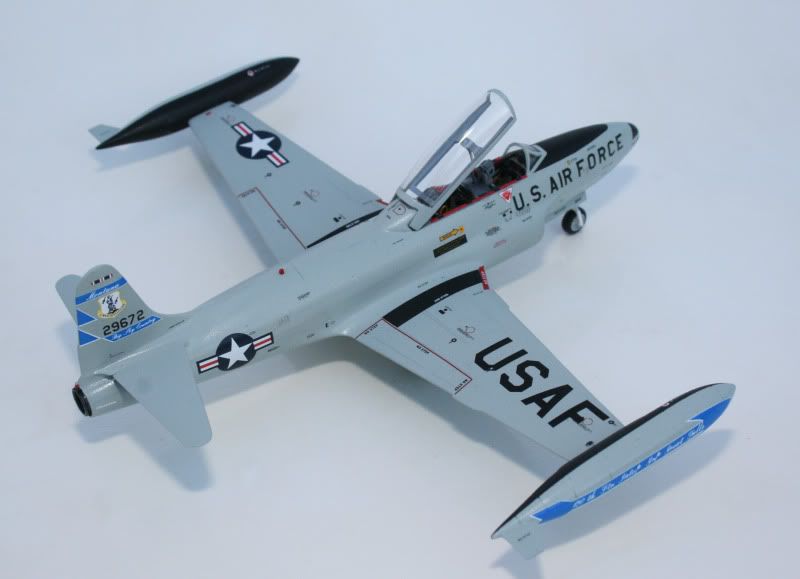
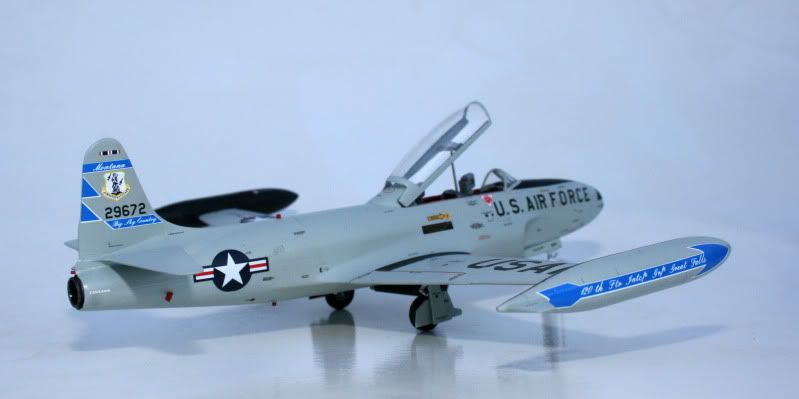
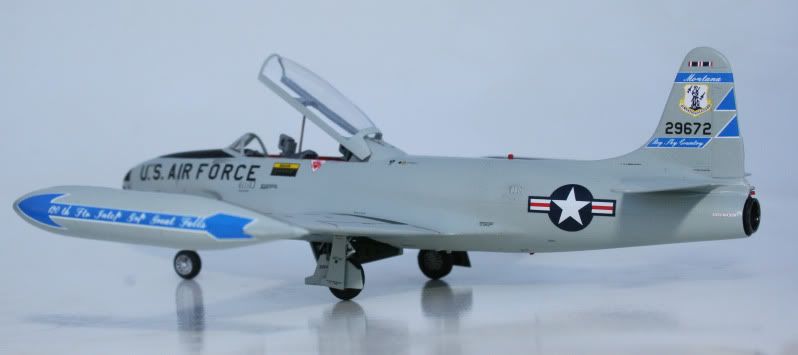
Most of the decals came from the Xtradecal sheet with a few exceptions. The large “USAF” on the wings are much too narrow and tall on the Xtradecal sheet (but I think they are okay for the F-80s on the sheet?) so I robbed better ones from the Mark I “T-33 Colors and Markings” book/decal sheet. I used the same sheet for the various ejection warnings since they more closely resembled the Montana ANG bird in my reference photos. The Xtradecal sheet missed the Distinguished Unit Award ribbon on the tip of the vertical fin. I also didn’t like the color of the ANG shield provided – it was too dark and too small. Luckily, the Air Doc A-7D ANG sheet provided me with a suitable ribbon and ANG shield to use (I had to cut the ribbon down to fit to a little bit so it was the correct size for the tiny T-33 fin tip). I used the kit proved wing walks and a few other bits. The 80+ stencils are all from the excellent Xtradecal sheet.
Once the decals were done and sealed, I added a few other bits to the model. All the little formation/anti-collision lights on the spine, underside, and above the tailpipe were added from stretched spruce. They were painted and then coated with Future. I added a cover to the rear seat instrument panel from foil painted dark gray. I added the fuel dump vain from a small piece of scrap plastic painted red. The plastic canopy open/close arm was replaced with a straight pin.
Hope you like it. On to the next one…
-Derek
I’ve got my 1/72 Sword finished. It was a lot of fun once I got those ugly wing root seams fixed up! Here are some photos of the completed model.
Most of the decals came from the Xtradecal sheet with a few exceptions. The large “USAF” on the wings are much too narrow and tall on the Xtradecal sheet (but I think they are okay for the F-80s on the sheet?) so I robbed better ones from the Mark I “T-33 Colors and Markings” book/decal sheet. I used the same sheet for the various ejection warnings since they more closely resembled the Montana ANG bird in my reference photos. The Xtradecal sheet missed the Distinguished Unit Award ribbon on the tip of the vertical fin. I also didn’t like the color of the ANG shield provided – it was too dark and too small. Luckily, the Air Doc A-7D ANG sheet provided me with a suitable ribbon and ANG shield to use (I had to cut the ribbon down to fit to a little bit so it was the correct size for the tiny T-33 fin tip). I used the kit proved wing walks and a few other bits. The 80+ stencils are all from the excellent Xtradecal sheet.
Once the decals were done and sealed, I added a few other bits to the model. All the little formation/anti-collision lights on the spine, underside, and above the tailpipe were added from stretched spruce. They were painted and then coated with Future. I added a cover to the rear seat instrument panel from foil painted dark gray. I added the fuel dump vain from a small piece of scrap plastic painted red. The plastic canopy open/close arm was replaced with a straight pin.
Hope you like it. On to the next one…
-Derek
Re: 1/72 T-33A - The new Sword kit - now complete!
Fri Jan 21, 2011 8:13 pm
Excellent! All those stencils would drive me nuts.
Re: 1/72 T-33A - The new Sword kit - now complete!
Sat Jan 22, 2011 12:13 am
spookythecat wrote:Excellent! All those stencils would drive me nuts.
Thanks Al. Glad you like it.
The stencils weren't too bad. I would only do 5 - 10 at time spread out over a week to keep my sanity
-Derek
Re: 1/72 T-33A - The new Sword kit - now complete!
Sat Jan 22, 2011 1:28 am
Viking73,
That looks spectacular and also looked like one heck of a thrash trowelling mud in all the seams. that ones a keeper!
That looks spectacular and also looked like one heck of a thrash trowelling mud in all the seams. that ones a keeper!
Re: 1/72 T-33A - The new Sword kit - now complete!
Sat Jan 22, 2011 7:44 am
Very Nice !!!!
Re: 1/72 T-33A - The new Sword kit - now complete!
Sat Jan 22, 2011 8:59 am
Job well done, that build looks excelent finished.